

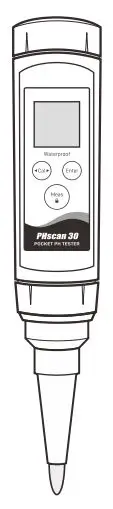
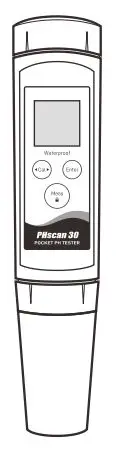
PHscan30 Pocket pH Tester
USER MANUAL

OVERVIEW
Thank you for selecting the PHscan series pocket pH tester. This user manual provides a step-by-step guide to help you operate the tester, please carefully read the following instructions before use.
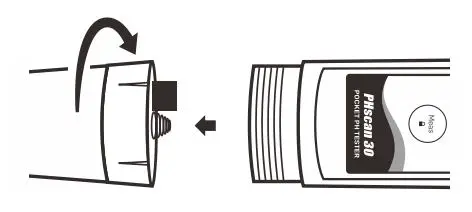
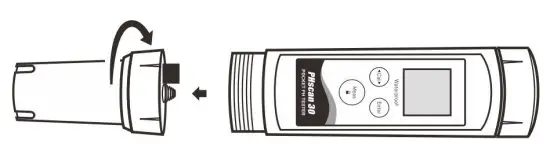
INSTALLING THE BATTERIES
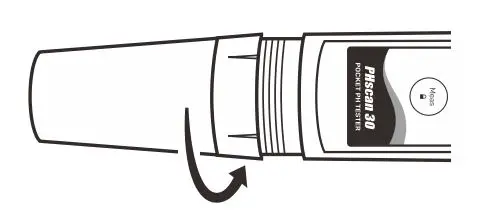
1. Twist the electrode collar counter clockwise, pull the electrode away from the tester.
2. Insert two AAA alkaline batteries into the battery compartment, note polarity.
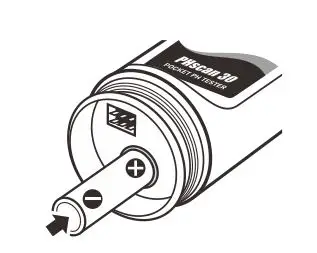
3. Push the electrode into the tester and twist the electrode collar clockwise until tight.
KEYPAD
| Key | Function |
 |
|
 |
|
 |
|
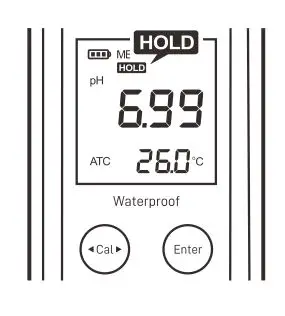
DISPLAY
| Icon | Description |
 | When the battery voltage falls below the minimum power requirements, the icon automatically disappears |
| MEAS | Indicates that the tester is in the measurement mode |
| CAL | Indicates that the tester is in the calibration mode |
| SETUP | Indicates that the tester is in the setup mode |
| ATC | Indicates that the automatic temperature compensation is enabled |
PRIOR TO USE
Remove the protective cap (and translucent cover) from the bottom of the tester. If some salt crystals deposited on the electrode, rinse with tap water to clean these deposits.
If tiny air bubbles are present inside the pH-sensitive glass membrane, gently shake the tester downward to remove air bubbles.

If the glass membrane has dried out, soak the electrode in 3M KCl or pH 4.01 buffer solution for about 30 minutes. If above solutions are not available, use the tap water.
SWITCHING THE TESTER ON AND OFF
- Press and hold the Meas key for about 5 seconds to switch on the tester.
- Press and hold the Meas key to switch off the tester.
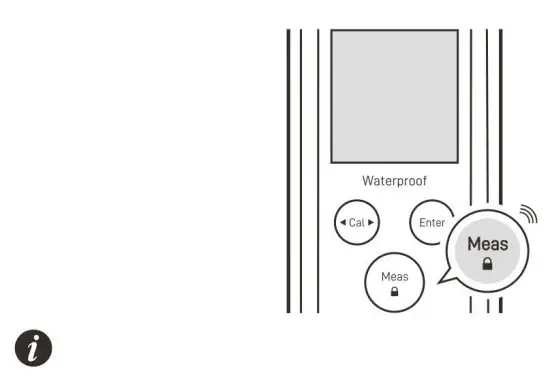
If you do not press any key within 8 minutes, the tester will switch off automatically to conserve energy.
The PHscan30 tester contains 7 menu items in the setup menu, the following table describes the functions of each option.
| Menu Item | Option and Description |
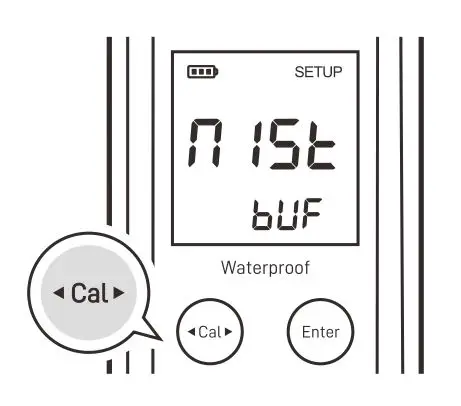
| pH Buffer Group Set the pH buffer group for calibration and auto recognition. | |
| | |
| | |
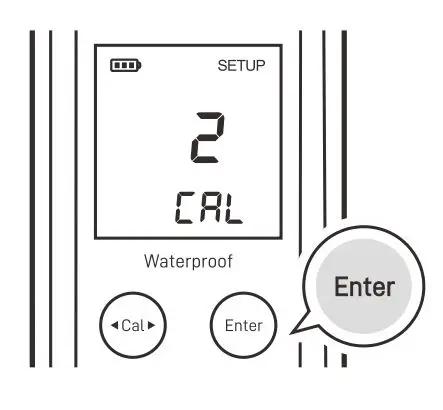
| Calibration Points Set the number of calibration points. | |
| | |
| | |
| Measurement Unit Set the default temperature unit. | |
| | |
| | |
| Temperature Calibration Refer to page 4. | |
| | |
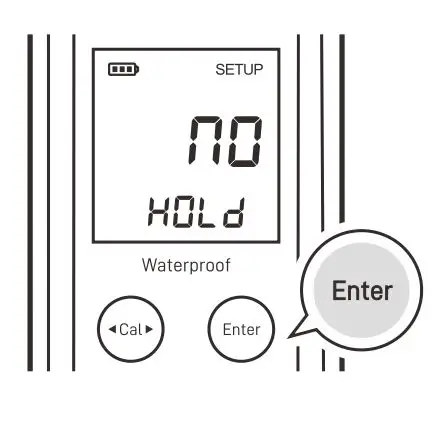
| Auto-Hold If enabled, the tester will automatically sense and lock the measurement endpoint. | |
| | |
| Auto-Power Off If enabled, the tester will automatically switch off if no key is pressed within 8 minutes. | |
| | |
| | |
 | Factory Reset If enabled, all of the calibration values and current settings will be deleted or reset to the factory defaults, the tester must be recalibrated. |
| | |
SETTING THE DEFAULT OPTION
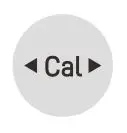
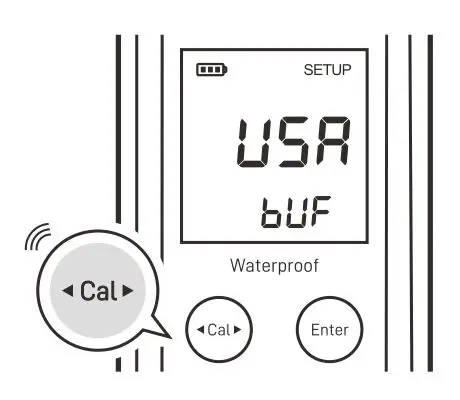
1. In the measurement mode, press and hold the Cal key to enter the setup menu.
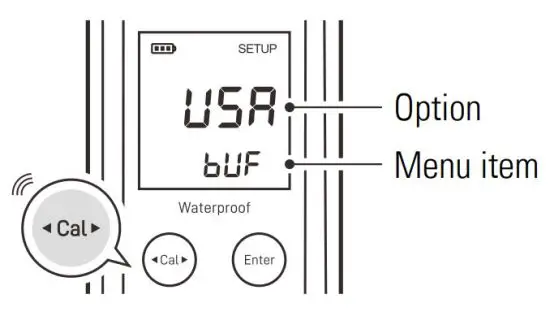
2. If necessary, press the Cal key again to select an option.
3. Press the Enter key, the tester saves the current option and moves to the next menu item.
4. Repeat steps above until the tester returns to the measurement mode.

- During the setting process, if you do not need to calibrate the temperature, press the Enter key to skip the
 option.
 - To exit the setup menu, press the Meas key.
pH CALIBRATION
The PHscan30 tester allows 1 to 3 points calibration, we recommend that you perform at least 2 points calibration for accurate pH measurement, the tester will automatically recognize and calibrate to following standard buffer values.
USA standard buffers pH 4.01, 7.00, 10.01
NIST standard buffers pH 4.01, 6.86, 9.18
Single point calibration should only be carried out with the pH 7.00 or 6.86, otherwise calibration will not be accepted. For better accuracy, we recommend calibrating the tester regularly. DO NOT reuse the buffer solutions after calibration, contaminants in.
solution will affect the calibration and eventually the accuracy of the. measurement.
SINGLE POINT CALIBRATION
Ensure that you have selected 1 point calibration in the setup menu.
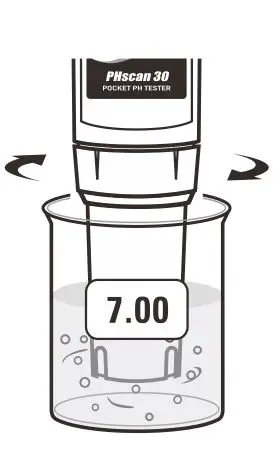
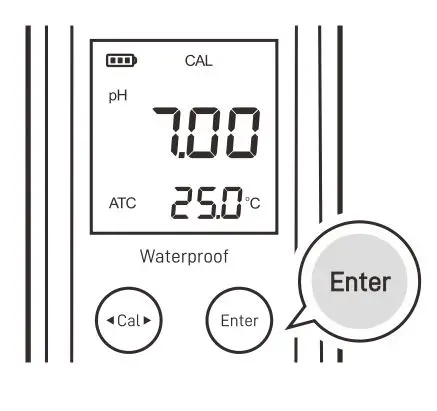
1.1 Press the Cal key, the tester shows pH 7.00/CAL 1.
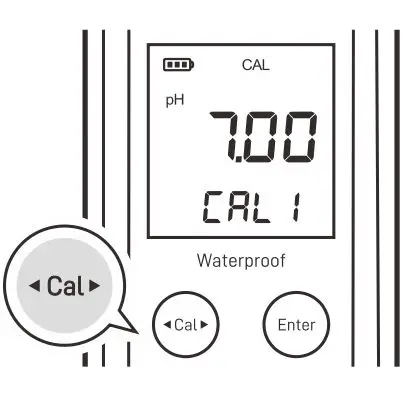
1.2 Rinse the electrode with distilled water, place the electrode into the pH 7.00 buffer solution, stir the tester gently to create a homogeneous solution.
1.3 Press the Enter key, the tester begins the calibration. When the reading has stabilized, the display will show ![]() . Calibration is completed.
. Calibration is completed.
POINTS CALIBRATION
Ensure that you have selected 2 points calibration in the setup menu.
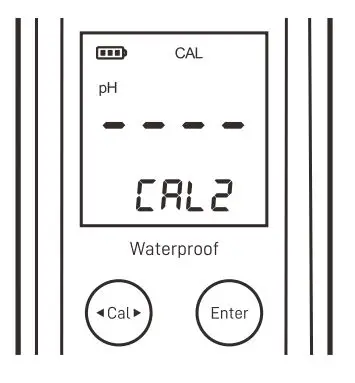
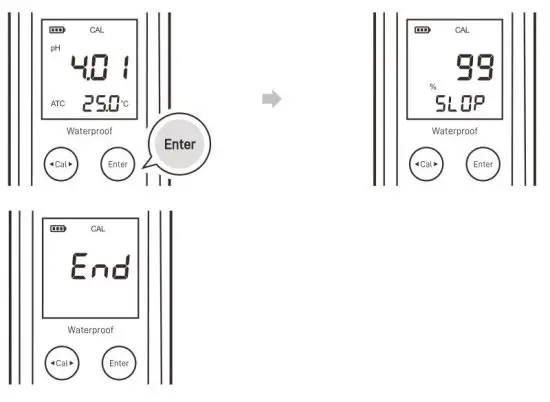
2.1 Repeat steps 1.1 through 1.3 above. When the first calibration point is completed, the display will show —- / CAL 2, the tester prompts you to continue with second point calibration.
2.2 Rinse the electrode with distilled water, place the electrode into pH 4.01 or 10.01 buffer solution, stir the tester gently.
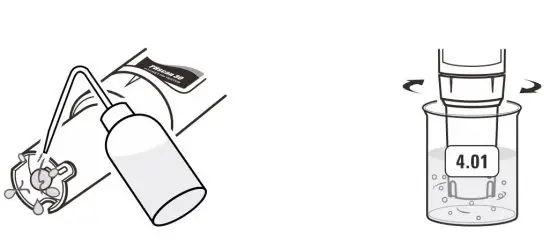
2.3 Press the Enter key, the tester automatically recognizes the buffer solution and begins calibration. When the reading has stabilized, the display automatically shows the electrode slope (e.g., 99%) and ![]() . Second point calibration is completed.
. Second point calibration is completed.
POINTS CALIBRATION
Ensure that you have selected 3 points calibration in the setup menu.
3.1 Repeat steps 1.1 through 1.3 above. When the first calibration point is completed, the display will show pH 4.01/CAL 2, the tester prompts you to continue with second point calibration.
3.2 Rinse the electrode with distilled water and place into the pH 4.01 buffer solution, stir the tester gently. Press the Enter key, the tester begins calibration. When the reading has stabilized, the display will automatically show the electrode slope and pH 10.01/CAL 3.
3.3 Rinse the electrode with distilled water and place into the pH 10.01 buffer solution, stir the tester gently. Press the Enter key. When the reading has stabilized, the display will automatically shows the electrode slope and ![]() . Calibration is completed.
. Calibration is completed.
- During the calibration, if the display shows
 indicating that the measured mV value for the current calibration point deviates by more than 60 mV ( approximately ± 1 pH ) from the theoretical value of the pH buffer. The calibration will not be accepted. Please check the electrode and make sure the buffer solutions are fresh and uncontaminated.
 - To exit the calibration without saving calibrated values, press the Meas key
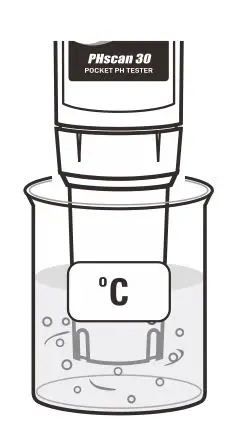
TEMPERATURE CALIBRATION
The PHscan30 tester is installed with a built-in temperature sensor for automatic temperature compensation. During the measurement, if the measured temperature reading differs from that of an accurate thermometer, the tester needs to be calibrated.
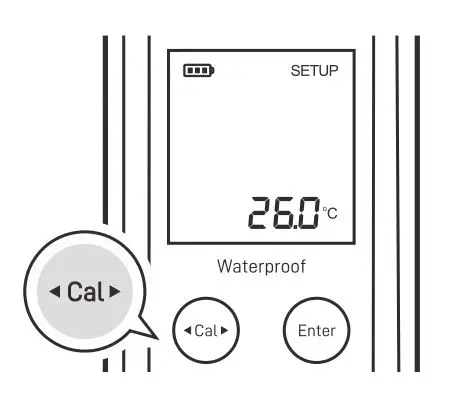
1. Press and hold the Cal key to enter the setup menu.
2. Press the Enter key until the display shows ![]()
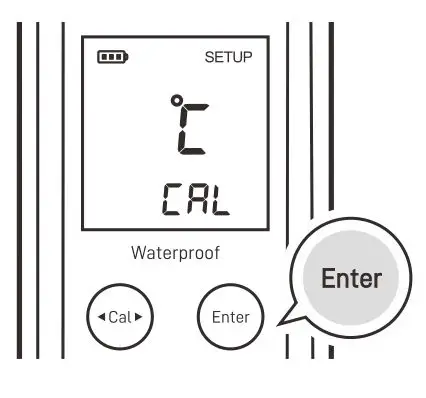
3. Press the Cal key, the tester enters the temperature calibration mode.
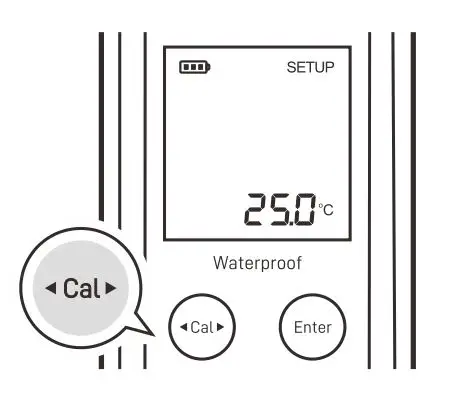
4. Place the electrode into a solution with a known accurate temperature and wait for the measurement to stabilize.
5. Press the Cal key to modify the temperature value.
6. Press the Enter key to save and press the Meas key to return to the measurement mode.
MEASUREMENT
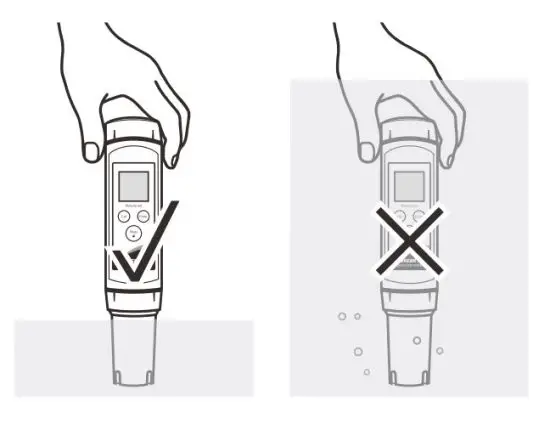
Rinse the electrode with distilled water, place the electrode into the sample solution and stir gently. Note, DO NOT completely immerse the tester in water. Wait for the measurement to stabilize and record the reading.
If your tester installed a spear tip electrode or flat surface electrode (refer to the Optional Accessories > pH Electrodes section) and the samples are soft solid or semi-solid, wet the sample with clean water, then slight pressure the electrode to take measure. Note that the pH sensitive membrane must be fully touched with sample surface.

- During the measurement, never wipe the pH-sensitive membrane as this will cause static interference, blot dry with a lint-free tissue to remove waterdrops on electrode.
- If the display shows —- indicating the measurement exceeds the range, remove the tester from the sample immediately.
- If the option is enabled in the setup menu, the tester will automatically lock the measurement endpoint and show HOLD icon. Press the Meas key to resume measuring.
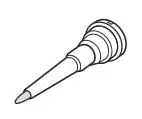
ELECTRODE
MAINTENANCE AND REPLACEMENT
CLEANING THE ELECTRODE
- Since the pH-sensitive membrane is susceptible to contamination, make sure that rinse the electrode thoroughly with distilled water after use.
- If your sample contains the oil or grease, soak the electrode in mild detergent or electrode cleaning solution for at least 15 minutes, then rinse with distilled water.
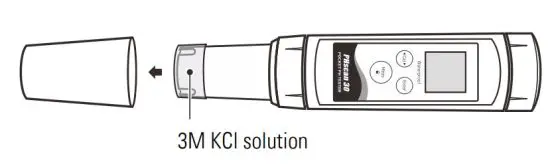
- If you do not use the tester for a period longer than 1 month, store the electrode in 3M KCl solution or electrode storage solution.
![]()
DO NOT store the electrode in distilled or deionized water, which will deplete the hydration layer of the pH-sensitive membrane and render the electrode useless.
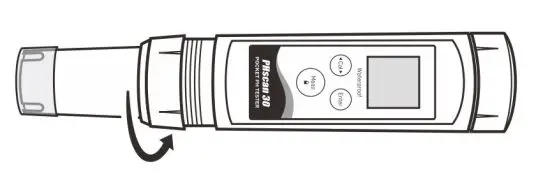
REPLACING THE ELECTRODE
If the tester fails to calibrate or gives fluctuating readings, you should consider replacing the electrode.
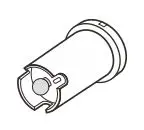
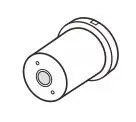
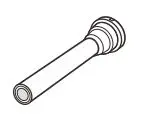
1. Twist the electrode collar counter clockwise, pull the electrode away from the tester.
2. Align the slot on the new electrode, gently push the electrode into the tester.

3. Twist the electrode collar clockwise until tight.
APPENDIX
PREPARATION OF pH BUFFER SOLUTIONS
The PHscan30 tester is packaged with the pH4.01/7.00/10.01 buffer sachets required for calibration.
1. Half fill a 250 ml volumetric flask with distilled water and add the pH 7.00 buffer reagent.
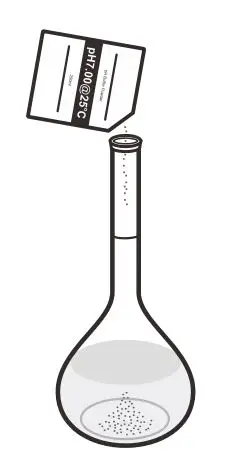
2. Swirl the volumetric flask gently to dissolve the reagent and fill to the mark with distilled water.
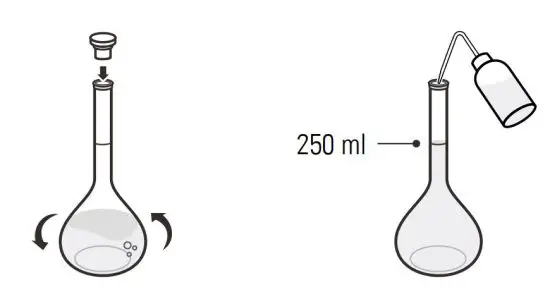
3. Cap and upend the volumetric flask several times to mix solution.
- Preparation of pH 4.01 and 10.01 buffer solutions are the same as above.
- Prepared buffer solution should be stored in hermetically sealed glass container and avoid direct sunlight.
PREPARATION OF ELECTRODE STORAGE SOLUTION
Dissolve 24.6 grams of analytical grade KCl reagent in 100 ml distilled water. Add pH 4.01 standard buffer and adjust solution to pH 4.
OPTIONAL ACCESSORIES
Solutions
| Order Code | Description |
| PHCS-USA | pH 4.01, 7.00, 10.01 buffer solutions, 480 m |
| PHCS-ES | Electrode storage solution, 480 ml |
| PHCS-OG | Electrode cleaning solution, removes oil and grease contaminants, 480 ml |
| PHCS-PR | Electrode cleaning solution, removes protein contamination, 480 ml |
 | E-PHscan-ST-10K
|
 | E-PHscan-FT-10K
|
 | E-PHscan-LT-10K
|
 | E-PHscan-PT-10K
|
TESTER SPECIFICATIONS
| Model | PHscan30 |
| pH | |
| Range | -1.00 to 15.00 pH |
| Resolution | 0.01 pH |
| Accuracy | ± 0.01 pH |
| Calibration Point | 1 to 3 points |
| pH Buffer Option | USA or NIST |
| Automatic Buffer Recognition | pH 4.01, 7.00, 10.01 or 4.01, 6.86, 9.18 |
| Temperature Compensation | 0 to 60° C (32 to 140° F), automatic |
| Temperature | |
| Range | 0 to 60° C (32 to 140° F) |
| Resolution | 0.1° C (0.1° F) |
| Accuracy | ± 1° C (± 1.8° F) |
| Calibration Point | 1 point |
| Calibration Range | Reading ± 10° C/° F |
| Other Specifications | |
| Operating Temperature | 0 to 50° C (32 to 122° F) |
| Storage Temperature | 0 to 60° C (32 to 140° F) |
| Relative Humidity | < 80% (non-condensing) |
| IP Rating | IP54 |
| Display | LCD, 21 × 21 mm (0.82 × 0.82 in.) |
| Power Requirements | 2 × 1.5V AAA alkaline batteries |
| Auto-Off | 8 minutes after last key pressed |
| Dimensions | 185 (L) × 40 (Dia.) mm (7.28 × 1.57 in.) |
| Weight | 100g (3.5 oz.) |
DISPOSAL
This product is required to comply with the European Union’s Waste Electrical and Electronic Equipment (WEEE) Directive 2002/96/EC and may not be disposed of in domestic waste. Please dispose of product in accordance with local regulations at the collecting point specified for electrical and electronic equipment.
WARRANTY
The warranty period for tester is one year from the date of shipment. Above warranty does not cover the electrode and pH buffer solutions. Out of warranty products will be repaired on a charged basis. The warranty on your tester shall not apply to defects resulting from:
- Improper or inadequate maintenance by customer
- Unauthorized modification or misuse
- Operation outside of the environment specifications of the products.
For more information, please contact the supplier.

Office: 4715 Castlewood St., Sugar land, TX 77479, USA
Tel: (+1) 346-762-7358
E-mail: [email protected]
Factory: F3, Building 2, No.2185, Laifang Rd., Shanghai 201615, China
Tel: (+86) 21-6404-1598
E-mail: [email protected]

The information in this document is subject to change without notice.
Copyright © Bante Instruments Inc, 2022. All rights reserved.


