![]()
INSTALLATION INSTRUCTIONS
CARD READER CONVERSION
WASHER AND DRYER SAFETY
Your safety and the safety of others are very important.
We have provided many important safety messages in this manual and on your appliance. Always read and obey all safety messages.
![]() This is the safety alert symbol.
This is the safety alert symbol.
This symbol alerts you to potential hazards that can kill or hurt you and others.
All safety messages will follow the safety alert symbol and either the word “DANGER” or “WARNING.”
These words mean:
![]() DANGER You can be killed or seriously injured if you don’t immediately follow instructions.
DANGER You can be killed or seriously injured if you don’t immediately follow instructions.
![]() WARNING You can be killed or seriously injured if you don’t follow instructions.
WARNING You can be killed or seriously injured if you don’t follow instructions.
All safety messages will tell you what the potential hazard is, tell you how to reduce the chance of injury, and tell you what can happen if the instructions are not followed
TOOLS AND PARTS
Gather the required tools and parts before starting installation. Read and follow the instructions provided with any tools listed here.
- TORX T20+Security driver
- Adjustable wrench
- Card reader
- Phillips screwdriver
Parts supplied in Kit
Check that all parts were included.
- Bezel
- Harnes
- Phillips head screws (3)
Note: Screws may be preinstalled on some models. - Nuts (6)
Note: Three nuts may be pre-installed on some models.
INSTALLING CARD READER-SINGLE TL WASHER, MATCHING DRYER, AND CSP
 |
| Electrical Shock Hazard Disconnect power before servicing. Replace all parts and panels before operating. Failure to do so can result in death or electrical shock. |
- Unplug the washer or dryer or disconnect power.
- Place a protective covering, such as a towel or a work pad, on top of the washer or dryer.
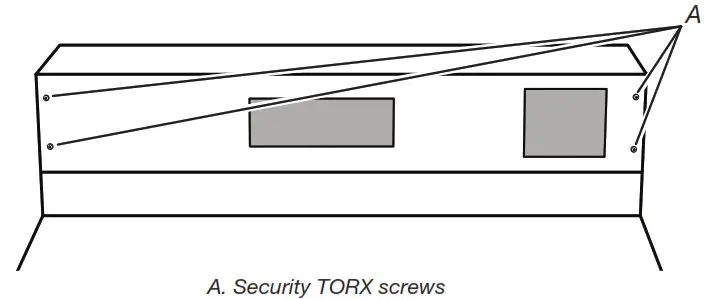
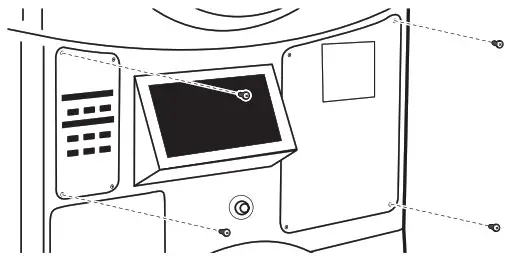
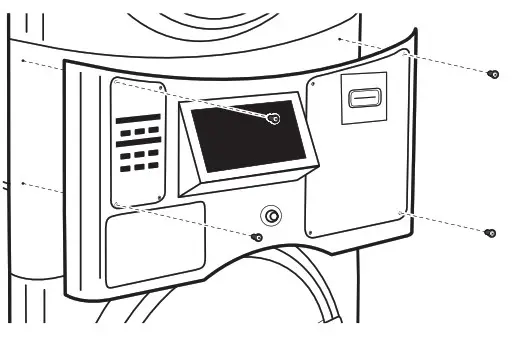
- For single washers or dryers, remove the 4 top control panel security TORX screws. For stacked dryers, remove the 6 control panel screws.
†TORX and T20 are trademarks of Acument Intellectual Properties, LLC.
- Lay the control panel face down onto the top of the washer or dryer.
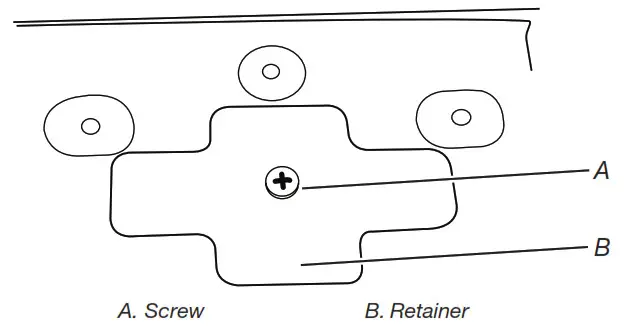
- Remove the screw from the center of the retainer.

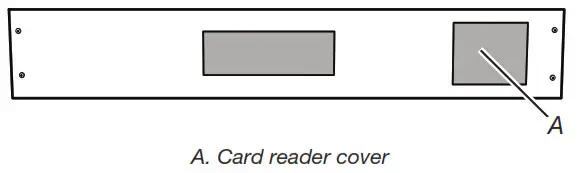
- Remove the card reader cover.

- Discard card reader cover and retainer.
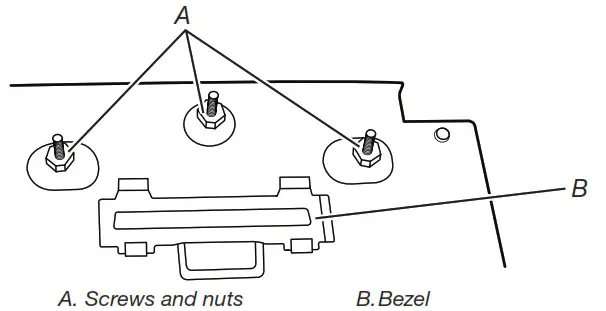
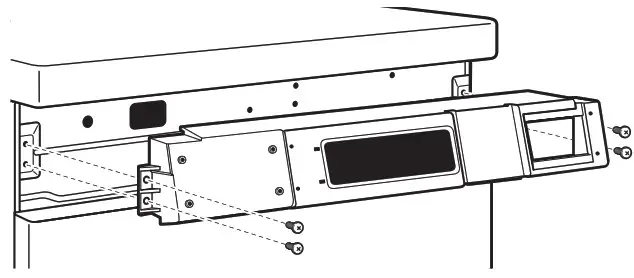
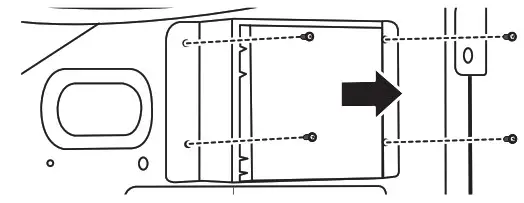
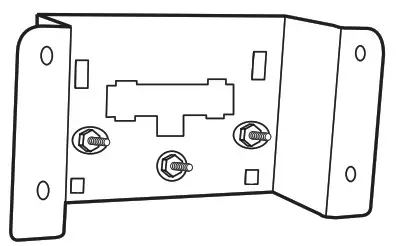
- Snap bezel onto control bracket. See Illustration in step 9.
- Install the 3 screws into the front of the control bracket and install a nut onto each of them. If the 3 screws have been pre-installed, skip stepping 10.

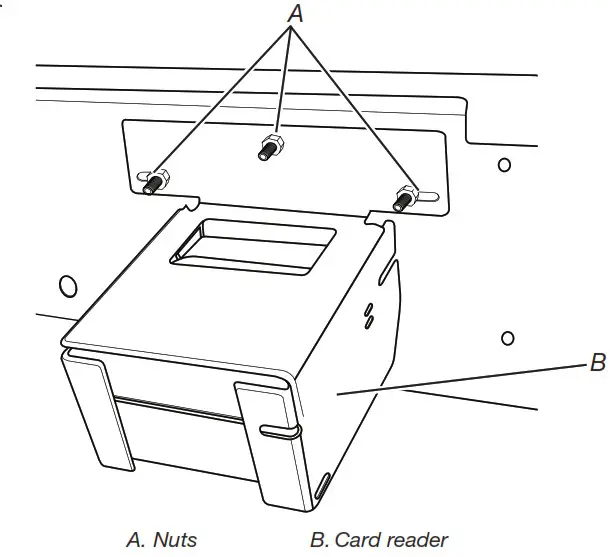
- Install the card reader according to the manufacturer’s instructions.
- Add a second nut onto each of the screws to secure the card reader.

INSTALLING CARD READER-SINGLE HORZ WASHER AND MATCHING DRYER
|
| Electrical Shock Hazard Disconnect power before servicing. Replace all parts and panels before operating. Failure to do so can result in death or electrical shock. |
- Unplug the washer or dryer or disconnect power.
- It is recommended to cover the top of the washer or dryer to avoid scratching the top of the console parts.
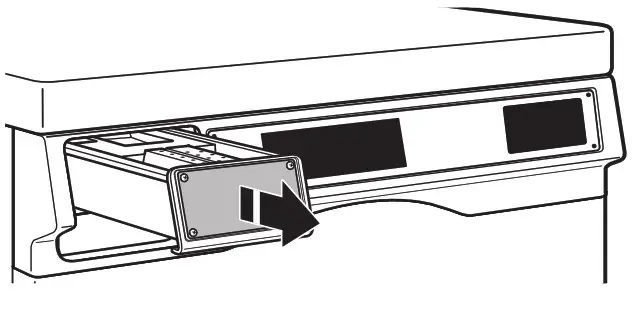
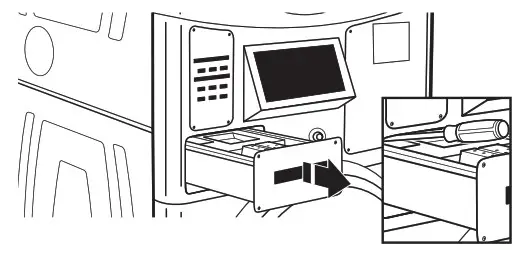
- Pull out and remove the dispenser from the washer.

- Remove the outer console panel:
Washer:
Remove the 6 TORX T20 security screws attaching the outer console panel to the control panel assembly.
Dryer:
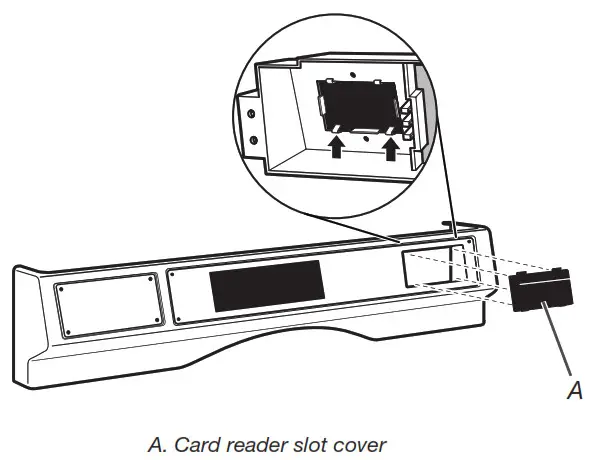
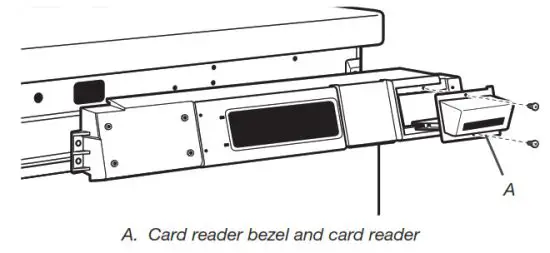
Remove the 8 TORX T20 security screws attaching the outer console panel to the control panel assembly. - Remove the card reader slot cover. Discard card reader slot cover. Dryer shown.

- Remove the control panel assembly. Dryer shown.

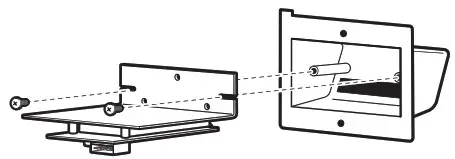
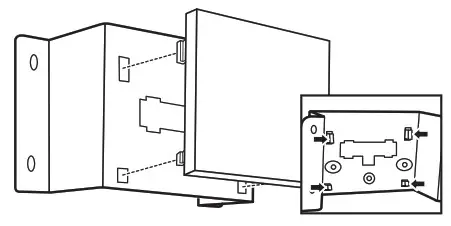
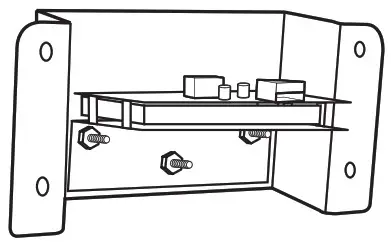
- Attach the card reader to the inside of the card reader bezel per instructions from the card reader manufacturer.

- Install the assembled card reader-bezel assembly into the control panel and secure it with the 2 screws in the literature package.

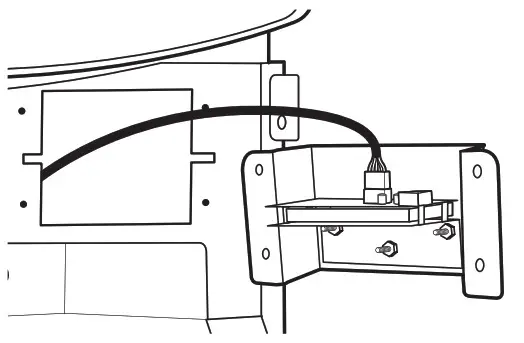
- Plug the wiring harness into the card reader and the card reader port on the control board at AA3.

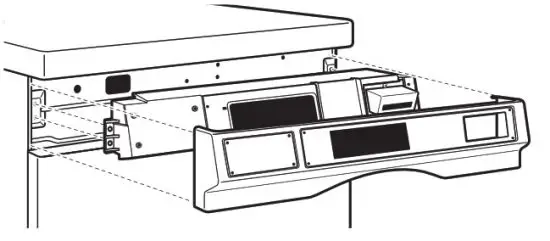
- Reinstall the console panel assembly and outer control panel by reversing steps 6 and 4, and for washers, 3. Dryer shown.

- Reinsert detergent dispenser assembly (washer only).


INSTALLING CARD READER-W/D STACK
![]() WARNINGElectrical Shock Hazard Disconnect power before servicing. Replace all parts and panels before operating. Failure to do so can result in death or electrical shock.
WARNINGElectrical Shock Hazard Disconnect power before servicing. Replace all parts and panels before operating. Failure to do so can result in death or electrical shock.
- Unplug stacked washer/dryer or disconnect power.
- Remove the dispenser drawer. Use a screwdriver to push down the tab to release the drawer.

- Remove the four control panel TORX screws.

- Remove the four-card reader bracket screws.

- Remove the snap-in card reader cover.

- Discard the card reader cover.
- Install the 3 screws into the front of the control bracket and install a nut onto each of them.

- Snap bezel onto card reader bracket.
- Install the card reader according to the manufacturer’s instructions.
- Add a second nut onto each of the screws to hold in the card reader.

- Plug the wiring harness into the card reader and the card reader port on the control board at AA3.

- Replace control panel using the original TORX screws.

COMPLETE INSTALLATION
![]() WARNINGElectrical Shock Hazard Disconnect power before servicing. Replace all parts and panels before operating. Failure to do so can result in death or electrical shock.
WARNINGElectrical Shock Hazard Disconnect power before servicing. Replace all parts and panels before operating. Failure to do so can result in death or electrical shock.
- Check that all parts are now installed. If there is an extra part, go back through the steps to see which step was skipped.
- Check that you have all of your tools.
- Dispose of/recycle all packaging materials.
Electric Dryers
- In the U.S.A:
For power supply cord installations, plug into a grounded (earthed) outlet. For direct wire installations, turn on the power. - In Canada:
Plug into a grounded 4 prong outlet. Turn on the power.
Washers & Gas Dryers - Plug into a grounded 3 prong outlet.
ASSISTANCE OR SERVICE
If you need assistance:
Contact the distributor where the washer or dryer was purchased. When you call, you will need the washer or dryer model number and serial number. Both numbers can be found on the serial-rating plate located on your washer or dryer.
W11463414A
©2020. All rights reserved.
Todos los derechos reservados.
10/20


