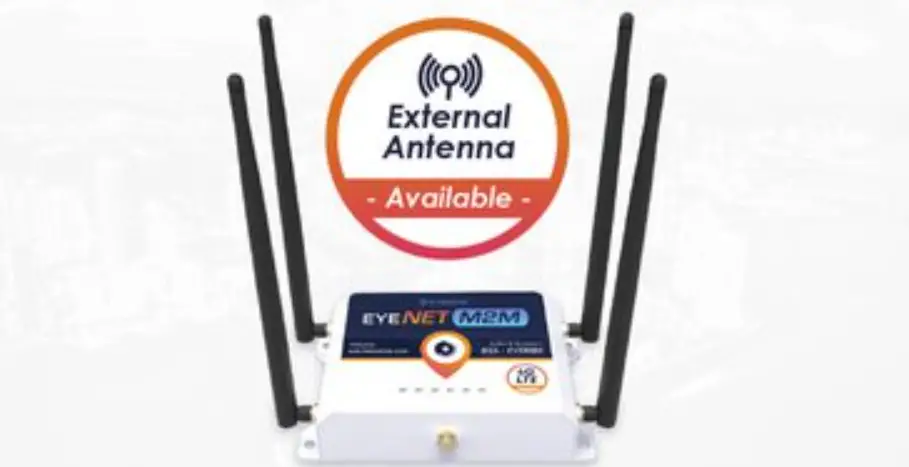
EYERIDE EYENET Wireless Router

Remark:
Eyeride reserves the right to revise this publication and to make changes in the content hereof without obligation to notify any person or organization of such revisions or changes.
All copyrights reserved. No reproduction by any means is allowed without acknowledge
Product Overview
Simply Description
EYENET V1.2 provide an easy way to expend your wired Ethernet to wireless. It work
well on gateway, and you could configure it via Web. It could meet both enterprise and the home’s requirements economically, its user could browser the internet and time and anywhere. It has multi-function ,high-performance and easy install. Will be your best choice to build your own WLAN. About the wireless security, EYENET V1.2 provide multi-protection, support unable SSID broadcast , also provide 64/128/152 bit WEP encryption , support for WPA / WPA-PSK, WPA2/WPA2-PSK security mechanism , in order to protect your data .Comply with 802.11a/ 802.11n/ 802.11g/ 802.11b/ 802.113/802.113u standard has 300Mbps , Our smart antenna management, makes the EL001 performs much better than other similar product in WiFi transmission distance, perfectly compatible with other network device.
Features and Specification
Main Features
- Provide 5 10M/100M Ethernet ports
- DHCP server
- Support RTS/CTS protocol , ensure the communication quality
- Roaming technology , efficient wireless connect
- DHCP serve static IP address
- Web manage
Specification
- Comply with 802.11a/802.11n/802.11g/802.11b/802.113/802.113u/802.11ac standard
- Support TCP/IP、DHCP、ICMP protocol
- Auto MDI/MDIX port
- Indicator LED, power adapter(12V 1A)
- Work temperature 0 – ℃40 ℃
- Operating Humidity:10%~90% non-condensing
Hardware Description
Panel Layout
Front Panel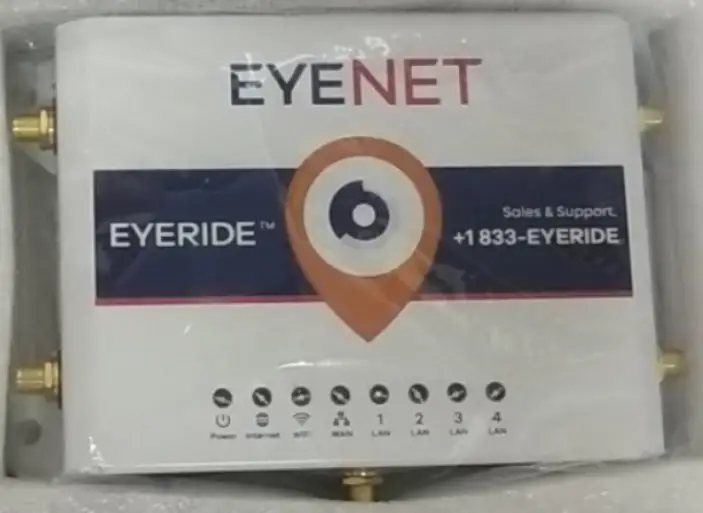
Pic 2-1 Front Panel
Indictor LED (Will adjust with the specific mode)
| Indictor LED | Description | Function |
| POWER | Power LED | Keep ON – Power in Keep Off – No Power |
| PCIE | PCIE | Flashing – PCIE module work Keep Off – PCIE module not work |
| LAN | LAN LED | On – The relevant port connect Off – No connect to the relevant port Flashing- Data transmission on the relevant port |
| WLAN | Wifi LED | Off – Wireless function unable On – Wireless function enable |

| Port | Description | Function |
| DC | Power Port | Connect the supplied power adapter. |
| LAN | LAN Port (RJ45) | Connect to the devices in the LAN, such as HUB, switches or PC |
| WAN | WAN Port (RJ45) | Connect to the WAN device, data exchange with the internet |
| Audio | Audio port | Connect to Audio for listening |
| Button | Description | Function |
| RESET/WPS | RESET/WPS Multi-function button | Rest: Press for 8 seconds WPS: Press one times. |
| Antenna | 2* 5Dbi omni internal antenna | Wireless data transfer and receive |
Rest
If you want to rest to the factory default settings, please refer the below steps
- To plug the power adapter.
- When the router works normally, press the REST/WPS button for 8 seconds.
- All the router’s LEDs will off and then on again, wait until it work normally.
- When above 3 steps done, the router will rest to the factory default setting.
Warming:
Before steps finishing, don’t cut the power off, or it will break your router.
System Requirements.
- Network card and Ethernet cable
- TCP/TP net software (Windows 95 or higher version has pre-install)
- IE 5.0 or higher version
Install Condition
When you install the router, please refer the below
- Put the device horizontally
- Keep away from any heat device
- Do not put it in some place which is too dirty or too humidity.
Remark:
The environment will effect the transfer distance , recommend using environment:
Temperature: 0 ℃ ,~H40um℃idity: 10%~95% RH
TCP/IP Configuration
Before using the device, you need to configure the network correctly, this manual is based on the Windows 2000/XP, the IP of the device is 192.168.1.1 , subnet mask is 255.255.255.0 . Firstly, connect your PC to the LAN port, and then you can configure the IP of your PC in 2 ways.
Set the IP
Set your PC’s IP as 192.168.1.xxx(xxx could be any number in 2~254), subnet mask to be 255.255.255.0 , default gateway 192.168.1.1 , DNS server 192.168.1.1
Auto set the IP by the DHCP server.
Set the TCP/IP to “automatically get IP address”, after setting , you could use the
Ping command to check if the device has connected to the PC. For an example, in Windows 2000, run the cmd.exe , and the enter ping 192.168.1.1 If the screen shows as the below, means OK, the device connected to the PC.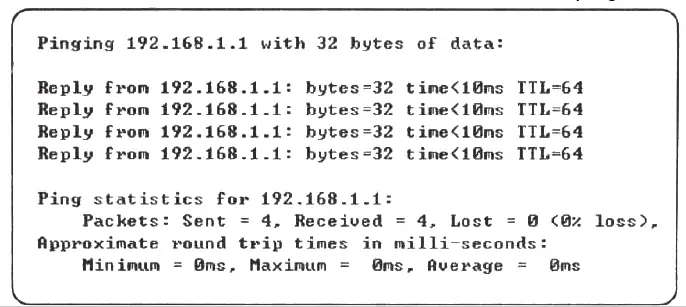
If it shows as below, it means fail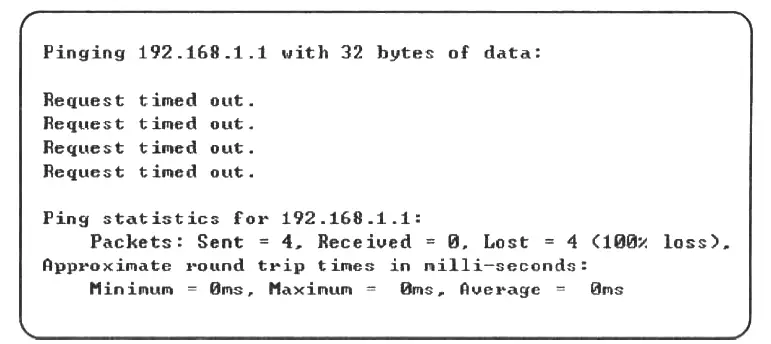 When it fails to connect, you could check as below. 1):If the hardware connect in right way?
>> The relevant LED to the PC must be on
2):If your PC’s TCP/IP sets right?
>> If the IP of the device is 192.168.1.1 , your PC’s IP must be 192.168.1.xxx(xxx should be 2~253)
Configuration Guide
Start and Login
The router provide the UI based on the IE, this solution could work in any MS Windows, Macintosh or UNIX system . Run the browser, unable the VPN (if the VPN is working) , and then input the 192.168.1.1 in browser. After doing that, you will see the login page, you should enter it as the administer, which means you should enter the username: root /Password: admin, and then click the “log in” The system of the ZBT-EYENET V1.2 is OpenWrt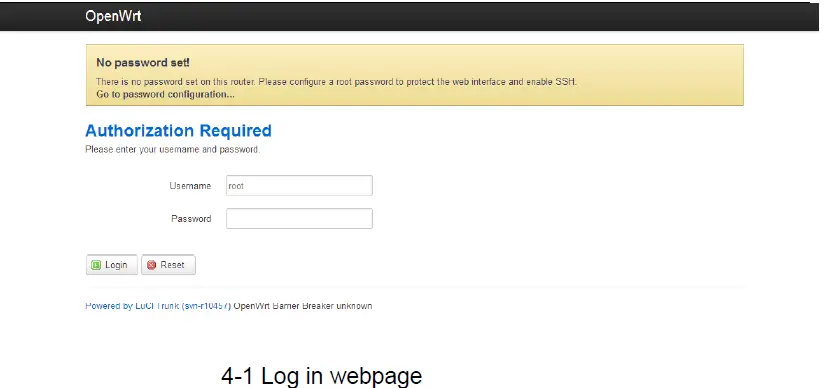
Log in webpage
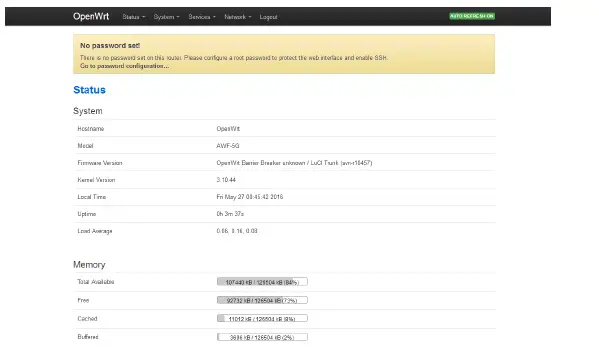
When everything goes well, the browser will show as the 4-2. There are several tag, click some tag, you could configure relevant function settings.
I will explain each menu.
us
Overview
Click the “Overview” You could check the running information, included system information, Memory, network, DHCP leases, wireless and associate stations, as
- System: Router name, Router model, Firmware version, Kernel version, Local Time, Uptime, Load average.
- Memory: Total available , Free, Caches, Buffered
- Network: The connection status of the WAN port.
- DHCP Leases: Show the IP address ,MAC, and the Lease time
- Wireless: It is about the wireless status , will included SSID, Mode, Work Channel, Bitrates, the MAC of the wireless interface , the Encryption of the transmission.
- Associate: Shows the status of all the device connect to the router via Wireless
Firewall
Click the firewall tag, you could check the firewall status of the device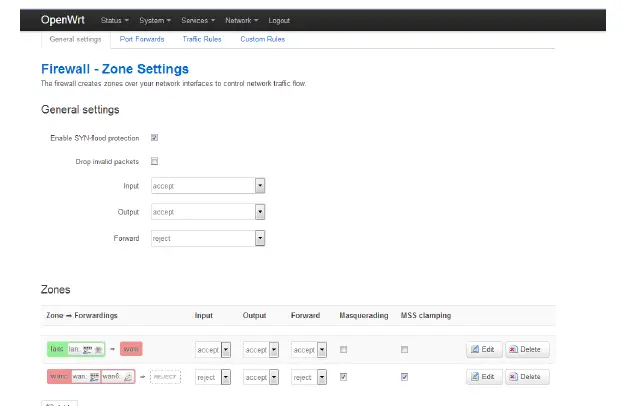
Routing List
Click the status-routes, you could check the routing list of the device, the currently active on the device.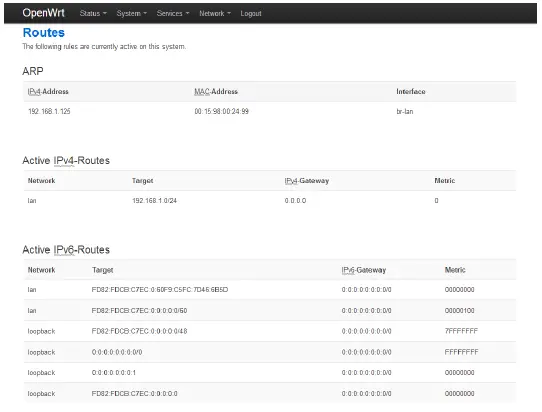
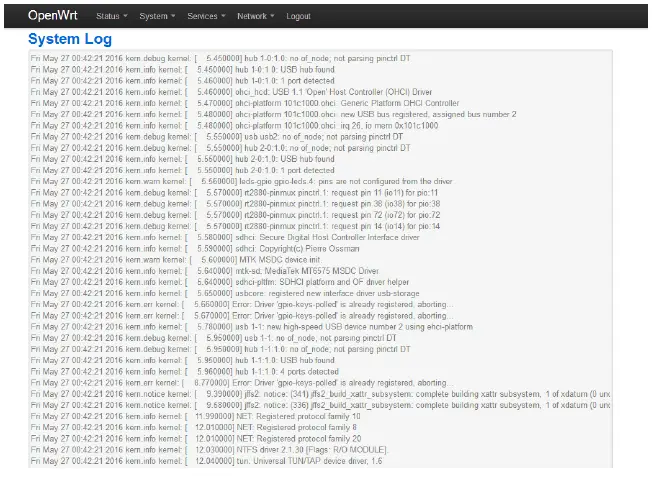
System Log
Click the System-Log, you could check the running status and the operate history
Kernel Log
Click the Kernel Log , you could check some information about the device’s system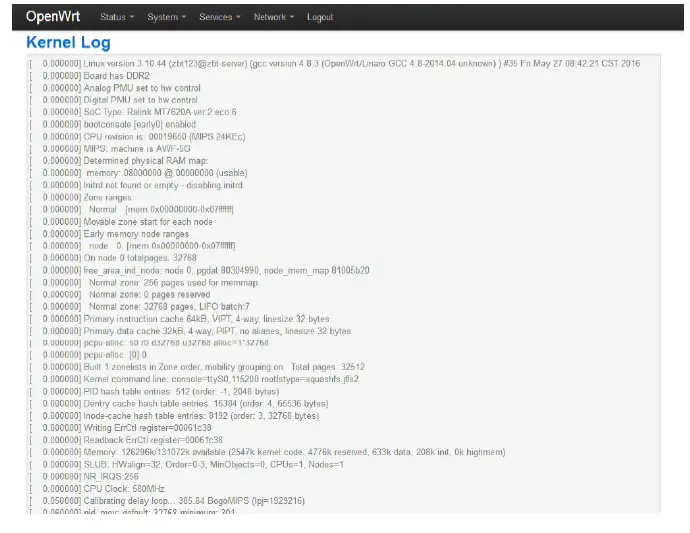
Processes
Click the processes, you could check an overview over currently running system processes and their status. Such as CPU usage, Memory usage. You could hang up ,terminate or even kill the program, depends on your requirements. As the 4.2.6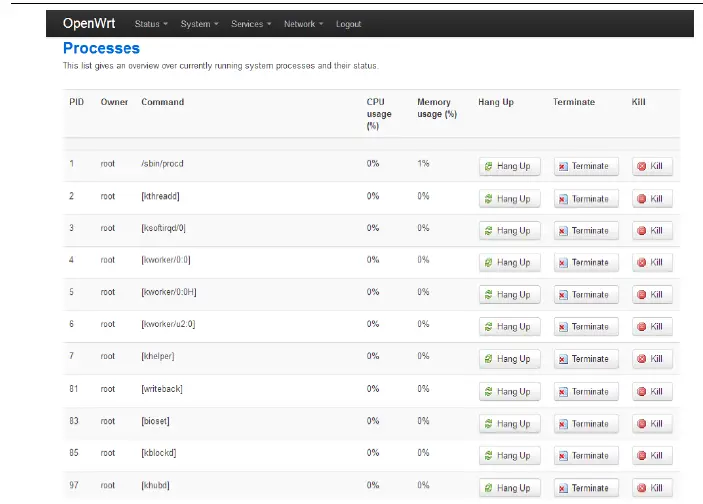
Realtime Graphs
Click the Realtime Graphs ,you could check the load, traffic, wireless and connection of the device.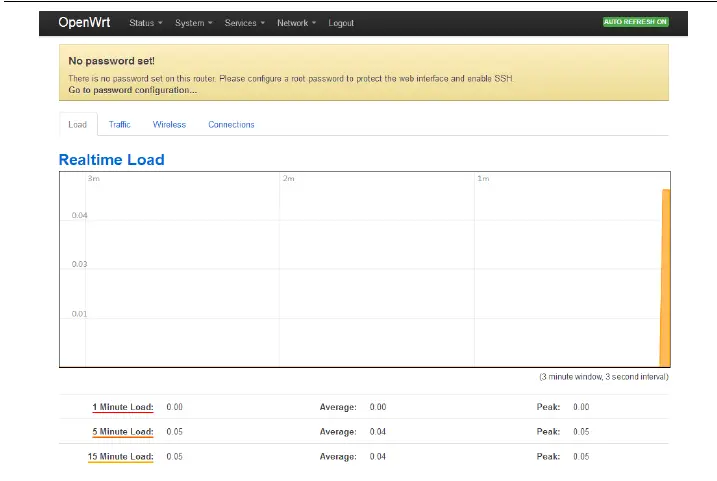
System
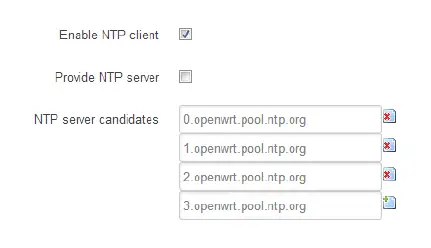
Click the System tag, you could check and edit some basic information of the device, including Local time, Hostname, time zone.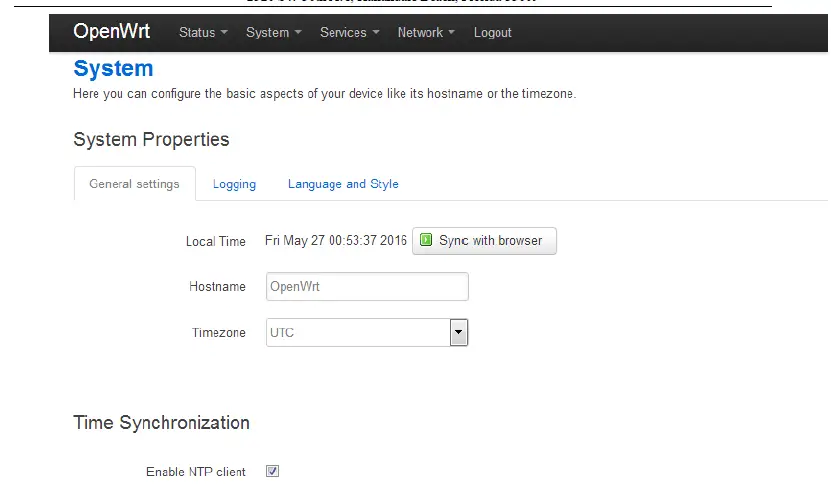
Administration
You can edit the administrator password for accessing the device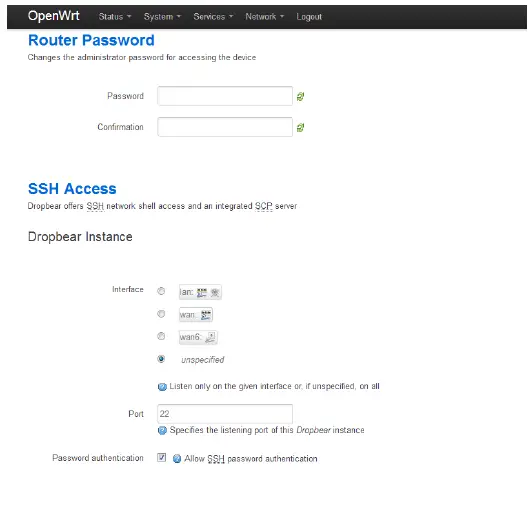
Software
Click the software page, you could download and install the package , do not operate it without a professional engineer.
Start-up
Click to the Start-up page, You can enable or disable installed init scripts here. Changes will applied after a device reboot, do not operate it without a professional engineer.
Schedule Tasks
This is the system crontab in which scheduled tasks can be defined. ,do not operate it without a professional engineer.
Mount Points, LED Configuration
Do some edition about the system , do not operate it without a professional engineer.
Backup/Flash Firmware
You could upgrade the firmware or backup it in this page, as below.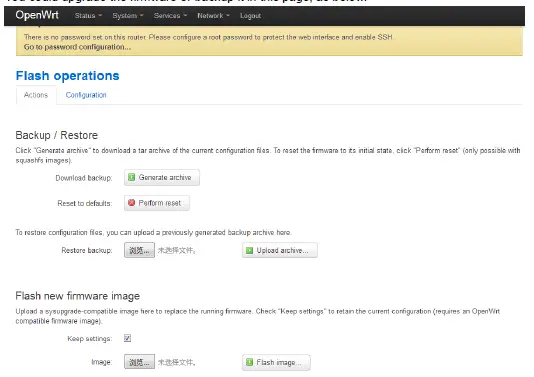
Reboot
Select menu system to restart, you can restart your device. When you click the Reboot tag, the device will reboot.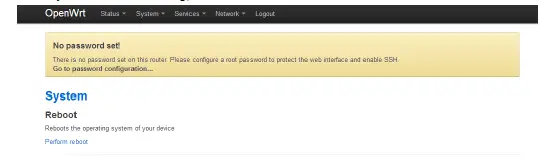
Service
Dynamic DNS
Dynamic DNS allows that your router can be reached with a fixed hostname while having a dynamically changing IP address
Network
Interfaces
Click the Interface tag, you could check the wired port’s status and edit it.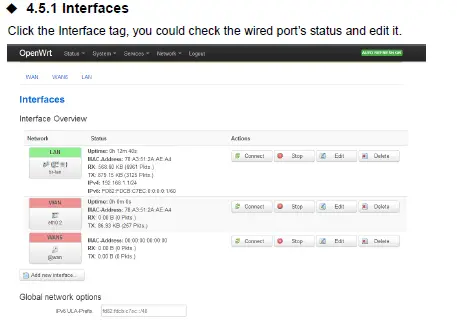 Wireless
Click the Interface tag, you could check the wireless port’s status and edit it.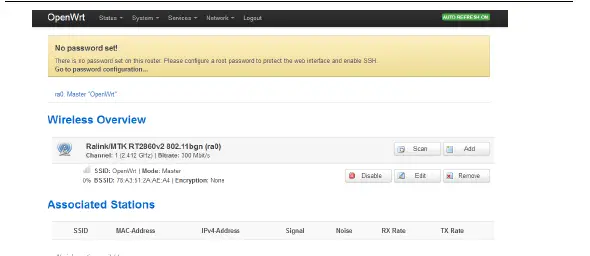
DHCP/DNS、Hostnames, Static Routes,
You could edit these setting in relevant page. do not operate it without a professional engineer.
Firewall
The firewall creates zones over your network interfaces to control network traffic flow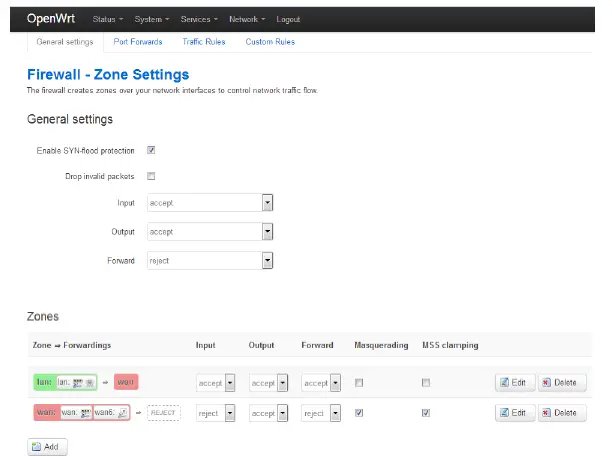
Diagnostics
With Diagnostics you can choose the network utilities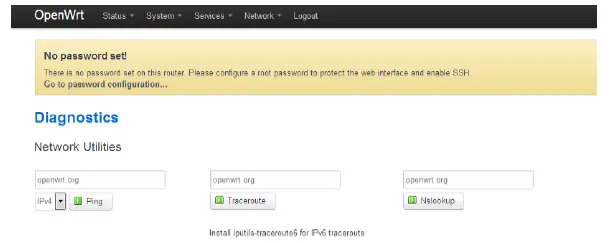
Log out
Click the Log Out tag, you will log out the website.
More details about the system. Please refer the https://openwrt.org/
Flash Firmware
Operate this keep the router connecting computer status.
First, use sharp item Pressing the RESET button as “Picture 1” below, then power on the router.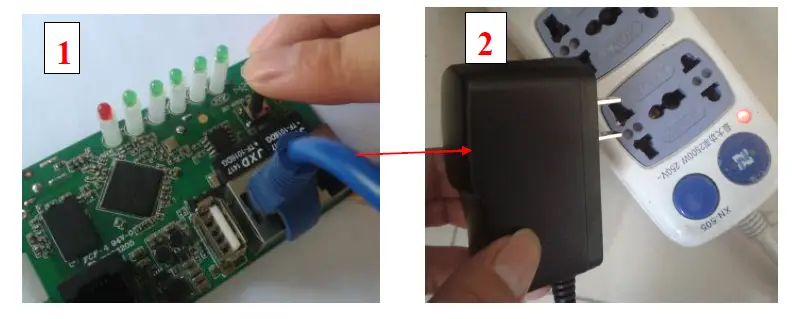
Second, set the computer TCP/IP in to static IP 192.168.1.X ( X means any number between 2 to 255 ) and Subnet mask into 255.255.255.0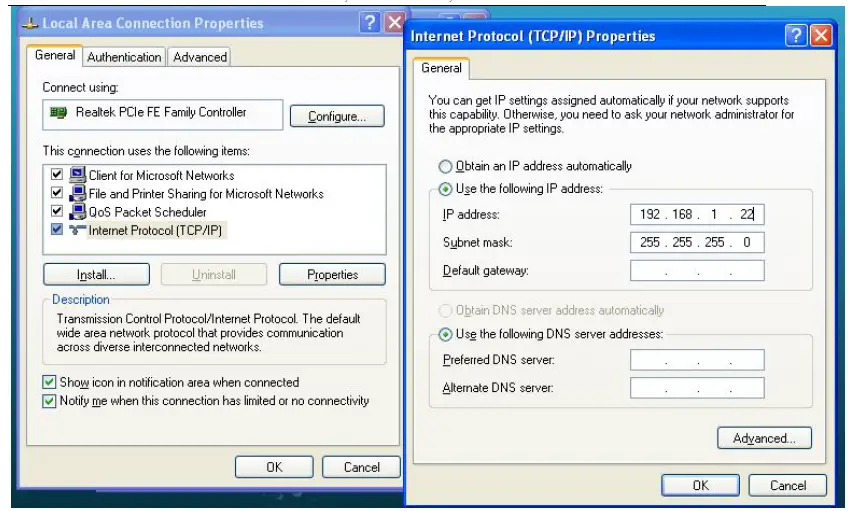
Third, key in 192.168.1.1 into browser, come into “ Firmware recovery page” as below pic.
(this system developed based on Chinese ,so the page shows Chinese word)
Click “ Browser ” button find the firmware “root _uImage. uImage” from your computer, double click “root _uImage.uImage” to hang on it. Then click “Recovery Mode ”to start uploading
(During uploading time, don’t move or power off the router!! Otherwise will cause the router dead !!)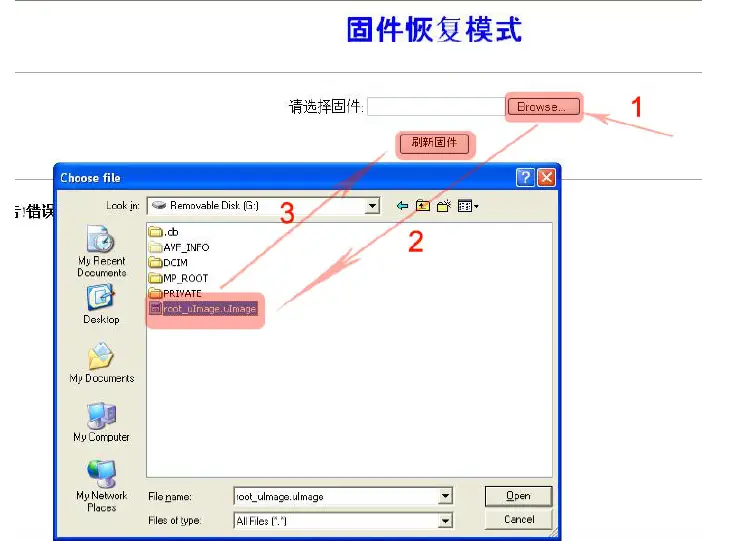

About 100seconds, the file upload success will show “升级完毕” as below picture show. And the router will automatic restart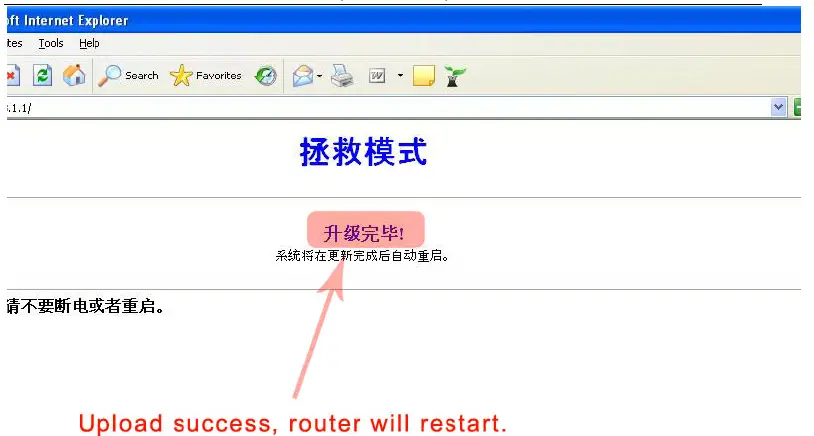
Fourth, Set the computer TCP/IP into automatic obtain IP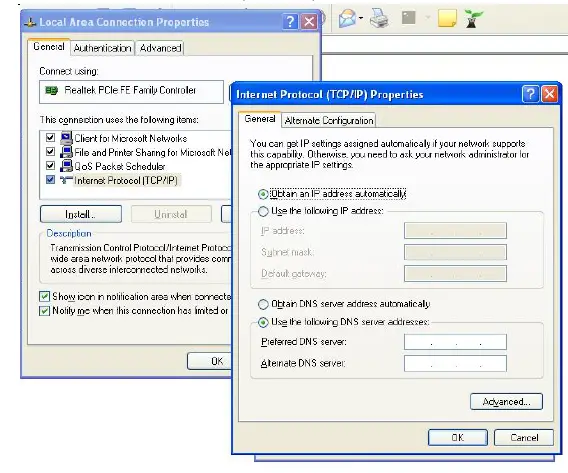
FAQ
LAN LED off
It is about the hardware connection issue, you could check follow below steps
- To check if the Ethernet cable plug into the port firmly.
- To check if the network device is power on
- Make sure the Ethernet cable are working well
The device work normally after setting . But the link will become unsteady after working
some time, such as delay and package dropping.
It means there are some interference in the work environment, you could follow the below steps to solve such problem.
- To check if each part of the connection are steady.
- If the signal strength are too weak, you can try to change the work channel, in order to reduce the reference.
Reboot the device. - Reset to the factory default setting.
After all the above steps, if it still have the same questions, please contact to the reseller or our FAE.
FCC Statement:
This equipment has been tested and found to comply with the limits for a Class B digital device, pursuant to part 15 of the FCC Rules. These limits are designed to provide reasonable protection against harmful interference in a residential installation. This equipment generates, uses and can radiate radio frequency energy and, if not installed and used in accordance with the instructions, may cause harmful interference to radio communications.
However, there is no guarantee that interference will not occur in a particular installation. If this equipment does cause harmful interference to radio or television reception, which can be determined by turning the equipment off and on, the user is encouraged to try to correct the interference by one or more of the following measures:
- Reorient or relocate the receiving antenna.
- Increase the separation between the equipment and receiver.
- Connect the equipment to an outlet on a circuit different from that to which the receiver is connected.
This device complies with part 15 of the FCC rules. Operation is subject to the following two conditions: (1) This device may not cause harmful interference, and (2) this device must accept any interference received, including interference that may cause undesired operation.
Note: Modifications to this product will void the user’s authority to operate this equipment.
FCC Statement
This equipment has been tested and found to comply with the limits for a Class B digital device, pursuant to Part 15 of the FCC Rules. These limits are designed to provide reasonable protection against harmful interference in a residential installation. This equipment generates uses and can radiate radio frequency energy and, if not installed and used in accordance with the instructions, may cause harmful interference to radio communications. However, there is no guarantee that interference will not occur in a particular installation. If this equipment does cause harmful interference to radio or television reception, which can be determined by turning the equipment off and on, the user is encouraged to try to correct the interference by one or more of the following measures:
- Reorient or relocate the receiving antenna.
- Increase the separation between the equipment and receiver.
- Connect the equipment into an outlet on a circuit different from that to which the receiver is connected.
- Consult the dealer or an experienced radio/TV technician for help.
This device complies with part 15 of the FCC Rules. Operation is subject to the following two conditions:(1) This device may not cause harmful interference, and (2) this device must accept any interference received, including interference that may cause undesired operation.
Changes or modifications not expressly approved by the party responsible for compliance could void the user’s authority to operate the equipment.
The device has been evaluated to meet general RF exposure requirement. The device can be used in portable exposure condition without restriction.
This equipment complies with FCC radiation exposure limits set forth for an uncontrolled environment. This equipment should be installed and operated with minimum distance 20cm between the radiator & your body.
FCC WARNING
This device complies with part 15 of the FCC Rules. Operation is subject to the following two conditions: (1) this device may not cause harmful interference, and (2) this device must accept any interference received, including interference that may cause undesired operation.
Any changes or modifications not expressly approved by the party responsible for compliance could void the user’s authority to operate the equipment.
NOTE: This equipment has been tested and found to comply with the limits for a Class B digital device, pursuant to Part 15 of the FCC Rules. These limits are designed to provide reasonable protection against harmful interference in a residential installation. This equipment generates, uses and can radiate radio frequency energy and, if not installed and used in accordance with the instructions, may cause harmful interference to radio communications. However, there is no guarantee that interference will not occur in a particular installation.
If this equipment does cause harmful interference to radio or television reception,
which can be determined by turning the equipment off and on, the user is encouraged to try to correct the interference by one or more of the following measures:
- Reorient or relocate the receiving antenna.
- Increase the separation between the equipment and receiver.
- Connect the equipment into an outlet on a circuit different from that to which the receiver is connected.
- Consult the dealer or an experienced radio/TV technician for help.
To maintain compliance with FCC’s RF Exposure guidelines, This equipment should be installed and operated with minimum distance between 20cm the radiator your body: Use only the supplied antenna.


