
![]()
 Lubadh Dual Looper Instructions
Overview
Version 2 Firmware Featured
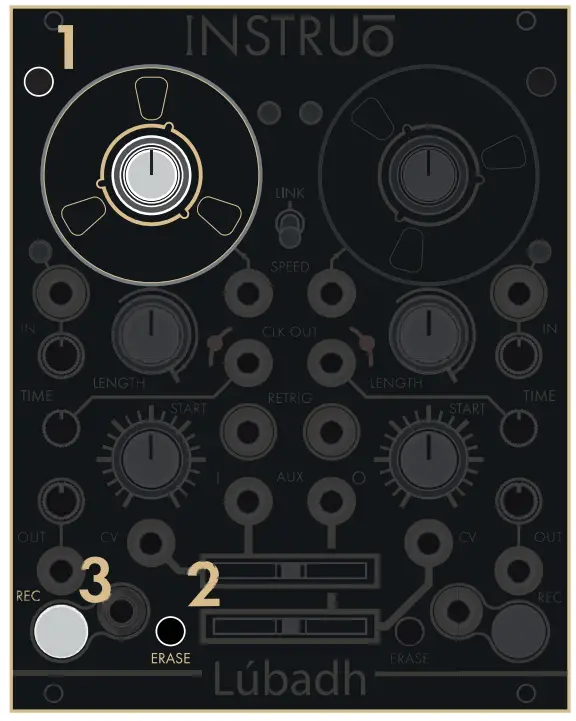
 EXPANDED SAMPLE MANAGMENT NAVIGATE FILES AND FOLDERS IN ORDER TO LOAD FROM MULTIPLE LOOP OPTIONS
![]() STEREO CAPABILITIES SAMPLE LOCKED LINKING FOR STEREO PLAYBACK, RECORDING AND SAVING
STEREO CAPABILITIES SAMPLE LOCKED LINKING FOR STEREO PLAYBACK, RECORDING AND SAVING
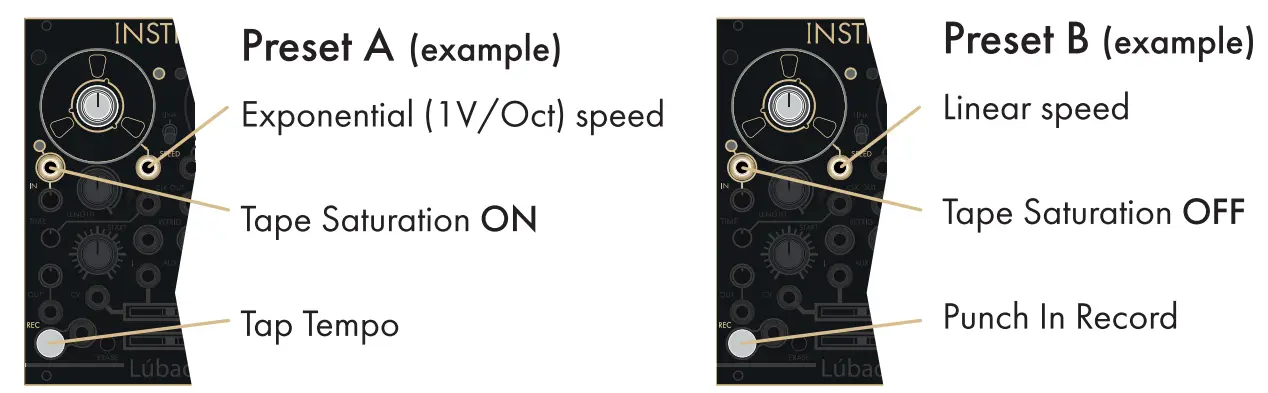
Presets
Each deck of the Lubadh can independently toggle between two user defined presets. Presets can be curated and accessed via the USB drive.
 Note: see manual for more details
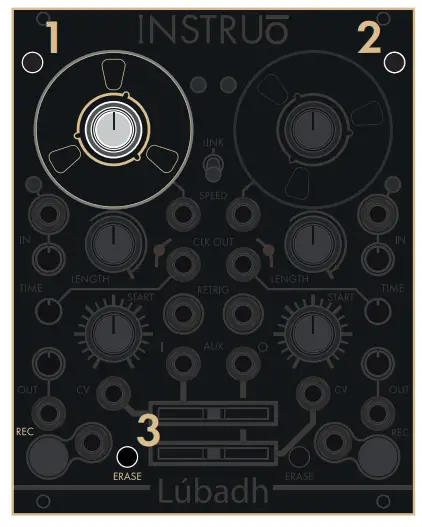
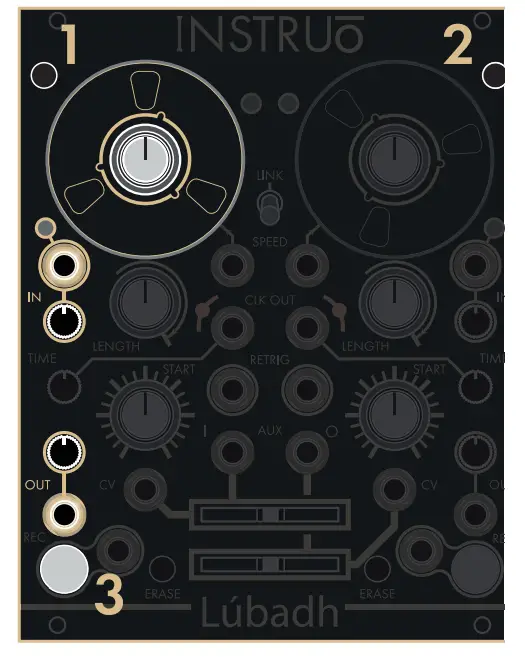
To toggle between presets: hold down buttons 1 and 2, then press button 3. (This action is mirrored for the opposite deck.)
Note: Preset settings are also autosaved between power cycles.
Time Functions
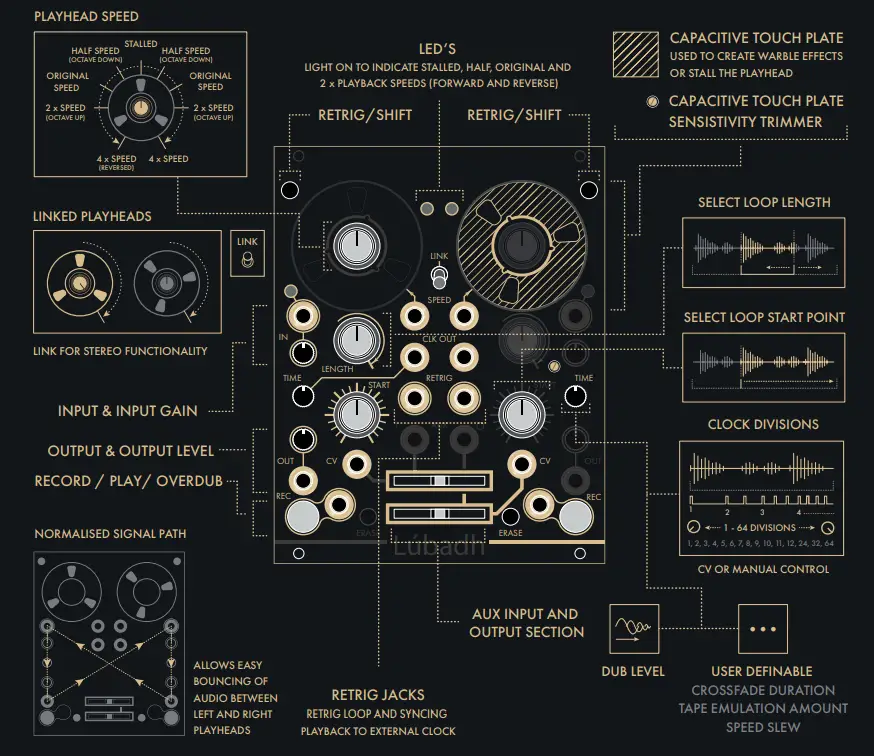
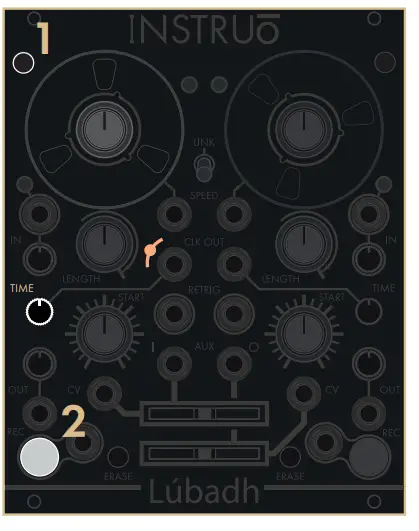 There are three seperate functions for the Time pot: Clock Divisions, Dub Level and User Definable Parameter. You can toggle through these functions by holding down button 1 and pressing button 2 for the left deck, this action is mirrored for the opposite deck.
![]() Note: CLK triggers indicated in white. The current time function is indicated by the Amber LED next to the ‘CLK OUT’ jack.
Note: CLK triggers indicated in white. The current time function is indicated by the Amber LED next to the ‘CLK OUT’ jack.
Amber LED Off
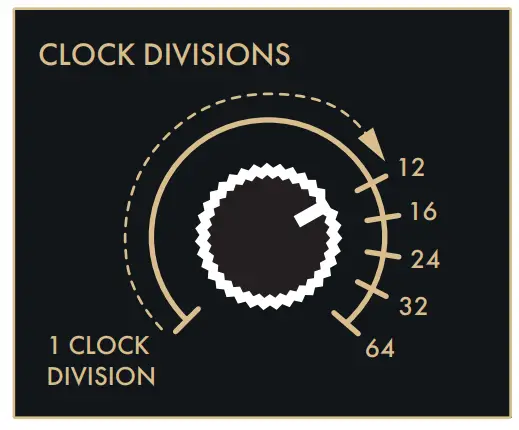 Time pot sets the number of clock divisions per loop. These are displayed by the white ‘CLK OUT’ LED.
Amber LED Solid Lit
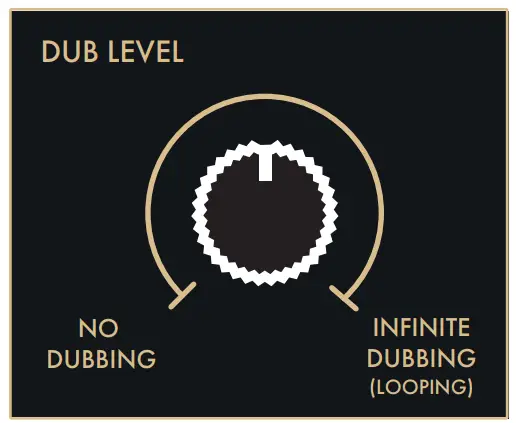 Sets the rate at which old recordings fade out. Akin to feedback in a delay
Amber LED Pulsing
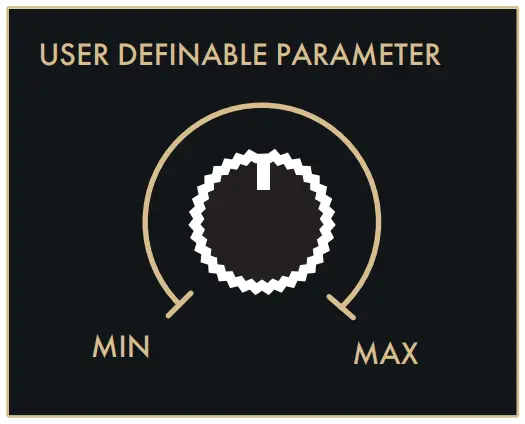 Controls parameter amount. – Crossfade Duration – Tape Emulation Amount – Speed Slew
Monitoring Options
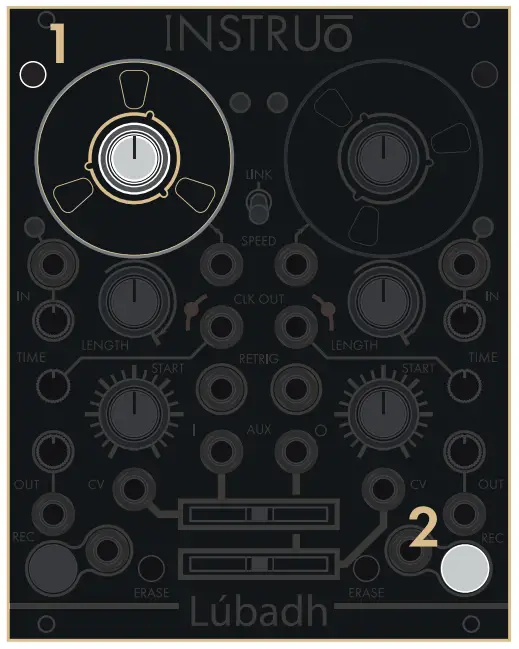
 There are three options for input monitoring: Monitoring On, Armed Monitoring and Monitoring Off. You can toggle through these options by holding down buttons 1 and 2, then pressing button 3 for the left deck, this action is mirrored for the opposite deck.
Monitoring On – Record Button Solid White
Monitoring Off – Record Button Off
Monitoring On – When monitoring is on, throughput audio is always present of the output and summed with any recorded loops. (DEFAULT). Armed Monitoring – When armed monitoring is selected, throughput audio is muted by default, pressing the record button ‘arms’ the deck and throughput audio is toggled on, pressing record again records a loop, pressing record to finish the recording disables throughput audio and only the recorded audio is heard. When armed the erase button will disarm the deck without erasing the loop.
Monitoring Off – When monitoring is off only the recorded material appears at the output.
Looping or One-Shot Modes
Toggle between looping/one-shot modes by holding button 1 and pressing button 2 for the left deck, this action is mirrored for the opposite deck. Looping or One-Shot Record In one shot-record, recording starts from current playback position, records one full loop (set by start position and length) and stops recording automatically. (Looping by DEFAULT).
Note: Idle record button is lit mixed amber/ white when monitoring is on, pulsing mixed when armed monitoring is on and remains off when monitoring is off.
 Looping or One-Shot Playback
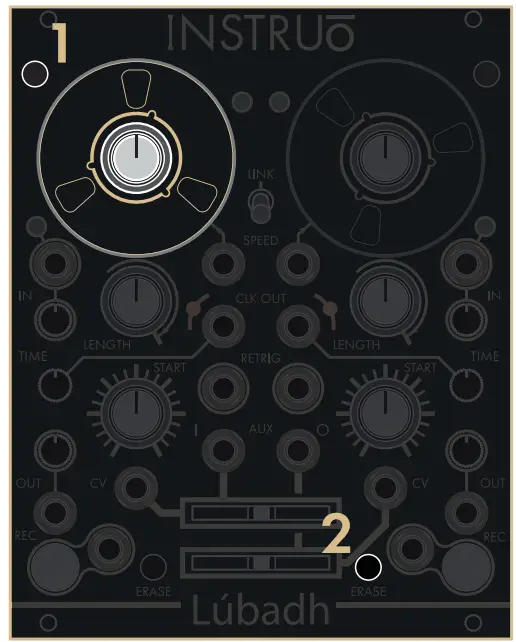
When looping is disabled (i.e. one-shot mode) playback stops after each loop. Retrigger will prompt the recording to play once. (Looping by DEFAULT)
Note: The record button will blink white when loop playback is selected and blink mixed when one-shot playback is selected.
Save and Load
 Save
Save
To save a recording onto the Lubadh USB hold down buttons 1 and 2, then press button 3, this action is mirrored for the opposite deck. Note: Recordings and settings are also autosaved between power cycles.
Load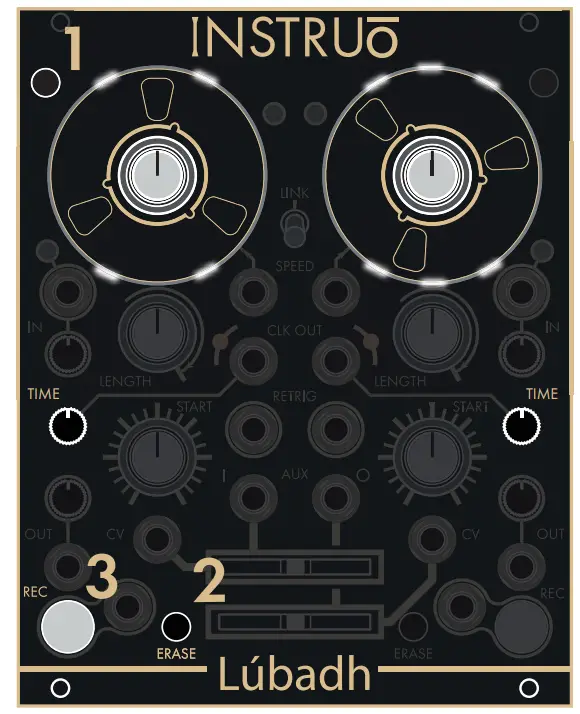 To enter the load menu hold down button 1 and press button 2. When in the load menu, left time pot selects which file and right time pot selects which folder to load (deck LEDs indicates which file/folder is selected). This action is mirrored for the opposite deck. Press button 3 to load selected loop.
Auxiliary Input & Output Crossfaders
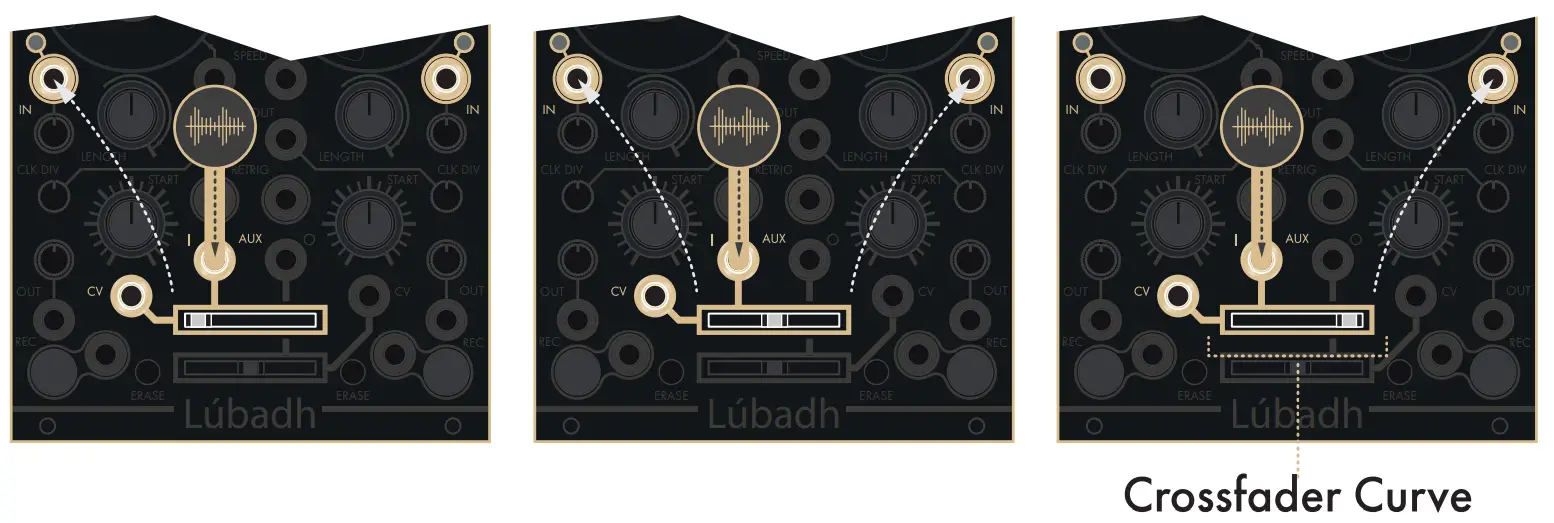 Auxiliary Audio Input
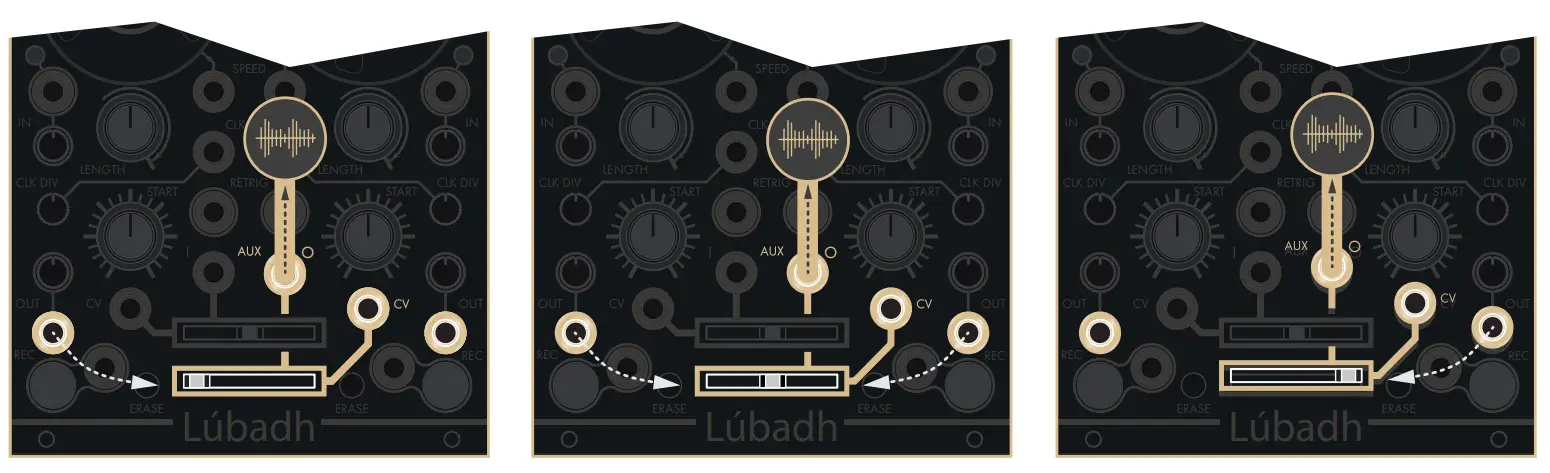
In addition to the left and right input/output sections, the Lobadh also has auxiliary input and output crossfaders which allow additional audio to be sent to the input sections or monitored from the outputs. Voltage control allows for modulation up to audio rate.

Auxiliary Audio Output
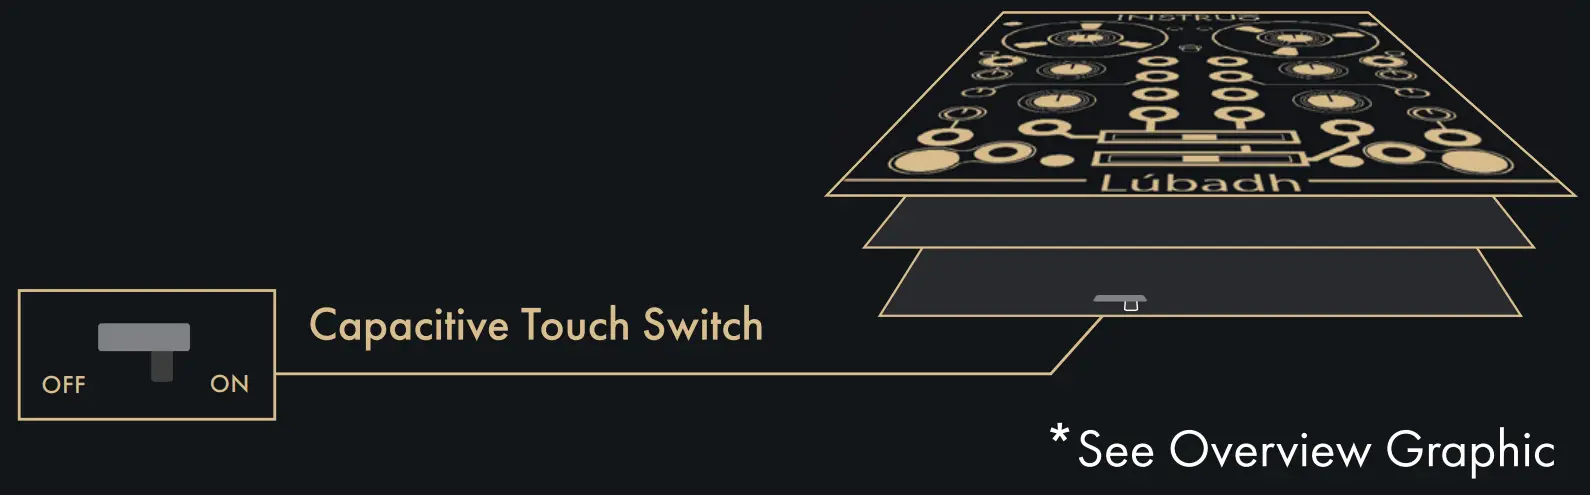
Capacitive Touch & Pre/ Post Switches
Capacitive Touch Switch
The switch on the lower side of the rea PCB toggles the capacitive touch on /off.
 Pre/ Post Output Level Pre/Post switches on the rear of the pcb are used to toggle the output fader to being either pre or post output level.

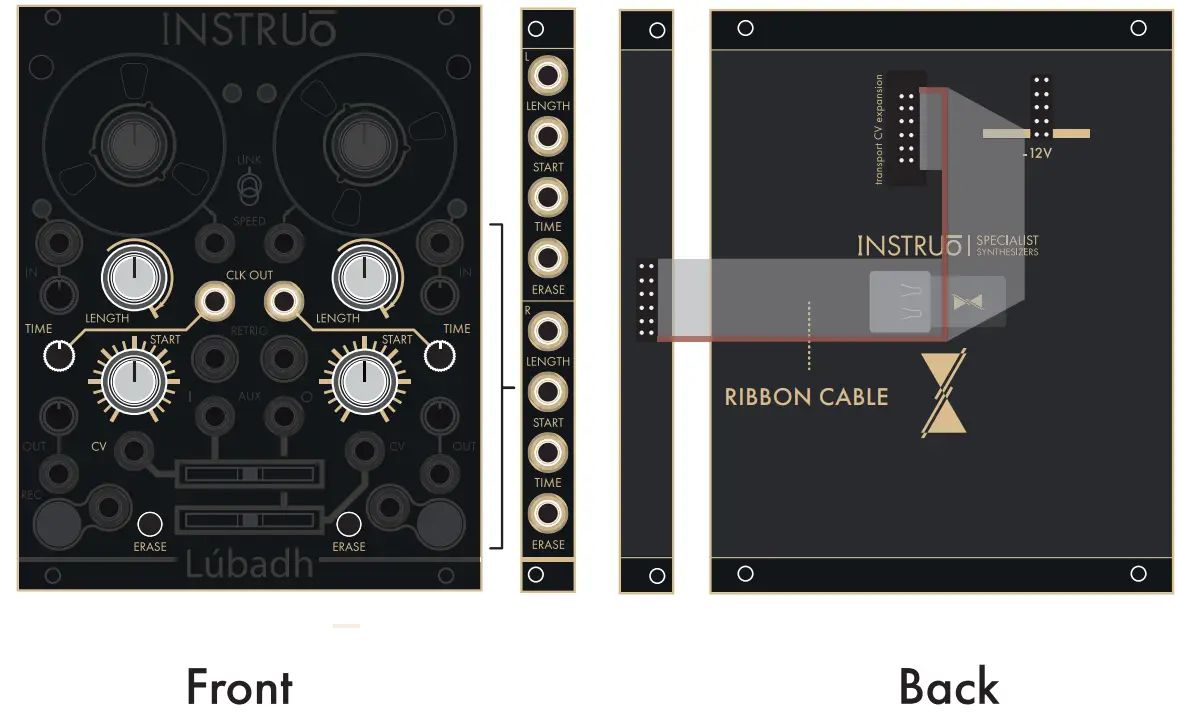
CV Expander
Included with the Lobadh is a CV expander, which is connected to the module via a ribbon cable. The expander allows for additional CV control over all remaining parameters.
Note: All CV inputs are bipolar (5Vpp).
Cheat Sheet
| Functions | Button Combinations | Display |
| Monitoring Modes | Both Shifts & Record | On – REC LED Solid White Armed – REC LED Pulse White Off – REC LED Off |
| Time Pot Function | Shift & Record | CLK Divisions – CLK LED Off Dub Level – CLK LED Solid Lit User Definable Parameter – CLK LED Pulsing |
| Looping Record One-Shot Record | Shift & Opposite Record | Looping – Unchanged One-Shot – REC LED Mixed |
| Looping Playback One-shot Playback | Shift & Opposite Erase | Looping – REC LED Blinks White One-Shot – REC LED Blinks Mixed |
| Punch In Record /Tap Tempo | Erase & Record | REC LED Lights Amber /Mixed |
| Toggle Preset | Both Shifts & Erase | Preset A – REC LED BlinksWhite Preset B – REC LED BlinksMixed |
| Flip Playback Direction (in 1 V/Oct Mode) | Opposite Erase + Erase | Speed Indicator LED’s Blink |
| Delete Taps | Erase & Shift | N/A |
| Save | Shift, Erase & Record | Deck LED Animation |
| Load | Shift & Erase | Deck LED Animation |
| Reset | Both Shifts & Both Records | Speed Indicator LED’s Pulse |
![]()


