iDPRT SP310 Thermal Label Printer
- Website: www.idprt.com
- After Service: https://idprt.afterservicevip
- Customer Service Email: [email protected]
INSTALLATION INSTRUCTION
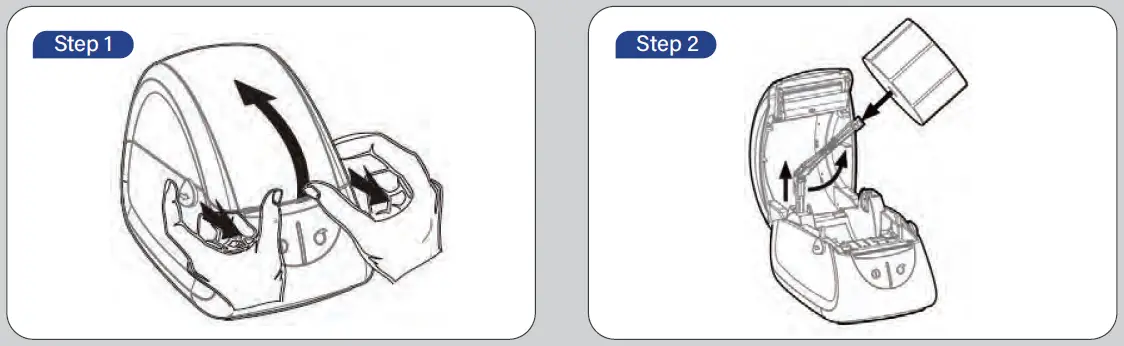
- Push the open button of the top cover with both hands to open it upward.
- Pull up the paper roll shaft and then adjust the shaft according to the internal diameter of paper roll. Install the paper roll and fix the shaft.

- Pull out the paper roll, open the paper guides to the max-width and pass the paper through the paper guides, then adjust the paper guides to suit the paper width.
- Press down the printer cover, then tear off the excess paper

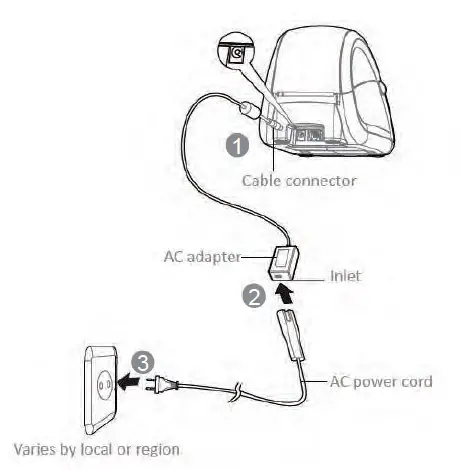
Printer Connection
- Connect the AC adapter to the cable connector.
- Connect the AC power cord to the inlet.
- Connect the other end of the AC power cord into the socket outlet.

- Connect the USB cable to the printer and PC.


For detailed steps for each system, please refer to the detailed path in the manual
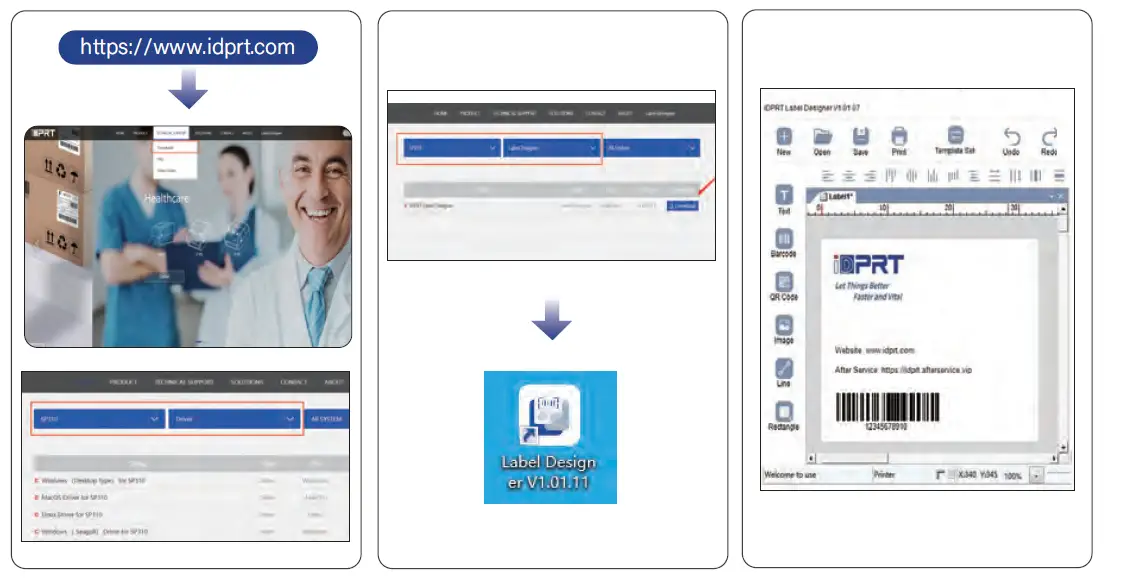
- Download and install SP310 driver
- Download and install Label Designer
- DIY the label size and create a label (1″-3.35″ printing width)


