![]()
Thermal Label Printer User Guide
KE103
Innovation you can trust.
To view the full manual with more instructions, scan the QR code.

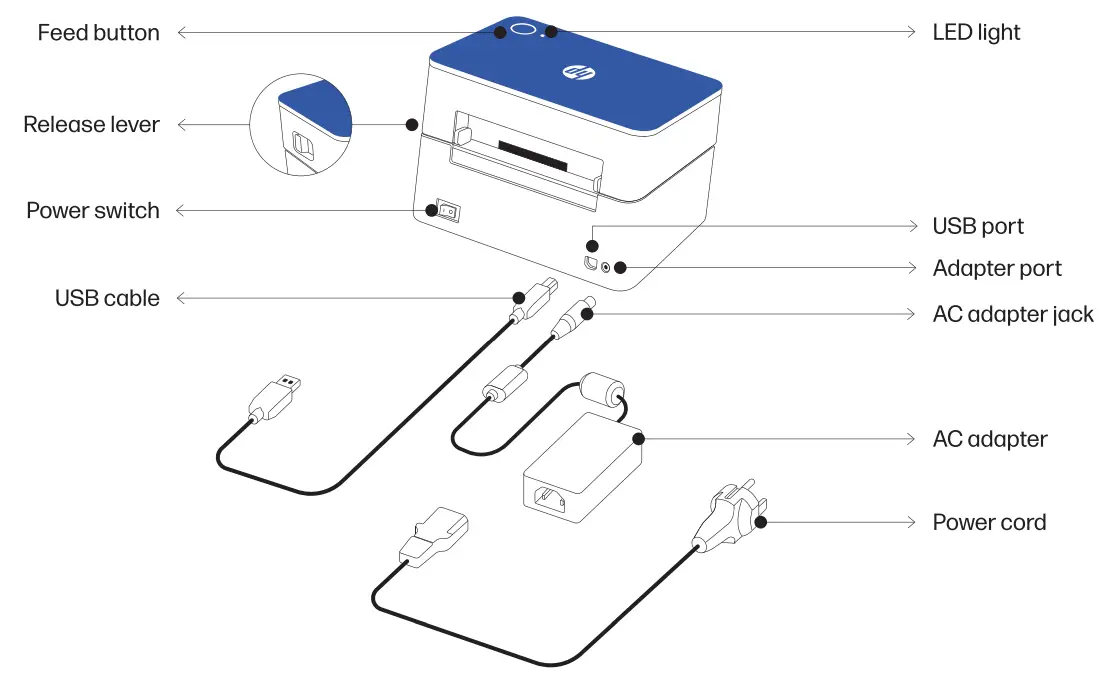
Product Overview
Set up instructions
Powering the printer
- First, connect the AC adapter jack to the printer adapter port.
- Connect the power cord to the AC adapter.
- Connect the power cord to a power source or outlet.

- Connect the USB cable to the back of the label printer.
- Connect the other end of the USB cable to a PC or Mac computer.
- Turn on the printer with the power switch.


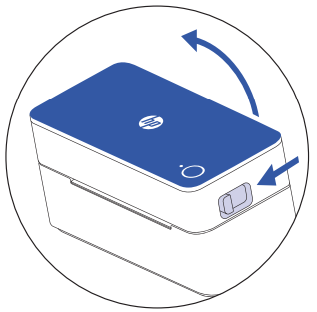
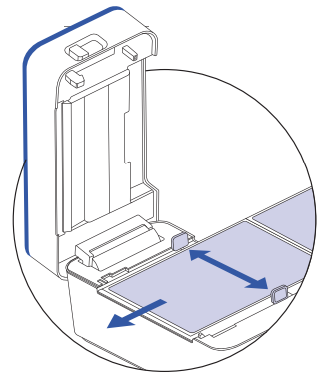
Loading the labels
- Press on the release lever on the side of the printer to unlock the printer cover.

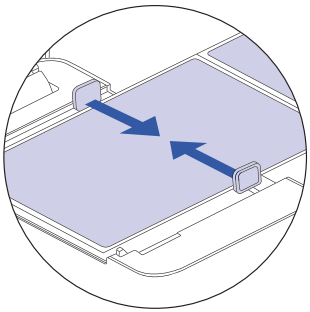
- Lift the printer cover and place the label between the media holder guides. NOTE: Make sure the printing side of the label is facing up when placing the label.

- Adjust the media holder guides to hold the type of label you have in place. NOTE: Once the media holders guides are set, you can continue to load labels through the back of the printer without opening the cover.

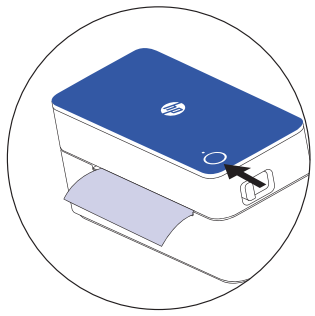
- Close the printer cover. Once printer cover is closed, label should align on its own. If it doesn’t, press the feed button to align the label. NOTE: By default, most platforms are preset to 8.5- x11″ labels. Make sure to adjust your label size accordingly based on your printing needs.
Installing the driver
- Install the driver for Mac or PC at hpworksolutions.com/setup to start using your printer.

Pro tips
- Avoid using poor quality labels as they can damage the printer
- Regularly clean the printer head.
- Press the feed button on the printer to skip a blank label.
- If paper is jammed, turn off the printer and allow the printer head to cool down.
- Open the cover and ensure that the rubber is clean. For cleaning, use an alcohol swab then wait for the area to dry before turning on the printer
*See page 8 for more on maintenance.
| Function | Action | LED color |
| Label Feed Test/ Label Alignment | Press the feed button once to align the label and make sure label feeds through the printer. | When complete, light will be solid green |
| Configuration Page Printing | Press & hold the feed button for 1- 3 seconds to print out a configuration page that will give you information about the printer. | Slow blinking green light |
| Manual Printer Calibration (if needed) | Press & hold the feed button for 4 – 6 seconds to calibrate the printer. | Fast blinking green light |
| Factory Reset | Press & hold the feed button for 7 – 9 seconds to reset device back to factory settings. | Slow blinking red light |
LED Color guide
| LED color | Problem | Solution |
| Yellow solid light | N/A | Printer is getting ready. |
| Green solid light | N/A | Printer Is ready to print. |
| Slow blinking yellow light | Printer is having trouble with the label or gap sensor may not have recognized media. | Remove the labels from the printer. Then, carefully insert the labels back into the printer. Make sure the labels are properly installed in the printer |
| Fast blinking yellow light | Firmware Is updating. | Walt for the printer to finish updating. |
| Red solid light | Printer cover is open. | Make sure the printer cover is closed fully before you start to print. |
| Slow blinking red light | Label is jammed or labels are running low. | Open the printer cover and adjust the labels as needed. |
Maintenance
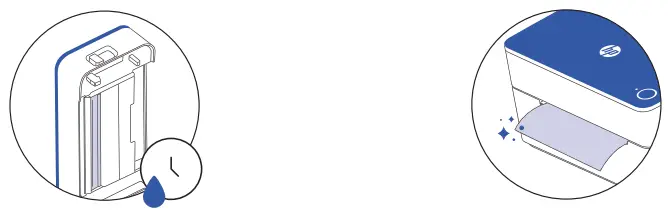
Cleaning printer head
- Turn the printer off, remove the power cord and AC adapter, and n en thp rover
- Wait until printer head cools down.
- Clean printer head using alcohol swab.

- Wait until alcohol completely dries before closing the cover.
- Connect the AC adapter and power cord to the printer and print a test page to check that printer head is clean.

Safety precautions
- Please turn off and unplug the printer when it is not in use for long periods of time.
- Use only with the power cord and power adapter supplied with the product. tower rating: 24Vdc, 2.5 A
- Do not bend the power cord excessively or place objects on the cord.
- CAUTION: The printer head can become very hot after printing labels.
- Do not touch the printer head.
- Keep the printer out of reach of children and pets.
- Do not use printer if any parts are missing or damaged.
- Do not attempt to disassemble or repair the printer yourself.
For more information
 To watch a quick setup video or to learn more about your HP Label Printer, please visit www.hpworksolutions.com/setup or scan the OR code:
 To view the two-year limited warranty, please go to: www.hpworksolutions.com
![]() Need help?
Need help?
Get in touch with our knowledgeable customer service team
by accessing our live chat at www.hpworksolutions.com,
emailing us at [email protected],
or calling 1-877-424-9746.
![]()
HP is a trademark of HP Inc. or its affiliates, used by C&A Marketing, Inc. under license from HP Inc. Microsoft, Windows, Windows Server, Windows Vista, and Windows 10 are trademarks of Microsoft Corporation in the U.S. and/or other countries. Apple, AirPrint, iPod, [Phone, iPad, App Store, Mac, Macintosh, and OS X are trademarks of Apple Inc. in the U.S. and other countries. All other products, brand names, company names, and logos are trademarks of their respective owners, used merely to identify their respective products, and are not meant to connote any sponsorship, endorsement, or approval.
© 2022. All Rights Reserved. Made in Korea. C&A Marketing, Inc.114 Tived Lane East, Edison, NJ 08837


