![]()
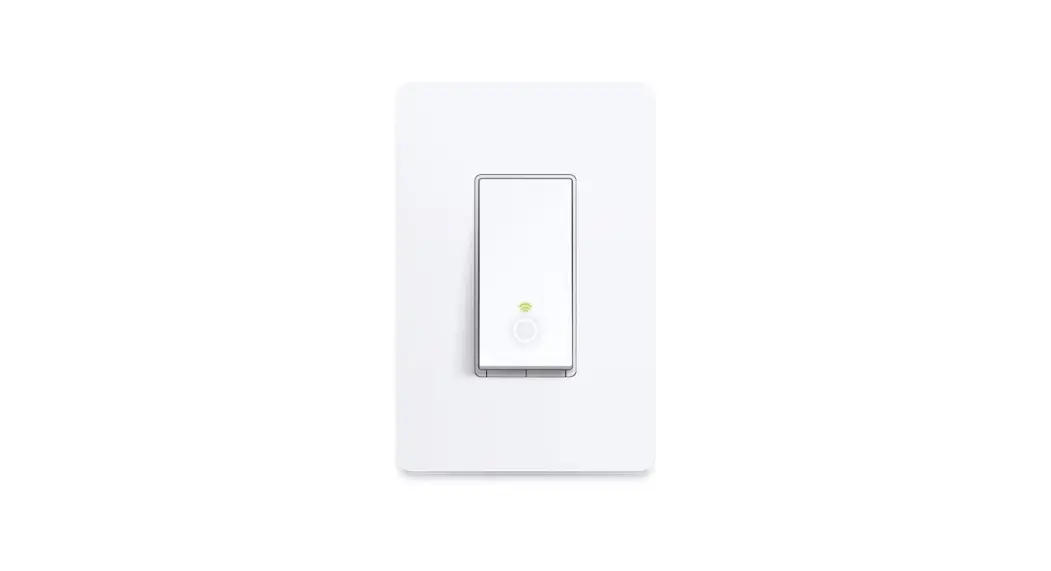
![]() Smart Wi-Fi Dimmer Switch
Smart Wi-Fi Dimmer Switch
KS230 KIT
Quick Start Guide
*You can find step-by-step instructions in the Kasa Smart app.
![]() Wiring guide:
Wiring guide:
Scan QR code or visit
https://www.tp-link.com/support/faq/3400/
 https://www.tp-link.com/support/faq/3400/
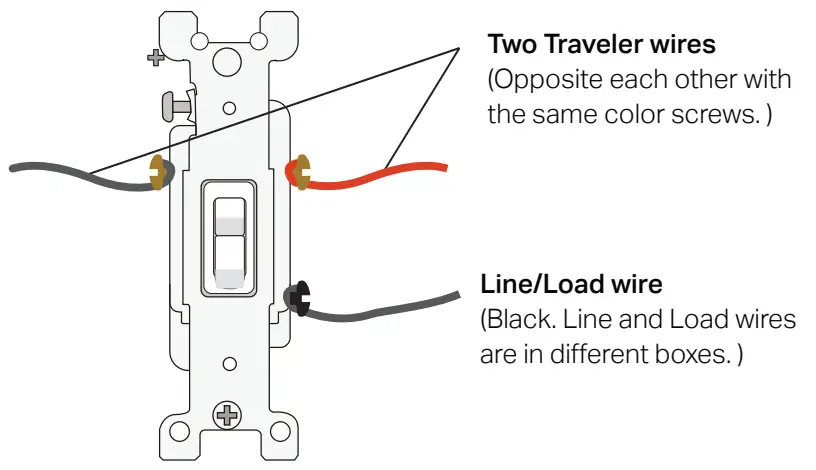
Wire Your 3-Way Dimmer
- Turn off the circuit breaker. Then remove the two wallplates. Your dumb switches might look like this.

- Get to know the wires.
Line (Live/Hot): Usually black. One end is connected to the circuit breaker, the other to your FIRST 3-Way switch.
Load: Usually black. One end is connected to the light fixture, the other to your SECOND 3-Way switch.
Travelers: Usually one is black and the other is red.
Neutral: Usually a bundle of white wires, not connected to the dumb switch. They may be folded up in the very back.
Ground: Usually green or copper.
The wire colors used in this guide are recommended by National Electric Codes (NEC). They may differ from your actual wire colors.
Note:
1. The main and satellite dimmers cannot work separately or with traditional 3-way switches.
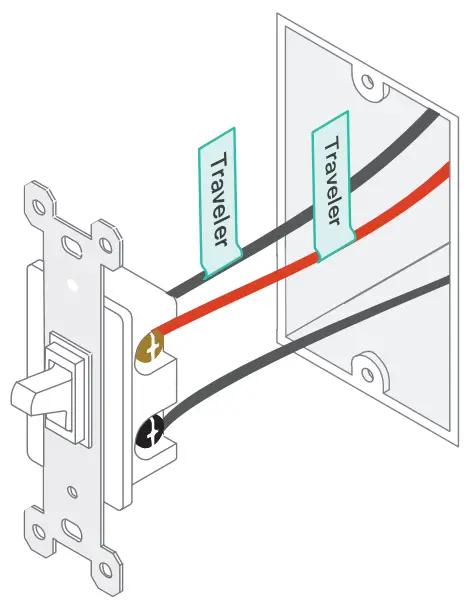
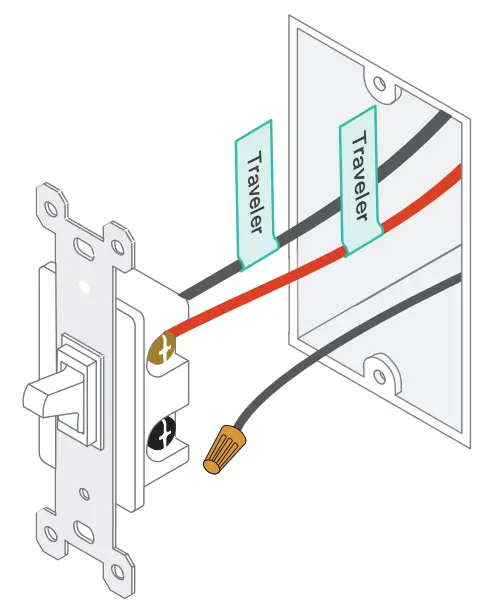
2. You can find detailed wiring instructions in the Kasa Smart app. - Label the Traveler wires in the two wall boxes.

- Only disconnect the Line/Load wires from the two dumb switches, then cover them with provided wire nuts for safety.

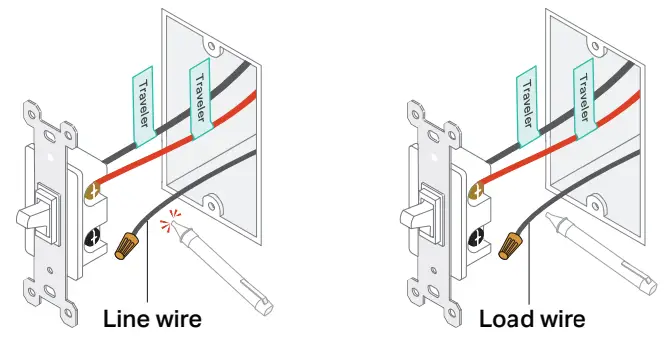
- Identify Line and Load wires in the two wall boxes.
1) Turn on the circuit breaker. Use a voltage detector to identify the energized wire (Line wire). Take care to avoid electric shocks.
 3) Label the other wire in the other wall box as Load wire. This is the wall box for the satellite dimmer.
2) Turn off the circuit breaker and label the Line wire. This is the wall box for the main dimmer. - Label the Neutral wire in the wall box for the main dimmer, and the Ground wires in both wall boxes.
CAUTION: - Disconnect all wires from the two dumb switches, and then connect them to the Smart 3-Way Dimmer as below.
No need to distinguish between the two traveler wires. Check the main dimmer LED to see if the wires are connected correctly.
 Blinking red quickly: The wires are wrongly connected. Please check the wiring. It’s recommended to consult an electrician.
 3) Label the other wire in the other wall box as Load wire. This is the wall box for the satellite dimmer.
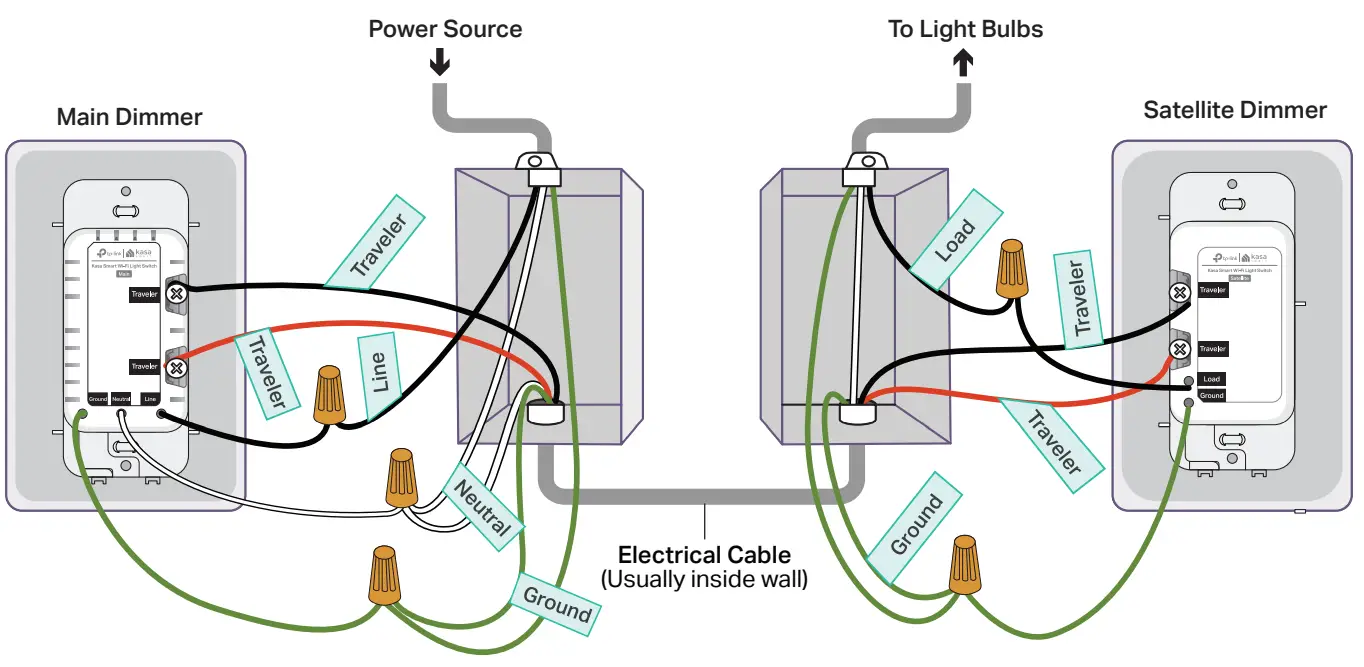
Set Up Your 3-Way Dimmer
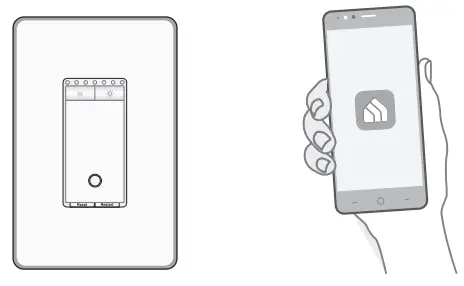
STEP 1 DOWNLOAD APP
Get the Kasa Smart app from the App Store or Google Play.
 http://www.tp-link.com/common/promos/app_kasa.html?ref=QRCode
STEP 2 SET UP
Tap the + button in the app. Select Smart Switches then Smart 3-Way Dimmer. Then follow the app instructions to set up your smart dimmer.
Appearance
This 3-Way Dimmer Kit has the main dimmer and a satellite dimmer. They cannot work separately or with traditional 3-way switches.
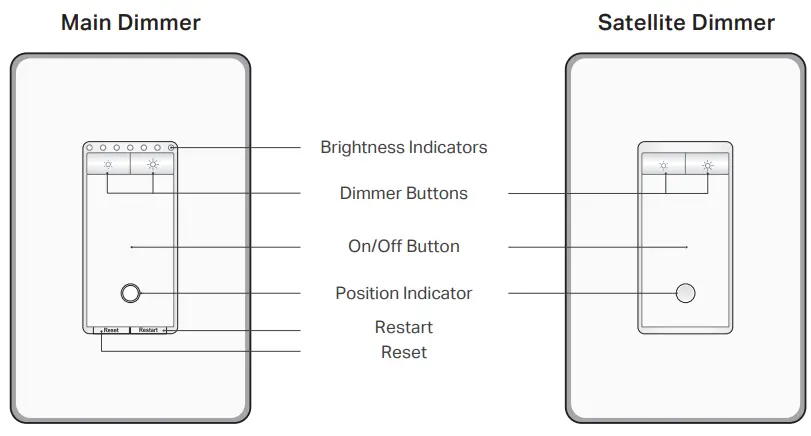
Buttons
| Decrease or increase the brightness. | |
| Reset | Press and hold for about 5s to reset Wi-Fi while keeping previous settings. Press and hold for about 10s to restore your dimmer to factory default settings. |
| Restart | Press to restart your dimmer. |
| On/Off Button | Press to turn on / off your dimmer. |
Brightness Indicators
Brightness Indicators | Indicate the brightness of the light. More indicators mean higher brightness. |
Position Indicator
| Solid amber | Starting up. |
| Blinking amber & green | Ready for setup. |
| Blinking green | Connecting to Wi-Fi. |
| Stay green for the 30s | Connected to Wi-Fi. |
| Solid red | Disconnected from Wi-Fi. |
| Blinking amber | The dimmer is being reset to factory default settings. |
| Solid white | The dimmer is off. LED is on to indicate the dimmer location in the dark. |
Buttons
| Decrease or increase the brightness. | |
| On/Off Button | Press to turn on / off your dimmer. |
Indicator LED
| The dimmer is off. LED is on to indicate the dimmer location in the dark. |
Specifications
Rating: 120 V~ 60 Hz
Load: 300 W Incandescent 150 W LED (MLV)
Operation temperature: 0~40℃
Dimming Type*: Leading Edge Dimming / TRIAC Phase-Cut
Operating control, Type 1 action
Pollution Degree 2
Rated Impulse Voltage 2500 V
Software Class A
*It’s also suggested to contact your bulb’s Support to check the supported dimming type of the bulb.
Safety Notice
Before installing, servicing, or removing the switch, read and follow all safety precautions including the following:
- CAUTION – Risk of Electric Shock – More than one disconnect switch may be required to de-energize the equipment before servicing. A circuit breaker that disconnects the Line and Neutral conductor simultaneously is suitable.
Ensure power is off at the circuit breaker before removing or installing any switch. Use a non-contact voltage tester to ensure the power is off. - The Smart Switch must be installed and used in accordance with the National Electric Code (NEC) or your local electrical code. If you are unfamiliar with these codes and requirements or are uncomfortable performing the installation, consult a qualified electrician.
- Do not install the Smart Switch with wet hands or when standing on wet or damp surfaces.
- Install only in a suitable UL Listed outlet box (suitable dimensions: H > 2.95 in./75 mm, W > 1.81 in./46 mm, D > 2 in./51 mm).
- Tighten terminal screws to 13 lbs-in for the main dimmer switch, and 11 lbs-in for the satellite switch.
- Keep the device away from water, fire, humidity, or hot environments.
- Do not attempt to disassemble, repair, or modify the device. If you need service, please contact us.
- Do not use devices where wireless devices are not allowed.
FCC Statement
This equipment has been tested and found to comply with the limits for a Class B digital device, pursuant to part 15 of the FCC Rules. These limits are designed to provide reasonable protection against harmful interference in a residential installation. This equipment generates, uses, and can radiate radio frequency energy, and if not installed and sed in accordance with the instructions, may cause harmful interference to radio communications. However, there is no guarantee that interference will not occur in a particular installation. If this equipment does cause harmful interference to radio or television reception, which can be determined by turning the equipment off and on, the user is encouraged to try to correct the interference by one or more of the following measures:
—Reorient or relocate the receiving antenna.
—Increase the separation between the equipment and receiver.
—Connect the equipment into an outlet on a circuit different from that to which the receiver is connected.
—Consult the dealer or an experienced radio/TV technician for help.
FCC Radiation Exposure Statement
This device complies with FCC radiation exposure limits set forth for an uncontrolled environment and it also complies with Part 15 of the FCC RF Rules. This equipment must be installed and operated in accordance with provided instructions and the antenna(s) used for this transmitter must be installed to provide a separation distance of at least 20 cm from all persons and must not be co-located or operating in conjunction with any other antenna or transmitter. End-users and installers must be provided with antenna installation instructions and consider removing the no-collocation statement.
This device complies with Part 15 of the FCC Rules. Operation is subject to the following two conditions: (1) this device may not cause harmful interference, and (2) this device must accept any interference received, including interference that may cause undesired operation.
Caution!
Any changes or modifications not expressly approved by the party responsible for compliance could void the user’s authority to operate the equipment.
Canada Statement
This device contains license-exempt transmitter(s)/receiver(s) that comply with Innovation, Science, and Economic Development Canada’s license-exempt RSS(s). Operation is subject to the following two conditions:
(1) This device may not cause interference.
(2) This device must accept any interference, including interference that may cause undesired operation of the device.
The device meets the exemption from the routine evaluation limits in section 2.5 of RSS 102 and compliance with RSS-102 RF exposure, users can obtain Canadian information on RF exposure and compliance.
This transmitter must not be co-located or operating in conjunction with any other antenna or transmitter. This equipment should be installed and operated with a minimum distance of 20 centimeters between the radiator and your body.
 Need some help?
Visit www.tp-link.com/support for technical support, user guides, FAQs, warranty & more
©2022 TP-Link
7106509733 REV2.0.0
*Images may differ from actual products.


