![]()
RBKWMB Orbi Wall Mounting Kit
User Guide
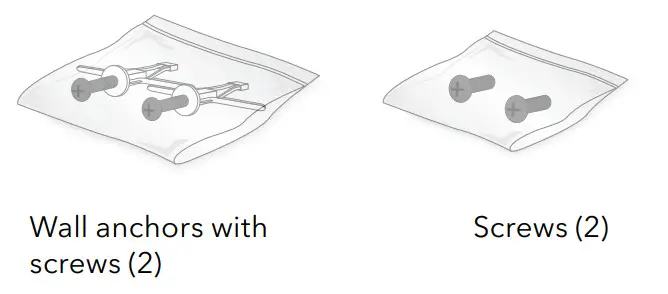
Package contents
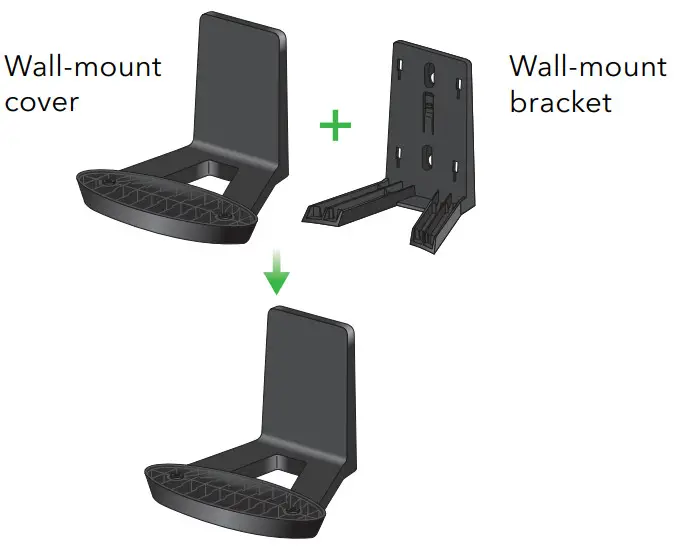
Note: The bracket and cover come reattached.
IMPORTANT: You can only install the wall mount vertically on a wall. Do not install the wall mount horizontally or on the ceiling.
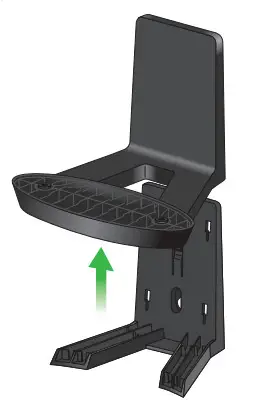
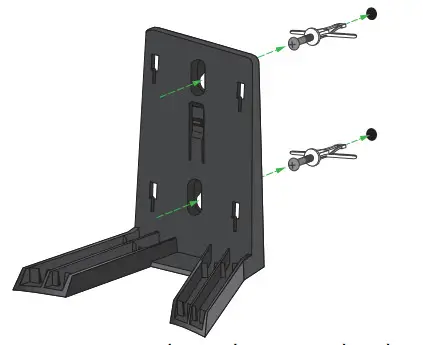
Prepare the wall mount
- Slide the wall-mount cover up to detach it from the bracket.

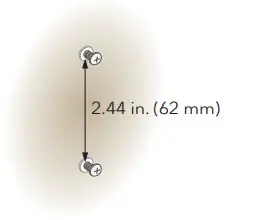
- Mark the wall where you want to insert the provided anchors and screws, which must be 2.44 in. (62 mm) apart, and drill a 10mm (25/64”) pilot hole for each anchor.

- Insert the anchors and screws, leaving about 0.25 in. (6 mm) of each screw protruding from the wall.
 When the screws are placed correctly, the holes at the back of the mounting bracket fit over the protruding screws, allowing you to slide the mounting bracket downward until the tops of the slots are resting on the screws.
 When the screws are placed correctly, the holes at the back of the mounting bracket fit over the protruding screws, allowing you to slide the mounting bracket downward until the tops of the slots are resting on the screws.
Install the wall mount
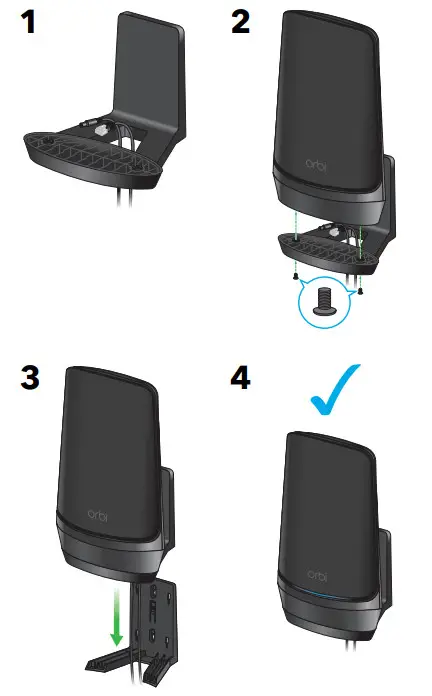
How to install Orbi models with mounting holes on the bottom.
Note: These instructions show the Orbi WiFi 6E Quad Band Router AXE11000 (model RBRE960B).
Support and Community
Visit netgear.com/support to get your questions answered and access the latest downloads.
You can also check out our NETGEAR Community for helpful advice at community.netgear.com.
Regulatory and Legal
(If this product is sold in Canada, you can access this document in Canadian French at https://www.netgear.com/support/download/.)
For regulatory compliance information including the EU Declaration of Conformity, visit https://www.netgear.com/about/regulatory/.
See the regulatory compliance document before connecting the power supply. For NETGEAR’s Privacy Policy, visit https://www.netgear.com/about/privacy-policy.
By using this device, you are agreeing to NETGEAR’s Terms and Conditions at https://www.netgear.com/about/terms-and-conditions.
If you do not agree, return the device to your place of purchase within your return period.
NETGEAR, Inc.
350 East Plumeria Drive
San Jose, CA 95134, USA
NETGEAR INTERNATIONAL LTD
Floor 6, Penrose Two,
Penrose Dock, Cork,
T23 YY09, Ireland
© NETGEAR, Inc., NETGEAR and the NETGEAR Logo are trademarks of NETGEAR, Inc. Any non-NETGEAR trademarks are used for reference purposes only.
![]()
 NETGEAR, Inc.
350 East Plumeria Drive
San Jose, CA 95134, USA
References
 English - NETGEAR Communities
-
NETGEAR Forum - NETGEAR Communities
-
NETGEAR Forum - NETGEAR Communities
-
NETGEAR Forum - NETGEAR Communities
-
NETGEAR Support | NETGEAR
 NETGEAR-Unterstützung | NETGEAR
 Soporte de NETGEAR | NETGEAR
 Supporto NETGEAR | NETGEAR
-
美国网件(NETGEAR) - 技术支持
-
NETGEAR Forum - NETGEAR Communities
-
NETGEAR Privacy Policy | NETGEAR
-
Regulatory | NETGEAR
-
NETGEAR Terms and Conditions | NETGEAR
-
Regulatory | NETGEAR
-
Regulatory | NETGEAR
-
Regulatory | NETGEAR
-
Regulatory | NETGEAR
-
Regulatory | NETGEAR
-
Download Center | Downloads and Documentation | NETGEAR
 Assistance NETGEAR | NETGEAR


