![]()
Quick Installation
Guide
Safety Instructions
![]() When printer is working, please beware of the high temperature of hotbed, extruder head, and other hot parts, Please don’t touch any hot part during printing in case of scald. Please note hot parts need time to coo! down after working.
When printer is working, please beware of the high temperature of hotbed, extruder head, and other hot parts, Please don’t touch any hot part during printing in case of scald. Please note hot parts need time to coo! down after working.
![]() The printer has 220V AC/MOV AC voltage and other high voltage power connector, Please 5 don’t touch conductive part in case of electric shock,
The printer has 220V AC/MOV AC voltage and other high voltage power connector, Please 5 don’t touch conductive part in case of electric shock,
![]() The power of some key parts of the printer (such as hotbed, extruder head) is stronger, During installation and usage, please ensure all terminals are connected tightly to avoid any (sparking may be caused by loose wiring. To ensure safety, printer should be manned during working.
The power of some key parts of the printer (such as hotbed, extruder head) is stronger, During installation and usage, please ensure all terminals are connected tightly to avoid any (sparking may be caused by loose wiring. To ensure safety, printer should be manned during working.
![]() The printer betongs to mechanical equipment. When it is working, please don’t touch ‘Se moving parts in case of mechanical wounding.
The printer betongs to mechanical equipment. When it is working, please don’t touch ‘Se moving parts in case of mechanical wounding.
Machine parameters
| Printing Size(mm) | 00*300*400 | Molding Tech | FDM | |
| Slice Software | CURA /Simplify3D/ Repetier-Host ect | Power Supply | AC :115-240 V DC:24V 15A | |
| Nozzle Number | 1 | Total Power | 360W | |
| Slice Thickness | 0.1-0.4mm | Bed Temp | ≤ 110℃ | |
| Precision | ±0.1mm | Nozzle Temp | ≤ 260℃ | |
| Nozzle Diameter | 0.4mm.Support 0.2/0.3/0.6/0.8mm | Printing Speed | ≤180mm/s, Normal 30-60mm/s |
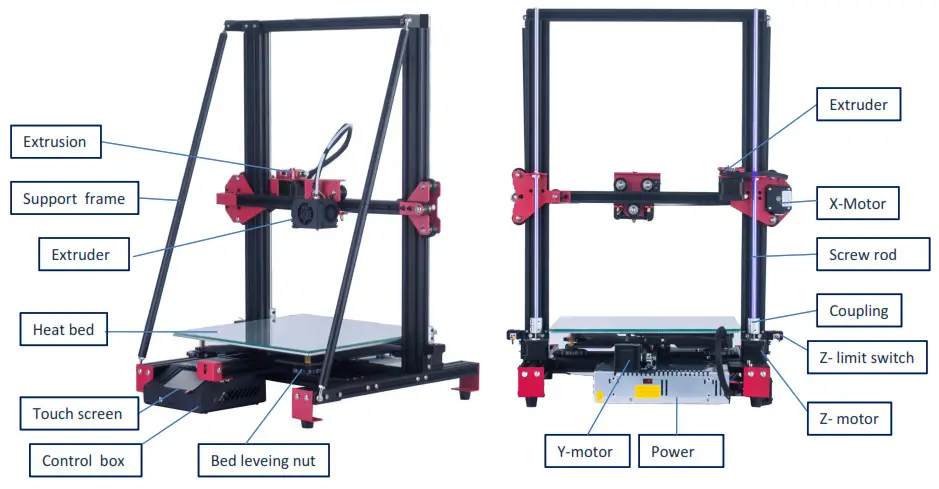
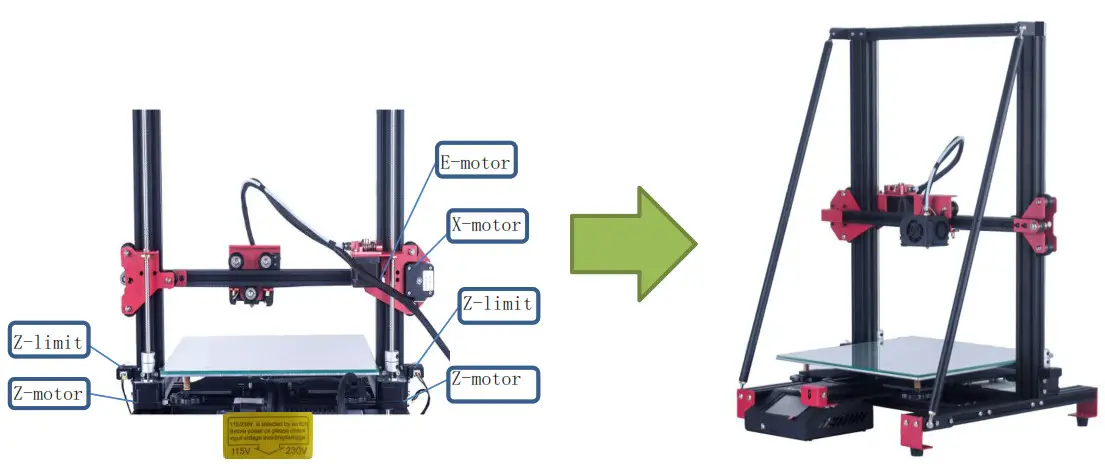
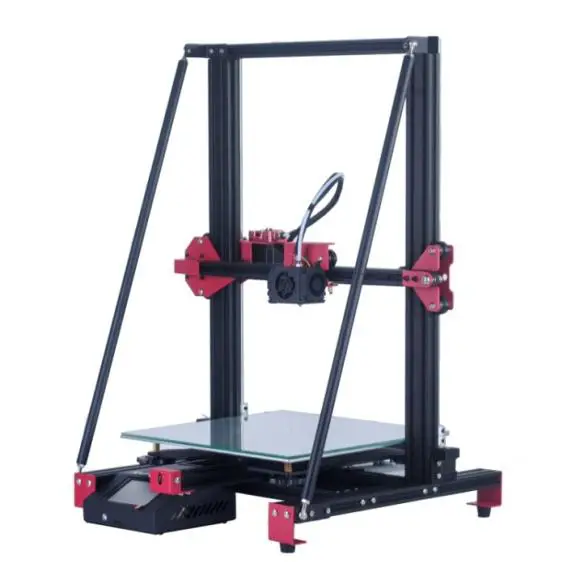
Structure introduction
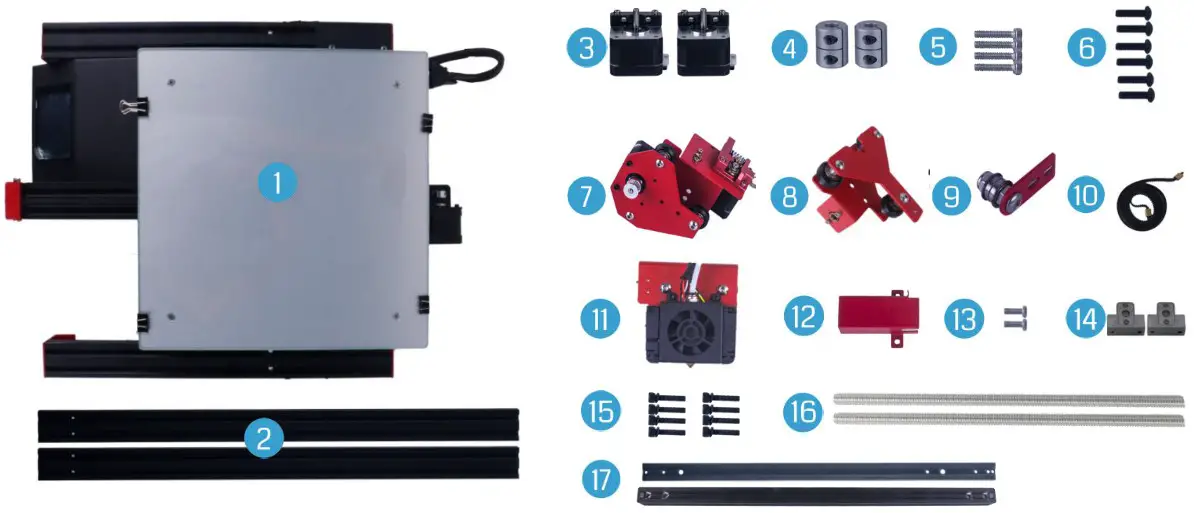
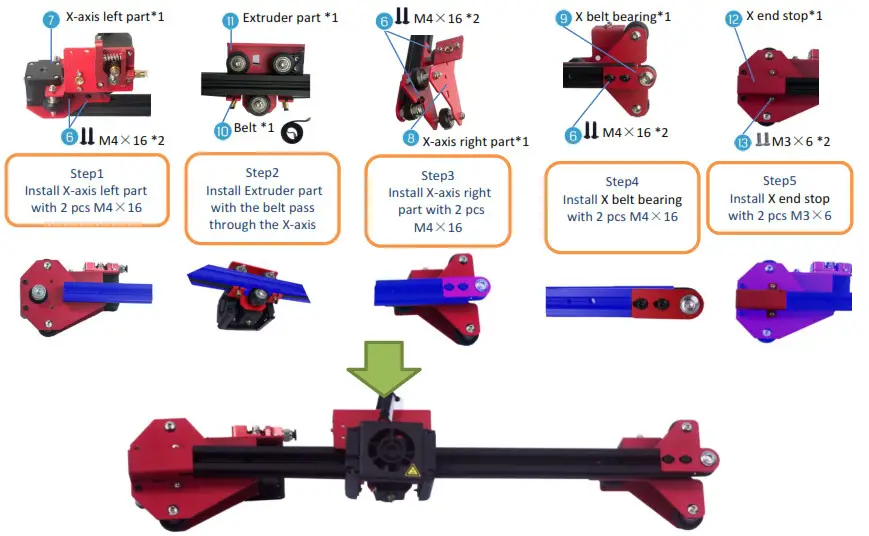
| 1. Printer base*1 | 7. X-axis left part*1 | 13. M3×6 *2 |
| 2. 2040 aluminum profile*2 | 8. X-axis right part*1 | 14. Screw rod fixing block*2 |
| 3. Z-motor *2 | 9. X belt bearing*1 | 15. M5×25 *8 |
| 4. Coupling *2 | 10. Belt *1 | 16. Screw rod *2 |
| 5. M4×20 *4 | 11. Extruder part *1 | 17. 2020 aluminum profile*2 |
| 6. M4×16 *6 | 12. X end stop*1 |
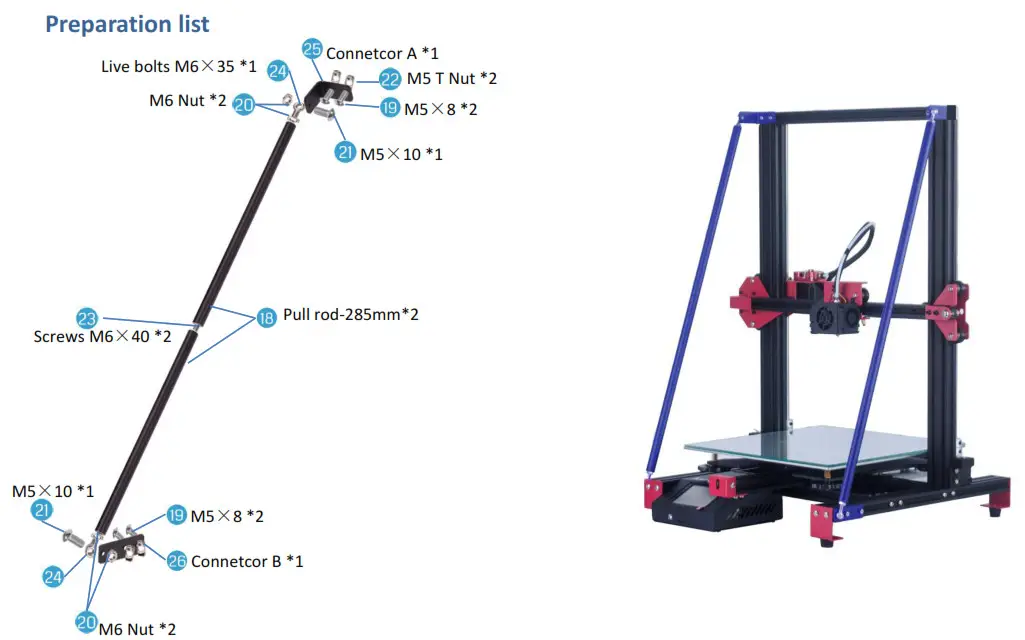
Preparation list
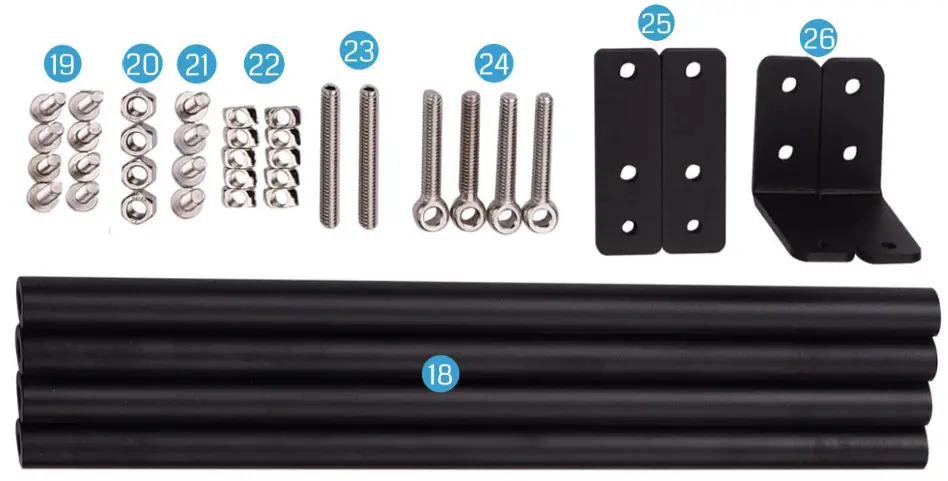
| 18. Pull rod-285mm*4 | 21. M5×10 *4 | 24. Live bolts M6×35 *4 |
| 19. M5×8 *8 | 22. M5 T Nut *10 | 25. Connetcor A *2 |
| 20. M6 Nut *4 | 23. Screws M6×40 *2 | 26. Connetcor B *2 |
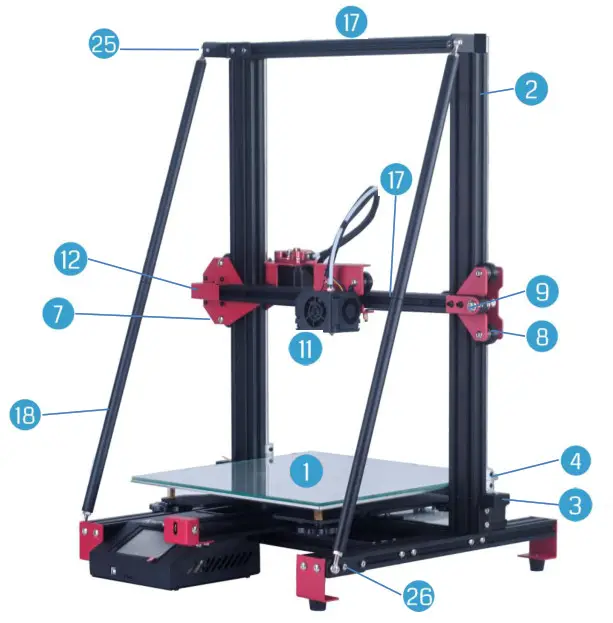
Part 1 : Install the Z parts
Preparation list

Part 2: Install the X parts
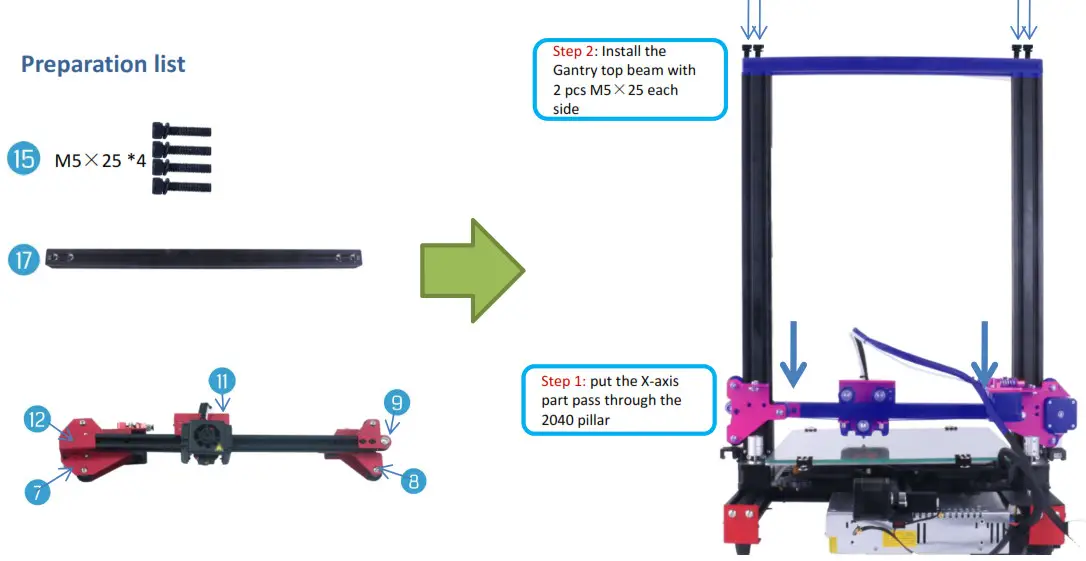
Part 3: Fixed gantry
 Part 4: Installing screw rod
 Part 4: Installing screw rod
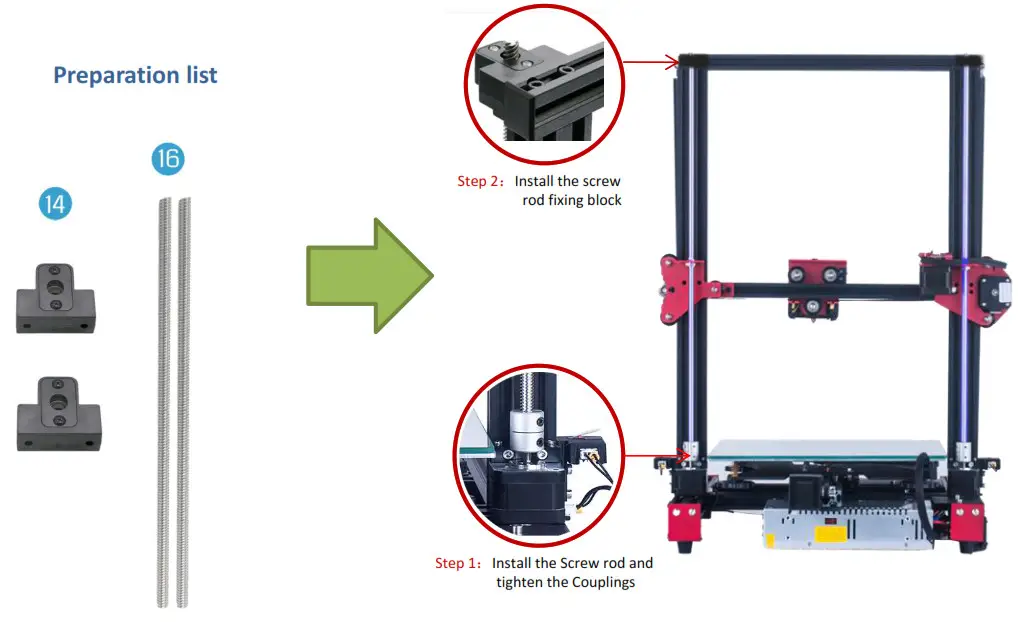
Part 5: Install support rod
Part 6: Line connection
![]() Select voltage before starting up
Select voltage before starting up
Level the heated bed
- Auto Home
 All Disable xy
- Test with A4 paper, adjust the nuts under the platform up and down, to make the nozzle just presses the A4 paper, and ensure that the four corners are the same distance. Repeat steps 1-2 times if necessary


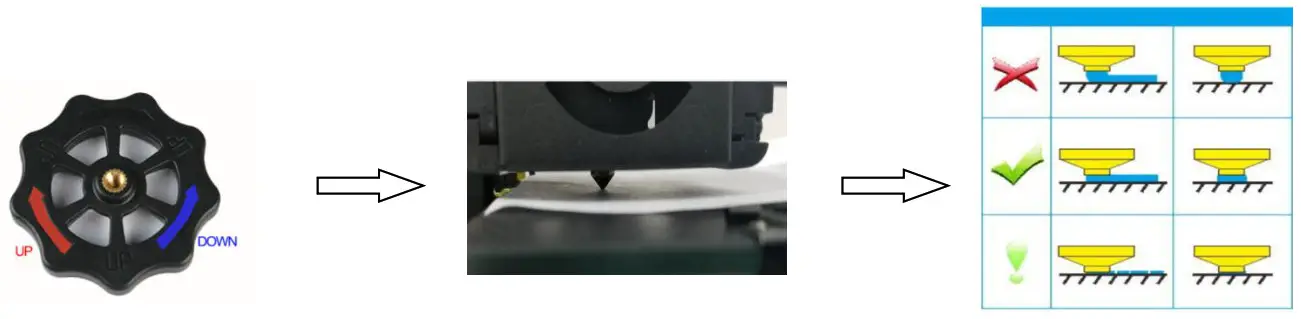
The normal distance

Too close: The short distance may lead to abnormal discharge or even damage caused by plugging the nozzle Normal: The correct distance will help you to complete the printing work better and more economically
 Too far: Too far distance will cause printing materials to be unable to attach to the hot bed, so that they cannot be printed normally
Installation software
- Open the SD card,find the CURA(or download online), After installing the software:Add a printer Settings

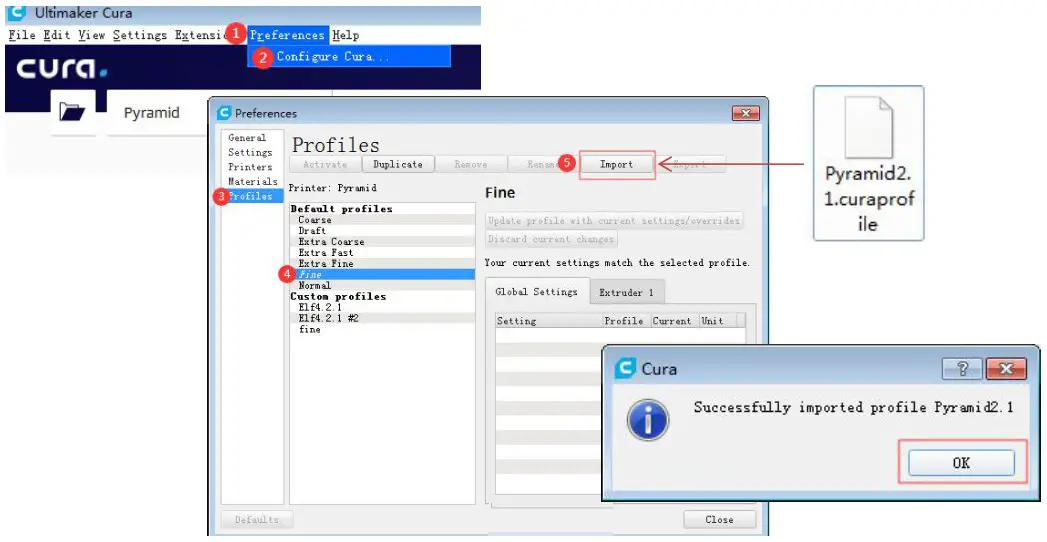
- Import the profile from the SD card


Start printing
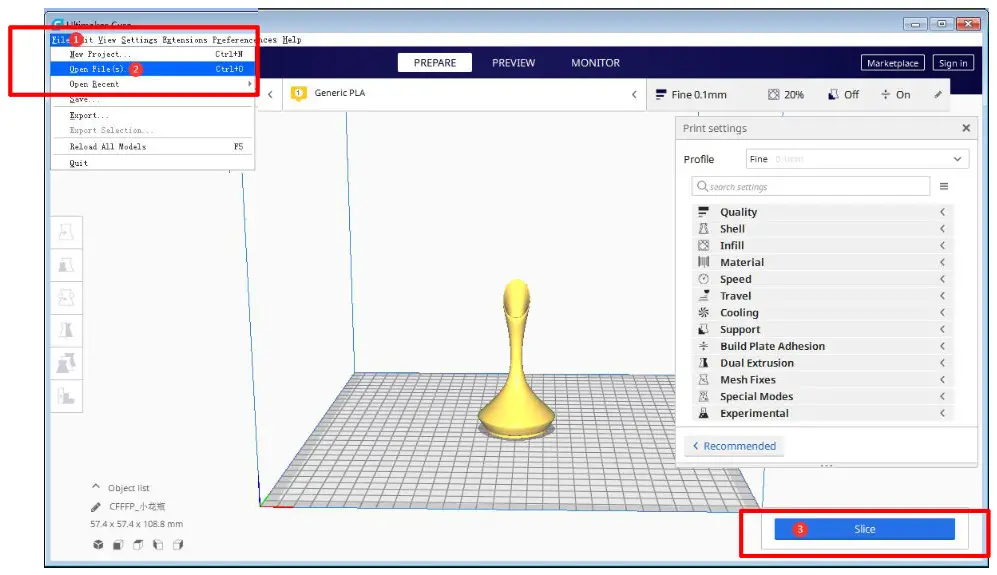
- Open the Cura : File —–Open file(Import your STL)—- Slice

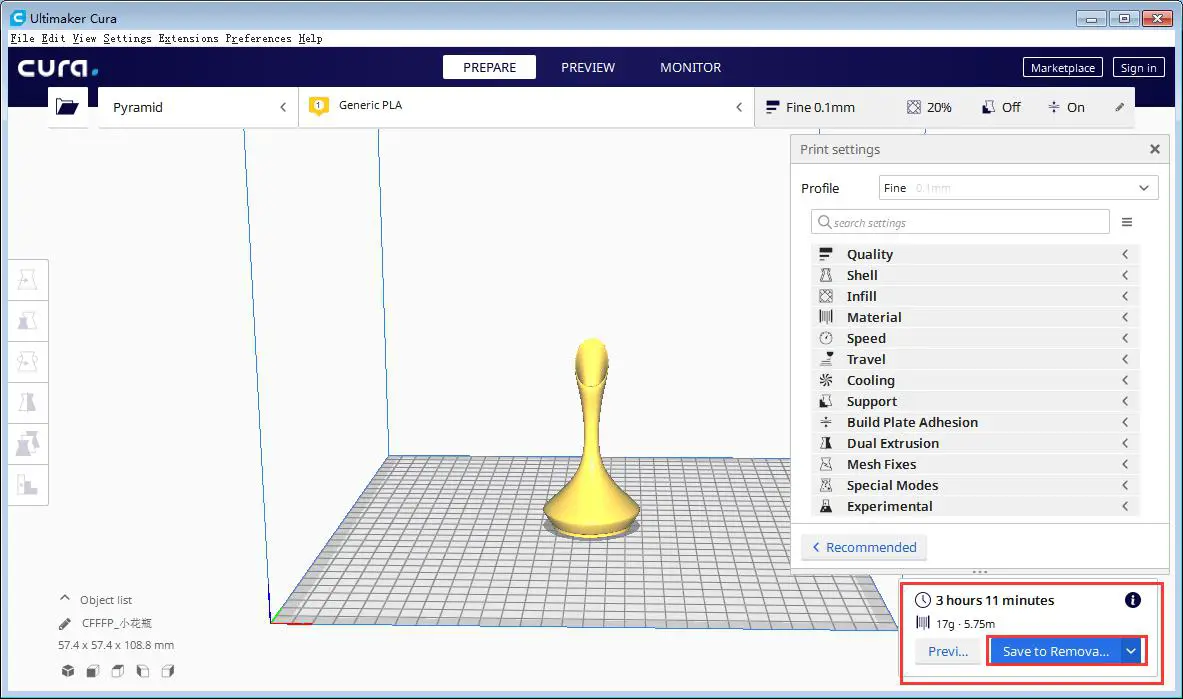
- Save file to the TF card

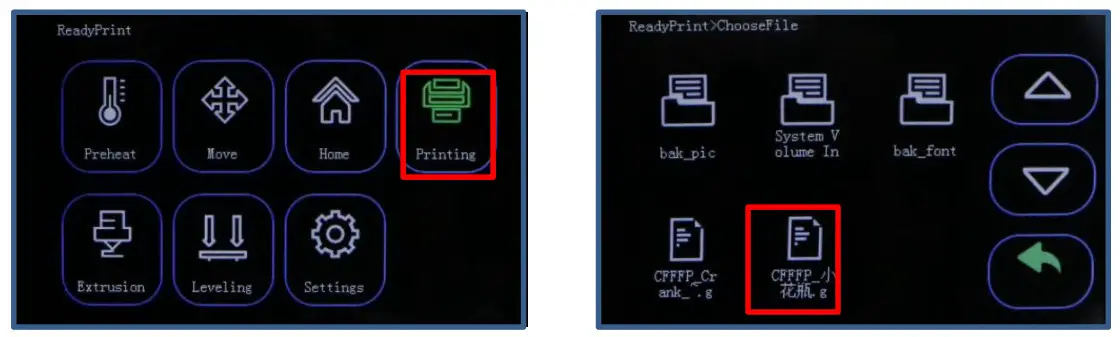
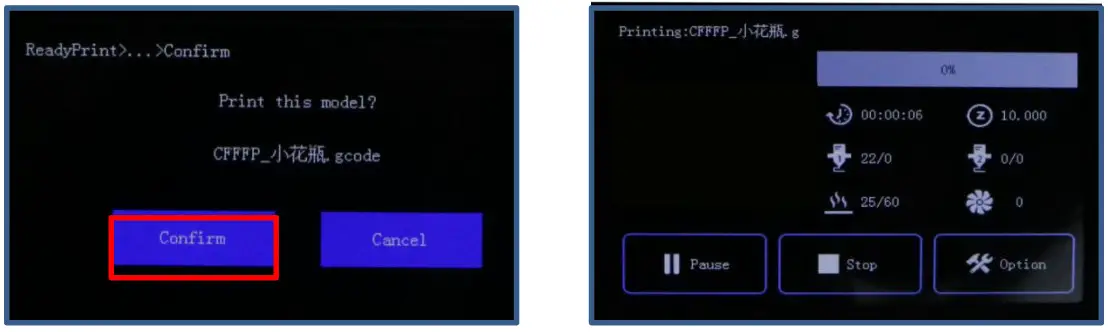
- Put the TF card to the printer, Select “Printing”—-Select your file

- Select “Confirm”, than start printing after heating

Warm reminder
Dear customers:
- In order to ensure the quality of products, we will carry out printing test for each printer in the factory. If you find that the nozzle has slight traces of use, this is left by the printing test. We try to clean it up as much as possible, but please don’t mind.
- The factory test voltage is 220V. When installing, please select 110V or 220V according to your local power supply to ensure the printer can work normally. Please find the following power supply identification, and use a screwdriver or tweezers to move the regulator on the power supply.

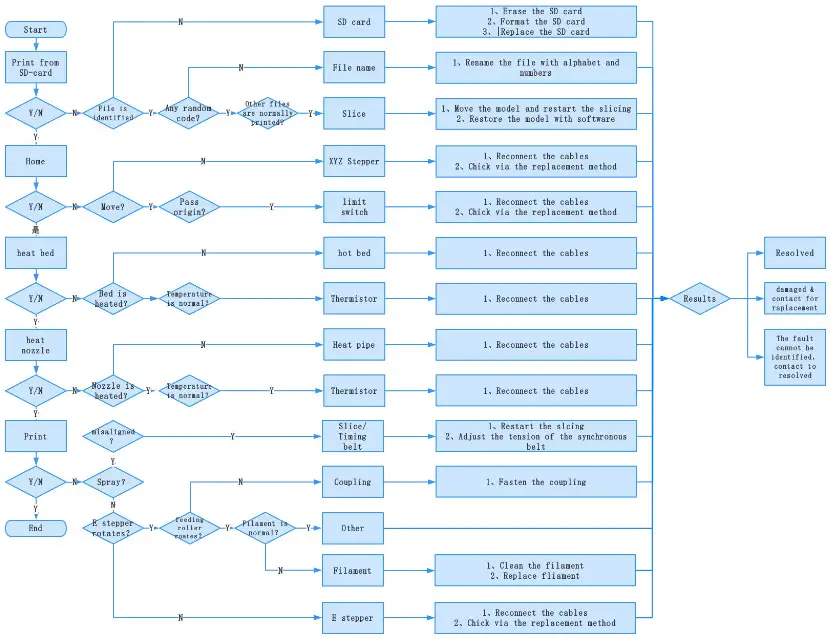
Trouble Shooting
Tips: More informations on the TF card
email: [email protected]
Amazon: [email protected]
Amazon store: www.amazon.com/shops/toauto


