DRIJA Prisma Isla 90 Range Hood

SAFETY NOTIFICATIONS
Please read these notifications carefully and act upon them, to ensure the user’s personal safety and prevent damage to your belongings
- Don’t use this use this item for any other purpose than a household hood.
(Risk of fire and damage) - Don’t use this item if the power cord or plug are damaged, and make sure the
socket you use is in good repair. (Risk of electric shock and fire) - Don’t lift the appliance by holding just the power cord; do not yank out the plug by pulling on the power cord.
(Risk of electric shock and fire) - Please use an earthed 220V-240V outlet.
(Risk of damage and electric shock) - Make sure not to overload the outlet.
(Risk of excessive heat and fire) - Do not touch the plug with wet hands. Clean the plug if is moist or dusty.
(Risk of electric shock) - Do not let children use the hood
(Risk of personal injury) - Do not close the hood too much when cooking.
(Risk of damage) - Don’t take down the filters when cooking.
(Risk of damage) - Please wear the gloves when installing the hood.
(Risk of personal injury)
2.0 Only have the manufacturers personnel dismantle service or modify the hood.
INSTRUCTION FOR THE SWITCH
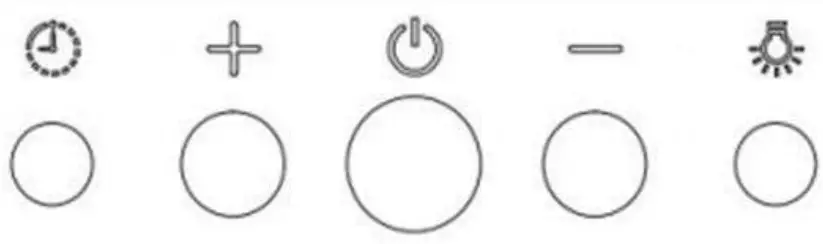
![]() On / Off button: Press this button, the buzzer sounds and the halo indicator light is blue, indicating that the chimney campaign is in standby. Press again, all states are off.
On / Off button: Press this button, the buzzer sounds and the halo indicator light is blue, indicating that the chimney campaign is in standby. Press again, all states are off.![]() When the chimney bell is in standby state, press this key, then the bell rings and the halo indicator light is blue, the engine runs at low speed. Each time you press this button, the speed has been “low, medium, high, stop” in the sequence cycle.
When the chimney bell is in standby state, press this key, then the bell rings and the halo indicator light is blue, the engine runs at low speed. Each time you press this button, the speed has been “low, medium, high, stop” in the sequence cycle.![]() When the chimney bell is in standby mode, press the key, then the bell rings and the halo indicator light is blue, the engine runs at high speed. Each time you press this button, the speed has been “high, medium, low, stop” in the sequence cycle
When the chimney bell is in standby mode, press the key, then the bell rings and the halo indicator light is blue, the engine runs at high speed. Each time you press this button, the speed has been “high, medium, low, stop” in the sequence cycle![]() Time key: When the chimney campaign is in standby mode, press the activation key, the buzzer sounds and the halo indicator light is blue, indicating that the campaign
Time key: When the chimney campaign is in standby mode, press the activation key, the buzzer sounds and the halo indicator light is blue, indicating that the campaign
enters the off state, after three minutes, the whole state off.![]() Light button: Press the light button, the bell rings and the halo indicator light is blue, the light will come on, press it again, the light will go out.
Light button: Press the light button, the bell rings and the halo indicator light is blue, the light will come on, press it again, the light will go out.
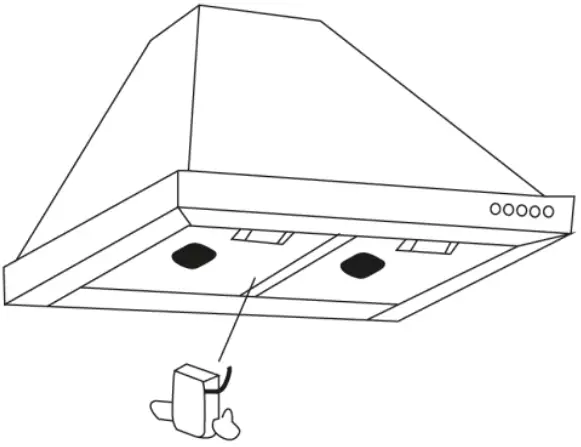
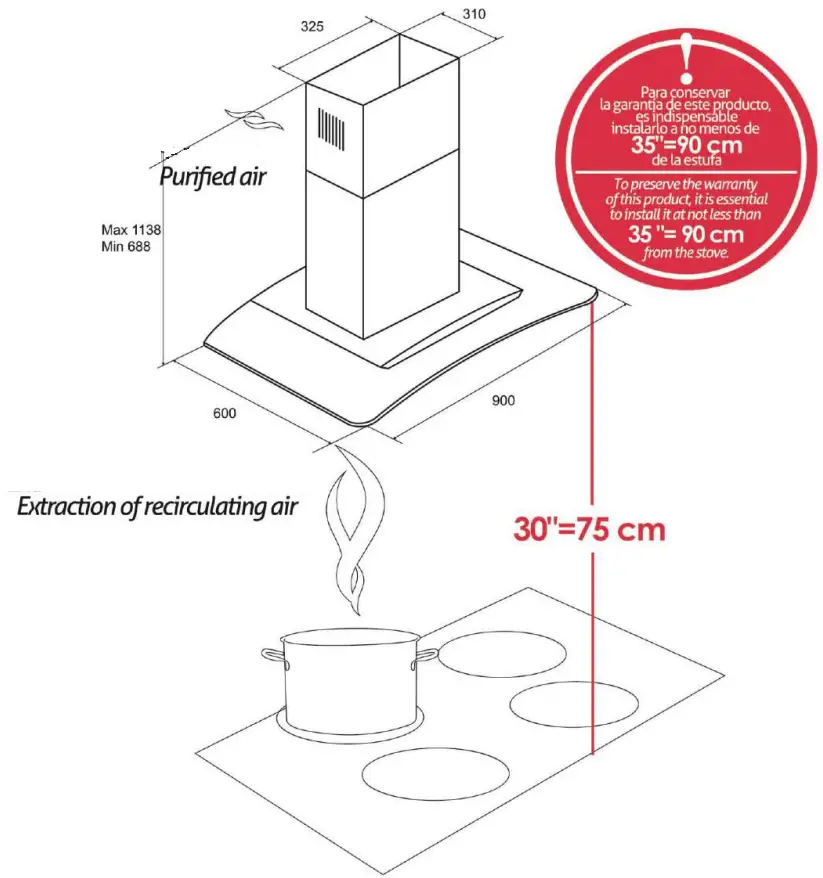
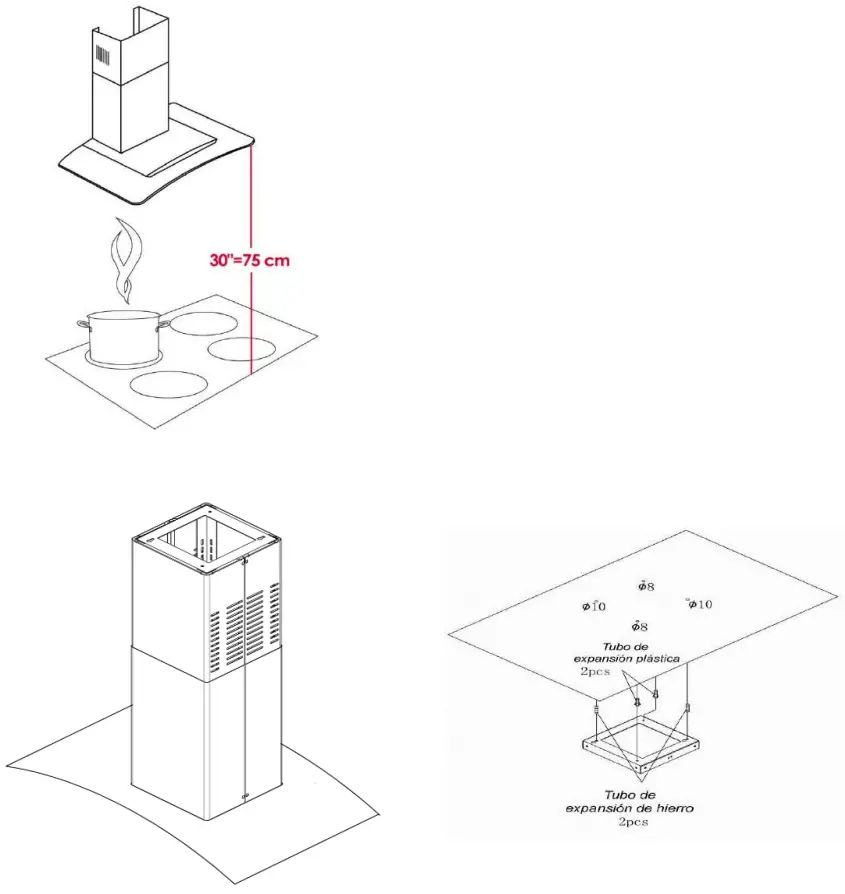
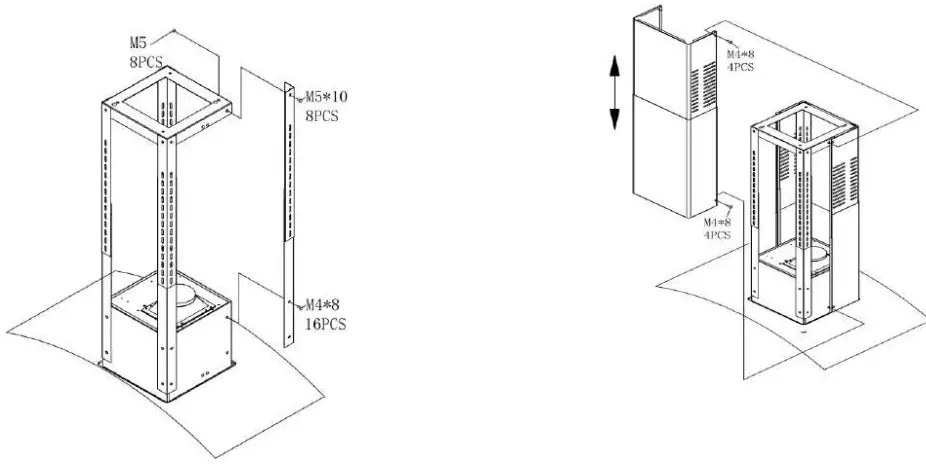
INSTALLATION SKETCH

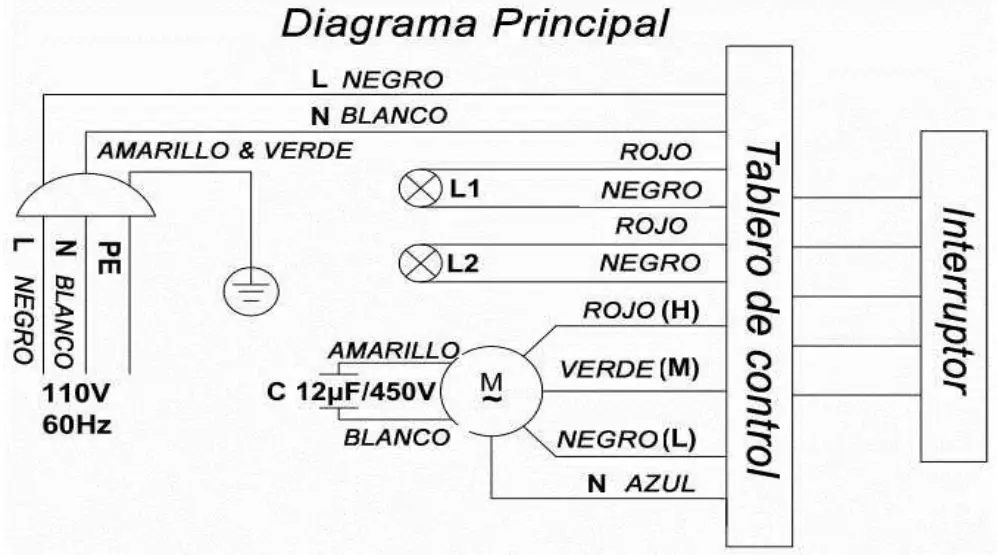
CIRCUIT DIAGRAM
TROUBLE SHOOTING
| PROBLEM | CAUSE | SOLUTION |
| the machine and the light do not work after you’ve pressed the function key |
|
|
| Lights work and the motor don’t work |
|
|
| Shaking |
|
|
| Only one of two keys for the motor work |
|
|
| Insufficient suction |
|
|
CLEANING AND MAINTENANCE
Never use metal abrasive pads, abrasive cleaners, or very stiff brushes.
To clean the lightweight cover, use only a household cleaner diluted with water, then rinse with clean water and wipe dry with a soft cloth.
Once the product is clean, it is recommended to apply mineral oil or baby oil to the steel with a clean, dry towel. For the cleaning of the glasses, we suggest to apply alcohol (with great caution) with a dry and clean towel
ESSENTIAL: Clean these filters every month to avoid any risk of fire. The filter collects greasy smoke and dust and is an element that plays an important role in the flammable when saturated with fatty residues. Clean it with a commercial household cleaner, then rinse thoroughly and dry. This cleaning can be done in your dishwasher with the filter upright (do not allow it to come in contact with dirty dishes and pans)
Before using the cartridge filter for the first time, remove the protective film.
To remove the filter from the cartridge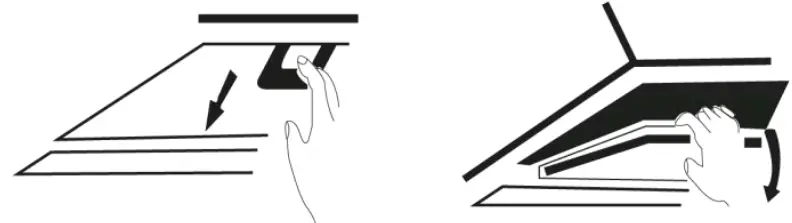
- Push back.
- Turn the filter down with one hand after cleaning, replace the filter, performing the same operations in reverse order
- ANNUAL CLEANING: Activated charcoal filter Applies only to manifold installed as units of recirculation (not ventilated to the outside). This filter will catch the odor and should be changed at least once a year depending on how much it is underneath.
Order these filters from your dealer (using the nameplate reference number inside the extractor) and keep a note of the date it was changed.
WARNING:
- Disconnect the extractor before performing any service.
- Remove the filters.
- Insert the new carbon filter into the fan extractor
- On the inner surface, then rotate directly.
- Repeat the same operation for all cassette filters
- Re-attach the filters.


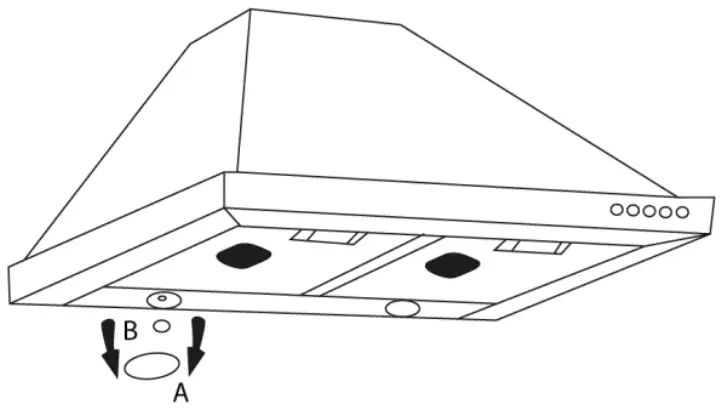
CHANGING THE LIGHT BULBS
MODEL WITH LED LIGHT
- Remove the chrome edges “A” by turning them anticlockwise
- Replace type 2W LED by unscrewing
- Replace the assembly by performing the operations in reverse order.

MODEL USING BULB LIGHTS OR NEON TUBE
- Unscrew the screw securing the light cover.
- Tilt back.
- The type of bulb you use is 2W LED, replace the bulb, unscrew, and screw the new bulb (see diagram).
- Replace the light cover; screw the light cover back on