![]() 7.0 Software for the Gerber Printing System
7.0 Software for the Gerber Printing System
Instruction Manual
Adding output devices at the end of OMEGA 7.0 installation
![]() To add output devices after installing OMEGA 7.0 software
To add output devices after installing OMEGA 7.0 software
- Turn on Install Plotters/Printers checkbox in the OMEGA 7.0 Setup Complete dialog box to open the Add or Delete Gerber Vinyl Printer(s) dialog box.
- If you are installing a vinyl printer use one of the procedures in “Installing vinyl printers.” If you are not adding a vinyl printer, click Close to display the next device installation dialog box – the Add or Delete Plotter/Router(s) dialog box.
Follow the installation procedures later in this chapter.
Installing vinyl printers
OMEGA 7.0 allows you to install three types of vinyl printers:
Local (Gerber USB-to-Parallel)
Remote
Network (Gerber MAXX™ 2 or GERBER EDGE FX)![]() Note: There may be some screen shot variation depending on which operating system is being used.
Note: There may be some screen shot variation depending on which operating system is being used.
Local vinyl printers
GERBER EDGE and EDGE 2 vinyl printers can be connected to the OMEGA 7.0 computer via a Gerber USB-to-Parallel cable.
Windows 8.0/8.1 and 10 computers do not support the needed EDGE 1 and EDGE 2 parallel port usage. Therefore you cannot communicate with a GERBER EDGE or EDGE 2 printer
VIA PARALLEL PORT
- You must use a Gerber USB-to-Parallel cable.
Or you can upgrade your thermal printer to a GERBER EDGE FX which communicates via Ethernet cable.
Installing a GERBER EDGE using the Gerber USB-to-Parallel cable
You can install a GERBER EDGE as a USB device using the Gerber USB-to-Parallel available from GSP.
See the “USB Interface Cable Installation Instructions.pdf” document on the OMEGA 7.0 USB install thumb drive in the documentation folder for EDGE USB Installation Instructions.
Do not plug in the Gerber USB to Serial or Parallel cables until instructed to do so in the instructions.
Note: This procedure assumes you have installed OMEGA 4.0 SP1 or higher.
To delete a local vinyl printer
- Open the Add or Delete Gerber Vinyl Printer(s) dialog box. The Local tab displays.
Note: There may be some screen shot variation depending on which operating system is being used.
- Choose the printer from the Installed Vinyl Printer to be deleted.
- Click Delete.
- Click Close. The next time that you access the Add or Delete Gerber Vinyl Printer(s) dialog box, the vinyl printer will be removed from the Installed Vinyl Printers field.

Remote vinyl printers
To add a remote vinyl printer
Note: Instructions for networking Gerber equipment can be found in “Chapter Seven:![]() Networking Devices.” Follow these instructions before proceeding.
Networking Devices.” Follow these instructions before proceeding.![]() Note: There may be some screen shot variation depending on which operating system is being used.
Note: There may be some screen shot variation depending on which operating system is being used.
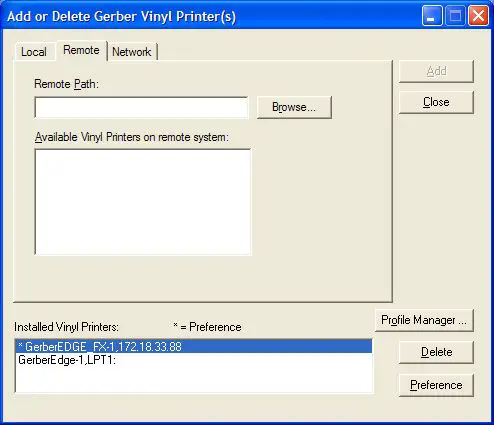
- Open the Add or Delete Gerber Vinyl Printer(s) dialog box. The Local tab displays.
Click the Remote tab.
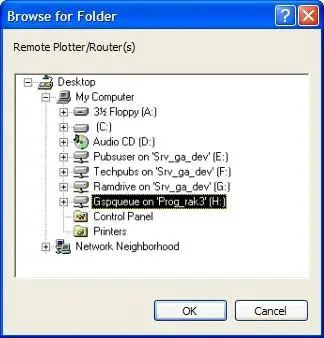
- Click the Browse button to open the Browse for Folder dialog box.
- Select the correct drive (Gspqueue folder) for the networked printer.

- Click OK to return to the Add or Delete Gerber Vinyl Printers dialog box with the Remote Path filled in.

- Choose a printer from the Available Vinyl Printers on the remote system list.
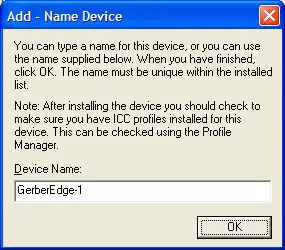
- Click Add to open the Add-Name Device dialog box.

- Use the name provided, or enter your own description and click OK. The name of the new plotter will appear in the Installed Vinyl Printers field of the Add or Delete
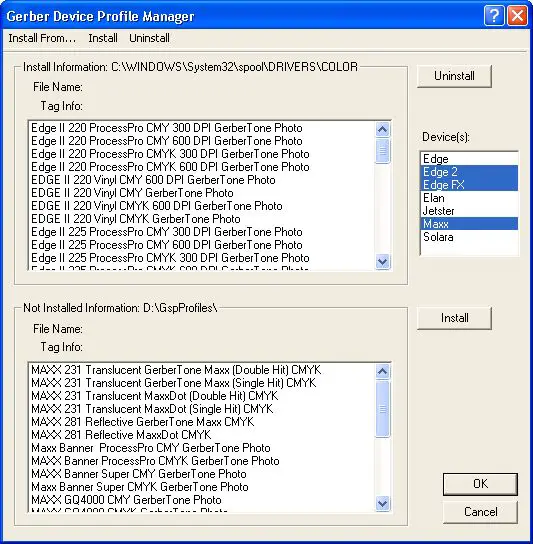
Gerber Vinyl Printer(s) dialog box. - If you wish to modify which profiles display in OMEGA 7.0, click the Profile Manager button to open the Gerber Device Profile Manager dialog box. Turn on which profiles that you want to appear (EDGE, EDGE 2, EDGE FX, or MAXX 2) and uninstall any profiles that are unnecessary and click OK.

- Click Close to close the Add or Delete Gerber Vinyl Printer(s) dialog box.

To delete a remote vinyl printer
- Open the Add or Delete Gerber Vinyl Printer(s) dialog box. The Local tab displays.
- Click the Remote tab.
 Note: There may be some screen shot variation depending on which operating system is being used.


