Sriaxnol Mini Projector Laptop TV Stick Xbox Speaker
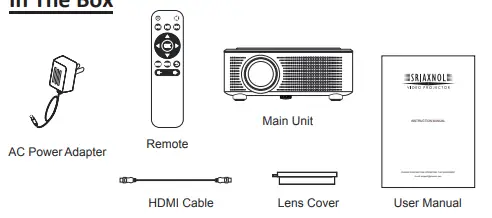
In The Box
Important Safety Instructions
- Read these Instructions.
- Keep these Instructions.
- Heed all Warnings.
- Follow all instructions.
- Do not use this apparatus near water.
- Clean only with a dry cloth.
- Do not block any ventilation openings. Install in accordance with the manufacturer’s instructions.
- Do not install near any heat sources such as radiators, heat registers, stoves, or other apparatus (including amplifier) that product heat.
- Protect the power cord from being walked on or pinched particularly at plugs, convenience receptacles, and the point where they exit from the apparatus.
- Only use attachments/accessories specified by the manufacturer.
- Unplug this apparatus during lightning storms or when unused for long periods of time.
- Refer all servicing to qualified service personnel. Servicing is required when the apparatus has been damaged in any way, such as power-supply cord or plug is damaged, liquid has been spilled or objects have fallen into the apparatus, the apparatus has been exposed to rain or moisture, does not operate normally, or has been dropped.
- Use only with a cart, stand, tripod, bracket, or table specified by the manufacturer or sold with the apparatus. When a cart is used, use caution when moving the cart/ apparatus combination to avoid injury from tip-over.
Additional Warnings and Precautions
- Do not look directly into the projector light.
- Don’t touch the project lens
- Mains adapter is used as disconnect device and it should remain readily operable during intended use. In order to disconnect the apparatus from the mains completely, the mains plug should be disconnected from the mains socket outlet completely.
- Use of controls or adjustments or performance of procedures other than those specified may result in hazardous radiation exposure.
- Changes or modified to this unit not expressly approved by the party responsible for compliance could void the user’s authority to operate the equipment.
- Use of this unit near fluorescent lighting may cause interference regarding use of the remote. If the unit is displaying erratic behavior move away from any fluorescent lighting, as it may be the cause.
- Shock hazard – Do Not Open.
- Caution and marking information is located at the rear or bottom of the apparatus.
- To reduce the risk of fire or electric shock, do not expose this apparatus to rain, moisture, dripping, or splashing.
- Objects filled with liquids, such as vases, shall not be placed on the apparatus
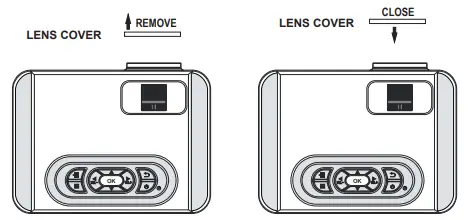
Remove & Close The Lens Cover
- Remove the lens cover before using
- Close the lens cover when unit is not using

Placing of Your Projector
Your projector can be installed in four different configurations (see picture below):
Front Table:
Select this location with the projector placed near the floor in front of the screen. This is the most common way to position the projector for quick setup and portability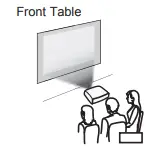
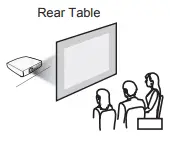
Rear Table:
Select this location with the projector placed near the floor behind the screen.
NOTE: That a special rear projection screen is required
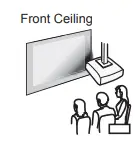
Front Ceiling:
Select this location with the projector suspended upside-down from the ceiling in front of the screen.
NOTE: A projector mount is required to install the projector in a ceiling.
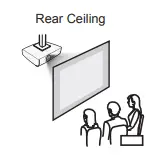
Rear Ceiling:
Select this location with the projector suspended upside-down from the ceiling behind the screen.
NOTE: A projector mount is required to install the projector in a ceiling. A special rear projection screen is required.
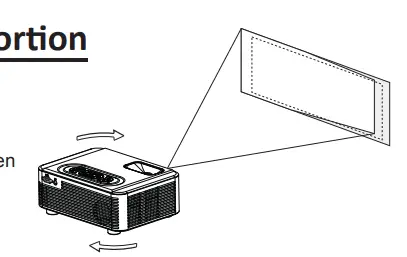
To reduce Image Distortion
- Move the projector as close to the center of the screen as possible.
- The light beam from the projector should be perpendicular to the screen for a rectangular or square image

Distance Between The Projector And Screen
Measure the distance between the projector and where you want to position the screen. This is the projection distance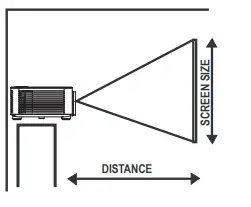
Installing Your Projector in the Ceiling
When installing the projector in the ceiling, please purchase a projector mount recommended by an installation professional and follow the instructions that come with the mount. Before installing the projector in the ceiling, please check to make sure the ceiling structure can support the weight of the projector and the mount. If in doubt, please ask the advice from an installation professorial.
NOTE: Projector mount and screw(s) not included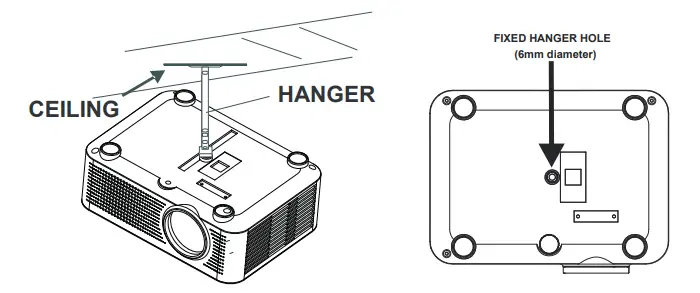
Adjust The Vertical Location
Follow below picture to adjust the vertical location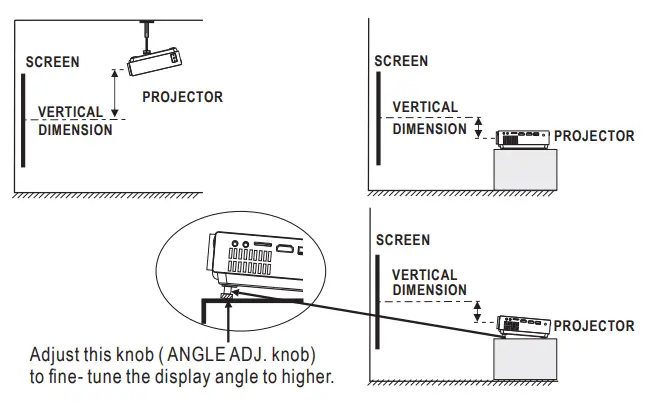
Adjust The Focus And Keystone
Follow below picture to adjust the focus and trapezoidal screen. Adjust the focus by turning the knob while observing the image pixels near the center of the screen. Optimal focus is obtained when the pixels are clearly visible. Depending on the projected screen size, the focus near the screen edges may be less sharp than the screen center. Keystone image is created when the projector lens is projected from above or below the center of the screen. Keystone correction restores the distorted image to a rectangular or square shape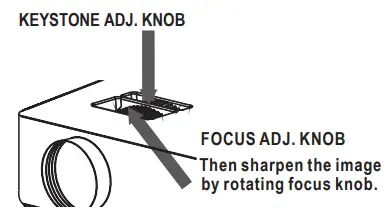
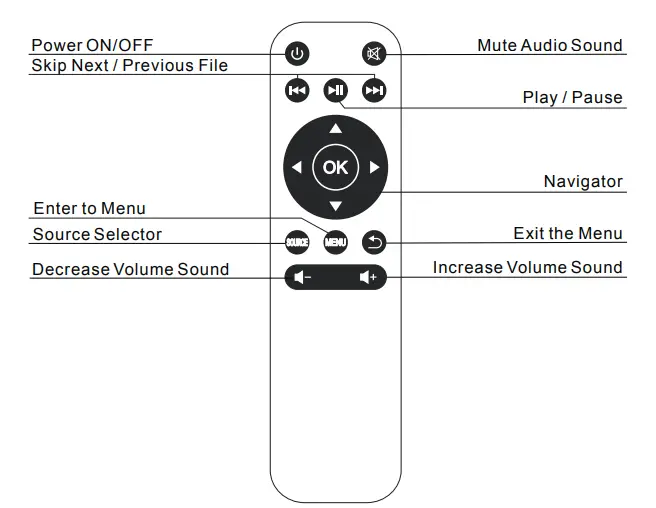
Controls of Remote
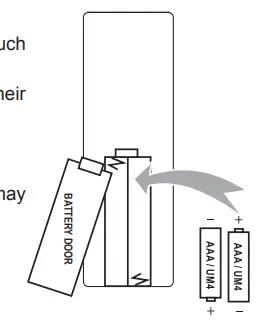
Install / Remove Batteries of Remote
Remove the battery compartment cover on the back of your remote by carefully sliding to open. The battery cover can then be lifted away. Fit the correct batteries (not included), referring to the polarity markings. Finally, replace the cover
NOTES:
- Batteries shall not be exposed to excessive heat such as placing under the sunlight or near a fire.
- Please make sure the batteries are installed with their correct polarities.
- Do not mix old and new batteries.
- Use only the same type of batteries.
- Do not dispose of the batteries in fire, battery may explode or leak.
- Do not recharge a non-rechargeable battery

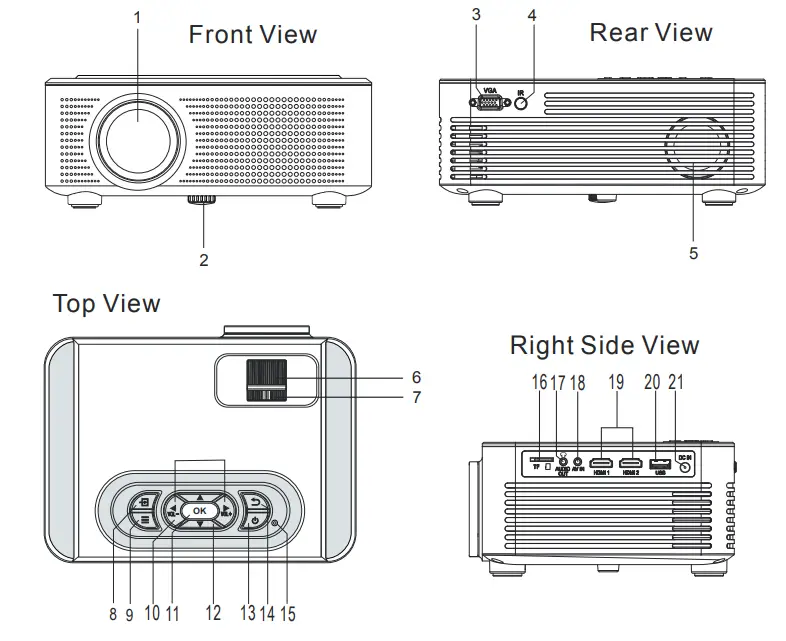
Controls of Projector
- LENS
- ANGEL ADJ. Knob
- VGA IN Port
- IR Sensor (Rear)
- SPEAKER
- FOCUS ADJ. Knob
- TRAPEZODAL ADJ. Knob
- SOURCE
 Buttonn
 - MENU
 Button
  Vol- Vol+
 Button
 Button
 Button
- POWER
 Button
 - RETURN
 Button
 - POWER Indicator
- TF Card Slot
- Audio Out Jack
- AV IN Jack
- HDMI 1 & 2 Ports
- USB Port
- DC IN Jack

Install Power Adapter
- Follow below picture to connect power adapter
- Connect small end of adapter first and then plug the adapter body to power outlet.
WARNING:
Before connecting to the power supply, ensure that the supply corresponds to the information on the rating label at the back of the apparatus.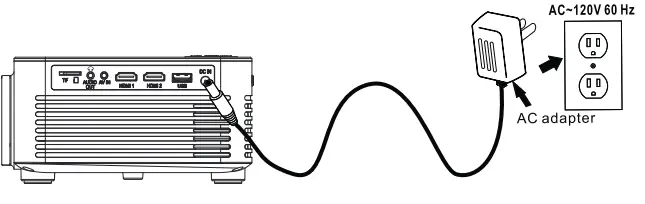
 Press the button to switch on unit, press again to turn off.
 / SOURCE – Press the button to select input source.
- / MENU – Press the button to enter projector menu.
 Press the buttons to navigate and select screen item of menu.
 Press the button to return to previous status or exit the menu.
 – Press the buttons to select the sound level on the remote.
 Press the buttons to select the sound level on the panel.
 Press to mute the audio. Press again to resume.
 Press the buttons to search next or previous file on USB / TF.
 Press the button to play/pause the playback of file on USB / TF card.
 Press the buttons to navigate and select screen item of menu.
 Press to mute the audio. Press again to resume.
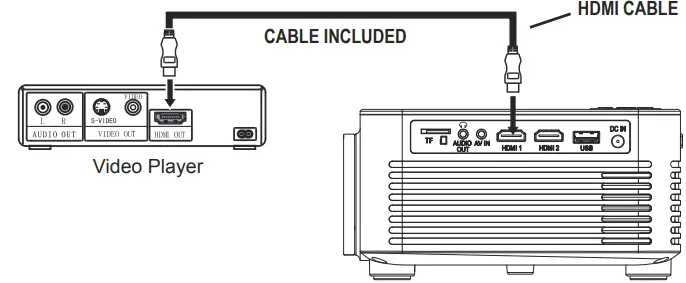
Connect HDMI Show The Image On Projector Screen
- Refer to the following picture to connect a set top box, a BD/DVD player or a streaming player to the HDMI input.
- Turn off the unit before connect HDMI cable.
- After connection, press the button to turn on unit and power indicator will light GREEN
- In home screen, use buttons to select HDMI 1 or HDMI 2 icon and press the button to enter. If not in home screen, press the / SOURCE button to enter.
- The video from the connected device will be shown on projector screen.
- Press the button to turn off unit power.

Important Note:
If there is no sound from the internal speakers when playing media contents from a set top box, BD/DVD or streaming players connecting to the HDMI input, please check the set top box or the player’s digital audio settings and make sure it is set to “PCM Stereo” mode
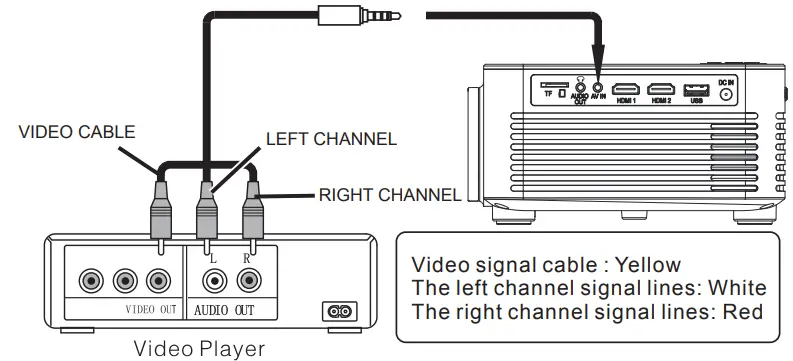
Connect AV Show The Image On Projector Screen
Follow below picture to connect AV cable and device.
- Turn off the unit before connect AV cable.
- Use AV cable to connect follow below figure
- After connect, press the button to turn on unit and power indicator will light GREEN
- In-home screen, use buttons to select AV icon and press the button to enter. If not in home screen, press the / SOURCE button to enter.
- The video of AV device will show on projector screen
- Press the button to turn off unit power

Note: If hot plug cause the unit hang up or malfunction, reset the unit by unplug the DC IN power jack at the rear right side of the unit. Wait for 10 seconds before reconnecting the power and turning the unit back on
Connect VGA Show The Image On Projector Screen
Follow below picture to connect VGA cable and device.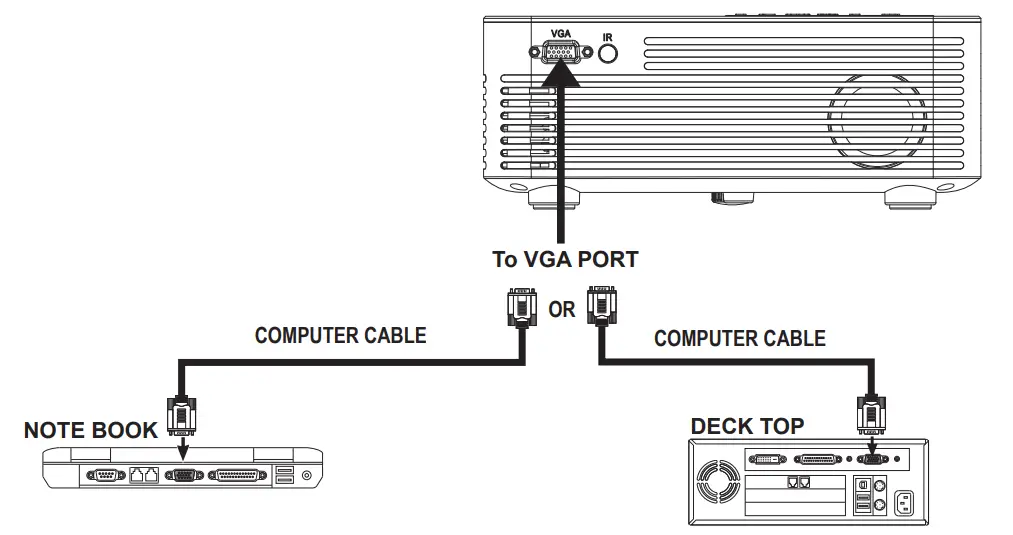
- Turn off the unit before connect VGA cable.
- Press the button to turn off power of your projector before connection.
- After connect, press the button to turn on unit and power indicator will light GREEN
- In home screen, use
 buttons to select VGA icon and press the button to enter. If not in home screen, press the / SOURCE button to enter.
 - The video of VGA device will show on projector screen
- Press the button to turn off unit power.
Please refer to the following table to adjust the output signal from computer
| Type | Resolution | Line Frequency
(KHz) | Field Frequency
(Hz) | |
|
PC |
VGA |
640×480 | 31.5 | 60 |
| 34.7 | 70 | |||
| 37.9 | 72 | |||
| 37.5 | 75 | |||
|
SVGA |
800×600 | 31.4 | 50 | |
| 35.1 | 56 | |||
| 37.9 | 60 | |||
| 46.6 | 70 | |||
| 48.1 | 72 | |||
| 46.9 | 75 | |||
|
XGA |
1024×768 | 40.3 | 50 | |
| 48.4 | 60 | |||
| 56.5 | 70 | |||
| SXGA | 1280×1024 | 63.9 | 60 | |
| 79.9 | 75 | |||
NOTE:
- VGA connections do not support audio. You will need to use the laptop or computer’s connected speakers
- If hot plug cause the unit hang up or malfunction, reset the unit by unplug the DC IN power jack at the rear right side of the unit. Wait for 10 seconds before reconnecting the power and turning the unit back on.
Connect Audio Output (Aux Out/Line Out/Earphones
Follow below picture to connect audio cable and device.
- Press the button to turn off power of your projector before connection.
- Use audio cable to connect follow below figure.
- After connect and turn on both units. Your projector sound from external device now.
- After using, turn off both unit

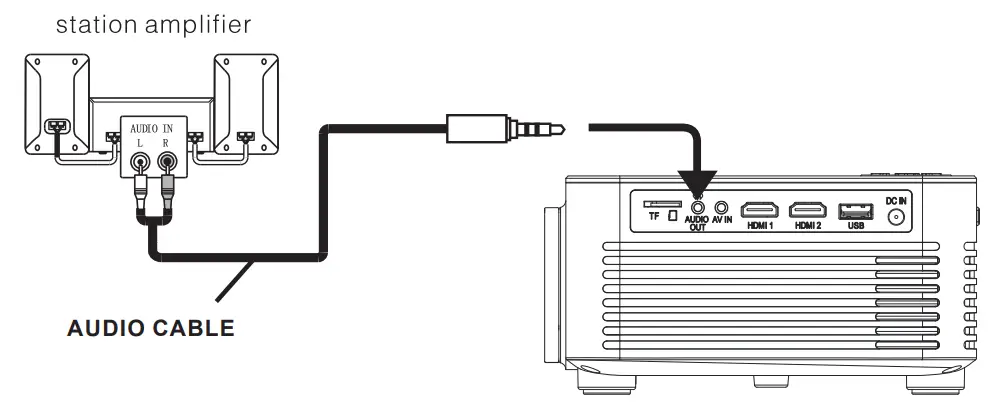
Important Note:
If there is no sound from the stereo audio output when playing media contents from a set top box, BD/DVD or streaming players connecting to the HDMI input, please check the set top box or the player’s digital audio settings and make sure it is set to “PCM Stereo” mode.
Note: If hot plug cause the unit hang up or malfunction, reset the unit by unplug the DC IN power jack at the rear right side of the unit. Wait for 10 seconds before reconnecting the power and turning the unit back on.
Install USB Device And TF (Micro SD) Card
- Follow below picture to install USB and TF card
- Turn off the unit before install USB / TF card.

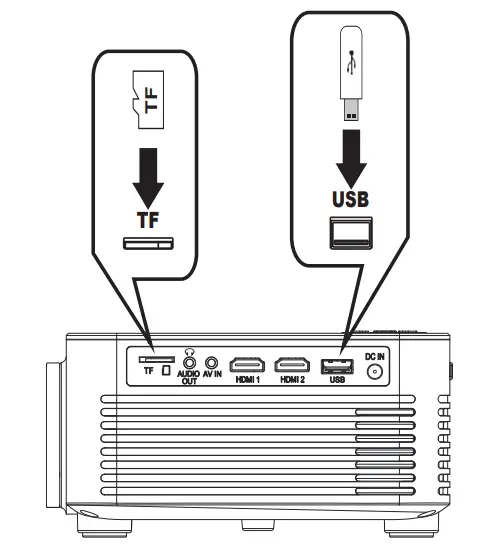
Note: This USB port is only used to read USB flash disk. DO NOT use it to charge any external equipment.
Using TF Card And USB Playback (Media Player)
Install USB / TF device:
- Turn off the unit before install USB / TF card.
- Install the USB device into USB port / Install the TF device into TF slot.
- After install, press the button to turn on unit and the power indicator light GREEN.
- In-home screen, use buttons to select MOVIE / PHOTO / MUSIC / TEXT icon and press the button to enter. If not in home screen, press the / SOURCE button to enter.
- If necessary, use the
 button to select C or D and press button to enter.
 - Use buttons to search the correct file to preview and press the button to playback file.
- Press button to search next or previous file.
- During playback, press the button to pause and press again to resume.
- Press the / EXIT button to exit.
NOTE: Before remove USB / TF device, press the button to turn off power FIRST.
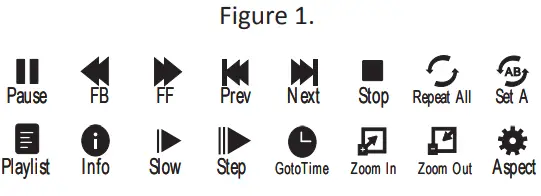
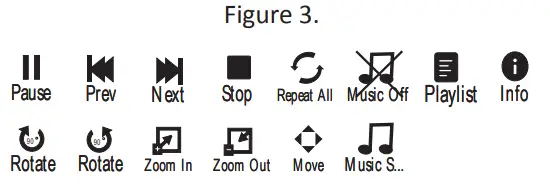
Sub-Menu on Movie screen
- When movie playback, press the button and more function screen show on lower
- Use the button to select icon and press the button to play special function

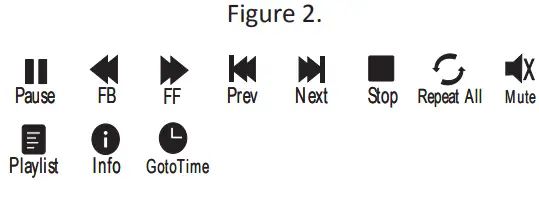
Sub-Menu on Music screen
- When music playback, press the button and more function screen show on lower
- Use the button to select icon and press the button to play special function.

Sub-Menu on Photo screen
- When photo playback, press the button and more function screen show on lower
- Use the button to select icon and press the button to play special function.

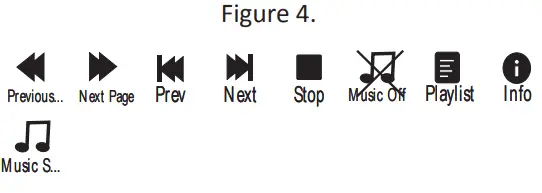
Sub-Menu on Text screen
- When text playback, press the button and more function screen show on lower
- Use the button to select icon and press the button to play special function.

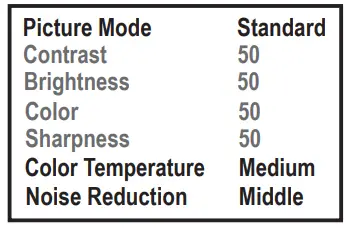
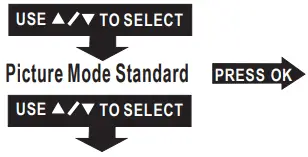
Using Projector Menu 1
- Press
 /MENU button to enter projector menu. press buttons to select PICTURE menu
 - This Picture menu showed on right upper of view screen

 Use to select different picture effect to Standard / Dynamic / Mild / User. Use to select and to adjust Contrast / Brightness / Color / Sharpness digit If chose User item.
 Use buttons to adjust Contrast level 0 to 100. (Active in User item of Picture Mode).
 Use buttons to adjust Brightness level 0 to 100. (Active in User item of Picture Mode).
 Use buttons to adjust Color level 0 to 100. (Active in User item of Picture Mode).
- Use buttons to adjust Sharpness level 0 to 100. (Active in User item of Picture Mode).
 Use buttons to select different color temperature to Cool / Medium / Warm.
 Use buttons to select Off / Low / Middle / High
 Use to select different picture effect to Standard / Dynamic / Mild / User. Use to select and to adjust Contrast / Brightness / Color / Sharpness digit If chose User item.
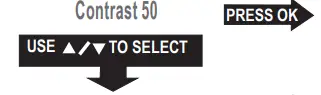 Use buttons to adjust Contrast level 0 to 100. (Active in User item of Picture Mode).
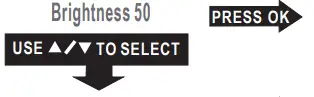 Use buttons to adjust Brightness level 0 to 100. (Active in User item of Picture Mode).
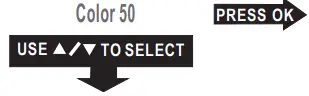 Use buttons to adjust Color level 0 to 100. (Active in User item of Picture Mode).
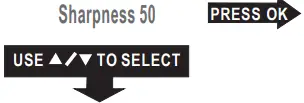 Use buttons to select different color temperature to Cool / Medium / Warm.
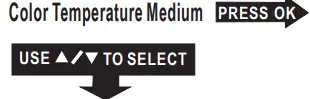 Use buttons to select Off / Low / Middle / High
Using Projector Menu 2
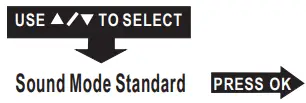
- Press /MENU button to enter projector menu, press buttons to select SOUND menu.
- This Sound menu showed on right upper of view screen.

 Use to select different sound effect Standard / Movie /Music / Sports / User. Use to select and to adjust Treble and Bass digit if chose User item.
 Use buttons to select Treble level 0 to 100.(Active in User item of Sound Mode).
 Use buttons to select Bass level 0 to 100. (Active in User item of Sound Mode).
 Use buttons to select Balance level to -50 to +50.
 Use to select different sound effect Standard / Movie /Music / Sports / User. Use to select and to adjust Treble and Bass digit if chose User item.
 Use buttons to select Treble level 0 to 100.(Active in User item of Sound Mode).
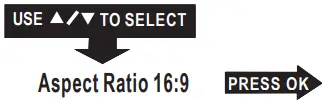 Use buttons to select Bass level 0 to 100. (Active in User item of Sound Mode).
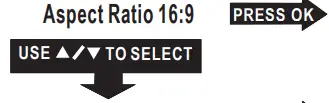 Use buttons to select Balance level to -50 to +50.
Using Projector Menu 3
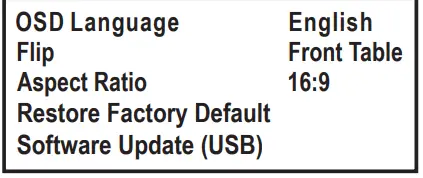
- Press /MENU button to enter projector menu, press buttons to select OPTION menu.
- This OPTION menu showed on right upper of view screen.
 Use button to select different language
 To select different project direction Front Table / Front Ceiling / Rear Table / Rear Ceiling
 Use to select different Aspect Ratio 4:3 / 16:9 / Full Follow below figure.
 Use buttons to select Y or N. If choose “Y” that your unit will go to factory default setting For service center use only
 Use button to select different language
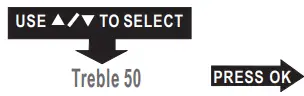 To select different project direction Front Table / Front Ceiling / Rear Table / Rear Ceiling
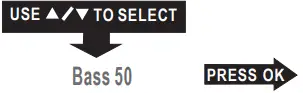 Use to select different Aspect Ratio 4:3 / 16:9 / Full Follow below figure.
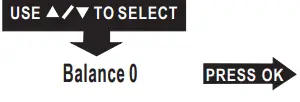 Use buttons to select Y or N. If choose “Y” that your unit will go to factory default setting For service center use only
| Aspect Ratio | |
| AV mode | 4:3, 16:9, Full, Panorama |
| HDMI mode | 4:3, 16:9, Full, Just Scan |
| VGA mode | 4:3, 16:9, Full |
| USB / TF input
(movie mode) | 4:3, 16:9, Full, Panorama, Just Scan |
DISCLAIMER
- Unless specifically agreed to in writing, SRIAXNOL:
- A. SRIAXNOL makes no warranty as to the accuracy, suffciency or suitability of any technical or other information provided in its manuals or other documentation.
- B. SRIAXNOL assumes no responsibility or liability for loss or damage, whether direct, indirect, consequential or incidental, which might arise out of the use of such information.
- The use of any such information will be entirely at the user’s risk.
FCC Warning
Any Changes or modifications not expressly approved by the party responsible for compliance could void the user’s authority to operate the equipment. This device complies with Part 15 of the FCC rules. Operation is subject to the following two conditions:
- this device may not cause harmful interference, and
- this device must accept any interference received, including interference that may cause undesired operation.
NOTE: This equipment has been tested and found to comply with the limits for a Class B digital device, pursuant to Part 15 of the FCC Rules. These limits are designed to provide reasonable protection against harmful interference in a residential installation. This equipment generates, uses, and can radiate radio frequency energy and, if not installed and used in accordance with the instructions, may cause harmful interference to radio communications. However, there is no guarantee that interference will not occur in a particular installation. If this equipment does cause harmful interference to radio or television reception, which can be determined by turning the equipment off and on, the user is encouraged to try to correct the interference by one or more of the following measures:
- Reorient or relocate the receiving antenna.
- Increase the separation between the equipment and receiver.
- Connect the equipment into an outlet on a circuit different from that to which the receiver is connected.
- Consult the dealer or an experienced radio/TV technician for help.
FCC Radiation Exposure Statement:
This equipment complies with FCC radiation exposure limits set forth for an uncontrolled environment .This equipment should be installed and operated with minimum distance 20cm between the radiator& your body. This transmitter must not be co-located or operating in conjunction with any other antenna or transmitter.
FCC
the projector provide 7days refund or replacement, and 24 month quality warranty.
maybe, this proyector without built-in HDCP is not well compatible with movie from some paid apps/websites, such as Netflix, Prime Video, Hulu( may be reduced, no picture, no sound, or even the video cannot be played) most of projectors exist. but our projector support TV Stick (Amazon fire tv stick, Chrome cast, Roku stick, etc)
The power adapter is normal in 86-140 fahrenheit. we had test many times and had pass the safety certification. please don’t worry about it. Feel free to contact us if you have any problem
Yes you would just need to have an outdoor screen our you can use a all white sheet and that should work.
it needs 300W portable power source.
Any HDMI cable should work, you may have change some settings on your laptop the output source settings..
There may be a problem with the cooling system, please contact our after-sales email and we will help you to solve it.
No, this is not bluetooth and wifi projector.
Yes it can there is HDMI on the projector I use my Amazon Firestick with the projector and it works great I don’t have cable at all I watch everything with my Firestick period.
this is a simple projector, it just play with HDMI or through adapter. it can’t support wifi or Bluetooth complex screencast.
the projector provide 7days refund or replacement, and 24 month quality warranty.
We would not recommend to project powerpoints, it’s not support some format.
Don’t touch the projector lens in hands; Projector prevent long working hours. Prohibit child touch or play. cleaning in dry clean rag
No you won’t as as you have WIFI hooked up there should be no problem with viewing at all what I use is a Amazon Firestick for my viewing pleasure.
It’s come with a projector, a hdmi cable, power and a manual.


