
MARINO 01
2021-08-09
![]()

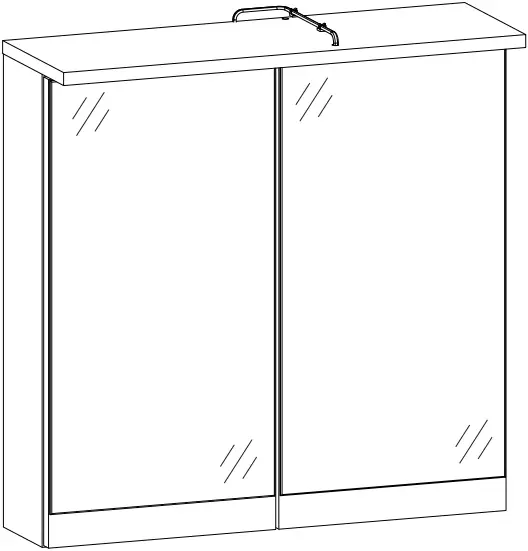

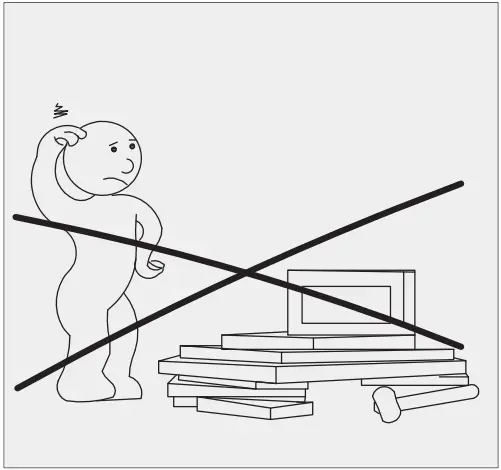
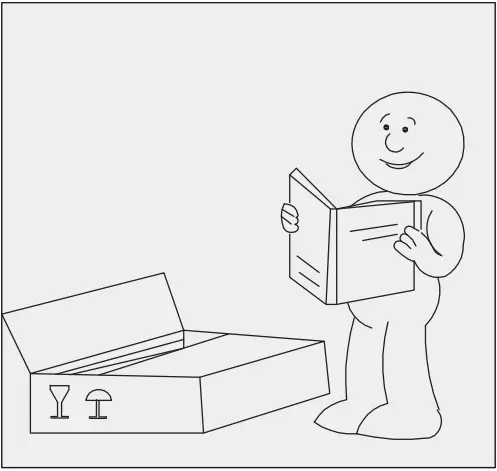
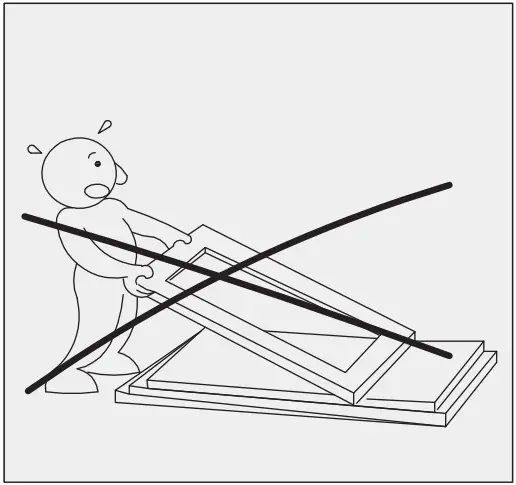
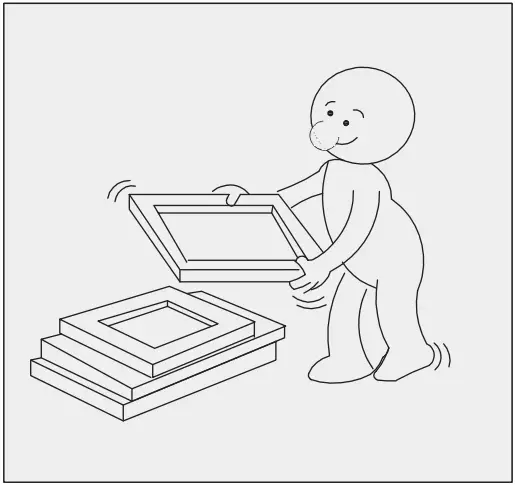
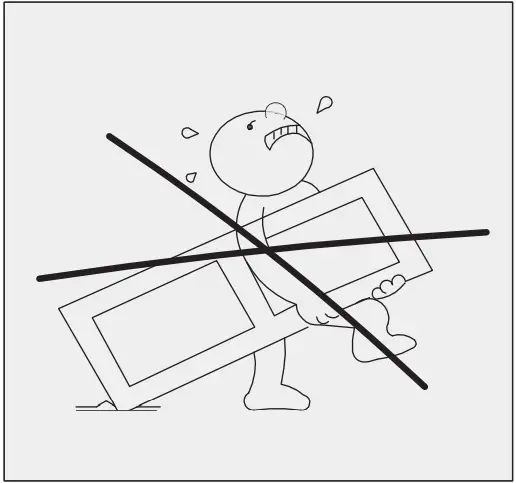
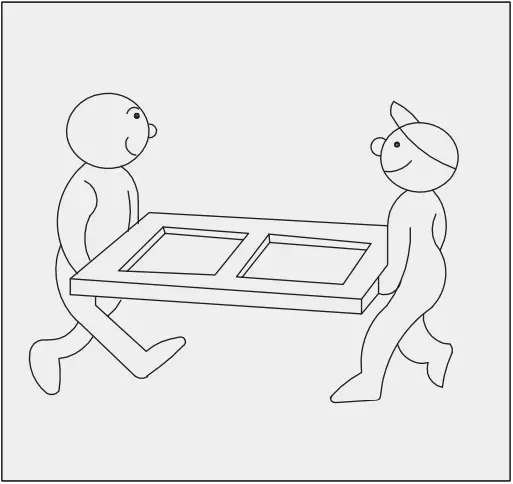
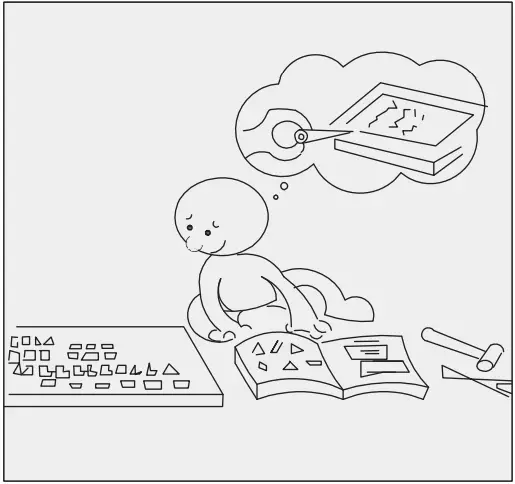
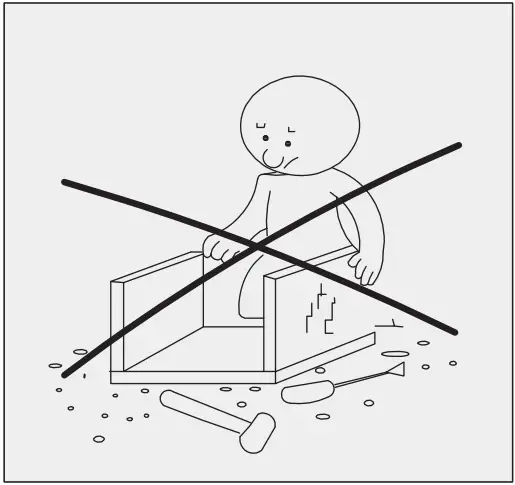
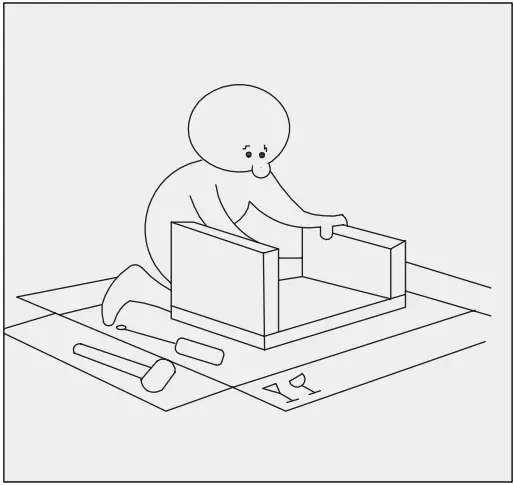
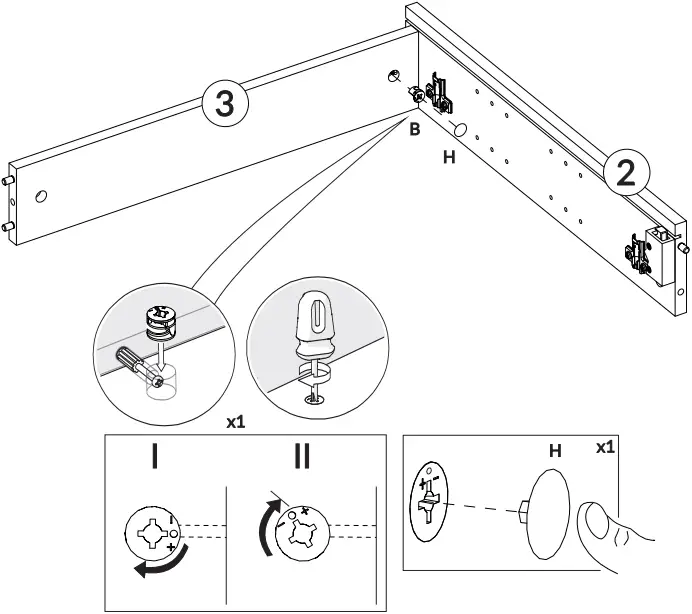
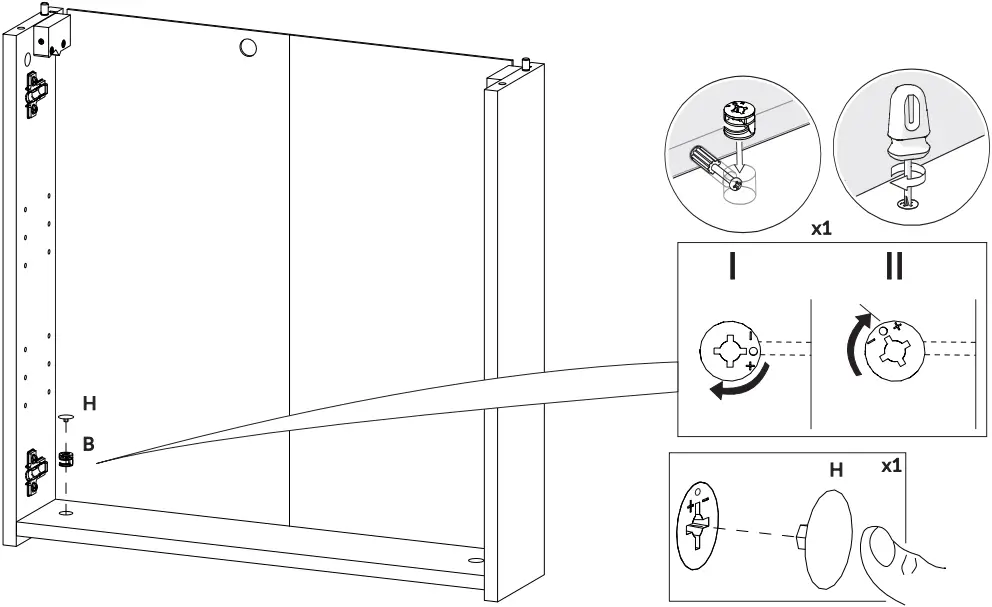
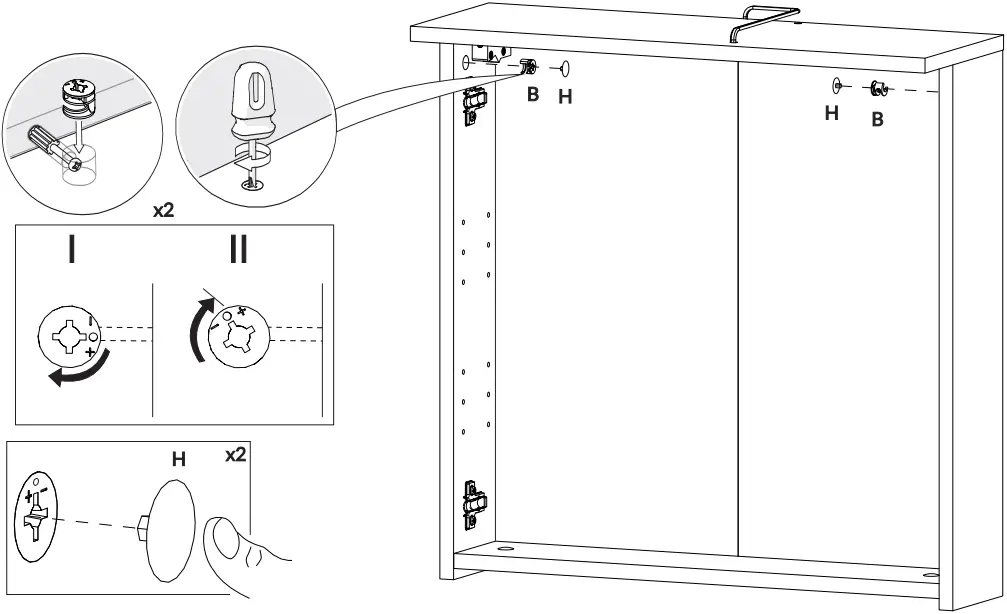
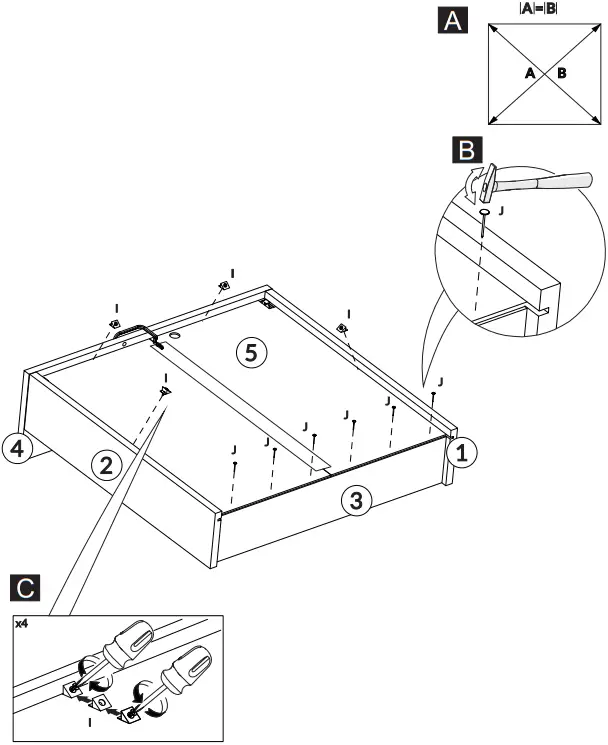
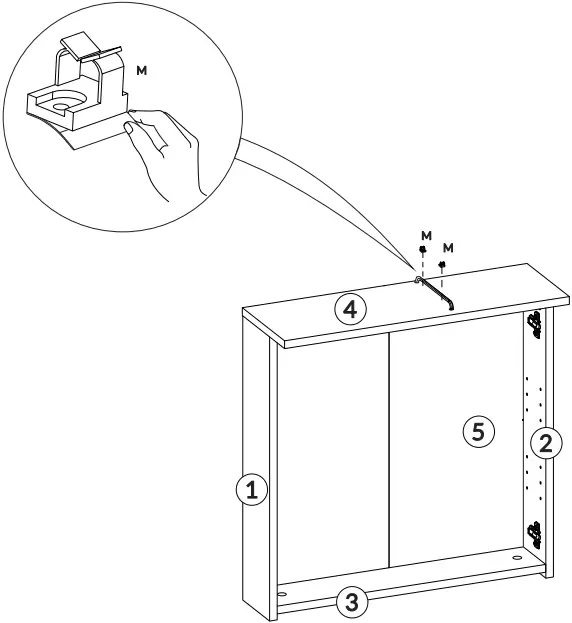
 Assembly instructions

![]()
![]()
![]()


![]()
Spare parts service
Is something defective or missing?
Use our spare parts service and scan the following QR code:
MARINO 01

Service card
![]()
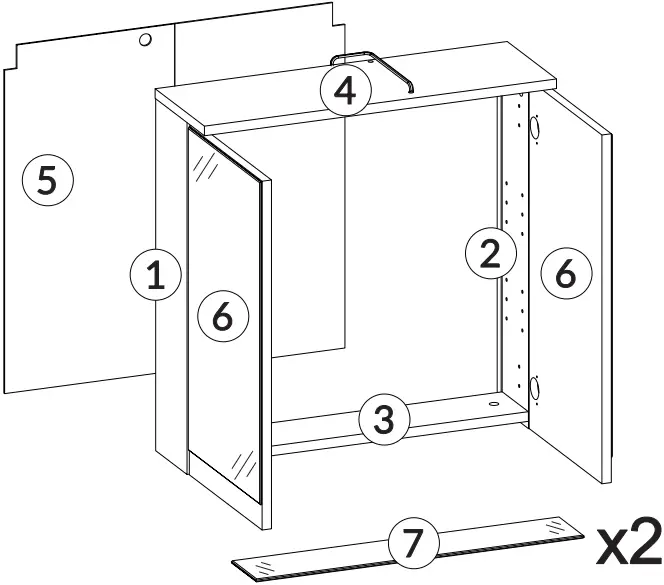
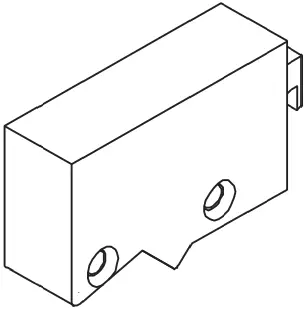
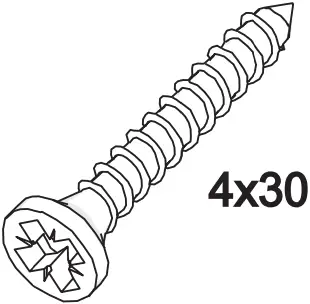
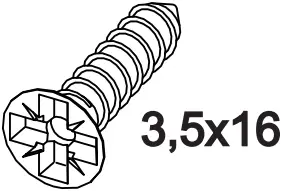
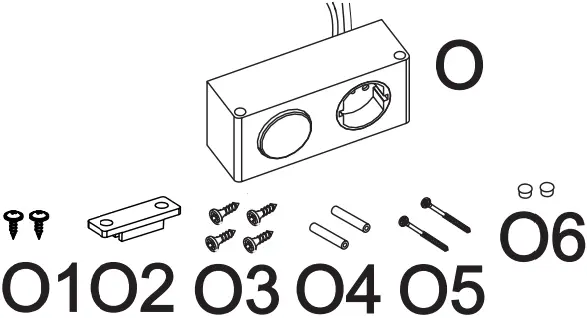
1 | x1 | 584x127x16 |
2 | x1 | 584x127x16 |
3 | x1 | 566x106x16 |
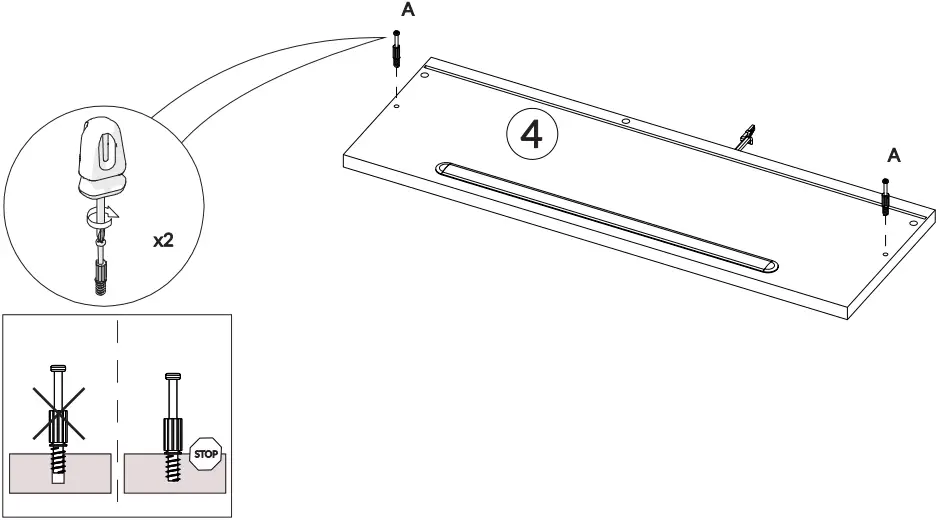
4 | x1 | 600x200x16 |
5 | x1 | 575x580x3 |
6 | x2 | 578x295x16 |
7 | x2 | 559x100x5 |
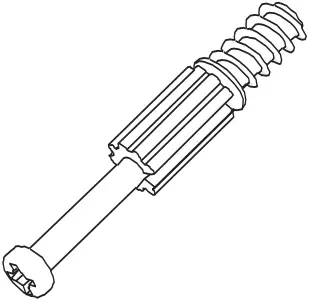
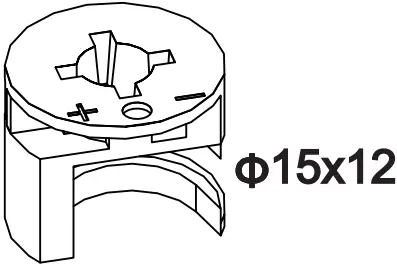
| A
x4 | B
x4 | C
x2 | D
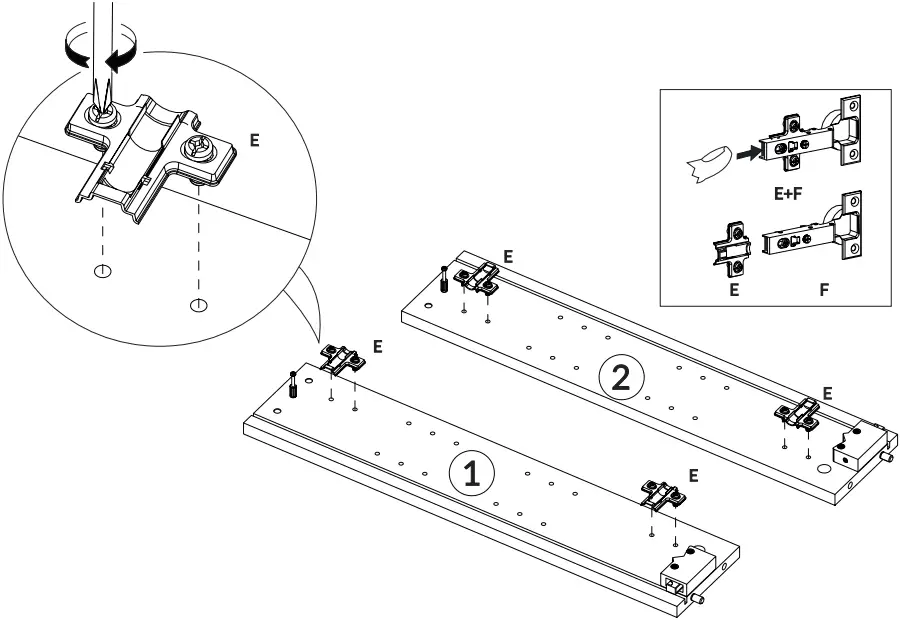
x4 | E
x4 |
| F
x4 | G
x8 | H
x4 | I
x4 | J
x6 |
| K
x8 | L
x2 | M
x2 | N
x1 | O
x1 |


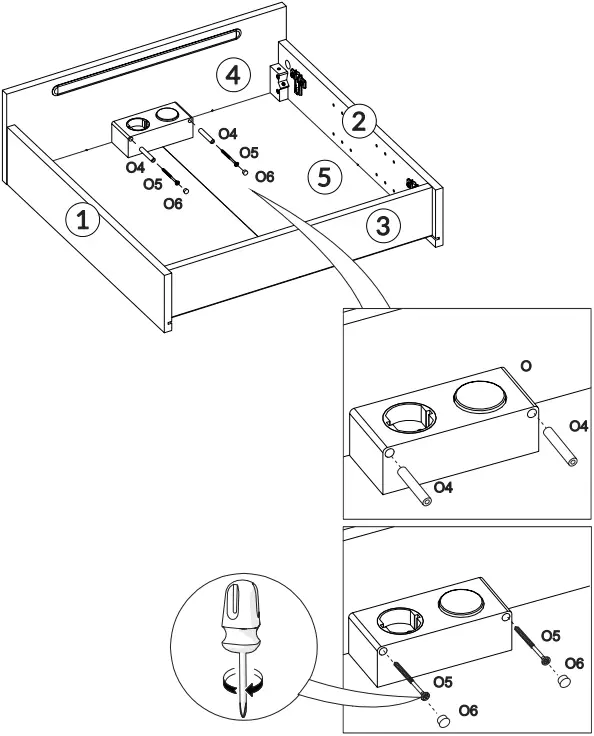
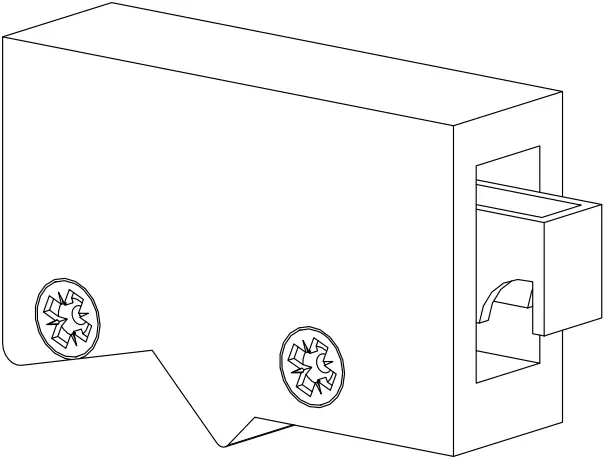
1
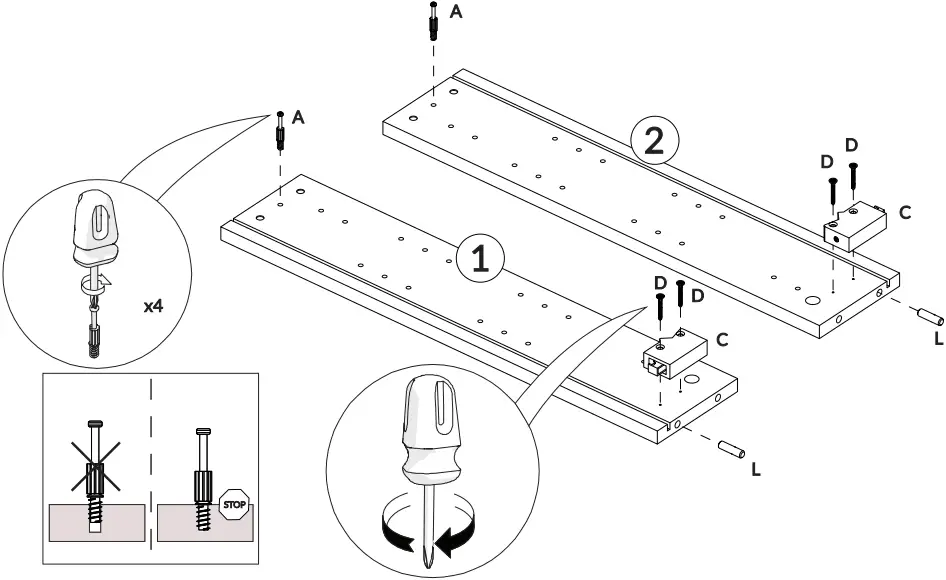
2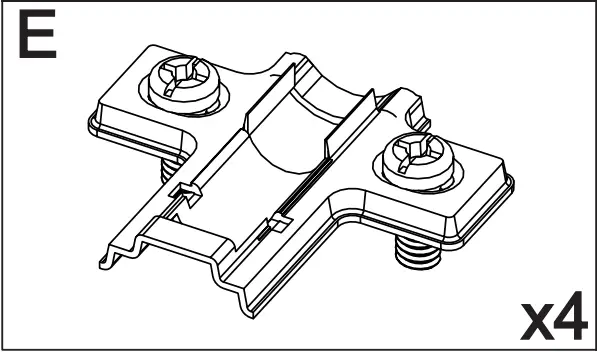
3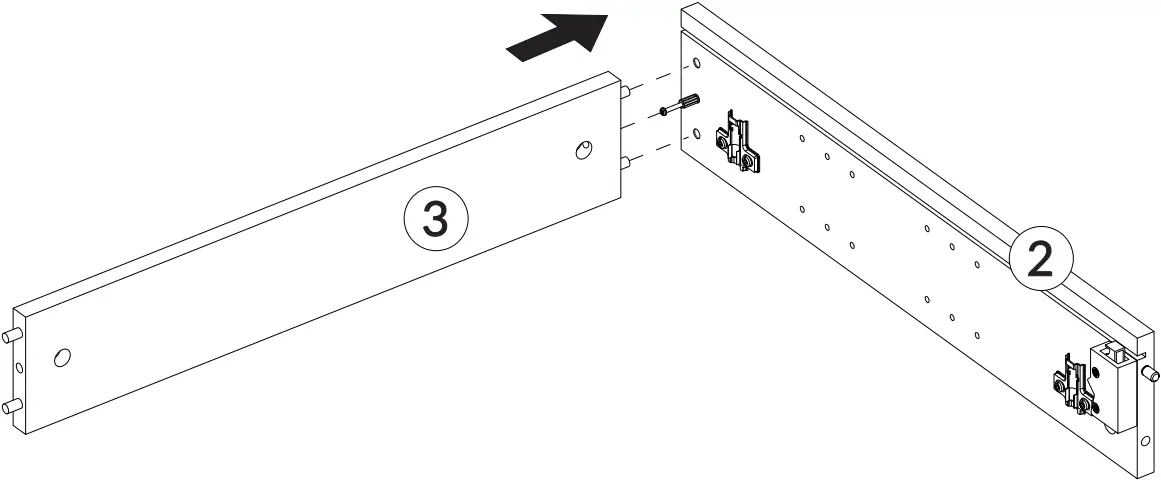
4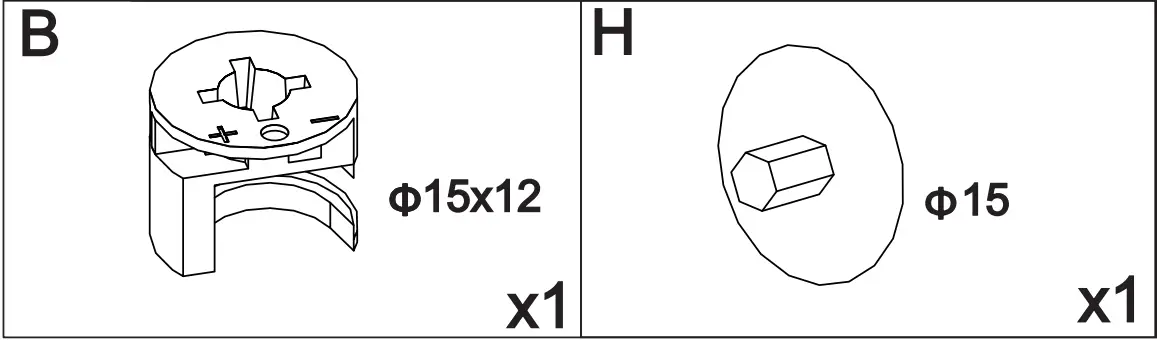
5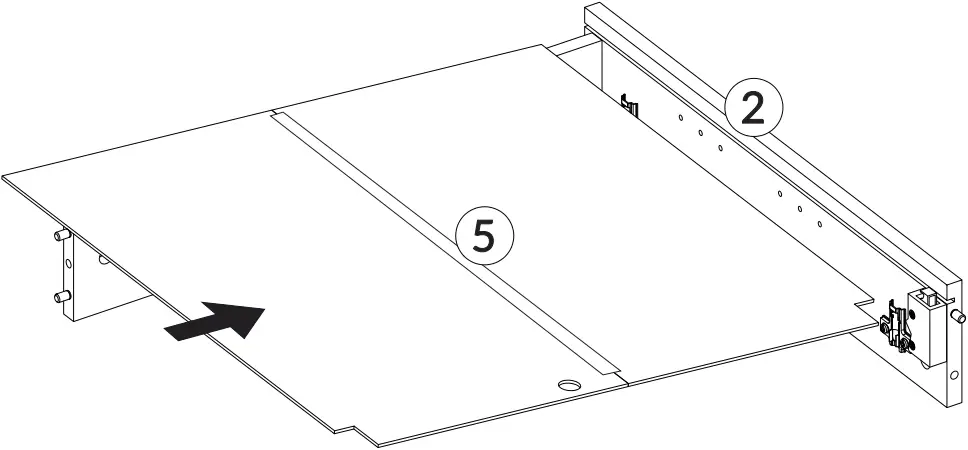
6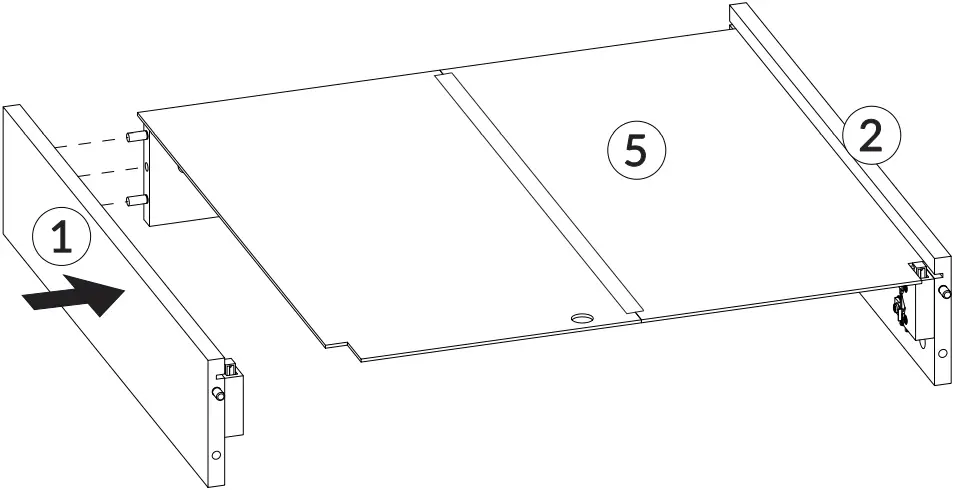
7
8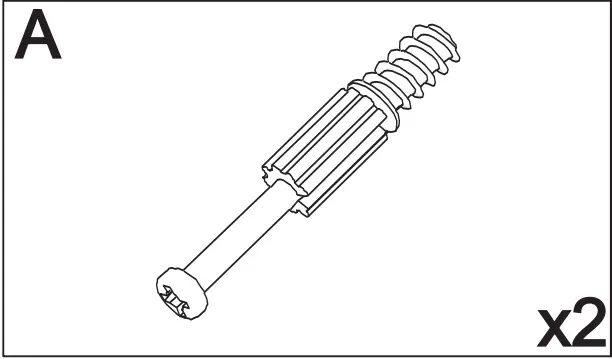
9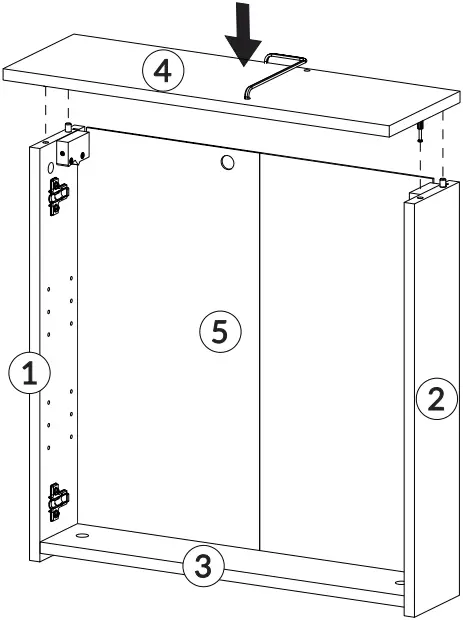
10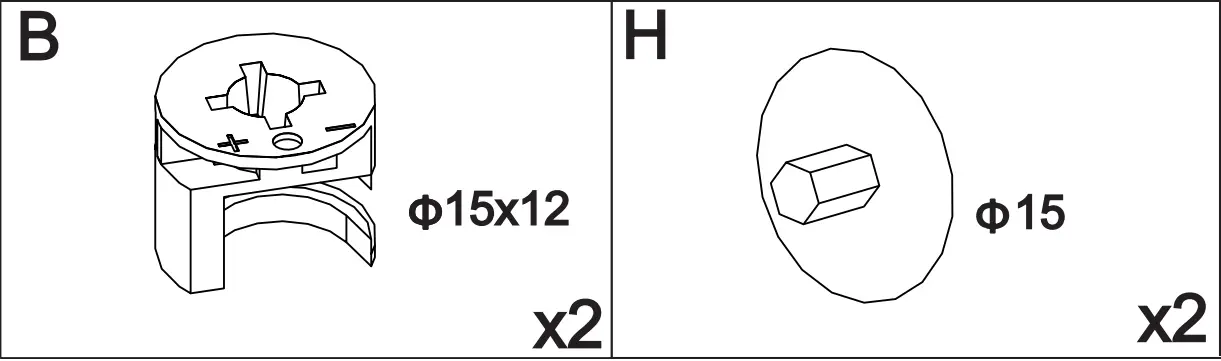
11
12
13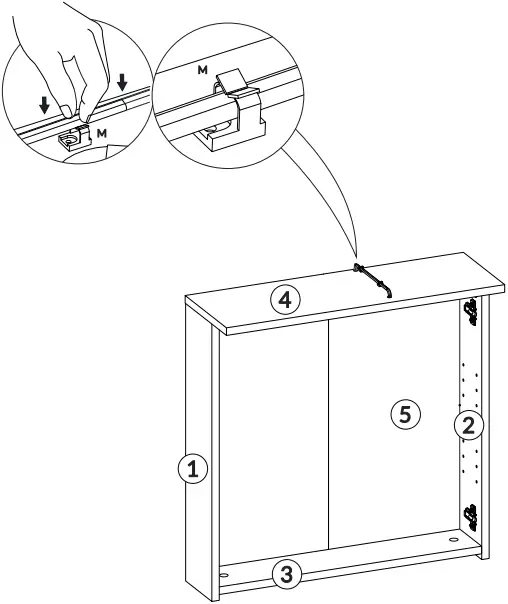
 Installation Instructions
— valid in Great Britain —
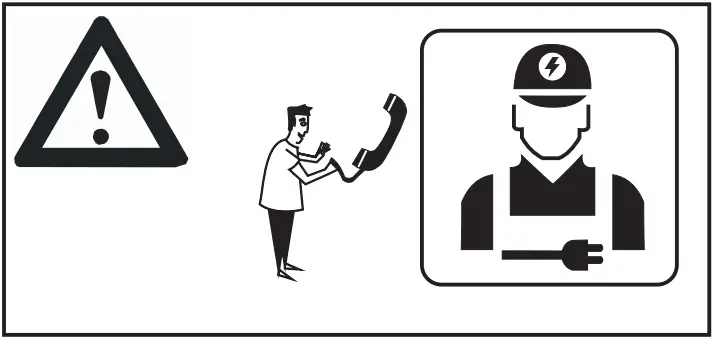
These instructions on wiring and installation are provided as a guideline to assist you. Same experience of electrical wiring and do-it-yourself is required to install the light fitting. If at any time you are unsure of how to proceed, please consult a qualified electrician.
Important:
This light fitting must be connected to the supply earth. If your lighting circuit does not have an earth, ask a qualified electrician to provide an earth facility. Light fittings should be connected to a 5 amp fused circuit. This light fitting is suit-able for indoor use only.
Before Starting
Please read through these instructions before commencing work, and keep them for future reference. Please Take Extreme Care When Carrying Out These Instructions.
Warning!
Always switch off electricity supply at the mains during installation and maintenance. We recommend that the fuse is withdrawn or the circuit breaker is switched off whilst work is in progress. Do not just turn off at the wall switch. All fittings must be installed in accordance with current Building Regulations and IEE wiring regulations.
Spotlight bulbs get very hot during use. Always switch off and allow to cool before changing bulbs or adjusting product.
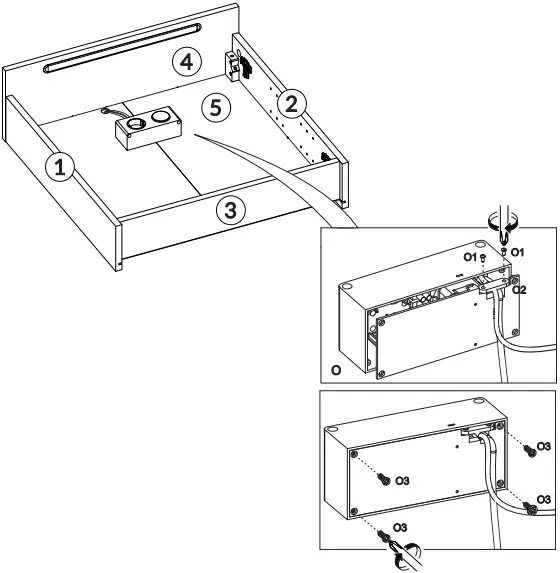
14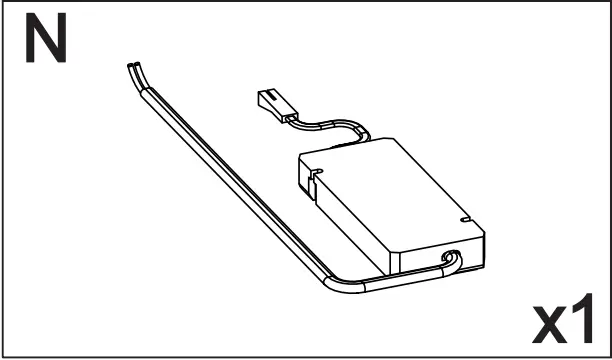
15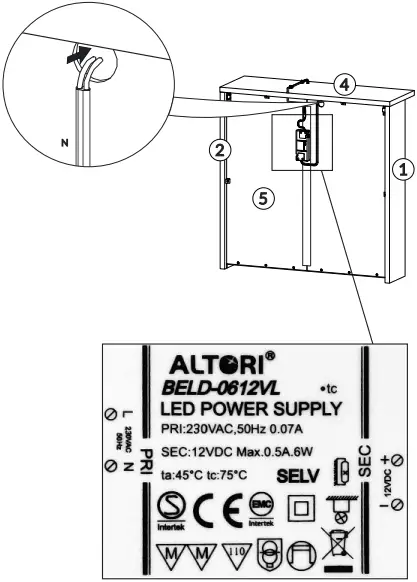
16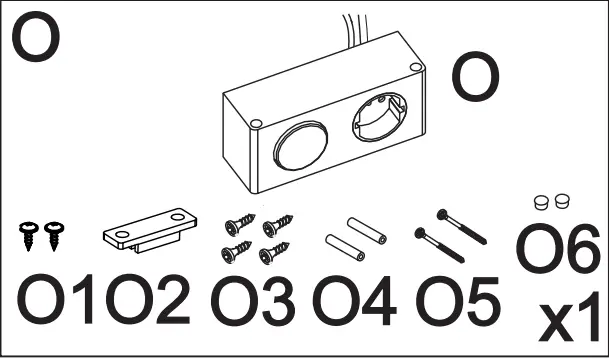
17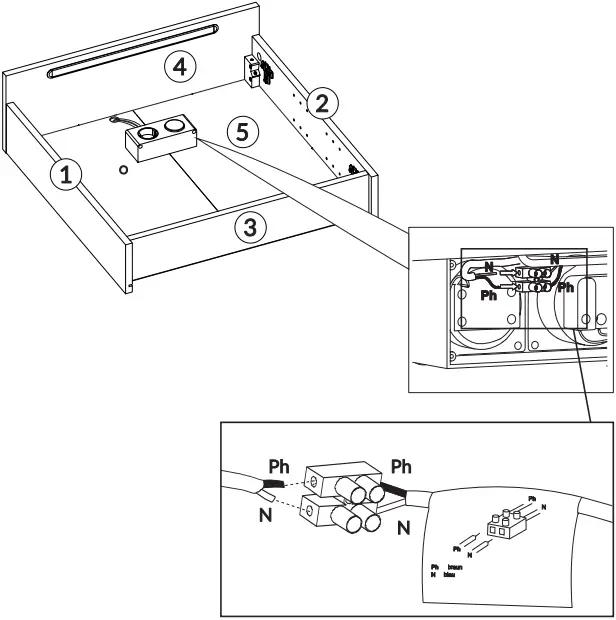
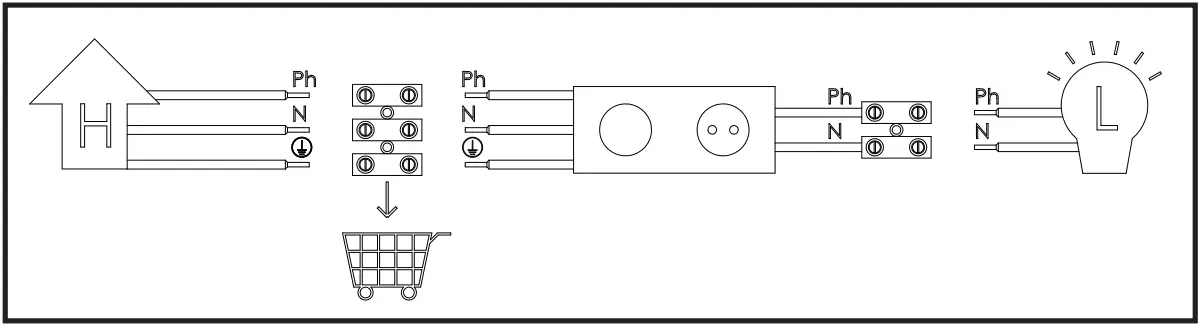
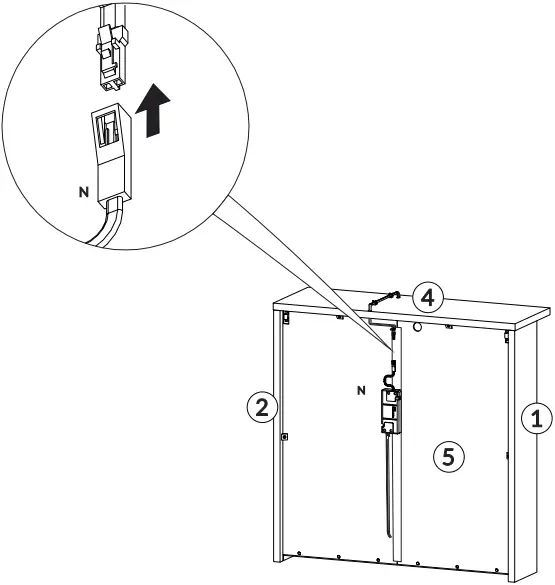
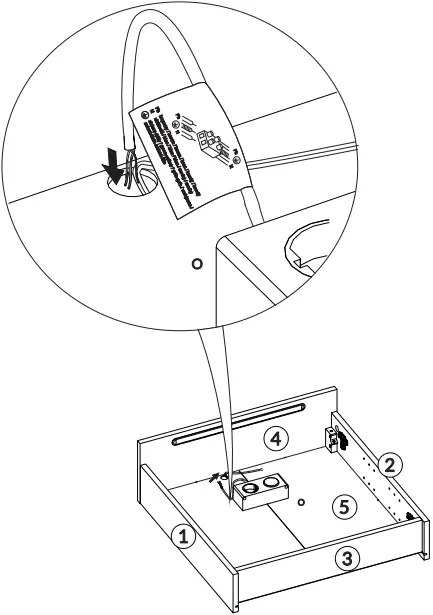
Ph brown
N blue![]() green-yellow
green-yellow
18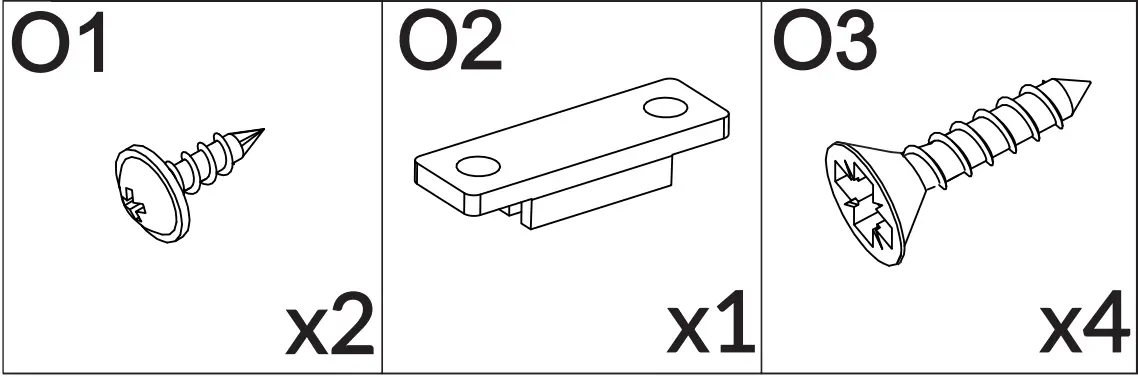
19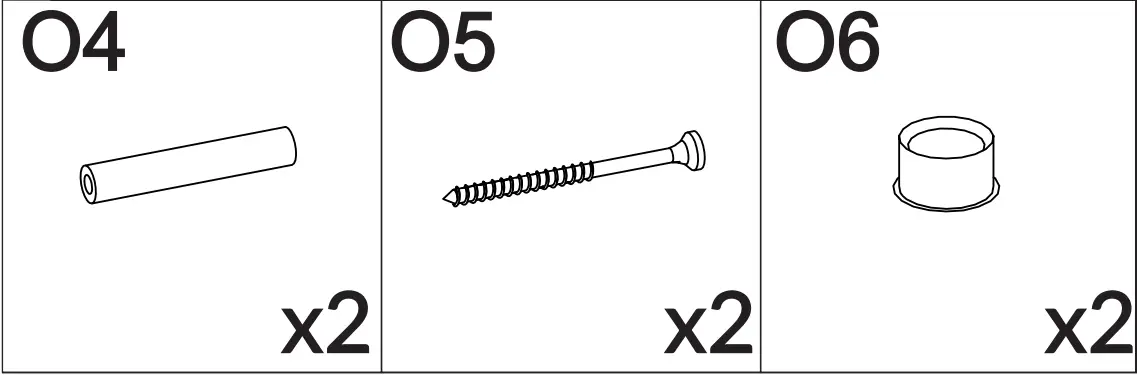
20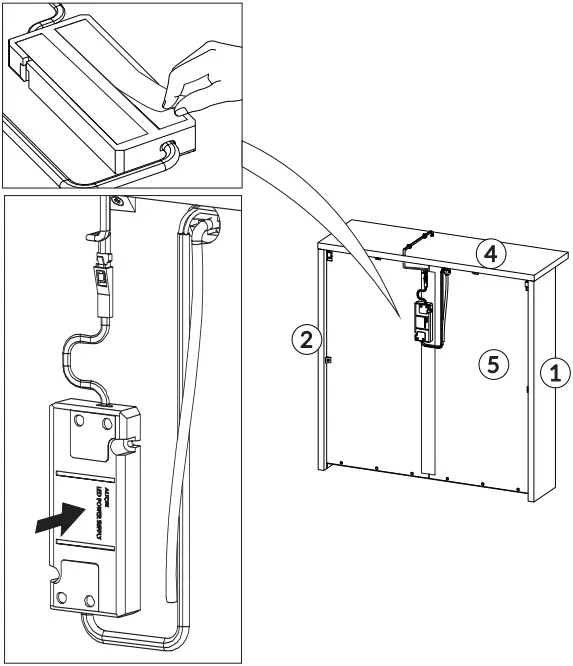
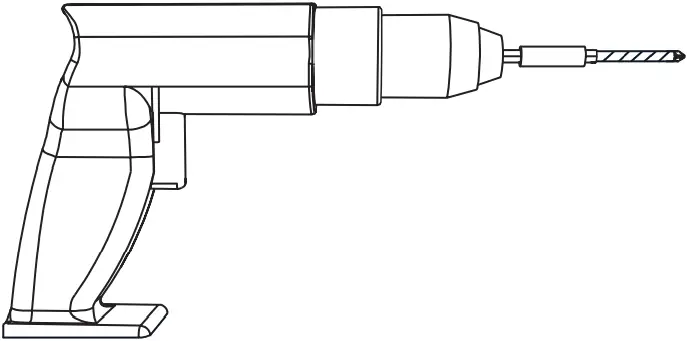
Check the type and strength of the wall.
Choose the appropriate screws and dowels for the walls.
Installation must be performed by a competent person.
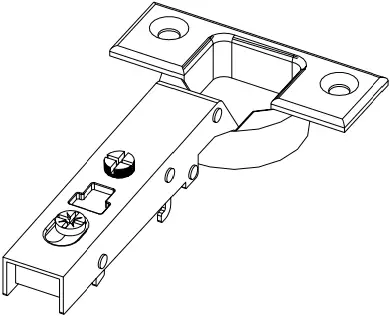
FIXIN THE CABINET TO THE WALL
21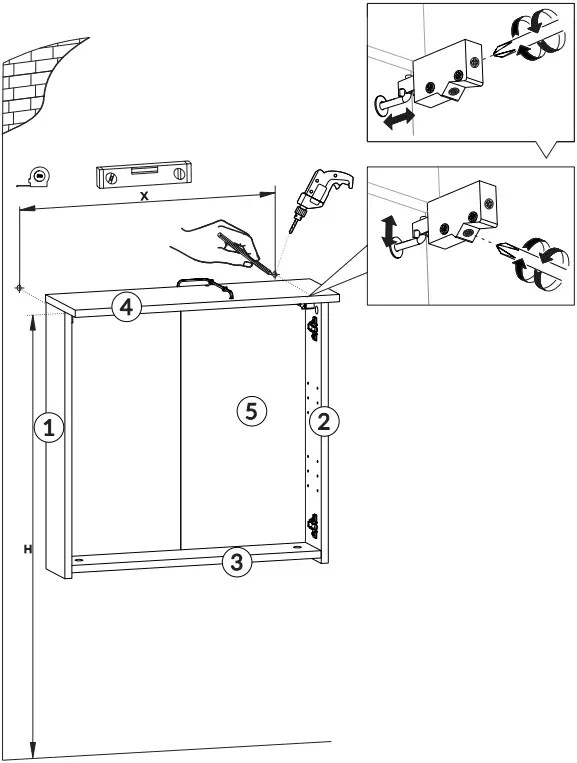
22
23
24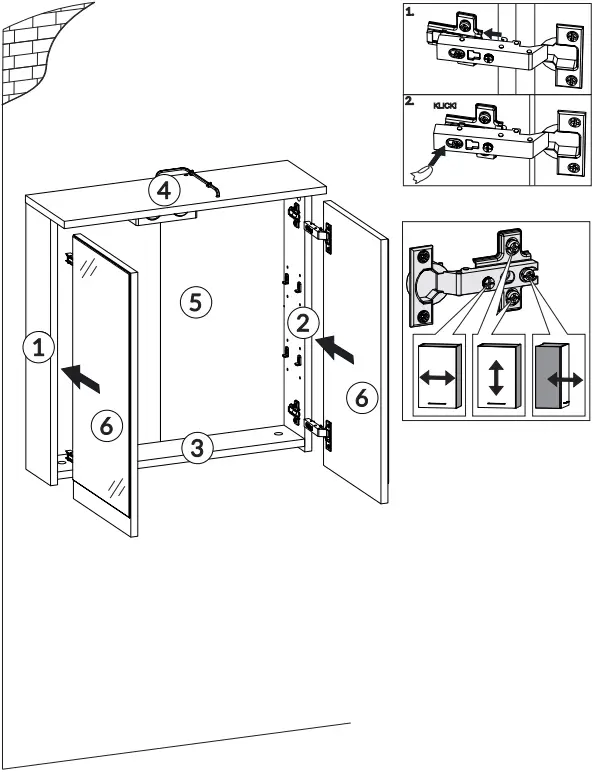
25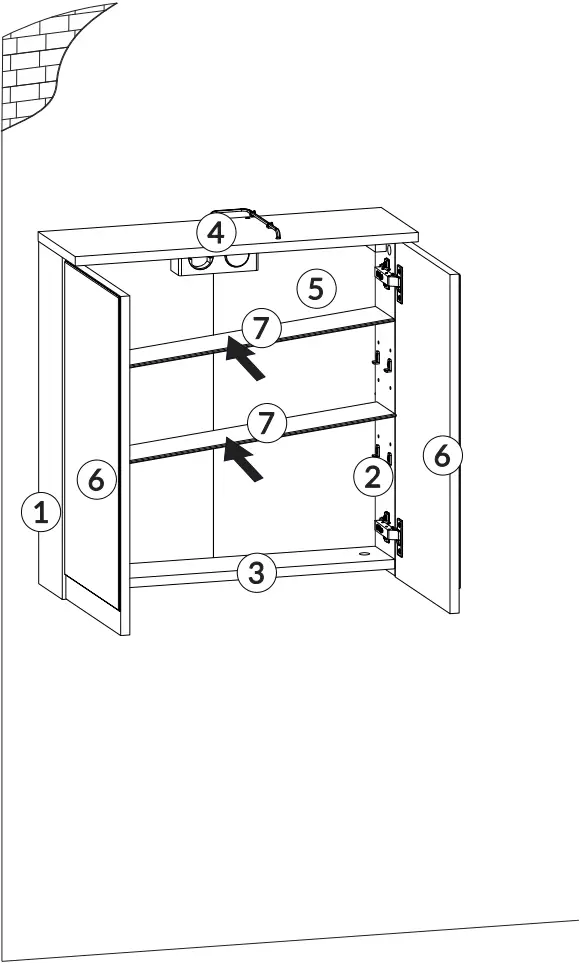
Furniture made from natural wood and panel materials
Dear customer,
Thank you for your order!
No matter if you bought a piece of furniture made from natural wood, a high-gloss front or a plastic front – every piece of furniture has unique characteristics. Even the texture and structure of wood, such as small knots in natural wood furniture, are part of the individual charisma of each piece of furniture.
Since natural wood furniture are permanently exposed to climate and humidity fluctuations, changes to the surface may occur (e.g. hair cracks or changes in colour) in some cases. In general, brightness decreases and colour saturation increases in the course of time – the wood darkens.
The changes mentioned above are normal for natural raw materials such as wood.
This booklet provides some care tips for your piece of furniture so that you can enjoy it for a long time.
The following applies in general:
- Don’t place any hot objects on the furniture.
- Don’t place candles directly on the furniture.
- Immediately wipe off any spilled liquids.
- Regularly check if the screws and fittings are tight.
- The typical, aromatic wooden odour is always a proof of quality for natural wood furniture.
- The natural emission of resin may produce bright spots on the knots which can be polished with a dry, lint-free cloth.
- Initially, a slight intrinsic odour is unavoidable for other wooden, paint, leather or upholstery materials too. These odours automatically disappear after a while. If you want to speed up this process, ventilate more often at the beginning and/or wipe out the furniture with a slightly damp cloth which was soaked in water mixed with a small amount of vinegar.
- Keep these notes in a safe place.
Care notes for stripped/oiled furniture made of natural wood
The surface of your new piece of furniture has been treated with pure organic oil. We recommend an occasional after treatment with suitable furniture oil to preserve this natural, stripped/oil gloss. Since some residue of natural oil may remain on the furniture due to the surface treatment method, we recommend to rub off the furniture with a lint-free cloth. After use, let the cloth dry completely before disposal.
Care notes for untreated/painted furniture made of natural wood
Using a moderately damp cloth is the most suitable method for cleaning the surface.
Attention: Corrosive cleaners as well as cleaners containing solvents or polish must not be used.
Care notes for furniture made of panel materials
We recommend using a soft, lint-free cloth or a shammy for conditioning your piece of furniture made of panel materials. Wipe off the surfaces with a slightly damp cloth or shammy.
The following applies in general:
Please don’t use the following deter-gents or cleaning agents at all:
- microfibre cloths or dirt erasers. They often contain fine abrasive particles which can cause scratches on the surfaces;
- aggressive chemical substances as well as abrasive cleaning agents or solvents. They may damage the surfaces too;
- scouring powder, steel wool or scouring pads. They destroy the surface so badly that reconditioning is impossible;
- vacuum cleaners. The nozzles and brushes can cause scratches on the surfaces;
- steam cleaners. The surfaces may be damaged or separated from the ground due to the high pressure and heat of the water vapour.
Your product development team


