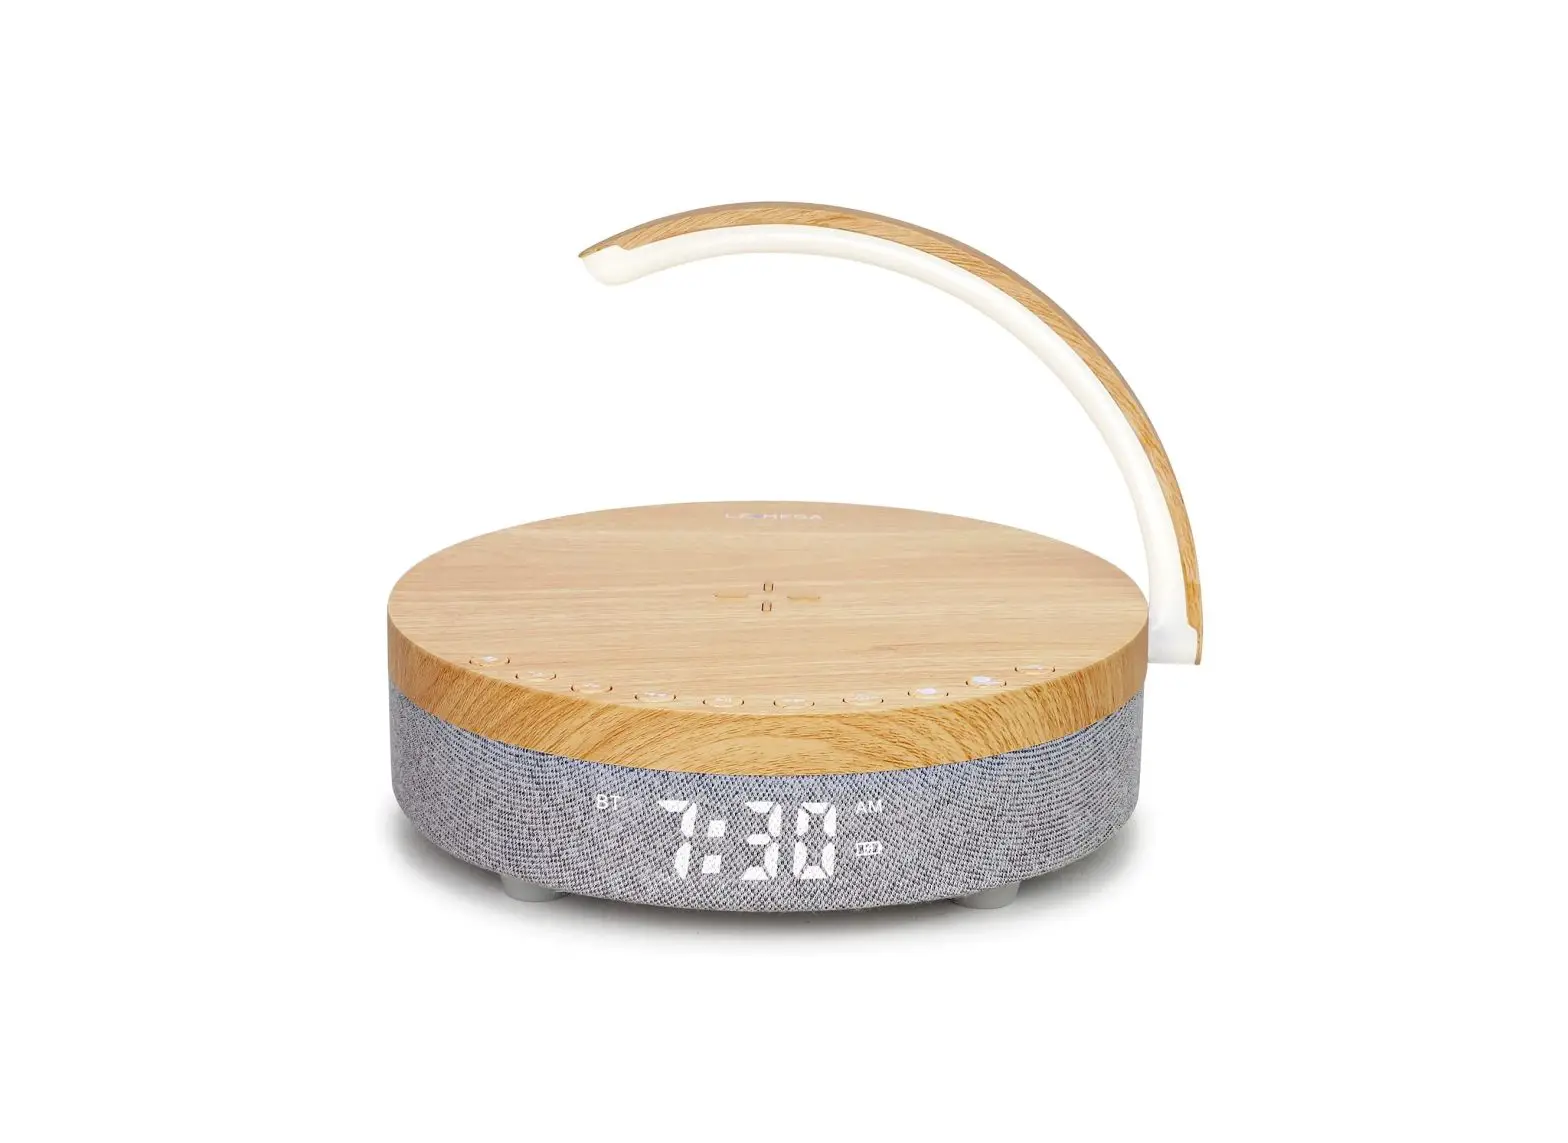
LEMEGA DTS2 Clock Radio Lamp and Wireless Charger Owner’s Manual
Important Safety Instructions
- Read these instructions.
- Keep these instructions.
- Heed all warnings.
- Follow all instructions.
- WARNING — To reduce the risk of fire or electric shock, do not expose this apparatus to rain or moisture.
- Clean only with a dry cloth.
- Only use attachments/accessories specified by the manufacturer.
- Unplug this apparatus during lightning storms or when unused for long periods of time.
- Keep this product a safe distance away from naked flame, such as a lit candle.
- Apparatus shall not be exposed to dripping or splashing and no objects filed with liquids, such as vases, shall be placed on the apparatus.
- Don’t press more than one key at the same time.
- In the event that the unit malfunctions, unplug it for 3 seconds, then plug in again.
Package content include
1 Power adapter
1 Owner’s manual
1 Warranty Card
2 FM wire antenna clips
LCD Display
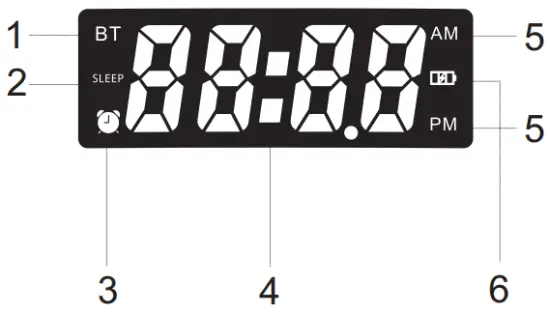
- Switching among different modes: Bluetooth, FM and Soothing sleep music mode.
- Set the sleep timer from 15mins / 30mins / 60mins / Sleep Off in turn
- Alarm setting
- Clock display
- witch between AM and PM
[Note: When you set the Alarm, please note the time is AM or PM] - Battery charging status display

 /M [Standby/ MODE]: Plug in the mains power or switch the power switch “ON” position at the rear panel to power on the DTS2 unit and enter Soothing sleep music automatically. Briefly Press M to switch FM mode, Bluetooth mode and Soothing music mode in turn. Press and hold [Long Press] g to Standby mode.
- VOL- /
 : Press and hold button to decrease the volume quickly. Briefly press to decrease the volume one step by one step.
 - VOL+ /
 : Press and hold button to increase the volume quickly. Briefly press to increase the volume one step by one step.
  : In Bluetooth / Soothing sleep music mode, briefly press to previous track.
In FM mode, briefly press to move backward 0.1 MHz frequency. Press and hold 2 seconds to auto-scan the backward stations. : Press to select Play/Pause under Bluetooth mode. In FM mode, press to auto-scan all good stations. After auto scanning, press the button to switch the saved stations from low frequency to high frequency.
 : In Bluetooth / Soothing sleep music mode, briefly press to next track. In FM mode, briefly press to move forward 0.1MHz frequency. Press and hold 2 seconds to auto-scan the stations.
 Sleep : In FM/BT/Soothing sleep music mode,
Press to set the time interval 15mins /30mins/ 60mins/Sleep Off in turn. the DTS2 unit will stop playing in 15mins/30mins/60mins. /ALARM : Press button to activate or deactivate alarm. Alarm icon will appear on the display when Alarm is activated.
Press and hold button to start Alarm Setting. When the hours flash, press / to set the hours, press to confirm and move to the next step.
When the minutes flash, press/ to set the minutes, press to confirm and move to the next step. Alarm source: Press / to select an alarm ringtone [9 soothing music sources available] then press button to confirm setting and move to the next step. Alarm Volume: Press / to set the volume, ther press Alarm to confirm setting and finish Alarm setting. CLOCK / DIM: Briefly press button to adjust the LCD brightness: High/Mid/Low in turn.
Press and hold to start the time setting.
Press/ to select 12H or 24H and press to confirm setting and move to the next step. When the Hours flash, press / to set the hours press to confirm setting and move to the next step. When the minutes flash, pres / to set the minutes, press to and finish clock time setting.
Note: If the time stops flashing while setting, repeat the above steps. Light Mode: Briefly press to enter into light mode. Press again to switch warm light, cool light and turn off in turn. Press and hold to adjust the light brightness level.
- Wireless charging: Please make sure your phone feature with wireless charge function before you do wireless charging. Then put your phones above the wireless charging indicator area and start to power charge. If your phone no built-in wireless charging, please go through 5V 1A USB Port for charging.
- Handle with light
- Snooze: After the alarm rings, press any of the buttons on the top of the units or on remote control to temporarily mute the alarm for 5 minutes, or briefly press the Alarm / Sleep button to cancel Alarm setting.
Back Overview
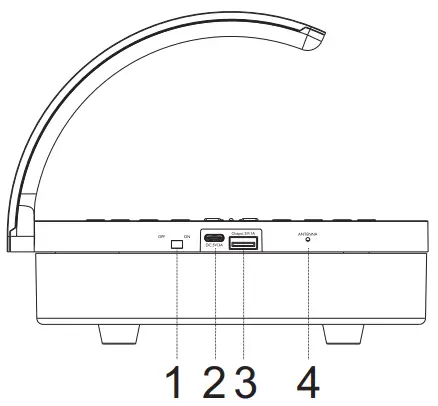
- Battery switch [ON / OFF]
- 5V 3A DC
- 5V 1A USB charging
- FM Wire Antenna
SOOTHING SLEEP MUSIC MODE
- Press “M” button on the unit to enter to Soothing sleep music mode:
- Briefly press / to change different Soothing music: Lullaby, Rain, Running Water, Birds chirping, Insect Sound, frog croaks, Ocean Waves, Thunder, Campfire in turn.
FM RADIO
- Press “M” button on the unit or press “FM” button on the remote to enter to FM mode;
- Briefly press / to move backward /forward each 0.1 MHz frequency to search stations. Or press AUTOTUNE button on remote control to auto-scan the active stations and save the strong signal stations automatically.
- : press the button to switch the saved stations from low frequency to high frequency.
Noted: To get a good radio reception, hung up FM antenna wire and move antenna wire around until you get good reception
BLUETOOTH
- Press “M” button to enter Bluetooth mode.
- Connect your smart phone, your smart phone will show bluetooth device name “LEMEGA DTS2” select device name “LEMEGA DTS2” to pair.
- You can start to play your music tracks, then adjust the volume level on your device.
SPECIFICATIONS
Model: DTS2
Type: Clock Radio & Charger
Drivers: 1 x 2.5″
Power output: RMS 3W
Wireless charging output: 5W
Power Supply: DC 5V 3A or 3.7V/8800mA/H lithium batteries
Dimensions: L 205 X 1160 X D205 MM Weight: 775g
Specifications are subject to change without notice.
Any Changes or modifications not expressly approved by the party responsible for compliance could void the user’s authority to operate the equipment. This device complies with part 15 of the FCC Rules. Operation is subject to the following two conditions:
FCC Statement
- This device may not cause harmful interference, and
- this device must accept any interference received, including interference that may cause undesired operation.
Note: This equipment has been tested and found to comply with the limits for a Class B digital device, pursuant to part 15 of the FCC Rules. These limits are designed to provide reasonable protection against harmful interference in a residential installation. This equipment generates, uses and can radiate radio frequency energy and, if not installed and used in accordance with the instructions, may cause harmful interference to radio communications. However, there is no guarantee that interference will not occur in a particular installation. If this equipment does cause harmful interference to radio or television reception, which can be determined by turning the equipment off and on, the user is encouraged to try to correct the interference by one or more of the following measures:
- Reorient or relocate the receiving antenna.
- Increase the separation between the equipment and receiver.
- Connect the equipment into an outlet on a circuit different from that to which the receiver is connected.
- Consult the dealer or an experienced radio/TV technician for help.
FCC Radiation Exposure Statement:
This equipment complies with FCC radiation exposure limits set forth for an uncontrolled environment .This transmitter must not be co-located or operating in conjunction with any other antenna or transmitter.
![]() Correct Disposal of this product. This marking indicates that this product should not be disposed with other household wastes throughout the EU. To prevent possible harm to the environment or human health from uncontrolled waste disposal, recycle it responsibly to promote the sustainable reuse of material resources. To return your used device, please use the return and collection systems or contact the retailer where the product was purchased. They can take this product for environmental safe recycling.
Correct Disposal of this product. This marking indicates that this product should not be disposed with other household wastes throughout the EU. To prevent possible harm to the environment or human health from uncontrolled waste disposal, recycle it responsibly to promote the sustainable reuse of material resources. To return your used device, please use the return and collection systems or contact the retailer where the product was purchased. They can take this product for environmental safe recycling.
DM CLOCK RADIO & CHARGER & LAMP
If you have any questions or suggestions, please share with us.
[email protected]
www.lemegaaudio.com
![]()
![]()
![]()
![]()
MADE IN CHINA