![]() SPT100
SPT100
TPMS Diagnostic Tool
User Manual
Specifications
TPMS Diagnostic Tool
Operating frequency: 125KHz, 433/434MHz, 315MHz
Operating voltage: 3.7V
Operating temperature: -10°C~ 60°C
Storage temperature: -20°C~ 70°C
Sensor
Operating frequency: 125KHz, 433/434MHz, 31 5MHz
Operating voltage: 2.1~3.3V
Operating temperature: -40°C~ 105°C
Storage temperature: -40°C~ 125°C
Static current: <1.0 uA
Pressure range: O~7 Bar
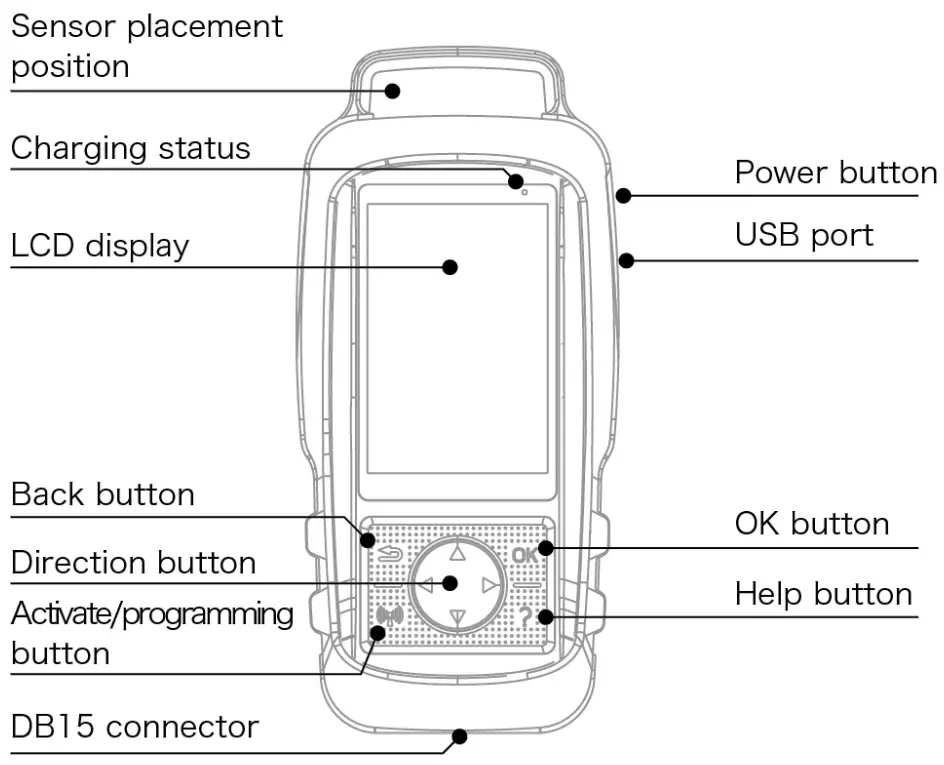
Brief look
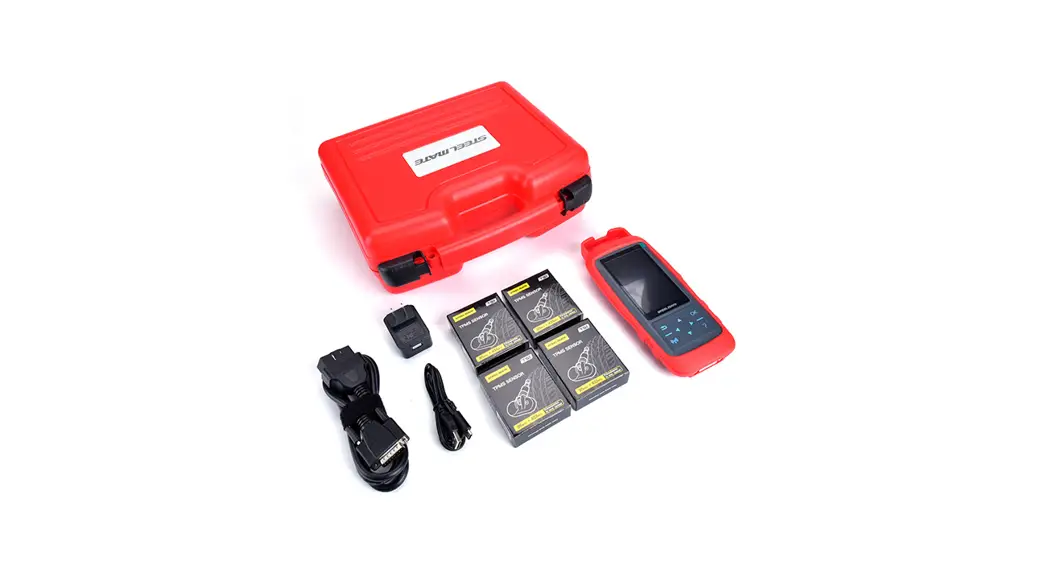
Includes
TPMS Diagnostic Tool, OBDII CABLE, USB CABLE, Manual
Power ON/OFF
Power ON: Press the power button to turn on the device.
Power OFF: Press the power button to turn off the device. Or the device will turn off automatically without any operation in 3 minutes.
Note: The time of auto power can be set in [System Setting].
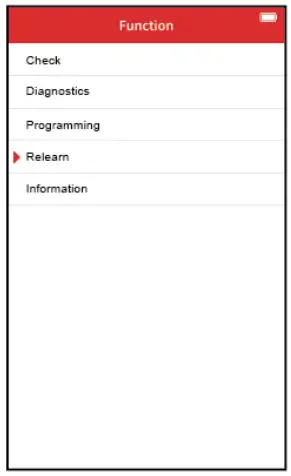
How to operate
From the main menu, press the Direction button to select the [TPMS diagnosis] function, and enter the test vehicle information selection page.
Note: All function screens shown in this manual are for reference only, actual screens may vary for each vehicle being tested. Please follow [Function 5 Tire pressure relearning method] to check the related relearning methods.

1. Tire pressure service interface
For direct TPMS in vehicles | For indirect TPMS in vehicles |
| Mainly include: Trigger and check the tire pressure sensor, tire pressure system diagnosis, program the tire pressure sensor, view relearning step,view the original tire pressure sensor information | Only include: view relearning step |

2. Trigger and check the tire pressure sensor
Note: If part of the sensors does not acquire the data, please back to the Tire pressure service interface, then select [Diagnostics] to acquire the sensor ID or more information.
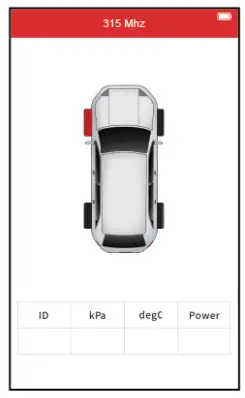 | 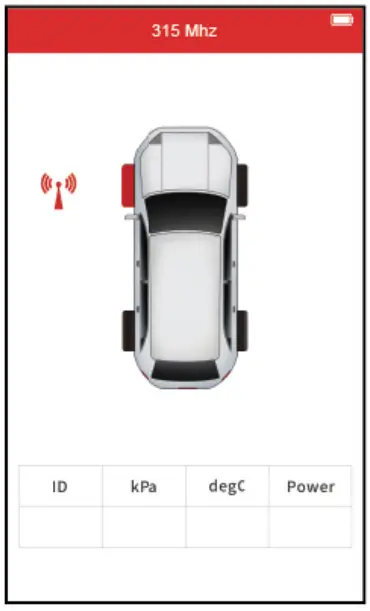 | 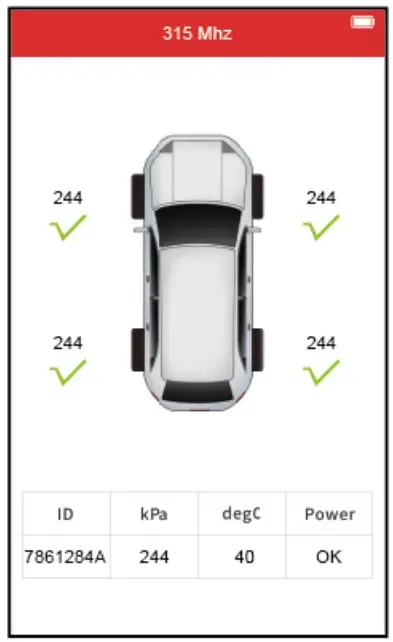 |
| Press the direction button to select the desired position, and take the device close to the sensor. | Press | After the trigger succeeds, the sensor data will be displayed on the screen. |
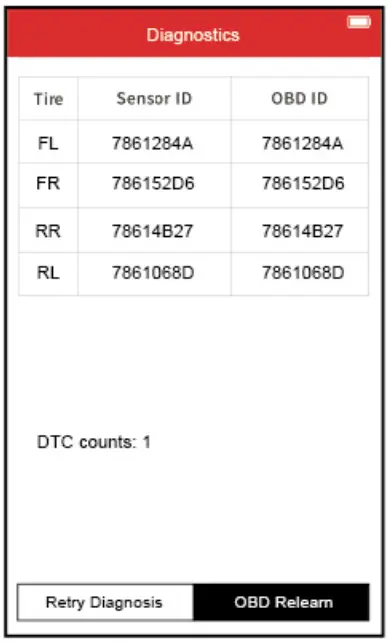
3. Tire pressure system diagnosis
 | Use OBD cable to connect with device and vehicle OBDII interface, and turn the ignition ON |
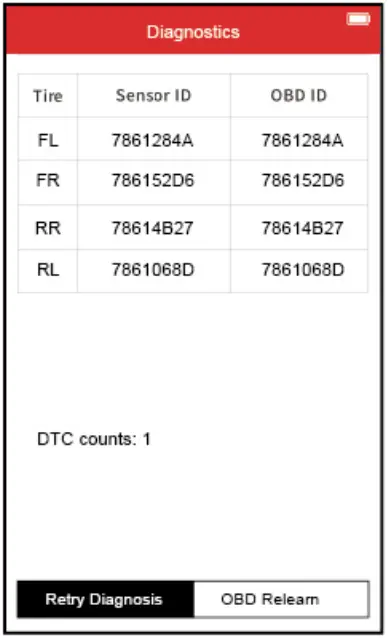 | The device will automatically read the original sensor ID and related fault code of the vehicle tire pressure system. |
 | Press the |
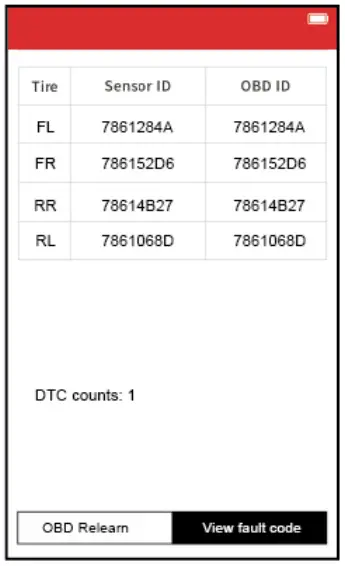 | Press the |
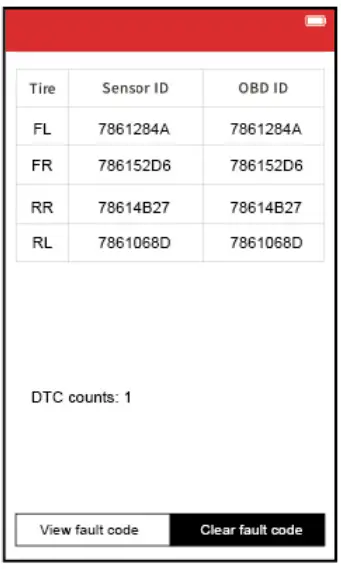 | Press the |
4. Program the tire pressure sensor
This function is to recover a sensor ID in order to enter it into the spare blank sensor. If the original sensor can be read, use the Copy functions to recover the ID. If it cannot be read, use the Auto Create function to create a randomized ID.

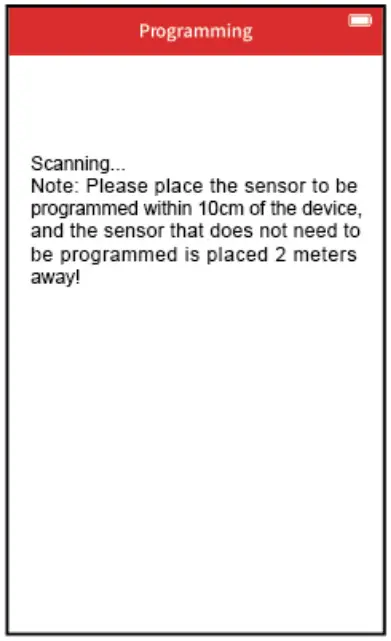
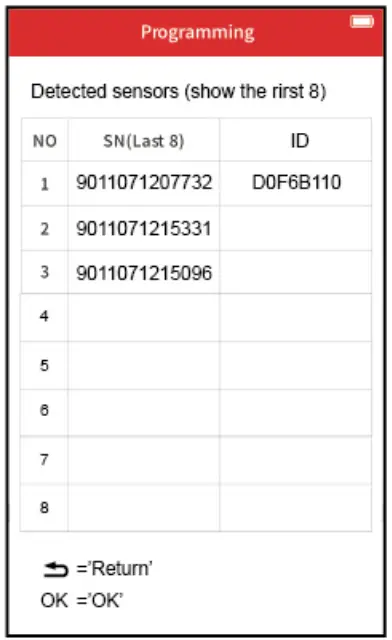
a. Auto-create sensors
This function is to create a sole senor ID of new sensors, these ID are random generation. The newly generate sensor ID is usually different from the sensor ID which is stored by the original tire pressure system. so need learn the newly generate sensor ID into the original tire pressure system.
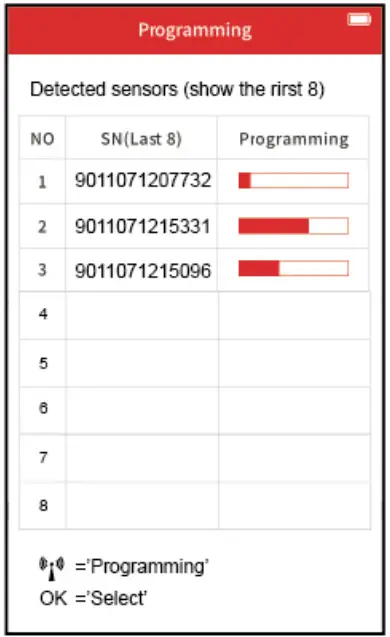
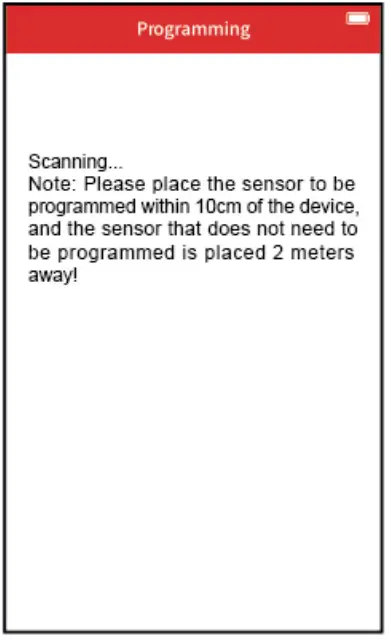
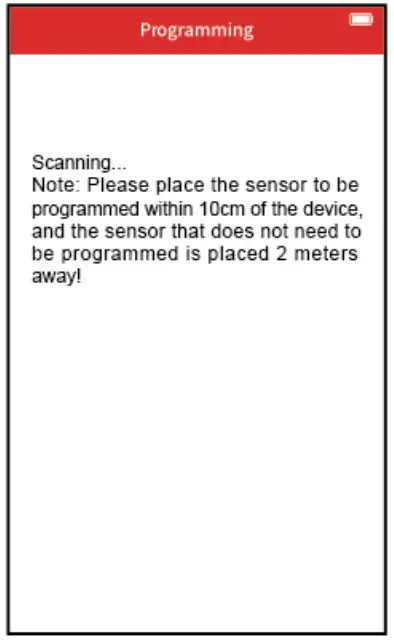 | 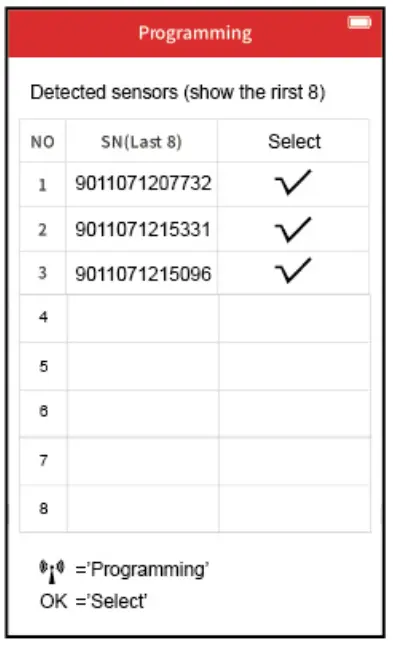 |
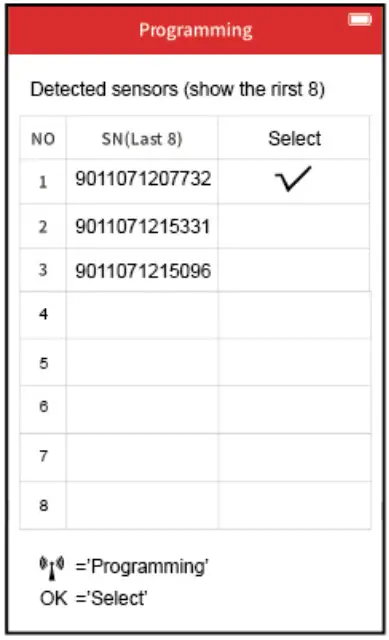
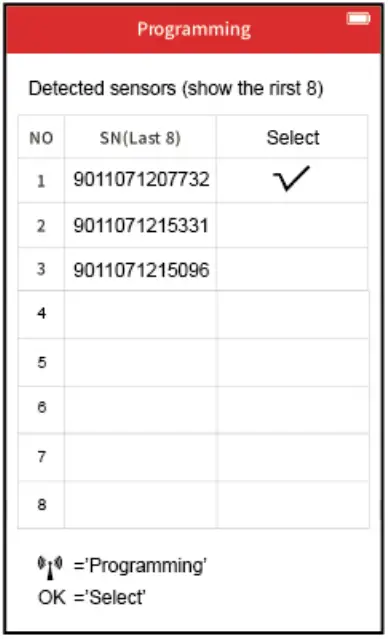
| Take the waited programming sensor close to the sensor placement position of the device. | If 1-8 sensors are scanned at the same time, press the direction button to select the waited programming sensor, and press the OK button to confirm. |
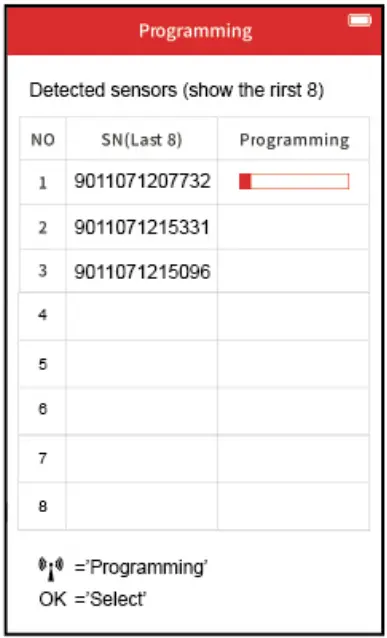
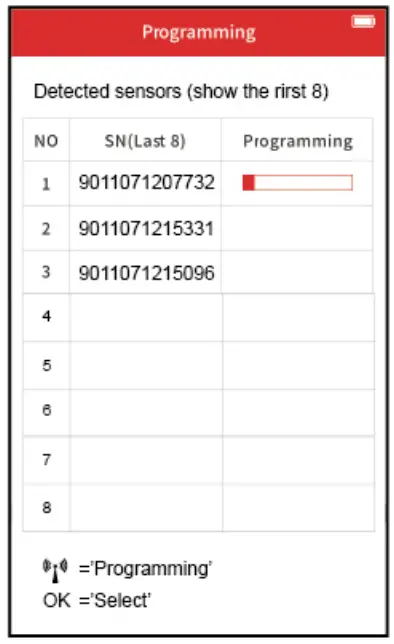
 | 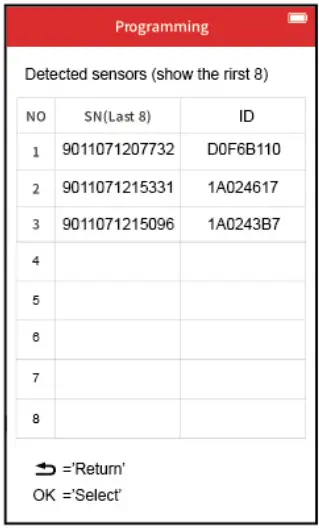 |
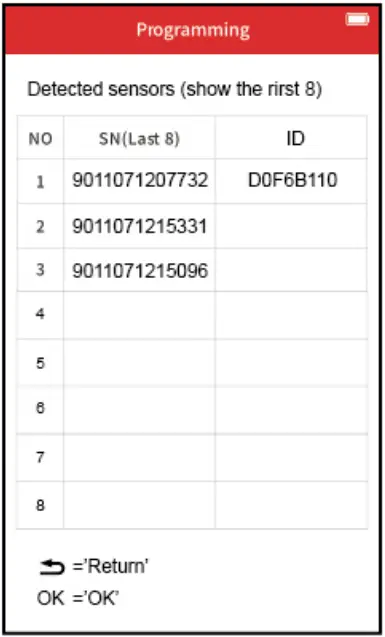
| Press the | After being programmed, the sensor SN and inputted ID will be displayed on the screen. |
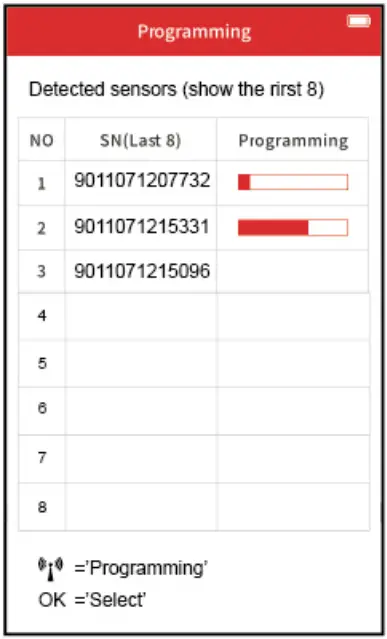 | 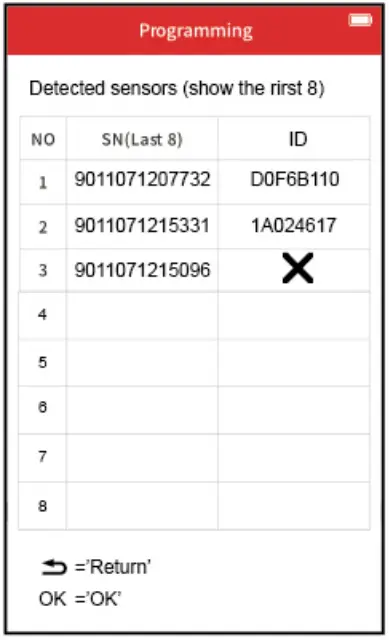 |
| If some sensor programming failed | The failed information will be displayed on the screen. |
b. Copy by input
 | 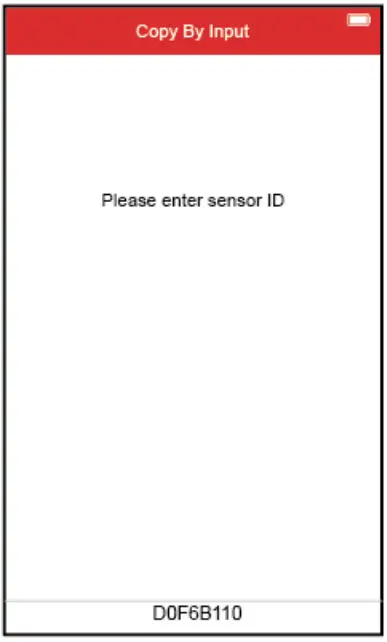 |
| Press the OK button to enter the next step. | Press the direction button to enter the ID as same as the original tire pressure to be re-programmed. |
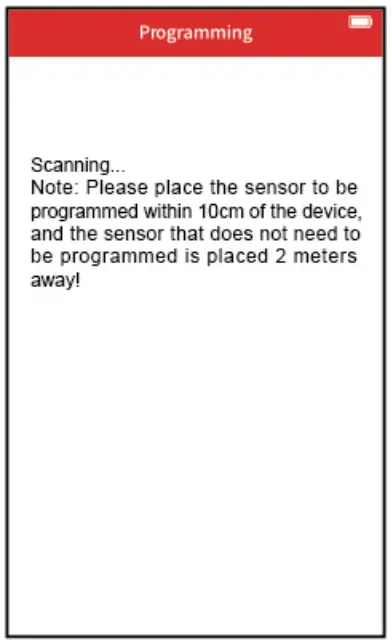 |  |
| Take the waited programming sensor close to the sensor placement position of the device. | If 1-8 sensors are scanned at the same time, press the direction button to select the wafted programming sensor, and press the OK button to confirm. |
 | 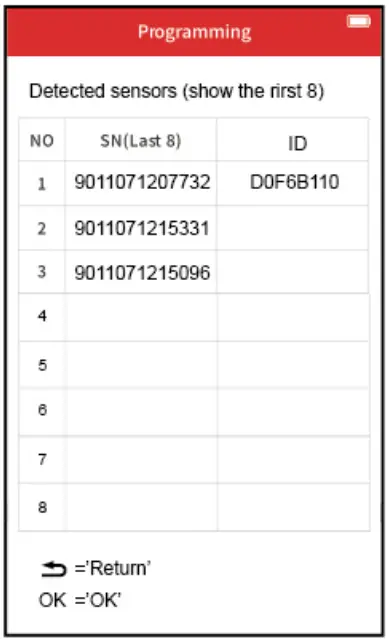 |
| Press the | After being programmed, the sensor SN and inputted ID will be displayed on the screen. |
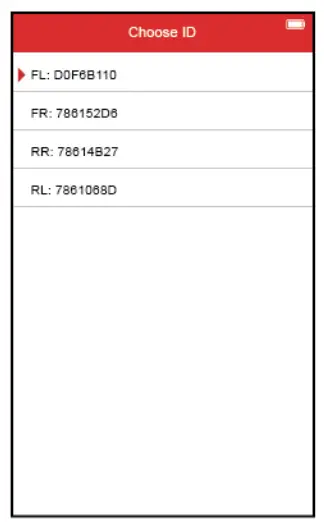
c.Copy by activation
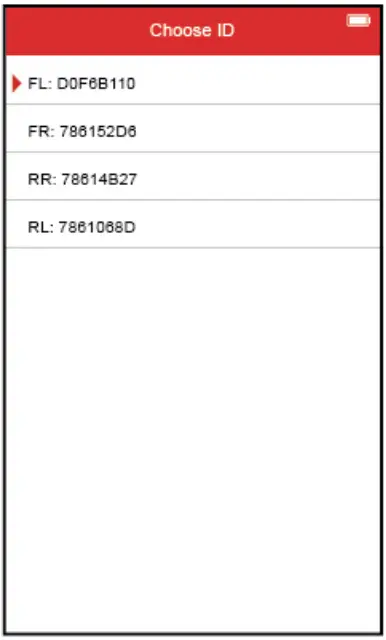 |  |
| The triggered sensors information in step 1 will be displayed on the screen, press the direction button to select the sensor to be programmed, and then press the OK button to enter the next step. | Take the waited programming sensor close to the sensor placement position of the device. |
 |  |
| If 1-6 sensors are scanned at the same time, press the direction button to select the waited programming sensor, and press the OK button to confirm. | Press |
 | |
| After being programmed, the sensor SN and inputted ID will be displayed on the screen. | |
d.Copy by OBD
 |  |  |
| Use the OBD cable to connect with the device and vehicle OBDII interface and turn the ignition ON | The original sensors’ information will be displayed on the screen, press the direction button to select the sensor to be programmed, and then press the OK button to enter the next step. | Take the waited programming sensor close to the sensor placement position of the device.
|
 |  |  |
| If 1-6 sensors are scanned at the same time, press the direction button to select the waited programming sensor, and press the OK button to confirm. | Press | After being programmed, the sensor SN and inputted ID will be displayed on the screen. |
5. Tire pressure relearning method
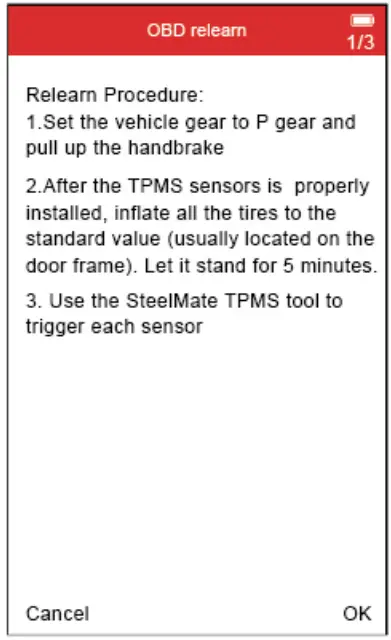
Please read relearning steps to operate.
6. Original sensor information
 |  | 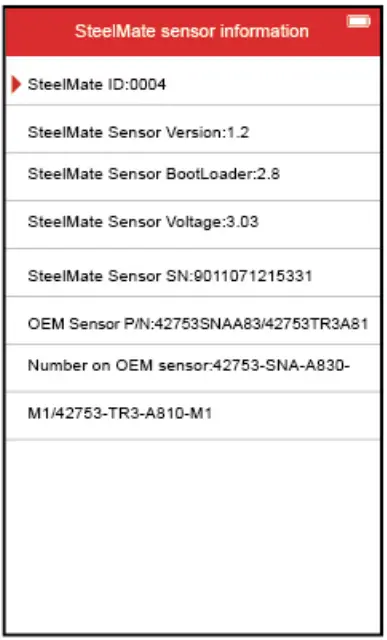 |
| Press the direction button to select the original sensor information or Steelmate sensor information, and then press the OK button to enter the next step. | The original sensor information will be displayed on the screen. | Take the device close to the sensor, then Steelmate sensor information will be displayed on the screen. |
Battery charging
This device is equipped 3000mN3.7V interior lithium polymer chargeable battery.
In order to get the device working at its best, please full charge the battery. Suggest at least 2 hours to charge before at the first time to use.
System settings
From the main menu, press the Direction button to select [Setting], and press the OK button to enter the setting page.

Recent test
From the main menu, press the Direction button to select [Recent test], then review the last tested vehicle information and sensor trigger data, and press the OK button can continue the last unfinished operation.

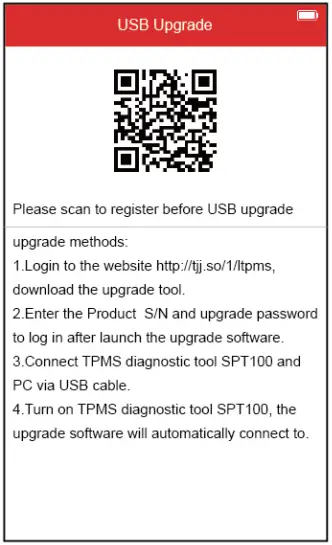
Upgrade
From the main menu, press the Direction button to select [Upgrade], then follow the steps shown on the left to upgrade the device software.
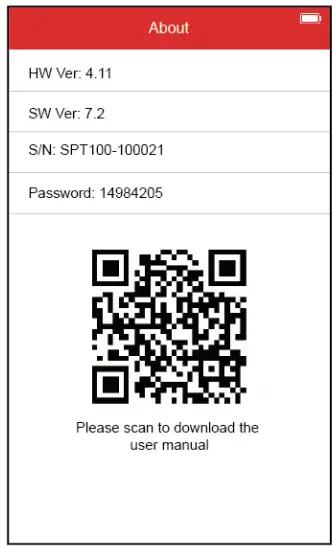
About
From the main menu, press the Direction button to select [About], then view the product information such as software, hardware version, serial number, and upgrade password.
Think safety think Steelmate
STEELMATE CO., LTD.
StecImam Industrial Park. Hoping Street. Donate Road, Dongfeng
Town, Zhongshan City, Guangdong, P.R. aline 528425