![]()
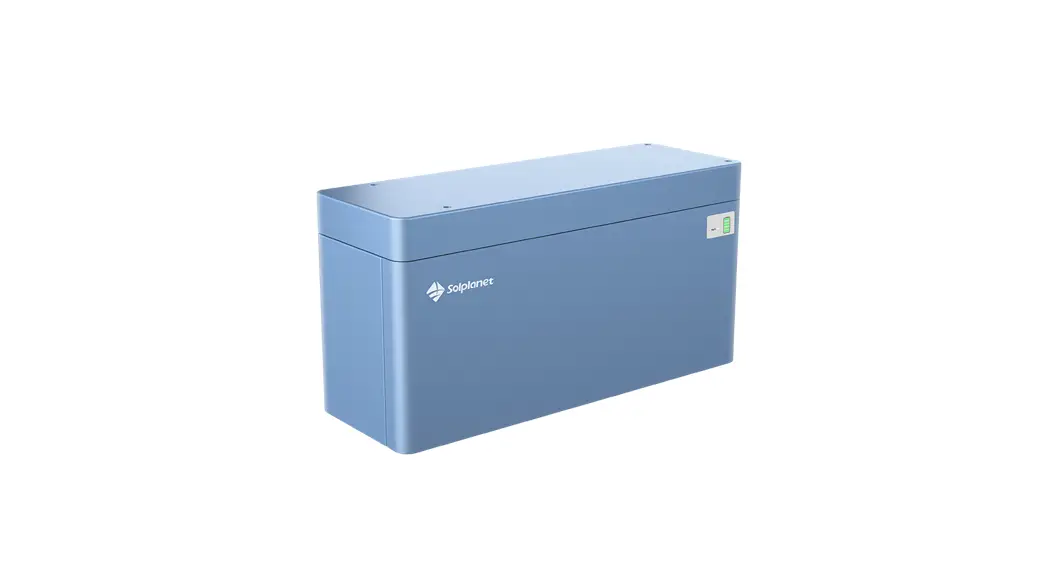
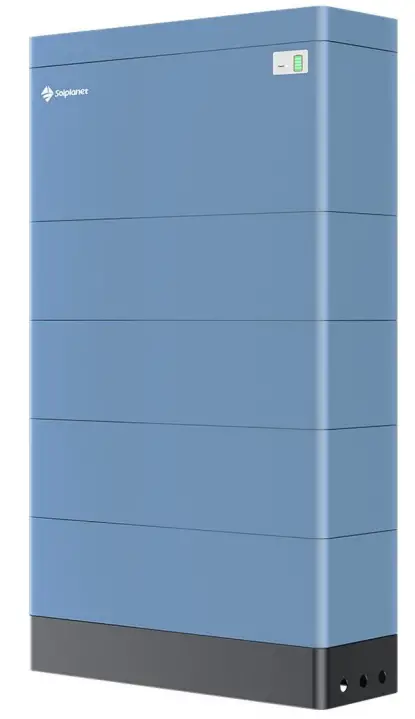 Ai-HB 2.56LG
Installation Manual Version:V01
Ai-HB 2.56LG High Voltage Lithium-Ion Phosphate Battery Storage System
For the latest High-Voltage Box installation documents in all supported languanges, visit: www.solplanet.net
This manual introduces Ai-HB 2.56LG from Solplanet. Ai-HB 2.56LG is a high-voltage lithium-ion phosphate battery storage system. Please read this manual before you install the battery and follow the instructions carefully during the installation process. In case of uncertainty, please contact Solplanet immediately for advice and clarification. All other trademarks contained in this document are the property of their respective owners and their use herein does not imply sponsorship or endorsement of their products or services. The unauthorized use of any trademark displayed in this document or on the product is strictly prohibited.
Safety Information
1.1 General Safety
Please carefully read the manual safety precautions and observe all the safety instructions on the equipment and in this document.
The “DANGER””WARNING”and “NOTICE” statements in this document do not cover all the safety instructions. They are only supplements to the safety instructions.
For user safety and utilization efficiency of this manual, a list of symbols is designed to alert people from danger. You must understand and comply with the emphasized information to avoid personal injury or property damage. Relative safety symbols have been listed below.![]() DANGER
DANGER
DANGER indicates a hazardous situation which, if not avoided,will result in serious injury and/or fire.![]() WARNING
WARNING
WARNING indicates a hazardous situation which, if not avoided,will result in property loss and/or void the
warranty.
NOTICE
NOTICE indicates normal situation which, if not avoided,will result in damage to the battery.
Follow local laws and regulations when installing, operating, or maintaining the equipment. The safety instructions in
this document are only supplements to local laws and regulations
1.2 Personal Safety
Personal Requirements
People who plan to install or maintain battery equipment must be trained, understand all necessary safety precautions,
and are able to correctly perform all operations.
Only qualified professionals or trained people are allowed to install, operate, and maintain the equipment.![]() DANGER
DANGER
- Do not place battery in an area accessible by children or pets.
- Do not touch the energized battery,the temperature of the battery enclosure may increase during operation.
- Do not touch the energized battery terminals.
- Do not stand on, lean on or sit on the battery.
1.3 Personal Safety
Symbols on Battery
The electrical symbols on the battery relate to electrical safety. Please make sure you have fully understood them before installation.
| Symbol | Explanation | |
| Electrical danger | Voltage exits when the battery is powered on. Only qualified personnel are allowed to operate. | |
| Earth connector | Earth connection. | |
| DC positive and negative connectors | To identify positive and negative connectors of DC power sources. | |
| CE mark | The product meets CE certification. | |
| WEEEtag | Batteries must not be disposed with general waste. It must be appropriately recycled in accordance with local regulations. | |
| Recycle | Batteries can be recycled, please refer to your local regulations regarding the correct disposal methods. |
Electrical Safety![]() DANGER
DANGER
- Before installation, ensure that the equipment is complete and intact, otherwise electric shocks or fire may occur.
- Do not connect or disconnect power cables when battery is powered on .
- Ensure the cables are terminated with the correct polarity. Failure to do so may result in electric arcs and cause may cause fire and/or personal injury.
- Do not connect the batteries in series or with batteries from different manufacturer´s.
- Do not connect the battery directly to an AC power source.
- Do connect the battery directly to the PV modules or PV array.
- Do not connect batteries in parallel.
- Do not connect the battery to a faulty and/or a non Solplanet inverter.
- Do not create short circuits across the positive and negative terminals.
- Ensure the grid is cut off and the battery is powered off before maintenance.
- Ensure the earth cable is securely connected before operation.
![]() WARNING
WARNING
- Recharge battery every six months.
- Recharge battery within 10 days after battery is fully discharged.
- Ensure battery cable is installed correctly.
- When the battery is being installed or repaired,ensure the battery is powered off and isolated. Using a multimeter check to ensure there is no voltage across the positive and negative terminals.
NOTICE
- Please use appropriately insulated tools for installation and maintenance.
- Please check the LED status when the battery is powered on.
- Please ensure the communication cable is connected correctly between the battery and the inverter.
- Please check for inverter alarms and the SOC reading once communication is established between the inverter and the battery.
Environment Safety![]() WARNING
WARNING
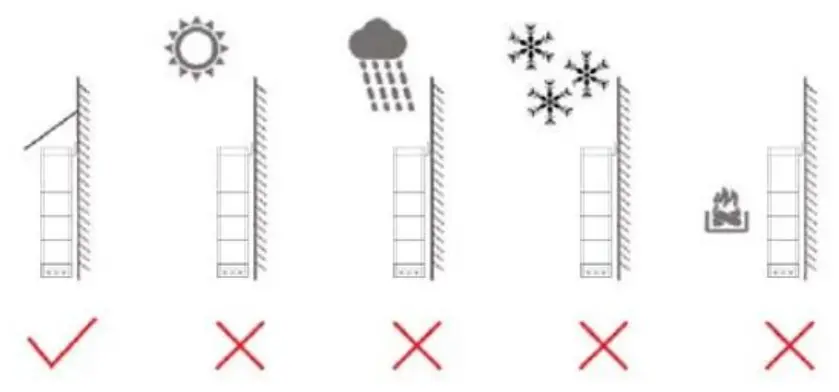
- Ensure the battery is installed in a dry and well-ventilated location.
- The installation location must be away from direct sunlight and rain.
- The installation location must be away from potential sources of fire.
- The installation location must be away from all sources of water.
- Do not expose the equipment to flammable gases and/or flammable liquids.
- Do not install the equipment in locations that contain flammable gases and/or flammable liquids.
- The operation and service life of the battery depends on the operating temperature. Operate the battery at a temperature equal to or better than the ambient temperature. The recommended operating temperature range is from 0°C to 30°C.
1.4 Transportation Safety![]() WARNING
WARNING
- The products have passed UN38.3 certification.
- The products have MSDS documents available, please contact Solplanet.
- The products belong to class 9 dangerous goods.
- Please protect the equipment packaging from the below situations.
- Being dampened by rain, snow, or submersed in water.
- Falling or mechanical impact.
- Being upside-down or tilted.
System Information
2.1 Product introduction
The Ai-HB 2.56LG is a high-voltage battery storage system based on lithium-iron phosphate technology. It is used to primarily store excess PV power that is generated by an inverter based PV system.
2.2 Specification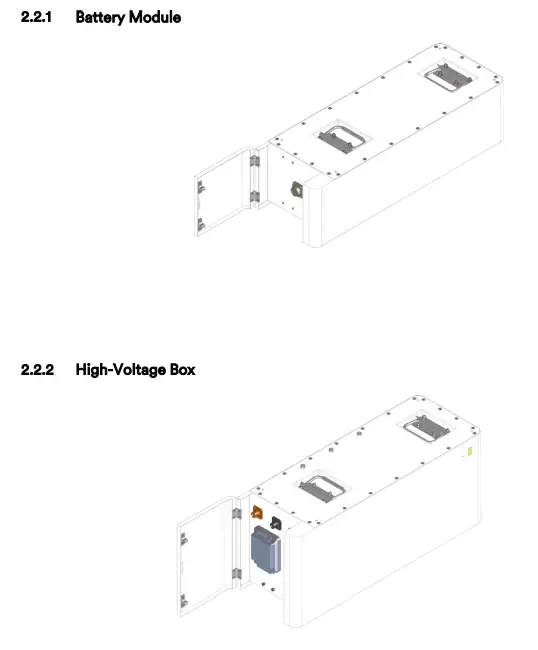
2.3 Connection Interface
2.3.1 Overview of the Connection Area

2.3.2 Start
(1) ON
For multiple battery Modules in series , long press (more than 5 seconds) Start button of the High-voltage box (which is connected to the inverter ) , the normal LED on the front panel will illuminate.L1 to L5 shows battery SOC , L6 shows battery status . The high-voltage box which contains the BMS will automatically encode and assign an ID to each battery module. The battery can then operate.
(2 )OFF
Press Start button of High-voltage box (Which connect with inverter) more than 5s , LED will flash in the front panel and then release the button,the principal battery module will shut down after all subordinate packs shut down (Sleep mode).
Tip:If the system does not work, keep the internal DC switch on the battery cluster closed
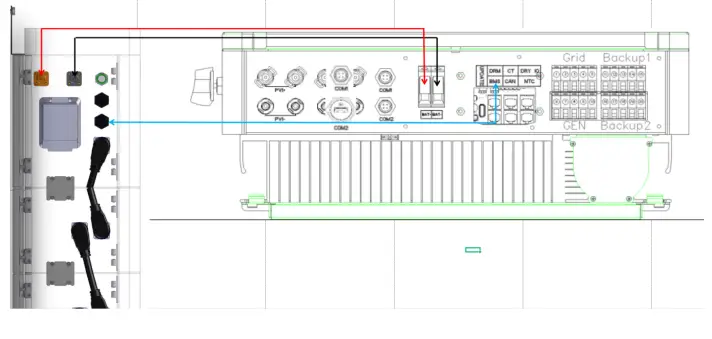
2.3.3 Link Com Port
The Link Com Port is the interface between the high-voltage box and the inverter. The inverter retrieves the battery data such as SOC, DOD, charge current via this connection.
CAN / RS485/RS232 Communication Terminal (RJ45 port), CAN/RS485 connect to inverter, follow CAN / RS485 protocol.
RS232 Communication follow RS232 protocol, for manufacturer or professional engineer to debug or service.
| PIN | Definition |
| Pin 1 | RS4 8 5 – B ( to PCS, reserved) |
| Pin 2 | RS4 8 5 – A ( to PCS, reserved) |
| Pin 3 | GND_ 2 |
| Pin 4 | CANH ( to PCS) |
| Pin 5 | CANL ( to PCS) |
| Pin 6 | RS2 32_TX |
| Pin 7 | RS2 32_RX |
| Pin 8 | RS232_GND |
2.3.4 Link Power/Link in/Link out
Link Power/Link in/Link out are used for the communication between battery piles. The battery pack close to the inverter as the master, others are the subordinate pack. 2.3.5 LED Indicator Definition

flash 1 – 0.25s light//3.75s off flash 2 – 0.5s light / 0.5s off flash 3 – 0.5s light / 1.5s off
LED Indicators Definitions
| Fault | Battery Level Indicator | |||||||
| Status | L6 | L5 | L4 | L3 | L2 | Ll | Descriptions | |
| Shut down | OFF | OFF | OFF | OFF | OFF | OFF | All OFF | |
| Standby | OFF | According to the battery level | Indicates Standby | |||||
| Charging | Normal | OFF | According to the battery level | The highest capacity indicator LED flashes(flash 2) others lighting | ||||
| Full Charged | OFF | Light | Light | Light | Light | Light | Turn to standby status when charger off | |
| Protection | Light | OFF | OFF | OFF | OFF | OFF | Stop charging | |
| Discharge | Normal | OFF | According to he battery level | |||||
| UVP | OFF | OFF | OFF | OFF | OFF | OFF | Stop charging | |
| Protection | Light | OFF | OFF | OFF | OFF | OFF | Stop discharge | |
| Fault | Light | OFF | OFF | OFF | OFF | OFF | Stop charging and Discharge | |
Installation
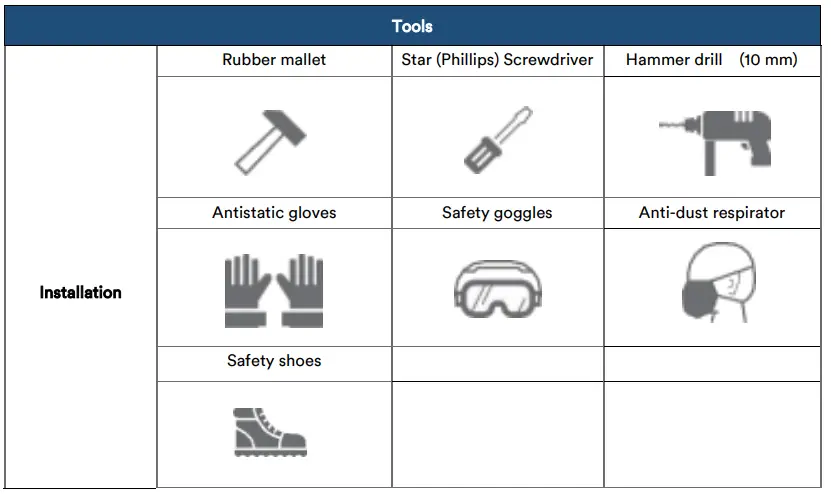
3.1 Tools
3.2 Checking deliverables
After unpacking the battery, check whether the delivered components are intact and complete.
| Packing List Of Battery Box | |||
| No. | Accessories | Quantity | Picture |
| 1 | Battery box 51.2V50Ah RAL5014 Pigeon blue | 1 | 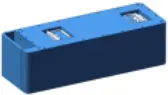 |
| 2 | Fixing plate V1.0_50245 t=2mm_stainless steel | 1 |  |
| 3 | Phillips hexagon screw with three combination bolt_M418mm_8.8 level 304 stainless steel | 4 | 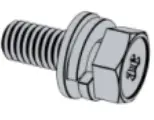 |
| 4 | Positioning pin ei 8’18.1_M5Iron_Black. | 4 |  |
| 5 | Moisture-proof desiccant(2g) | 2 |  |
| 6 | V1.0 M23 Self-locking 8-core 2_1_5_Double-pin 90°with cordlength 80t5mm | 1 |  |
| Packing List Of HV Box | |||
| No | Accessories | Quantity | Picture |
| RV Box RAL5014 Pigeon blue | 1 |  | |
| Heavy-duty leveling screw leg 50*M10*50mm | 4 | 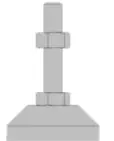 | |
| 3 | Base V1.0_600’210*90 t=2mm_SPCC_Panton e 433C_Fine sand lines | 1 | 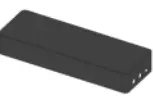 |
| 4 | Top cover V1.0_600’210’50 t=1.5mm_SPCC_RAL5 014 Pigeon blue_Fine sand lines | 1 |  |
| 5 | L-shape wall hanging brace V1.0_215’62292 t=2mm_SPCC_RAL501 4 Pigeon blue_Fine sand lines | 1 |  |
| 50’25*2mm stainless steel | 1 |  | |
| 7 | SPM-100_Black clamping ring plug rod | 4 |  |
| 8 | Positioning pin 0 8•18.1_M5lron_Black | 4 | |
| 9 | M23 Self-locking 8-core_2+1+5_4-hole flange socket with gasket_12-foot short plug+N/25 self-locking plug nut | 1 | 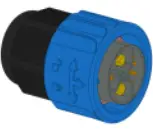 |
| 10 | Wall plug_MB*60mm_8.81evel 304 stainless steel | 3 | 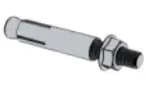 |
| 11 | Phillips hexagon screw with three combination bott_M6*12mm_8.8 level 304 stainless steel | 4 |  |
| 12 | Phillips slotted pan head .screws Iv15*20mm_8.8 level 304 stainless steel | 4 |  |
| 13 | Phillips hexagon screw with three combination bolt_Mr8mm_8.8 level 304 stainless steel | 4 |  |
| 14 | V1.0_PSRP6XC25XA 1 red 8AWG extra soft silicone .wire_length 000mm_EV10- 12 | 1 |  |
| 15 | V1.0 PSRP6XA25XA 1 black 8AWG extra soft siliconewire_length 2000mm_EV10- 12 | 1 |  |
| 16 | V1.0_RNB1.25-6_1 yellow-green two-color grounding wire BVR2.5_RNB1.25-6(2 ND | 1 |  |
| 17 | Vi .0 RJ45 Crystal plug elbow waterproof UL_CAT5E FTP_24AWG_L Blacic=2000mm RJ4-5 crystal plug | 2 |  |
| 18 | Moisture-proof desiccant(2g) | 2 | |
3.3 Installation requirement
- Install the battery indoors in a location that complies with your local regulations.
- Place battery in a secure location that restricts access to children and animals.
- Do not place the battery near any sources of heat.
- Do not expose the battery to moisture or liquids.
- Do not expose the battery to direct sunlight.
- Only mount battery on fire resistant building materials.
- Do not install batteries on flammable objects and/or building materials.
- Do not expose the battery to electrical sparks.
3.4 Installation
Step 1
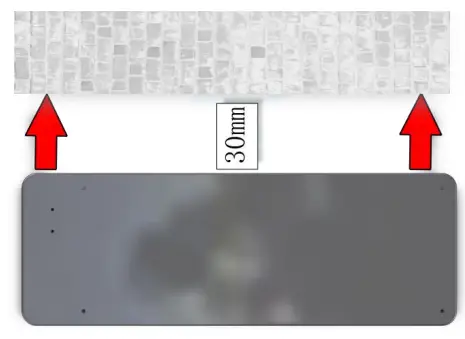
Placed the base against the wall, the distance between the base and the wall is 30mm as followed.
Step 2
Twist the dowel pins into the base and place the first battery modules on top of the base.
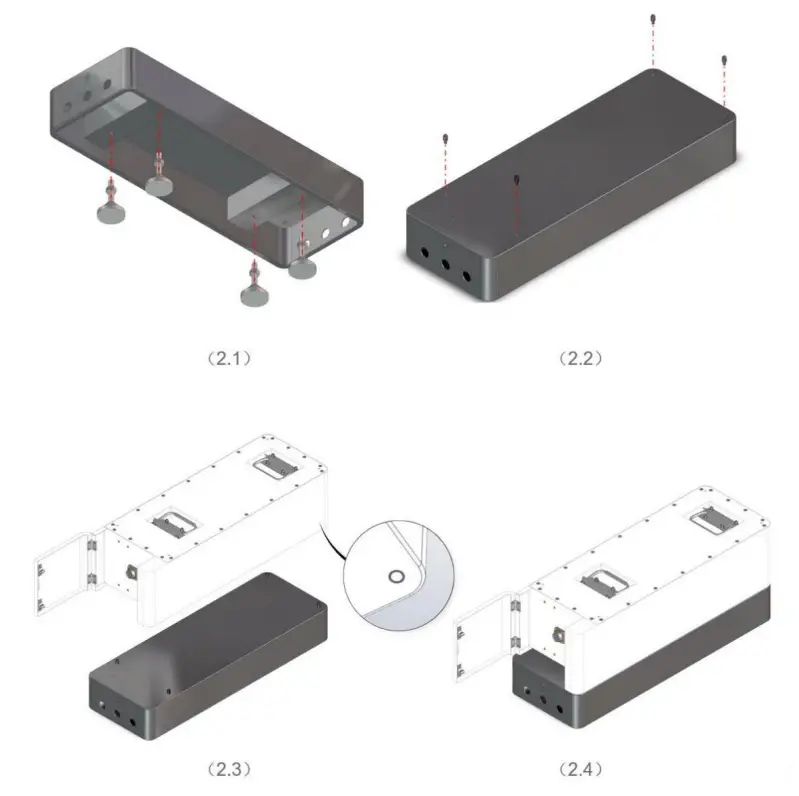
Step 3
Secure the battery module to the base with the L- bracket.
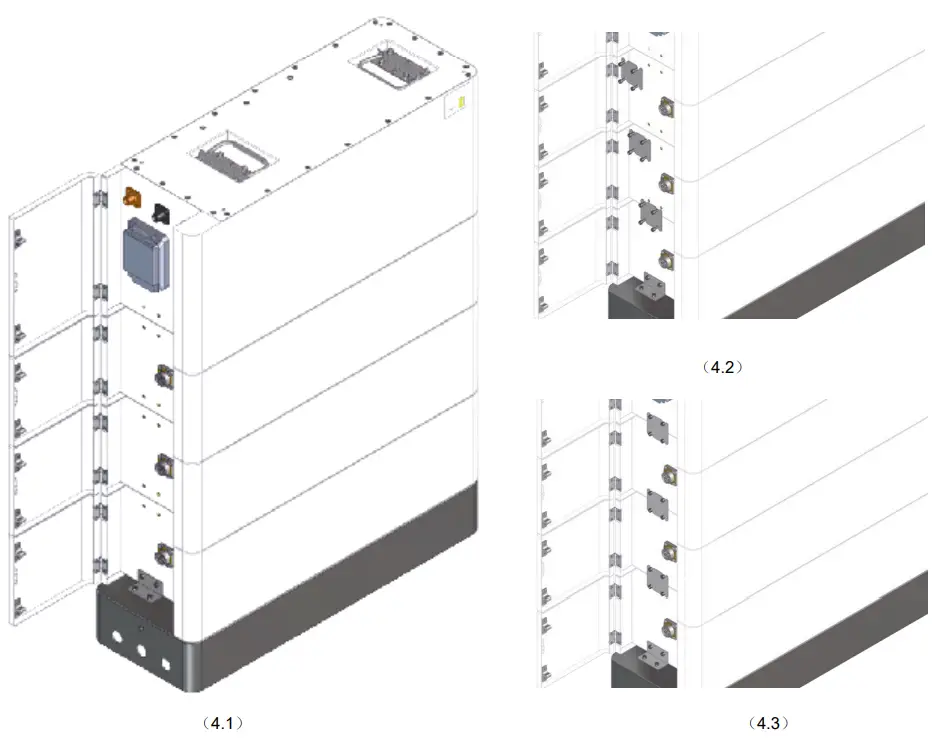
Step 4
Place the next battery module on top of the first battery module and secure the battery modules with the support plate. Repeat this step until all battery modules have been installed. The number of battey modules installed may vary to what is shown in the manual. Place the high-voltage box on top of the last module and secure it using the support plate. bracket.
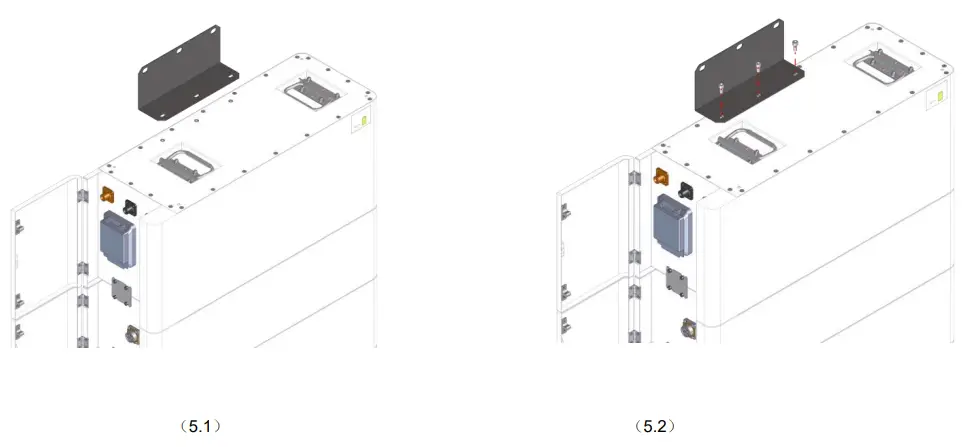
Step 5
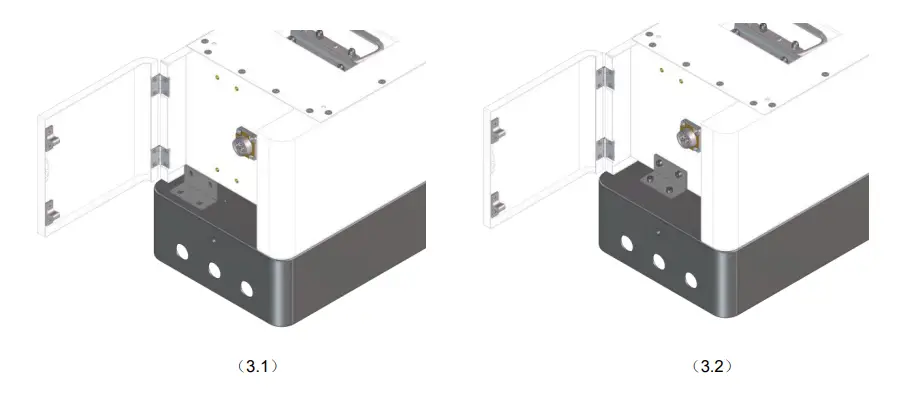
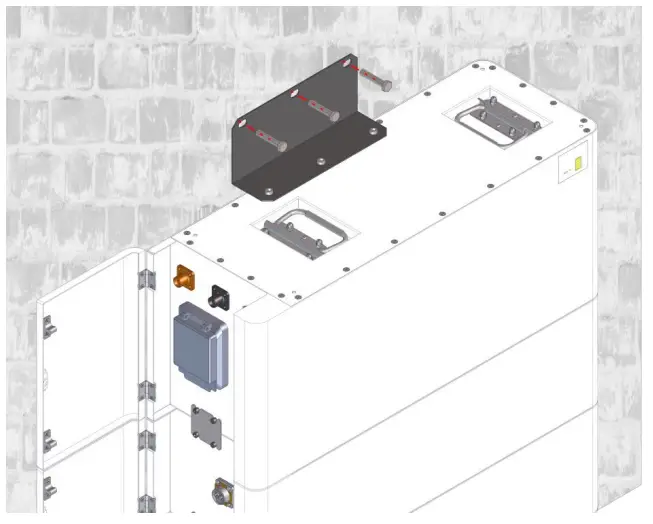
Attached the support bracket onto the high voltage box as shown in the image.
Step 6
Drill three holes of in the wall and insert three screw plugs.Insert three screws to secure the support bracket to the wall.
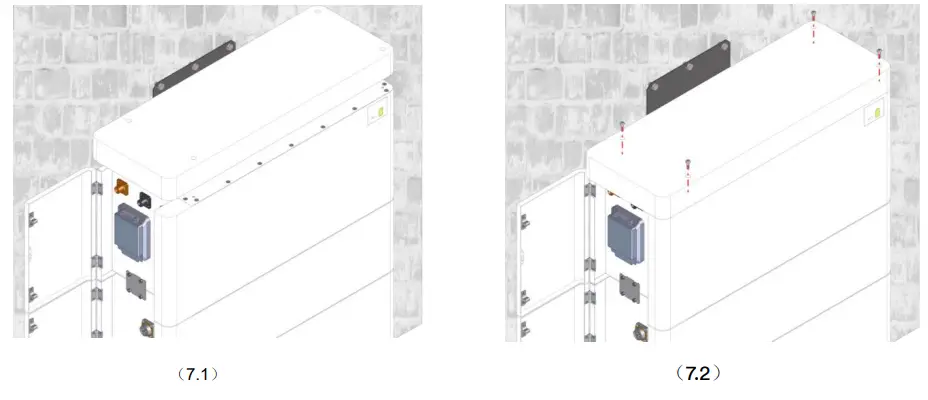
Step 7
Secure the lid of the high voltage box with the provided screws.
Step 8
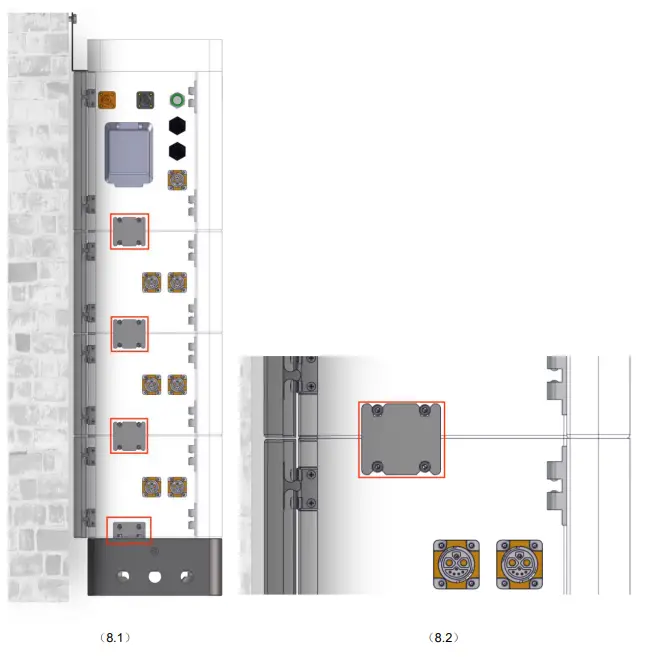
Connect the small metal plates between each modules as follows.
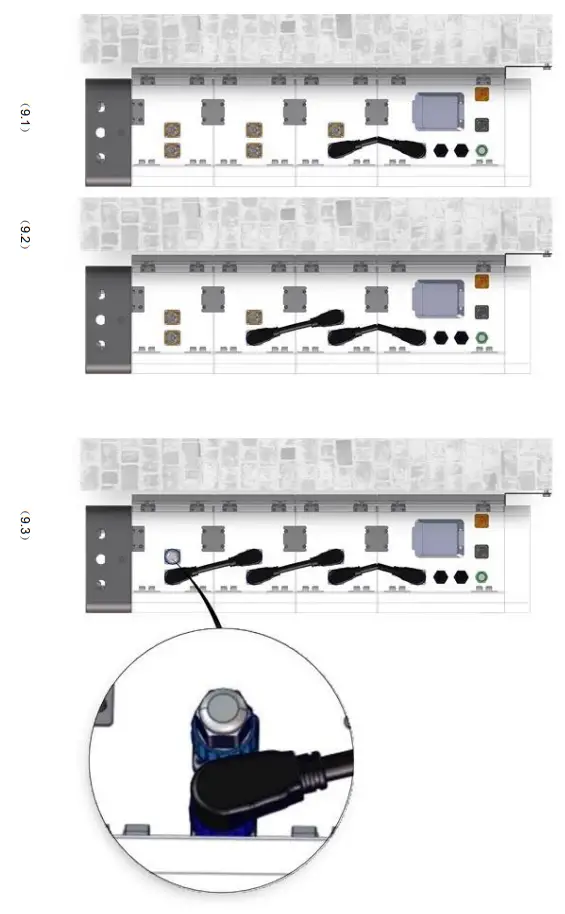
- Step 9
Connect the power cables between the battery modules and the high-voltage box as shown.
- Connect the power In section 2 this was shown as P+ and P-, please use consistent labels for all components.
- Connect the first High-voltage box Link Com Terminal to the inverter BMS port for communication beween inverter and battery.

![]() DANGER
DANGER
Ensure power cables are installed with the correct polarity. A dangerous situation may arise if the polarities are reversed.![]() DANGER
DANGER
Do not create a short circuit between the positive and negative terminals of the battery. Ensure the polarity is correct during installation.![]() CAUTION
CAUTION
Incorrect communication cable connection will cause the battery system to operate in unexpected ways whichmay lead to system failure.
Commissioning Procedure
After all the cable (power and communication) connections are completed, please ensure the following:
- Ensure the DC switch on the inverter is OFF
- Ensure the AC switch that is connected to the grid and EPS output (if used) of the inverter is OFF
- Ensure the DC switch on the HV box is OFF
For commissioning we recommend the following: - Turn the DC switch on the HV box ON
- Refer to section 2.3.2 Start for turning on the battery
- Wait until the HV box LED´s illuminate
- Wait until the inverter LED´s illuminate
- Turn the DC switch on the inverter ON
- Set-up the battery and the inverter using the Solplanet App, refer to the inverter and Solplanet app manual
- Turn the AC switch that is connected to the grid and EPS output (if used) of the inverter ON
Maintenance
Recharge Requirements During Normal Storage
Battery should be stored in an environment with temperature range between -10°C~+45°C and maintained regularly according to following table with 0.5C(51A) current till 100% SOC after long storage time.
| Storage Environment emperature | Relative Humidity of Storage Environment | Storage Time | SOC |
| Below – 10℃ | / | prohibit | / |
| – 10~25℃ | 5%~70% | ≤ 12 months | SOC≥100% |
| 25~45℃ | 5%~70% | ≤12 months | SOC≥100% |
| Above 45℃ | / | prohibit | / |
Recharge Requirements When Over Discharged Over discharged (90%DOD) battery should be recharged according to following table, otherwise over discharged battery will be damaged.
| Storage Environment Temperature | Storage Time | Note |
| – 10~25℃ | ≤ 15 days | Battery Pack disconnected from PCS |
| 25~35℃ | ≤7 days | |
| – 10~45℃ | < 12 hours | Battery Pack connected to PCS |


