
![]() DR-DF100B Mini Drone for Kids
DR-DF100B Mini Drone for Kids
User Manual
One Key Return
Press and hold the ![]() button, then the drone will return along the parallel direction where the tail of the drone pointed when the drone took off the last time. The LEDs on the drone keep flashing when the drone is returning.
button, then the drone will return along the parallel direction where the tail of the drone pointed when the drone took off the last time. The LEDs on the drone keep flashing when the drone is returning.
Press and hold the ![]() button again or move the Right Control Stick forward to cancel this mode, or the drone will keep flying back.
button again or move the Right Control Stick forward to cancel this mode, or the drone will keep flying back. 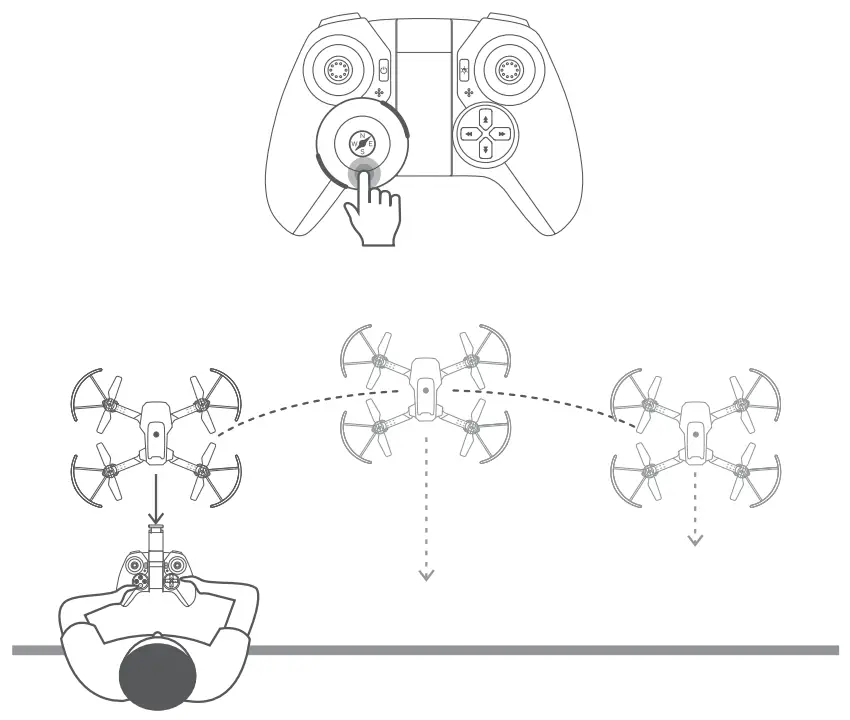
High-Speed Rotation
Press the ![]() button to make the drone rotate at high speed. Press the button again or move the Right Control Stick to any direction to exit this mode.
button to make the drone rotate at high speed. Press the button again or move the Right Control Stick to any direction to exit this mode. 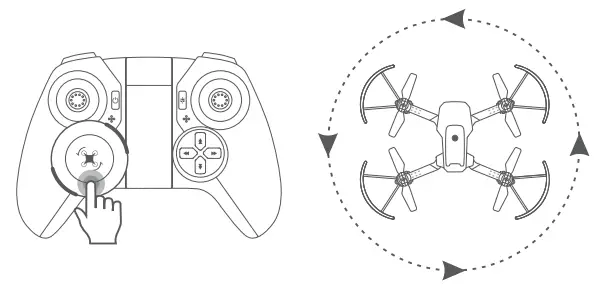
![]() Note: This function can’t be activated when the battery of the drone is low.
Note: This function can’t be activated when the battery of the drone is low.
Circle Fly
In the case of barrier-free within 5m radius around the drone, press the a button to fly the drone in ![]() circle.
circle.
Press the button again or move the Right Control Stick to any direction to exit this mode.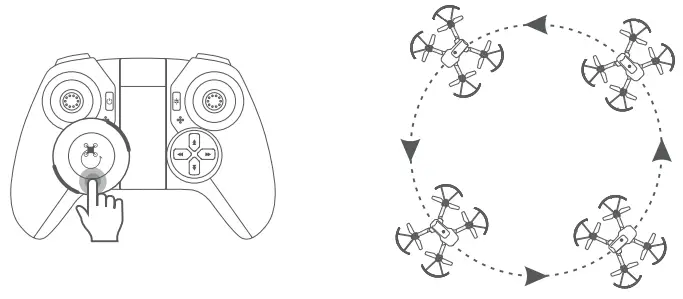
![]() Note: This function can’t be activated when the battery of the drone is low.
Note: This function can’t be activated when the battery of the drone is low.
Photo/Video
Please connect the drone to your mobile device first (refer to Page 19), then go to the App Dynalog Casper to check your photos and videos. Press the ![]() button to take a photo.
button to take a photo.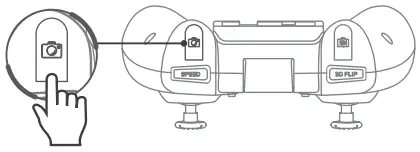 Press the
 ![]() button to start recording a video; press it again to stop recording and save the video.
button to start recording a video; press it again to stop recording and save the video.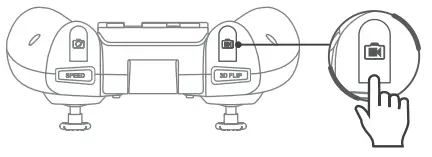
Altitude Hold/Hover
This is one of the default settings of the drone. When you release the Left Control Stick after an ascent/descent action, the drone will hover at the current flight height For a stable flight, press the trim buttons to adjust accordingly.
Emergency Stop
Press and hold the ![]() button, then the drone will stop in the airand fall.
button, then the drone will stop in the airand fall.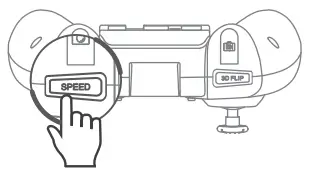
![]() Note: It’s NOT recommended to use this function during normal flight for landing, which may result in serious damage for your drone.
Note: It’s NOT recommended to use this function during normal flight for landing, which may result in serious damage for your drone.
App Operation Guide
1. App Downloading and Installation
Download and install Dynalog Casper into your mobile device from App Store'”/Google Play’ or by scanning the QR code below.
App’s Name: Dynalog Casper App’s
QR Codes:
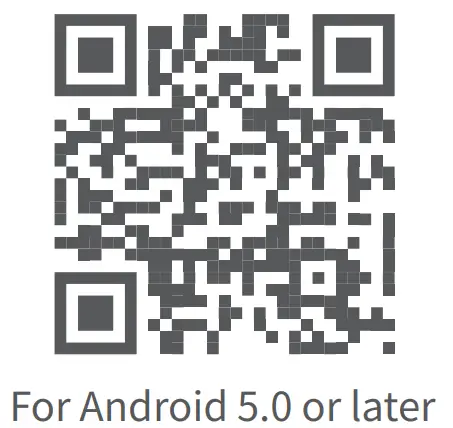 | 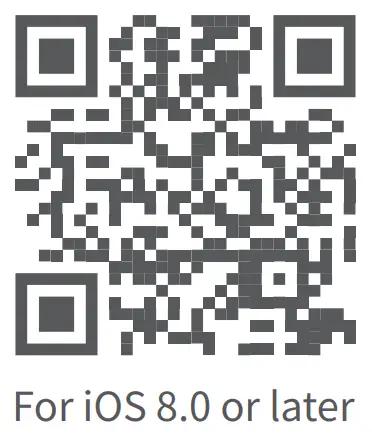 |
| https://qrs.ly/tsdtxcg | https://qrs.ly/rrdtxcn |
Name of the Drone’s WiFi:
DR-DF100B-B*** or DR-DF100B-W***![]() Note: Google Play™ is a trademark of Google Inc., and App Store™ is a trademark of Apple Inc.
Note: Google Play™ is a trademark of Google Inc., and App Store™ is a trademark of Apple Inc.
2. Link the App with the Drone
Step 1: Press and hold the ON/OFF button till the drone’s LEDs start flashing to turn on the drone. Then place the drone on a flat surface with the head forward.
Step 2: Go to the Wifi settings of your mobile device and connect to the drone’s Wifi(please refer to the”Name of Drone’s WWI” mentioned above). Tip: The drone’s Wifi has no Internet access. To prevent your mobile device from automatically switching to cellular data, it’s recommended that you turn off cellular data when connecting to the drone’s Wifi.
Step 3: Open Dynalog CasperApp and tap Start to enter the App. Tap ![]() to turn on the App, and the LEDs on the drone turn to solid on at a successful connection.
to turn on the App, and the LEDs on the drone turn to solid on at a successful connection. 
Step 4: Tap ![]() to calibrate the drone.
to calibrate the drone.![]() Notes:
Notes:
- If the drone’s Wifi is not listed or the App doesn’t show the preview image, please restart the drone and search the Wifi of the drone again.
- Make sure the drone’s Wifi is only connected to one device.
- Please allow the App Dynalog Casper to access the necessary permissions of your mobile device.
- Tapp
 to check the recorded videos and captures photos.
3. Function Overview of the App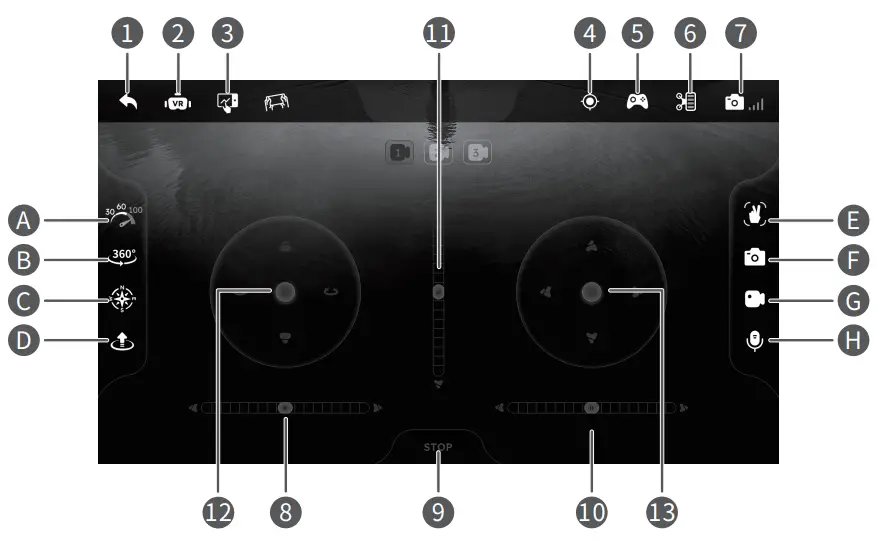
| 1. Back 2. VR Mode 3. Trajectory Flight 4. Calibrate 5. Virtual Remote ON/OFF 6. Drone Battery Status 7. Wifi Signal | 8. Trim clockwise/anticlockwise 9. Emergency Stop 10. Trim leftward/rightward 11. Trim forward/backward 12. Turn Left/Turn Right/ Ascend/Descend 13.Forward/Backward/ Leftward/Rightward |
| A Speed Switch B 360° Flip C Headless Mode D One Key Take-off/Landing | E Gestures for Photo/Video F Photo G Video H Voice Control |
![]() VR Mode:
VR Mode:
VR device (not included) is required to activate VR Mode.![]() Trajectory Flight:
Trajectory Flight:
Tap ![]() to activate this mode. Draw a path in the frame on the right side of the screen and the drone will fly following the path. Tap
to activate this mode. Draw a path in the frame on the right side of the screen and the drone will fly following the path. Tap ![]() to modify flight distance and time accordingly. Tap
to modify flight distance and time accordingly. Tap ![]() again to exit this mode.
again to exit this mode.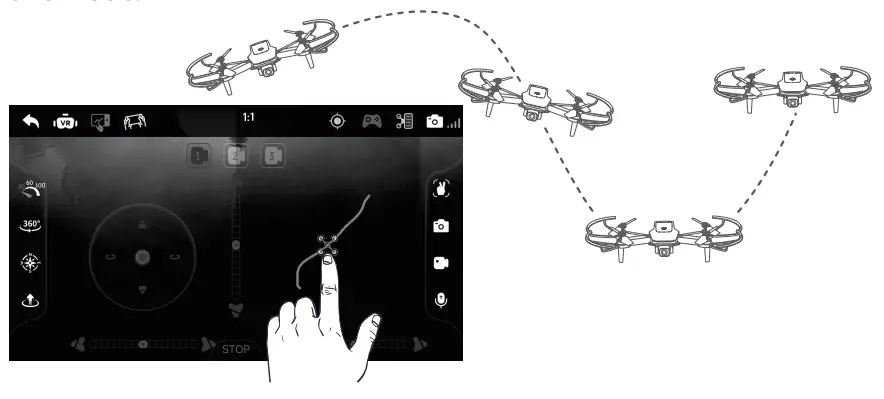
![]() Calibrate:
Calibrate:
Tap ![]() to calibrate the drone directly.
to calibrate the drone directly.
If the LEDs of the drone flash quickly after a sudden impact, please tap ![]() to calibrate the drone.
to calibrate the drone.![]() Battery Status:
Battery Status:
Check the battery status of the drone.![]() Wifi Signal:
Wifi Signal:
Check the Wifi status of the drone to avoid losing control. When it drops to 2 or 1 bar, please do not fly the drone far away.![]() Gestures for Photo/Video:
Gestures for Photo/Video:
Tap ![]() to activate this function. Stand in front of the camera at a distance of 1.5-3 meters, face the camera and make a
to activate this function. Stand in front of the camera at a distance of 1.5-3 meters, face the camera and make a ![]() gesture with your right hand to take a photo, a
gesture with your right hand to take a photo, a ![]() gesture to start or stop recording a video.
gesture to start or stop recording a video.![]() Photo:
Photo:
Tap ![]() once to take a photo. Please allow Dynalog Casper to access the photos on your phone before taking a photo.
once to take a photo. Please allow Dynalog Casper to access the photos on your phone before taking a photo.![]() Video:
Video:
Tap ![]() once to start recording, tap again to end and save the video. The interval time between recording and saving a video should be over 3 seconds.
once to start recording, tap again to end and save the video. The interval time between recording and saving a video should be over 3 seconds.![]() Voice Control:
Voice Control:
Press and hold CI to speak the following voice commands: Take off, landing, forward, backward, left, right. Please allow Dynalog Casper to access the microphone on your phone before speaking the voice command.![]() STOP
STOP
Stop: Tap STOP and a pop-up window will show to confirm if you would like to stop the drone.![]() Note: It’s NOT recommended to use this function during normal flight for landing, which may result in serious damage for your drone.
Note: It’s NOT recommended to use this function during normal flight for landing, which may result in serious damage for your drone.
Camera Views:![]() : View from the drone’s camera
: View from the drone’s camera![]() : View from your mobile device’s rear camera
: View from your mobile device’s rear camera![]() :View from your mobile device’s front camera
:View from your mobile device’s front camera![]() Note: To fly the drone with the remote and see the image through your mobile device in the App operation mode, tap
Note: To fly the drone with the remote and see the image through your mobile device in the App operation mode, tap ![]() to OFF, then restart the remote and wait for the automatic pairing.
to OFF, then restart the remote and wait for the automatic pairing.
TROUBLESHOOTING GUIDE
Ql. How to avoid losing my drone?
- Make sure the distance between the drone and the remote/App is effective. We recommend flying the drone on windless days. If you insist on flying the drone in the wind, we recommend flying at HIGH speed.
- It’s essential to calibrate the drone before flying.
Q2. Drone LEDs do not light up.
- Ensure that you’ve turned on the drone.
- Replace or charge the drone battery.
- Make sure that you did not press the button
 on the remote to trun off the drone’s LED indicators.
Q3. Drone LEDs keep flashing, but the drone never responds to any command from the remote.
- Restart the drone and remote.
- Replace or charge the drone battery.
- Make sure the batteries of the remote have enough power.
Q4. The flight is not stable.
- Return the drone and restart to do a flight calibration as instructed.
- Make the flight trimming accordingly.
- Fly the drone when the weather is good.
Q5. The response from the drone to the control is not sensitive.
- Make sure the distance between the drone and the remote is effective.
- The remote signal may be interfered, please land the drone and go to another place to fly it.
Q6. Connection between the drone and the App is frequently lost.
- Make sure the distance between the drone and the mobile device is effective.
- Make sure your mobile device is not connected to another network.
Q7. The App doesn’t respond to voice commands.
- Ensure the drone App has access to the microphone function of your mobile device.
Q8. Some of the functions don’t work in the App.
- Make sure the switch for the App GO is ON.
Q9. The drone will fly beyond the control range.
- Activate the Headless Mode, then move the Right Control Stick to fly the drone back.
SPECIFICATIONS
| USB Cable | |
| Input | 5V |
| Output | 5V |
| Rated Power | 2.5W |
FCC Caution:
Any Changes or modifications not expressly approved by the party responsible for compliance could void the users authority to operate the equipment. This device complies with part 15 of the FCC Rules. Operation is subject to the following two conditions: (1) This device may not cause harmful interference, and (2) this device must accept any interference received, including interference that may cause undesired operation.
Note: This equipment has been tested and found to comply with the limits for a Class B digital device, pursuant to part 15 of the FCC Rules. These limits are designed to provide reasonable protection against harmful interference in a residential installation. This equipment generates, uses and can radiate radio frequency energy and, if not installed and used in accordance with the instructions, may cause harmful interference to radio communications. However, there is no guarantee that interference will not occur in a particular installation. If this equipment does cause harmful interference to radio or television reception, which can be determined by turning the equipment off and on, the user is encouraged to try to correct the interference by one or more of the following measures:
— Reorient or relocate the receiving antenna.
— Increase the separation between the equipment and receiver.
— Connect the equipment into an outlet on a circuit different from that to which the receiver is connected.
— Consult the dealer or an experienced radio/TV technician for help.
For Remote:
This equipment complieswith FCC radiation exposure limits set forth for an uncontrolled environment. For R/C QUADCOPTER This equipment complieswith FCC radiation exposure limits set forth for an uncontrolled environment. This equipment should be installed and operated with minimum distance 20cm
![]()


