
MEDIATEK Genio 350 Evaluation Kit
Version History
| Version | Date | Author | Description |
| 1.0 | 2022-04-12 | MTK | First Release |
Packing list
| In box items | Qt’y | Note | |
| 1 | Genio 350 EVK main board | 1 | |
| 2 | AP1302 ISP board | 2 | Camera Board |
| 3 | AR0430 IAS sensor module | 2 | Camera Module |
| 4 | Mini-SAS cable | 2 | Camera Cable |
| 5 | TFT LCM MODULE 7 LCM+TP | 1 | |
| 6 | FPC SSBE5 i350EVK | 1 | LCM FPC Cable |
| 7 | 12V AC adaptor | 1 | |
| 8 | AC cable | 1 | |
| 9 | Plastic Pillars | 4 | |
| 10 | Screw | 4 | |
Genio 350 EVK Document

http://download.mediatek.com/aiot/G350QSG
Genio 350-EVK System Setup
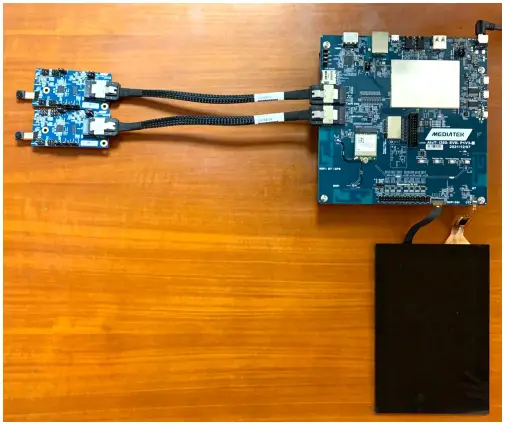
Please refer below pictures for entire assembled Genio 350 EVK, the entire peripherals include:
- LCM Module with Touch Panel * 1 sets
- Camera double board * 2 sets
- Connectivity module with 2 antennas * 1 sets
- Power Adapter * 1 sets

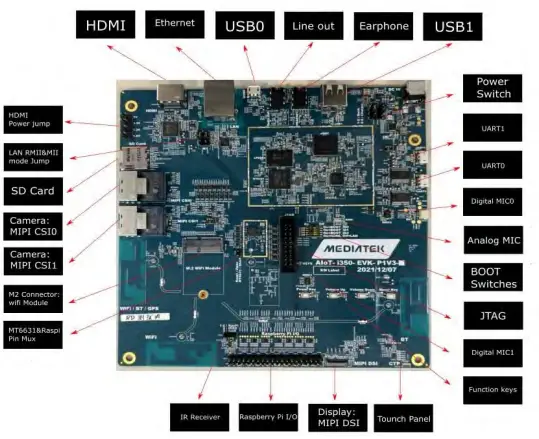
Genio 350-EVK Board overview
Please refer below picture for IO function overview of EVK.
Camera board installation
Install procedure:
Insert Mini-SAS Cable into Genio 350 EVK mainboard and Camera board corresponded connector. Connector locations can be referred to the marks in the picture as below.
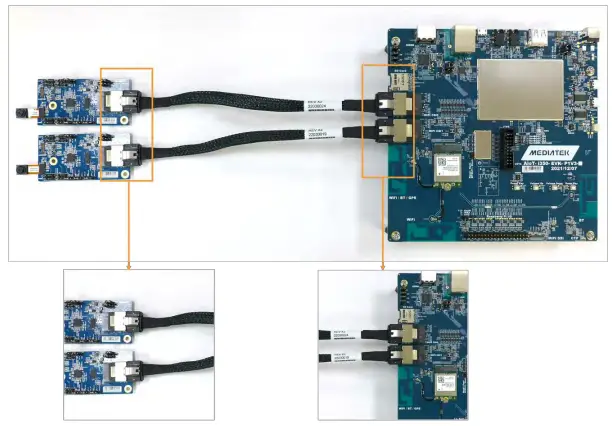
Mini-SAS cable is tightened down well, you should hear “click” sound.
DC Jack installation
Install procedure:
Plug Adapter into DC Jack connector.
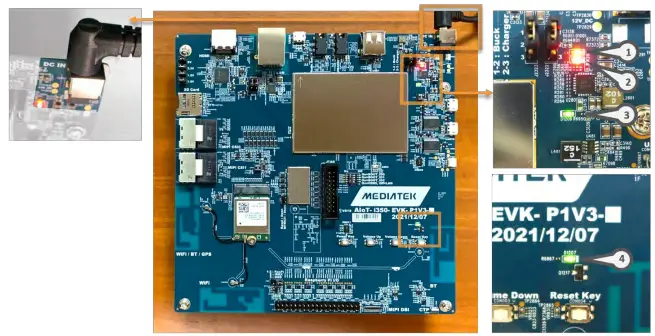
After the EVK power is turned on, pay attention to the LED indicator is lighted on. In normal condition, there are total 4 LED indicators will light, please refer the marks of above picture.
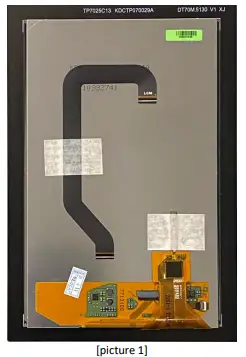
LCM/Touch Panel installation (1/2)
Install procedure:
Step1: Remove paper tape of the LCM/Touch Panel to release 2 FPC cables, as picture 1.
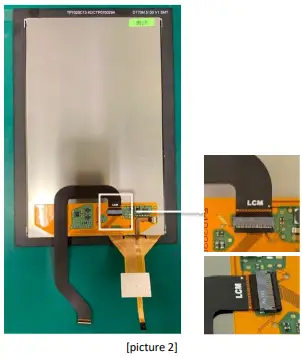
Step2: Insert the LCM FPC cable one terminal into the FPC connector of the LCM/Touch Panel, as picture 2. After cable inserted, the FPC connector must be pressed down firmly.
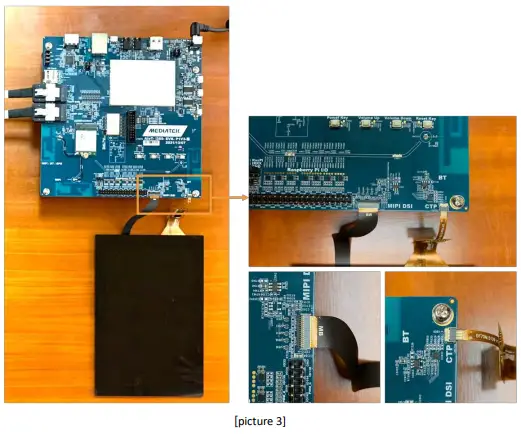
LCM/Touch panel installation (2/2)
Step3: Insert Touch Panel cable and LCM FPC cable into the FPC connector of the mainboard, please refer picture 3 for cable position and direction. After cable inserted, the FPC connector must be pressed down firmly.
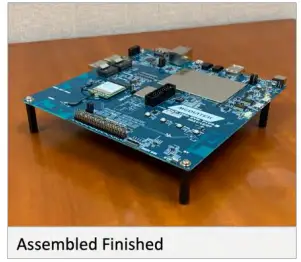
Bracing frame installation
Install procedure:
Step1: Insert the screws into the screw holes on the front of the Genio 350EVK mainboard. Step2: Tightening the Plastic Pillars from the back of the mainboard.

Please refer below picture for bracing frame assembled EVK
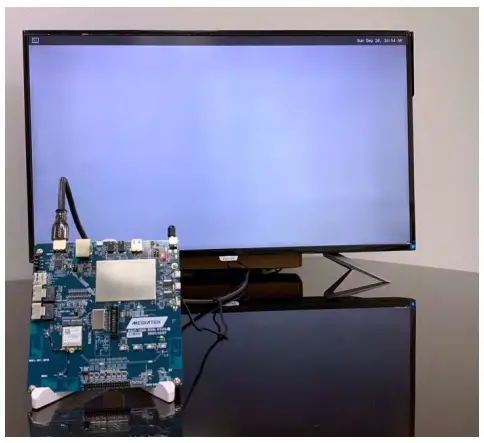
How to Power Up The System
After assembled all peripherals, now you can power on the EVK and start evaluation.
Step1: Connect UART0 to the computer via an USB cable. (If you want to see the logs.) Step2: Plug in the DC 12V power adapter.
Step3: You will see the screen is shown on HDMI display and some trace logs in UART0.
MediaTek Proprietary and Confidential
© 2022 MediaTek Inc. All rights reserved.
Unauthorized reproduction or disclosure of this document, in whole or in part, is strictly prohibited.


