![]() TL120 RGB Tube Light
TL120 RGB Tube Light
Instruction Manual
Names of Parts

| 1. Body | 7. MOE |
| 2. Power Switch | 8. DIM Button |
| 3. DC Power Jack | 9 FN Button |
| 4. Control Panel | 10. + Button |
| 5. Wireless Button | 11. – Button |
| 6. Cold | 12. DMX Input Port |
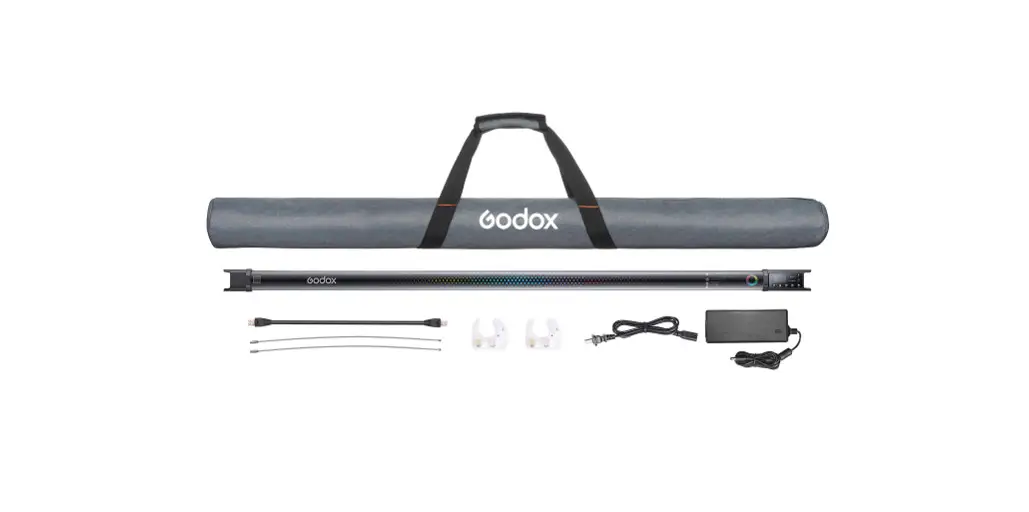
What’s in the Box
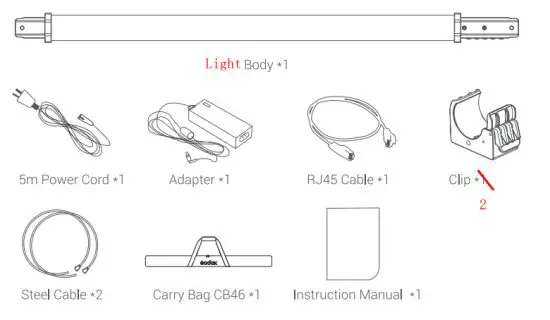
Four-light kit:

PdfEditor 4.0.0.14 Testversion – https://www.pixelplanet.com/de/pdfeditor/
Optional Accessories
Adapter TL-Al 20, DC Power Cable, Grid TL-G120, Two-light Bracket TL-B2. Four-light Bracket IL-B4. Eight-light Bracket TL-B8
Battery Management
- Power Supply
The built-in lithium battery *1444mcan offer about 2.5 hours of lighting in 100% brightness once got fully charged. The light can also be put into usage by connecting the adapter to a power source. - Charge
The whole charging takes about 2.5 hours. The charge grids indicator will be blinking in charging while displaying full grids once got fully charged.
Operation
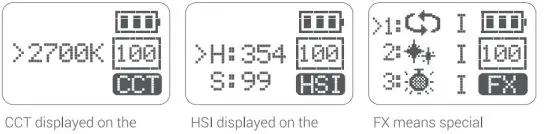
- Power Switch Use the power switch to control the on or off of the RGB tube light. Then, the current information will be displayed on the LCD panel.

- Mode Selection: tC2 Mode/RGB Mode/Special Effects Mode Press MOD button to switch different modes:

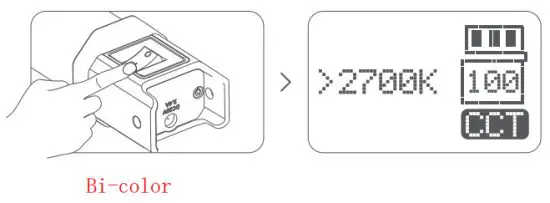
Bicolor
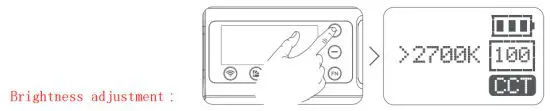
- Color temperature adjustment: press the +aor – button to adjust the color temperature from 2700K to 6500K.

- Press the DIM button, then, press the “+” or “-” button to adjust the brightness from 0 to 100.

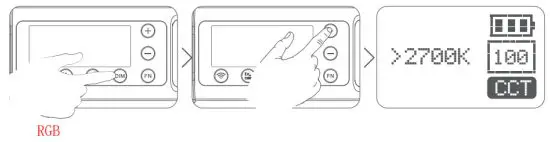
RGB Mode
- Adjust hue H: press the FN Button and H is selected. Then, press the “+” or –“button to adjust the hue from 0 to 360°.

- Adjust saturation 5: press the FN Button dial and S is selected. Then, press the “+” or “-“button to adjust the saturation from 0 to 100.

- Special Effects Modes (39)
1. Press the “+” or –“button to choose different special effects categories from 1 to 14. And the modes will display circularly by turning the selector dial. 2. After choosing the current mode, press down the FN Button from I, II, and III. And the modes will display circularly when keeping pressing the FN Button.
 3. There’re 39 kinds of situational special effects modes which are divided into 14 categories for your choice.


 2. After choosing the current mode, press down the FN Button from I, II, and III. And the modes will display circularly when keeping pressing the FN Button.
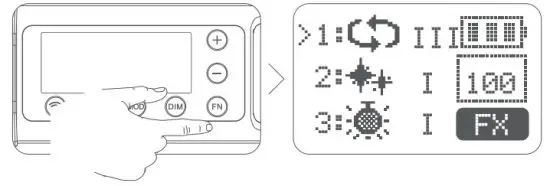 3. There’re 39 kinds of situational special effects modes which are divided into 14 categories for your choice.
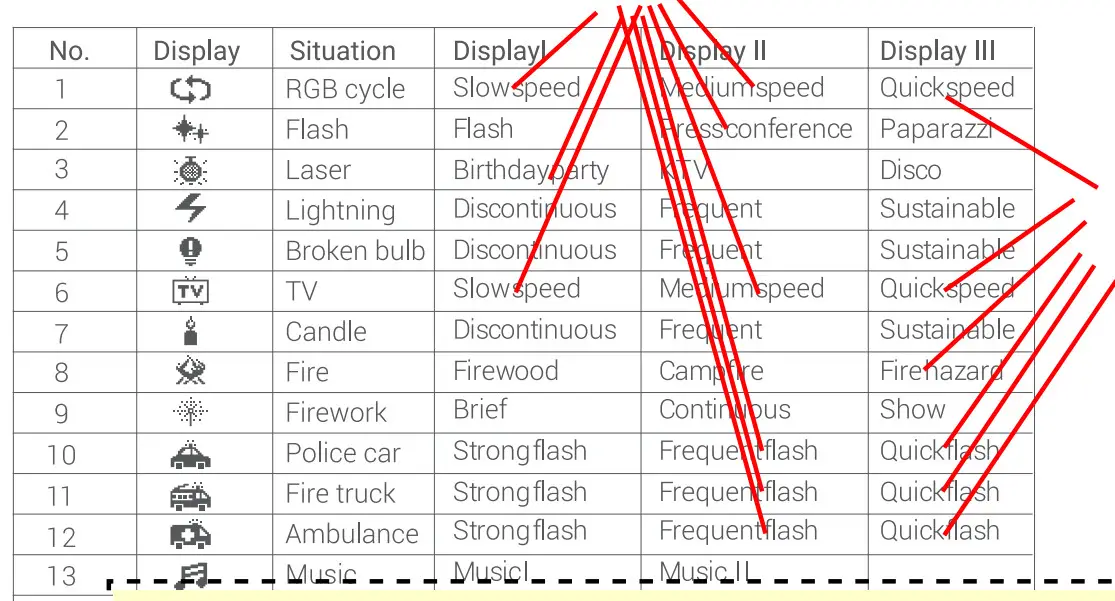
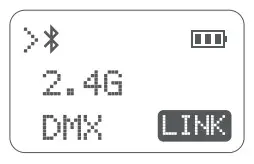
Control Modes Selectiontluetooth/2.4G Wireless Remote Control/DMXControl
Press the wireless button firstly, then, press the “+”or “-“button to choose the control mode. After choosing the mode, press the FN or wireless button to enter the relevant setting interface. Press the wireless button or another button to exit the setting interface.
 Bluetooth Setting
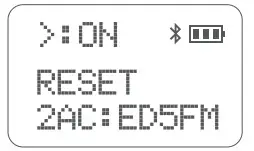
- Bluetooth switch: press the FN button to select Bluetooth. Then, press the “+” or “-” button to switch on or off. If”ON” is displayed, the Bluetooth is on and “OFF” means off. When the Bluetooth is on, the indicator will turn blue.

- Initialize the Bluetooth password: press the FN button to select RESET. Then, press the “+” or “-” button to reset the Bluetooth.
- Bluetooth Number: MAC: xxxx is the Bluetooth number of this light.

2.4G Wireless Setting
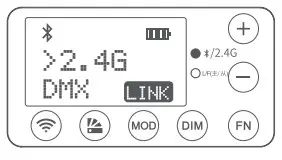 With a 2.4G wireless system, the TL120 RGB tube light has remote grouping and control functions. It is recommended to purchase RC-R9 remote control(optional) to achieve wireless control. Up to 6 groups of LED lights can be controlled. 32 channels and 99IDs are available with strong anti-interference capability.
- 2.4G Wireless switch: press the FN button to select the wireless icon. Then, press the “+” or “-“button to switch on or off 2.4G wireless. “ON” means 2.4G wireless is turned on(wireless indicator is lightened green), “OFF” means turned off(wireless indicator is put off).

- Group setting: press the FN button to select GR. Then, press the “+” or “-” button to select 6 groups from A to F.
- ID setting: press the FN button to select ID. Then, press the “+” or “-“button to select 99 IDs from 1 to 99.
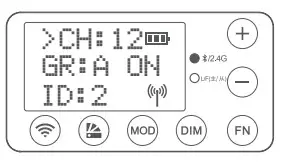
Note: When opening the Bluetooth and 2.4G simultaneously, the indicator will turn to cyan. Please make LED light’s channel, group and ID to the same as remote controls. The RGB tube light can only receive wireless signals in powered-on status.
DMX Control Modes
- Set the light to FOLLOW mode and press the FN button to choose ADD.
- Press the ‘+” or button to set 512 ADDs from 001 to 512;#41eirr the indicator will display blue.
- After set ADD, connect one end of the DMX cable to the DMX output port of the control center and the other end to the DMX input port of the light.
- The statistics sent by the control center are as follows:
| Mode/ Chand (ADD) | CCT | HSI | RGBW | FX | Filters |
| n | 0-52 | 52-103 | 104-155 | 156-207 | 208-255 |
| n+1 | 0-100 0-103% Brightness Adjustment | 0-100 0-100% Brightness Adjustment | 0-100 0-100% Brightness Adjustment | 0-100 0-100% Brightness Adjustment | 0-103 0-100% Brightness Adjustment |
| n+2 | 0-255 Cola, Temperature Selection | 0-180 H=180-2 Huge Selection | 0-255 Red Light | 0-17: RGB Cycle 18-35:Flash 36-53.Disco 54-71 Lightning 72-89.Broken Bulb 90-107.TV 108-125:Candle 126-143.Fire 144-161:Firework 162-179:Police Car 180-197:Fire Truck 198- 215Ambulance 216-233,Music 234-255BOS | 0-127: R-GEL 128-255:L-GEL |
| n+3 | 0-100 Saturation Setting | 0-255 Green Light | 0-85: Light Effect 1 86-171: Light Effect II 172-255: Light Effect III | 0-255(L•GEL/R-GEL) Colored Paper Switch (Every 13 values refers to one colored Pape() | |
| n+4 | 0-755 Blue Light | ||||
| n+5 | 0-255 White Light |
DMX LEAD and FOLLOW mode
- Set one of the LED lights to LEAD mode.
- Set other lights to FOLLOW modes.
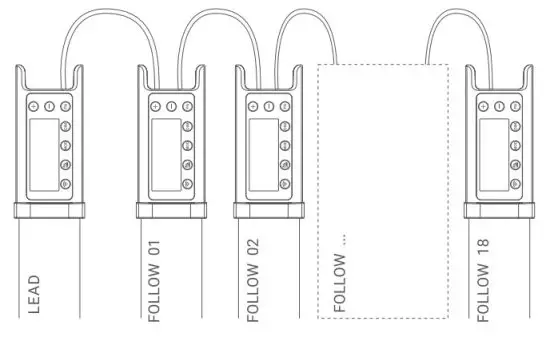
Note: When using LEAD and FOLLOW modes through the DMX port, the number of lights in FOLLOW modes cannot be over 18.
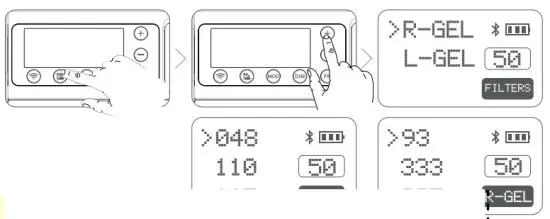
Color Gel Setting
Press the color gel button to enter the interface. Then, press the “+” or “-” button to choose R-Gel or L-Gel group. Then, press the FN to enter the color gel group to select the corresponding color gel. There is both 20 color gel in R-Gel and L-Gel groups for your choice, 40 kinds in total.
Connect with Smartphone APP
- As there is a QR code on the light body of TL120, please scan the QR code directly to download the “GodoxLight” smartphone APP(which can be used by Android and the Apple systems).
 For more smartphone APP operations, please open the “help” in APP to gain detailed guidance.
 - Set the Bluetooth of TL120 to ON.
 http://www.guteleben.com/html/dl_app/c_ble/GodoxLight/index.html
 For more smartphone APP operations, please open the “help” in APP to gain detailed guidance.
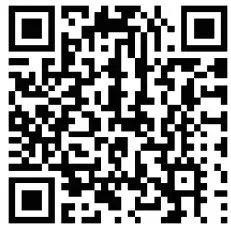
Illuminance Testing Data
| CCT | Illumination Unit | lm | 2m | 3m |
| 2800K | lux | 659 | 202 | 101 |
| fc | 61.2 | 18.8 | 9.4 | |
| 3200K | lux | 610 | 187 | 93.3 |
| fc | 56.7 | 17. | 8.7 | |
| 4300K | lux | 666 | 205 | 102 |
| fc | 61.9 | 19 | 10. | |
| 5600K | lux | 685 | 210 | 104 |
| fc | 63.7 | 20. | 10. | |
| 6500K | lux | 769 | 234 | 117 |
| fc | 71.3 | 21.7 | 10.9 |
Technical Data
| LED Light | TL120 |
| Built-in Lithium Battery | 1 4.4V/5200mAh/74.88Wh |
| Adapter | Output 20V/4. 8A |
| Power | 30W |
| Channel | 32 |
| Group | 6(ABCDEF) |
| Color Temperature Range | 27C0K-6500K |
| Light Brightness Range | 0% -1 00% |
| RGB Color Gamut | 0 – 360° |
| CRI (z) | 96 |
| TLCI (=) | 98 |
| Duration(continuous output in 100% full power in 2700K) | 150 minutes |
| Control Method | SmartphoneAPP/2.4G wireless/DMX control |
| Bluetooth Wireless Control Distance | ≈30m |
| 2.4G Wireless Control Distance | ≈50rn(with optional RC-R9 remote control) |
| Operation Temperature | -10~40°C |
| Dimension | 48*1170mm |
| Net Weight | 1.27kg |
| BT Frequency Range | 2402.0-2480.0MHz |
| Max. Transmitting Power | 5dbm |
* Product design and specifications are subject to change without notice
Maintenance
This product, except consumables e.g. adapter and adapter cable, is supported with a one-year warranty.
Avoid sudden impacts and the product should be dedusted regularly.
Maintenance of the flash must be performed by our authorized maintenance department which can provide original accessories.
Unauthorized service will void the warranty. If the product had failures or was wetted, do not use it until it is repaired by professionals.
Changes made to the specifications or designs may not be reflected in this manual.
FCC Statement
This device complies with part 15 of the FCC Rules. Operation is subject to the following two conditions: (1) This device may not cause harmful interference, and (2) this device must accept any interference received, including interference that may cause undesired operation.
Any changes or modifications not expressly approved by the party responsible for compliance could void the user’s authority to operate the equipment.
Note: This equipment has been tested and found to comply with the limits for a Class B digital device, pursuant to part 15 of the FCC Rules. These limits are designed to provide reasonable protection against harmful interference in a residential installation. This equipment generates uses and can radiate radio frequency energy and, if not installed and used in accordance with the instructions, may cause harmful interference to radio communications. However, there is no guarantee that interference will not occur in a particular installation. If this equipment does cause harmful interference to radio or television reception, which can be determined by turning the equipment off and on, the user is encouraged to try to correct the interference by one or more of the following measures:
- Reorient or relocate the receiving antenna.
- Increase the separation between the equipment and receiver.
- Connect the equipment into an outlet on a circuit different from that to which the receiver is connected.
- Consult the dealer or an experienced radio/TV technician for help.
The device has been evaluated to meet general RF exposure requirements. The device can be used in portable exposure conditions without restriction.
Declaration of Conformity:
GODOX Photo Equipment Co, Ltd. hereby declares that This equipment is in compliance with the essential requirements and other relevant provisions of EU Directive 2014/53/ EU. They are allowed to be used in all EU member states. For more information on DoC, Please click this weblink: http://www.godox.com/DOC/Godox_TL120_00C.pdf.
Applicable Products
Warranty Dear customers, as this warranty card is an important certificate to apply for our maintenance service, please fill in the following form in coordination with the seller and safe-keep it. Thank you!
| Product Information | Model | Product Code Number |
| Customer Information | Name | Contact Number |
| Address | ||
| Seller Information | Name | |
| Contact Number | ||
| Address | ||
| Date of Sale | ||
| Note: | ||
Note: This form shall be sealed by the seller.
Applicable Product
The document applies to the products listed on the Product Maintenance Information (see below for further information). Other products or accessories (e.g. promotional items, giveaways, additional accessories attached, etc.) are not included in this warranty scope.
Warranty Period
The warranty period of products and accessories is implemented according to the relevant Product Maintenance Information. The warranty period is calculated from the
How to Get the Maintenance Service
If maintenance service is needed, you can directly contact the product distributor or authorized service institutions. You can also contact the Godox after-sale service call and we will offer you service. When applying for maintenance service, you should provide a valid warranty card. If you cannot provide a valid warranty card, we may offer you maintenance service once confirmed that the product or accessory is involved in the maintenance scope, but that shall not be considered as our obligation.
Inapplicable Cases
The guarantee and service offered by this document are not applicable in the following cases: (1). The product or accessory has expired its warranty period; (4). Breakage or damage caused by inappropriate usage, maintenance, or preservation, such as improper packing, improper usage, improper plugging in/out external equipment, falling off or squeezing by an external force, contacting or exposure to the improper temperature, solvent, acid, base, flooding, and damp environments, etc;(3). Breakage or damage caused by the non-authorized institution or staff in the process of installation, maintenance, alteration, addition, and detachment; (4). The original identifying information of product or accessory is modified, alternated, or removed; (5). No valid warranty card; 5). Breakage or damage caused by using illegally authorized, non-standard, or non-public released software; (7). Breakage or damage caused by force majeure or accident; (8). Breakage or damage that could not be attributed to the product itself. Once met these situations above, you should seek solutions from the related responsible parties and Godox assumes no responsibility. The damage caused by parts, accessories, and software beyond the warranty period or scope is not included in our maintenance scope. The normal discoloration, abrasion, and consumption are not the breakages within the maintenance scope.
PdfEditor 4.0.0.14 Testversion – https://www.pixelplanet.com/de/pdfeditor/


