
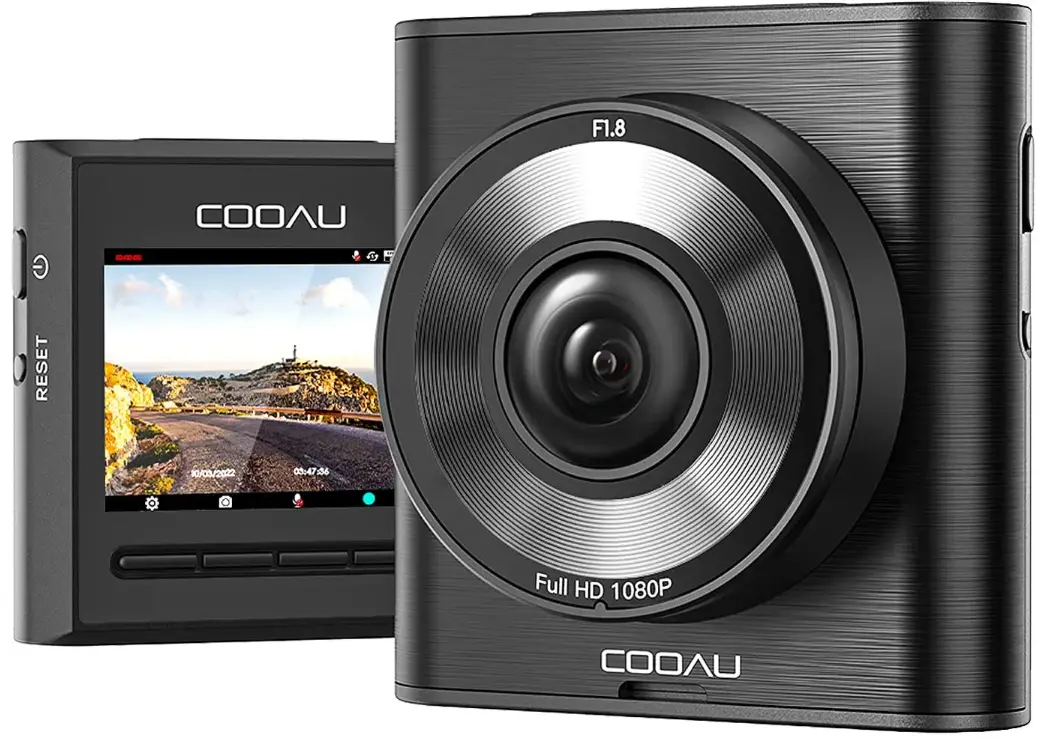
COOAU M53 Mini Dash Cam
Introduction
Thank you for purchasing COOAU products. To ensure your experience, please read this instruction manual carefully before use. Please keep it for your convenience. If you have any questions or comments, please contact us via our official email address [email protected]. The following are the precautions for using the dash cam:
- This product only supports a charger with an input voltage of 5\/, otherwise, it may cause damage to the machine.
- The memory card must be installed correctly to ensure proper function and video recording.
- When inserting or pulling out the SD card, please do so with the device off, otherwise, it may easily cause abnormalities or damage to the device.
- Video files may be lost or damaged if the Micro SD card is removed during recording.
- The camera must be in normal video recording working condition to record video files.
- When using outdoors, please avoid high temperatures and direct sunlight.
- The camera must not be disassembled, hit or put into the fire.
- Video files may be lost or damaged if the camera is dropped or involved in a collision.
- Please use our original accessories and do not disassemble the product at will.
- Please observe the relevant nominal laws and registration and do not use this product for any illegal purpose!
- If you need more support or encounter any product problems, please contact our after-sales email: [email protected].
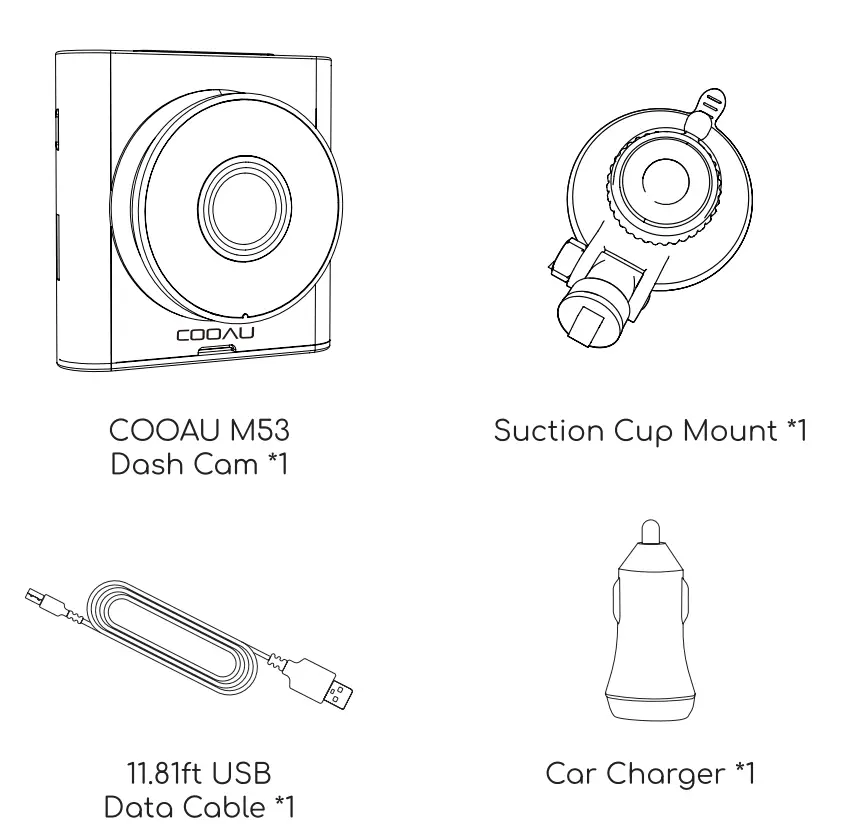
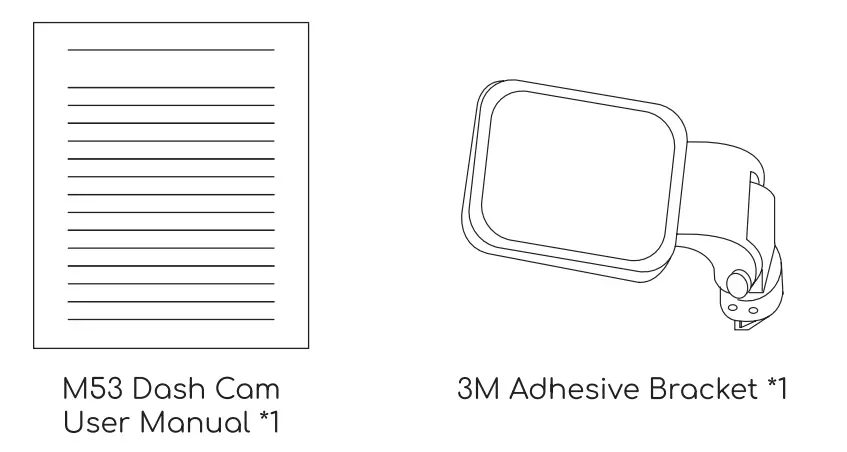
Packing List
Tips
Super Capacitor
- COOAU M53 dash cam adopts a built-in supercapacitor, which is only used for emergency file backup and settin9 saving, it has a longer service life than ordinary batteries.
- Once the power is disconnected, the supercapacitor will not provide constant power to support the normal operation of the camera.
- So if you cut off the power, the camera will immediately power off, which is a normal union even connect the camera to the power supply, the camera will automatically turn on and start recording
Indicator Lights
- The blue light is the power indicator and will remain on when the cam is turned on. The light will turn off when When the blue light is flashing, it means the machine is recording.
First Boot
- If you turn on the camera for the first time or every time you restore the cam to default settings, it will Jump directly into the settings, namely language setting and time setting.
- If the micro SD card is not inserted, you will be reminded to insert an SD card.
- If the card is inserted, the cam will jump to an interface that prompts you to format the micro SD card.
Use of SD Card
- Please format the Micro SD card to exFAT or FAT32 in Computer and then format it on dosh cam before use.
- We recommend thot you format the memory card every two weeks to maintain good read/write performance, but if you don’t do this, the dash com con still record as normal
Auto Overwrite
- The camera will automatically overwrite the locked files once the “emergency file” folder reaches 40% of the card capacity. Please regularly transfer important videos to your PC or other devices.
Intelligent Voice Reminder
This camera supports the following intelligent voice reminder functions.
- Please insert the memory cord.
- Please format the memory cord.
- Please replace the memory card.
- The emergency file will be full, please delete locked files or save them to another device.
- You have been driving for 1/2/4 hour(s), please take a rest.
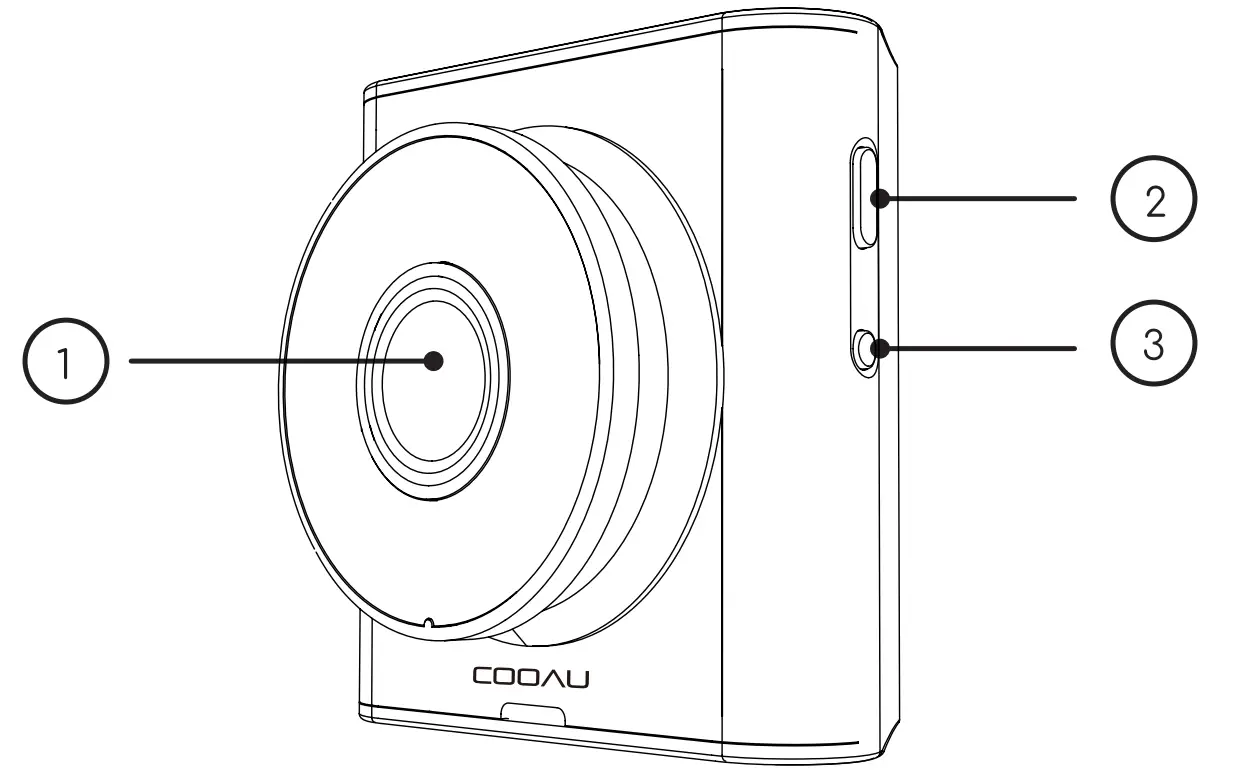
Camera Overview
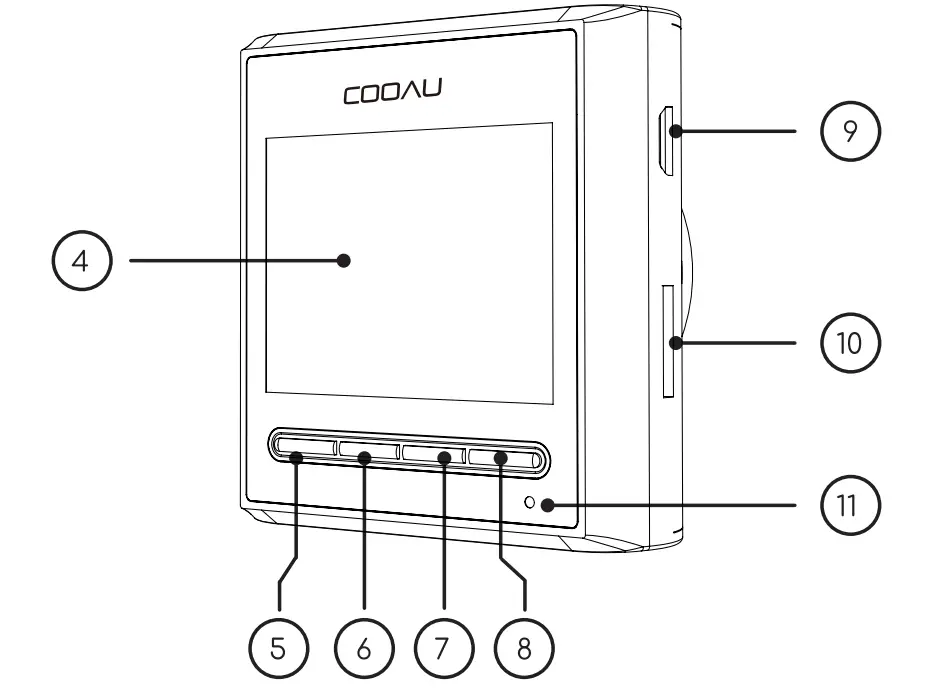
| Name | Description |
| Front Camero Lens | Front comero for capturing the rood ahead. |
| Long press to switch power on/off. | |
| RESET | Short press to restart. |
| IPS Screen | 2-inch IPS screen |
|
5 |
Emergency/ Menu/ Bock Button | 1. Under Video Mode: • Recording: Short press it to monuolly lock files to reserve important videos during recording; • No Recording: Short press it to go to menu. 2. Under Menu Mode: •Short press it to return to the previous menu. |
|
Photograph | 1. Under Video Mode: • Short press it to enter photo mode; 2. Under Photo Mode: • Short press it to start photographing; • Under Novigotion Menu: Short press it to select upward or leftward; 3. While Viewing Files: • Short press it to delete files. | |
| 6 | Mode/Up/ Left/Delete | |
| Button | ||
|
7 |
Microphone/ Down Button | 1. In video/photo mode: Short press it to select to turn the microphone on or off. 2. Under navigation menu: short press it to select down. |
|
8 |
OK/Pause/ Ploy/Video Mode Button | 1. Confirmation options. 2. In video mode: Stop/start video recording. 3. When viewing o file: Ploy/ pause the video. 4. In photo mode: Press it to return to video mode. |
| Micro USB Charging Port | USB port for charging or transferring files. |
SD Card Slat: Insert or remove the SD card
Indicator:
- Flashing Blue: Recording;
- Steady Blue: Charging.
Screen Overview
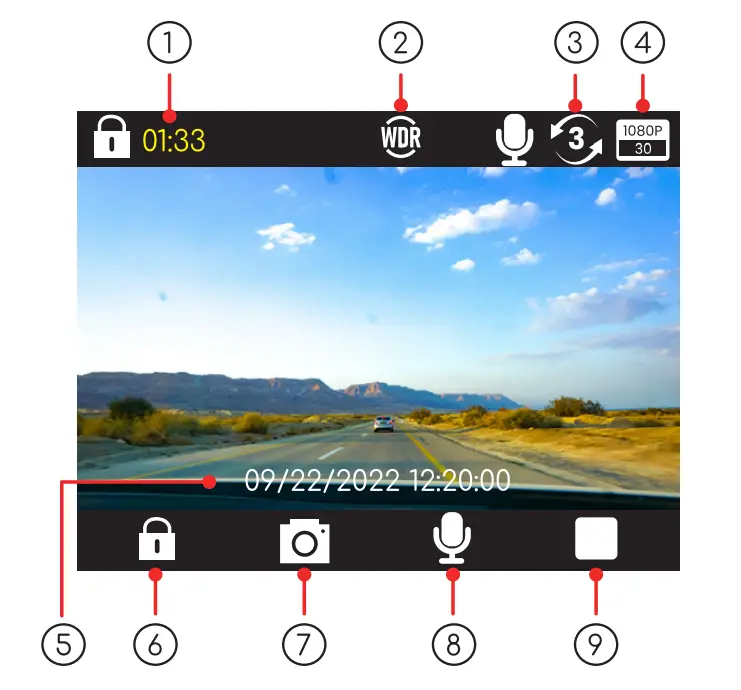
Recording Mode
- Recording Time
- WDR
- Loop Recording Interval
- Video Resolution
- Current Date/ Time
- Emergency Recording
- Snapshot
- Sound Recording is ON/OFF
- Pause Recording
No Recording Mode 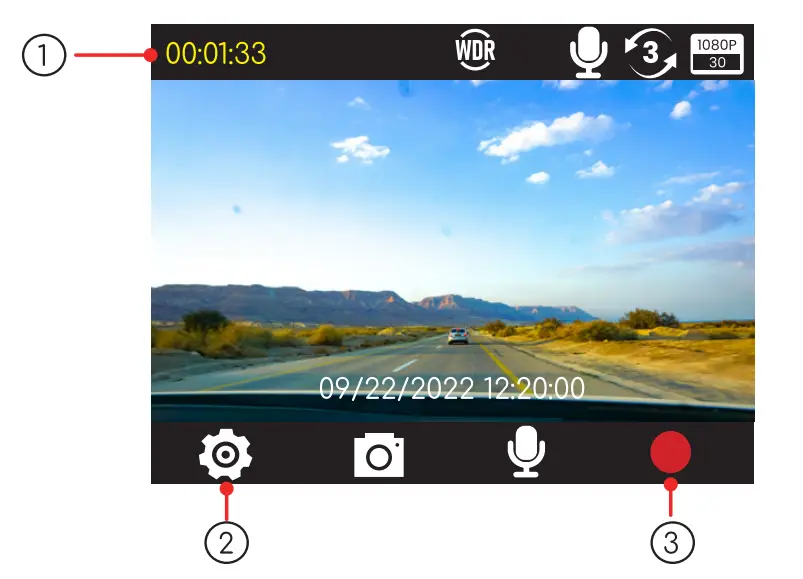
- Remaining recording time of the card
- Menu
- Recording Video
Menu Mode 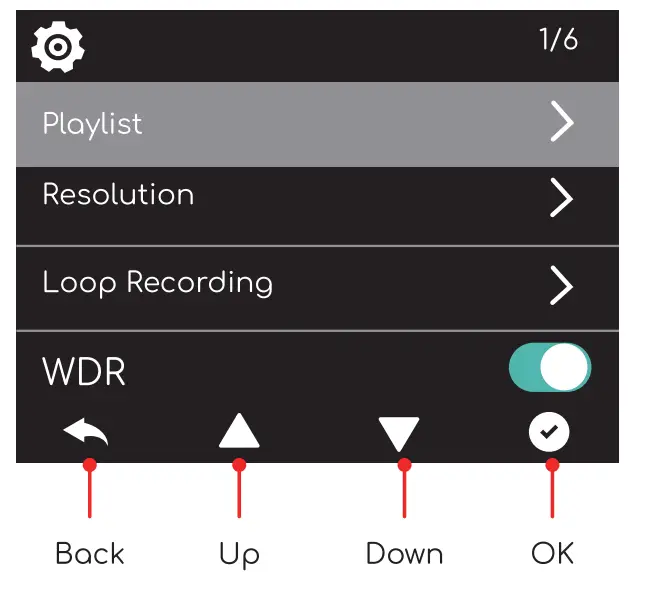
Getting Started
Insert a memory card
The precautions of SD card(Not included):
- ClasslO, SDHC, TF card. 256GB max supported.
- We suggest that you should choose a TF cord from famous brand, such as Samsung or Toshiba. We do not suggest Sandisk.
- There are many fake cards in the current market. Every card has its limited times of writing and deleting. If there is something wrong with the card after a long time use, it is quite normal, change to another new qualified card.
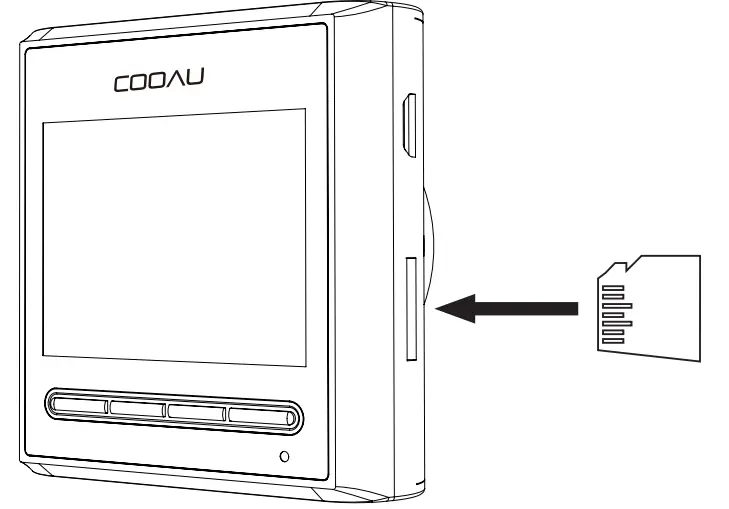
How to insert a Memory Card.
- Please insert the micro SD card as the following picture shows. (Pay attention not to insert in a wrong way or the card will get stuck and break the com.)
- Gently press the card inward and is will pop out.

Format a Memory Card
To format the Micro SD card correctly;
- Format the Micro SD card on your computer to FAT32 or exFAT;
- Press power button to enter menu; if the dash cam is recording video, press OK button to stop the recording first ;
- 3) Press Down button to choose the ”Format” option, press “OK” to Format Memory Cord.
NOTE:
- Please use o genuine Micro SD memory cord from 32GB to 256GB with o speed roting of doss 10 or above.
- Please format the SD cord to FAT32 or exFAT on the computer first. If you don’t know how to format it on computer, please contact us (support-us@cooau. com) for more information ond help.
- Ideally, we recommend that you format the memory two weeks to maintain good read/write performance, but if you don’t do this, the dash com con still record os normal.
- Do not remove or insert Micro SD cord when the comero is on. It moy damage the cord or cause doto Loss.
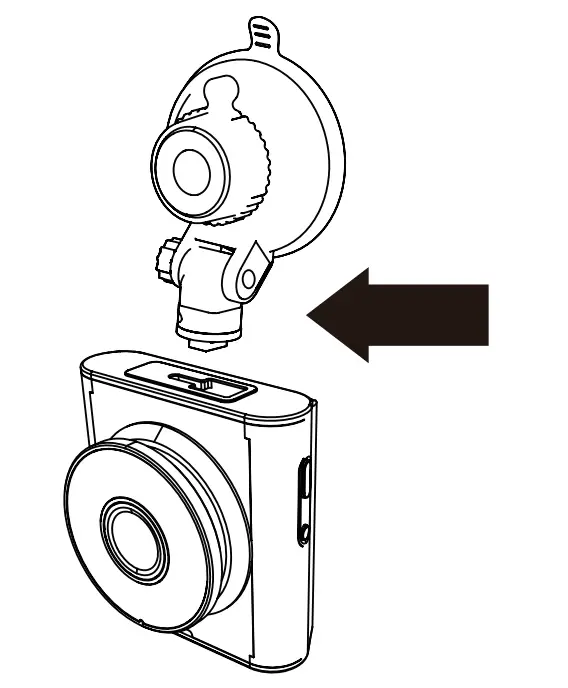
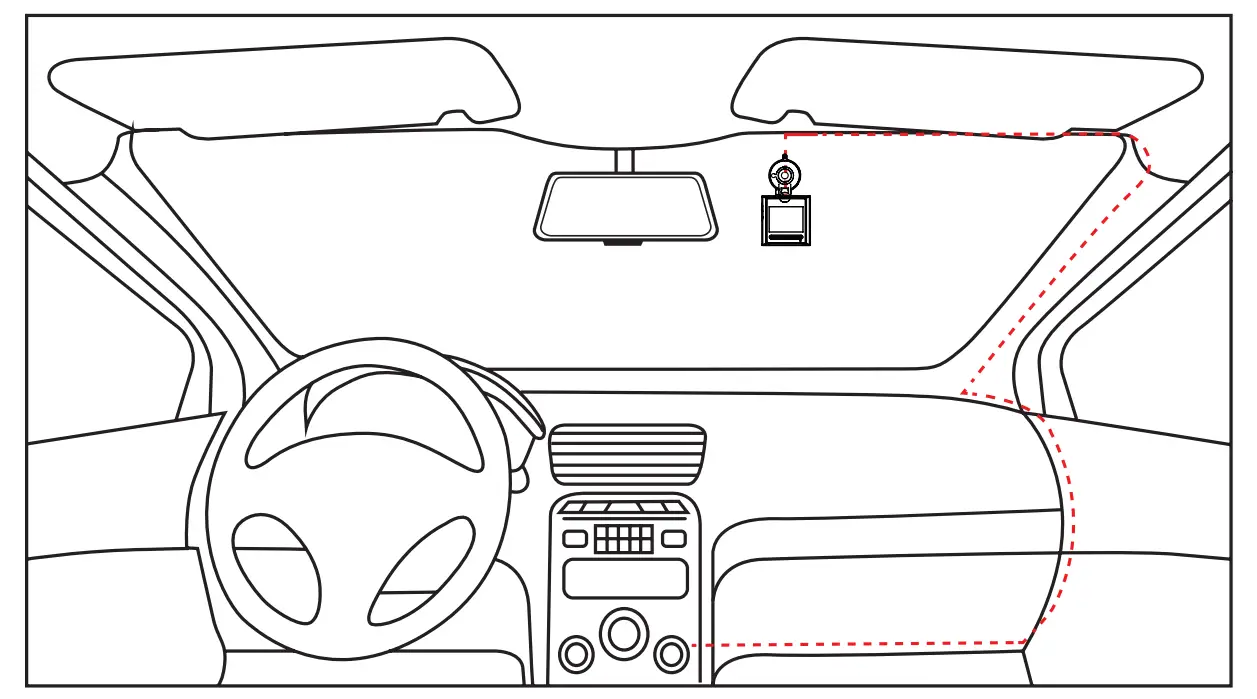
6.3 Install the Dash Cam onto the windshield
- Cleon ond thoroughly dry the windshield oreo were you wont to mount your dash camera.
- Insert and slide the mounting bracket on the suction cop into the mounting slot on the top of your dash camera.
Note: An adhesive mount is also available.
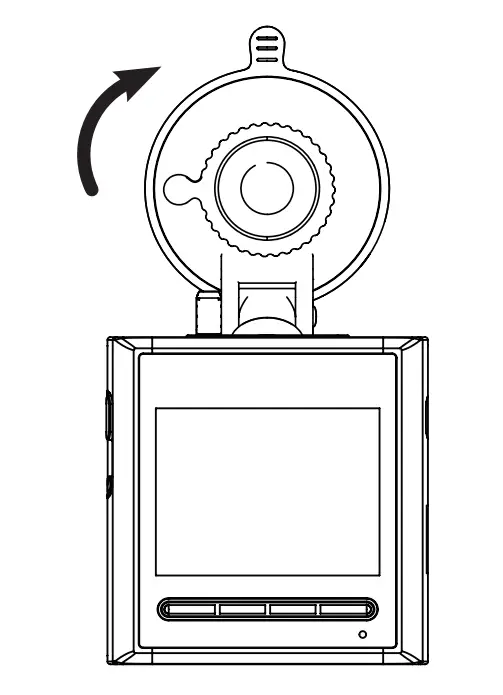
- Peel the protective film from the mounting bracket and the dash camera lens.
- Position the suction cup on the windshield, then move the mounting bracket switch clockwise until you hear o click.

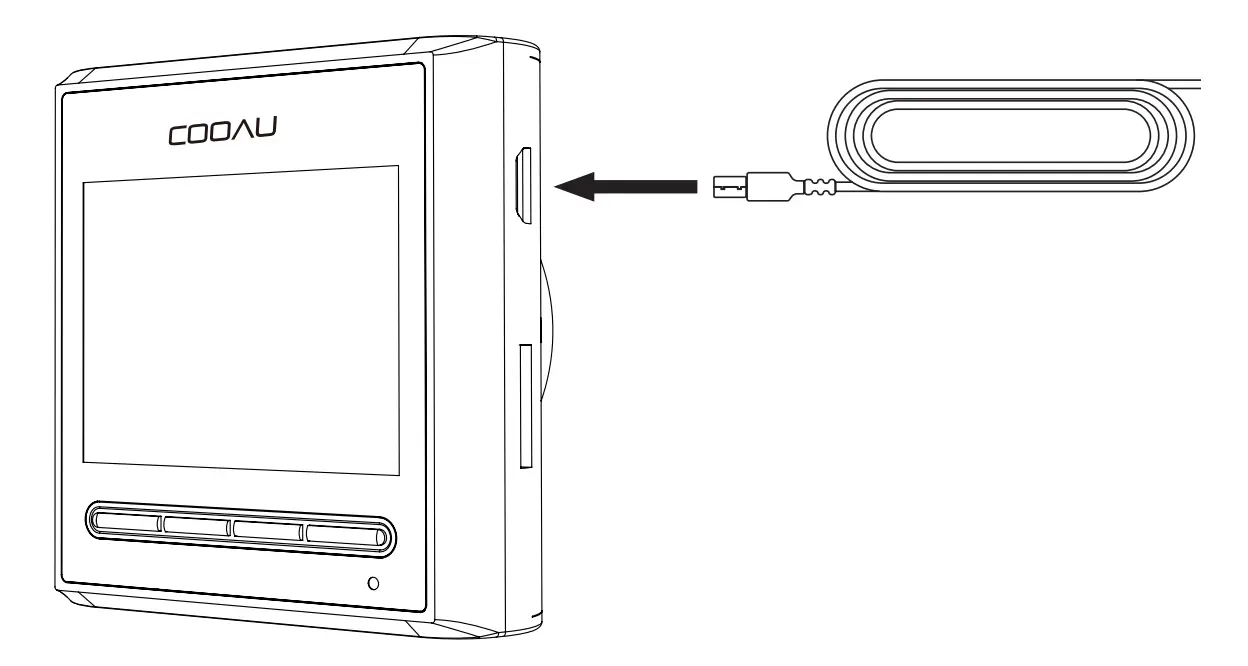
- Connect the provided USB coble to the USB port on your dash camera.

- Thread the coble from your dash camera, around the outer edge of the windshield, and to o 12 V vehicle accessory port.

- Plug the coble into the vehicle power adopter, plug the adopter into the accessory port, then turn on your vehicle. Your dash camera starts automatically.
- Rotate the mounting bracket to adjust the viewing angle as needed.
Basic Operations
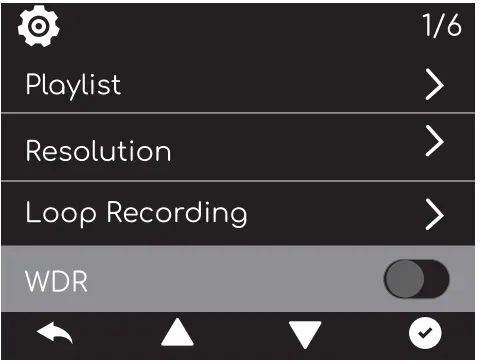
Instruction for Menu Setting
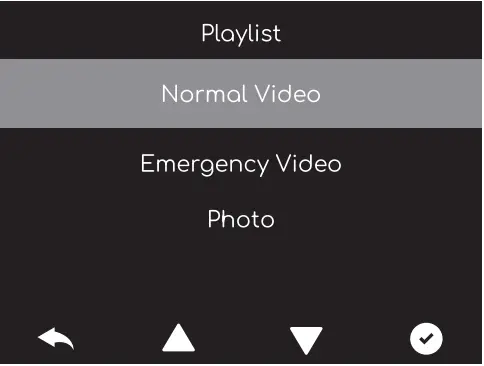
- Play List: Normal Video/Emergency File/Photo
You can view the normal video, Locked video, and photo here.
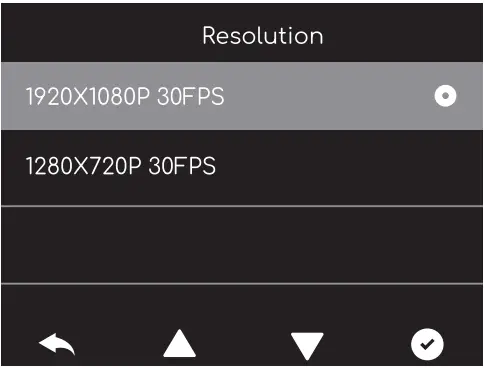
- Resolution: 1920·1osop 30FPS or 12so•72op 30FPS (Default: 1920•1080P 30FPS)

- Loop Recording: 1-Minute/3-Minutes/5-Minutes (Default: 3-Minutes)
While recording, the blue LED indicator will flash. The camera will overwrite the oldest file to save the current file outomoticolly when the cord reaches its capacity. You can set the time intervals as you like.
- WDR: On/Off (Default: Off)
Suitable for situations like law light or backlight, WDR is able to restore the true colors of
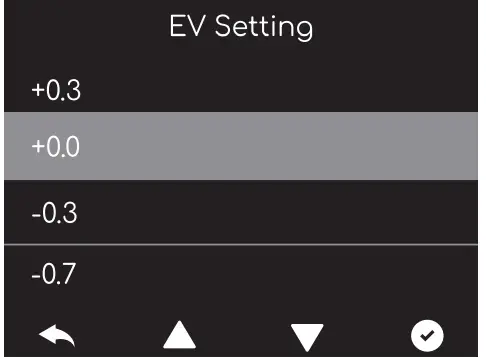
- EV Setting: (Default: +0.0)
- When shooting the sky, water and other scenes, the image tends to be black, the image is discolored and easy to be distorted How to solve this problem?
- Cause analysis: in a scene that has large contrast, the camera’s auto exposure function willbe affected and thus causing image color change.
- Solution: it con be corrected by adjusting the EV Setting. Higher value means brighter image.

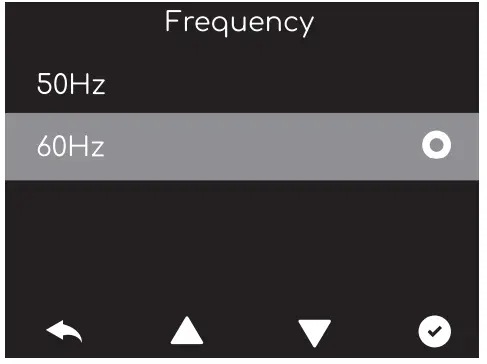
- Frequency: 50Hz/60Hz. (Default: 60Hz)
Please choose the proper one according ta Local situation.
Note:
The screen will appear horizontal stripes interference during the recording because of the wrong setting of frequency.
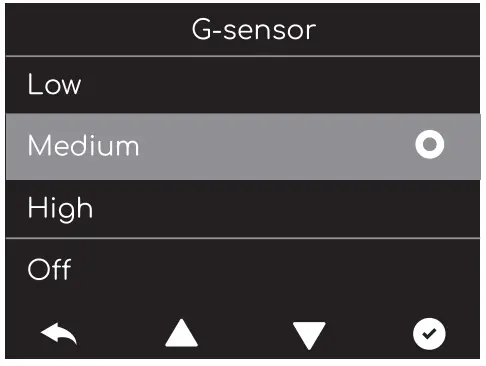
- G-Sensor: Off/Low/Medium/High (Default:Medium)
- Once the G-sensor detects collision and vibration, it will lock the current video clips to the emergency files folder automatically. The locked files won’t be overwritten by loop recording. Important events will be saved and can be used as evidence.
- The camera will overwrite the oldest event videos once the “emergency file” folder accumulates 40% of the card capacity. Please regularly transfer important videos to your PC or another Storage location (e.g.external hard drive). To maintain good read/write performance, the micro SD card should be formatted every 1-2 weeks.
- There are 3 levels of sensitivity; High, Medium, Low.
We suggest you should choose medium because high sensitivity will lead ta many unnecessary video clips saved as an emergency file, thus affecting the normal recording.
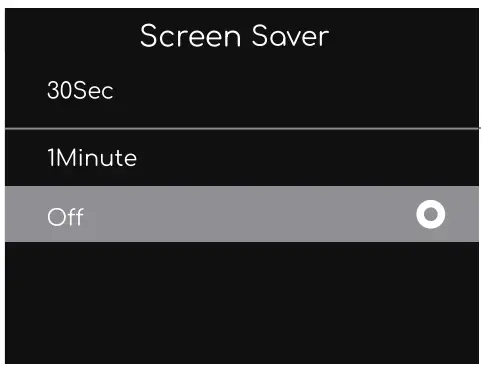
- Screen Saver: Off/30 Secands/1 Minute (Default: Off)
If you have no operation an the camera during the setting time, the screen will automatically go off. The LCD displays the time and the upper left corner displays the red dot. Screen saver will not affect the normal recording. You can press any button to return to the recording interface.
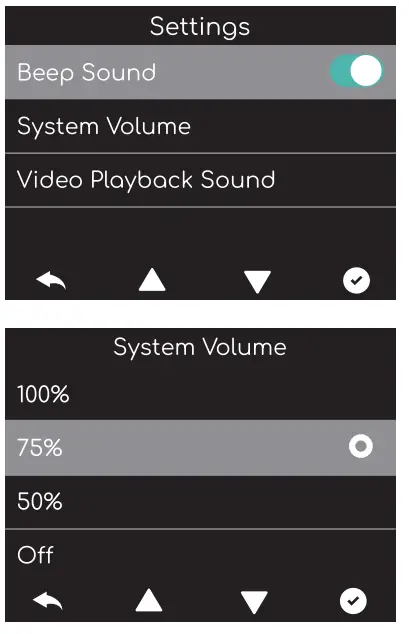
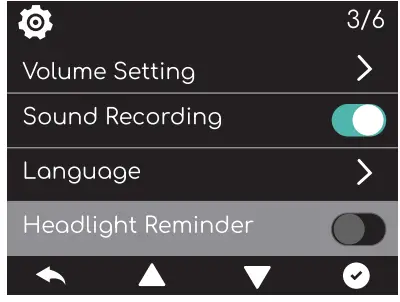
- Volume Setting:
- Button Beep: On/Off. (Default:On)
- Turn on/off the “beep” when you operate the camera.
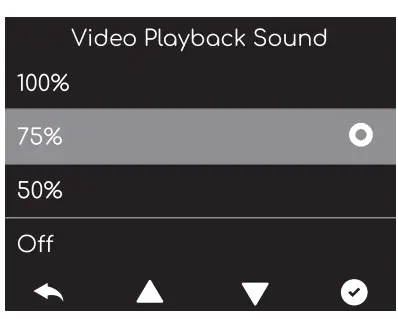
- System Volume: 100%/75%/50%/off (Default:75%)
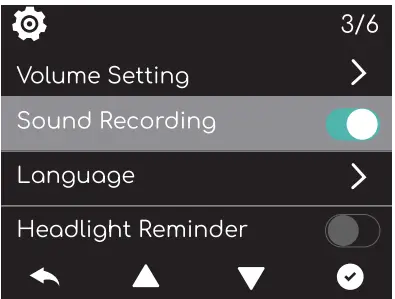
- Video playback Sound:100%/75%/50%/off (Default:75%) Note:
When you turn it off, this does not affect the sound recorded by the camera itself.

- Sound Recording: On/Off. (Default: On)
Note:
The camera doesn’t record audio if you turn it off for the purpose of protecting your privacy.
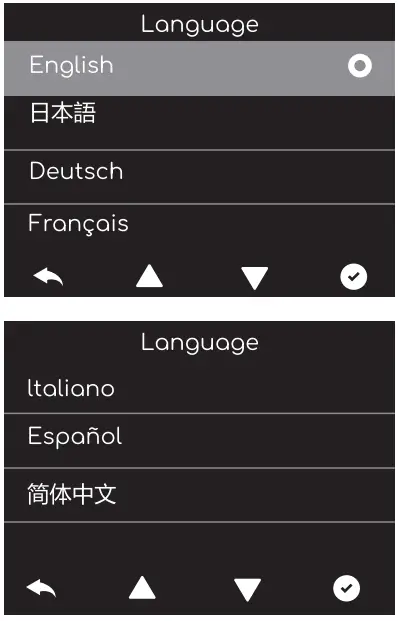
- Language: English/ E3;;$:!li’ /Deutsch/Franc;ais/ ltaliano/Espafiol/ mif;tcp:,t. (Default:English)

- Headlight Reminder on/off (Default:off)
This feature will prompt you to turn on the cor lights when the outside environment becomes dim.
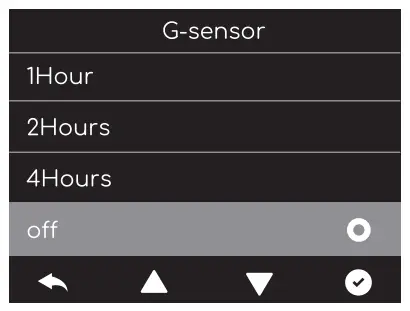
- Fatigue Driving Alert: 1 Hour/2 Hours/4 Hours/Off. (Default: Off)
When the time interval you set finishes, there will be o sound reminding you to get some rest after a period of driving. You can set your own fatigue driving time according to your mental condition and traffic regulations.
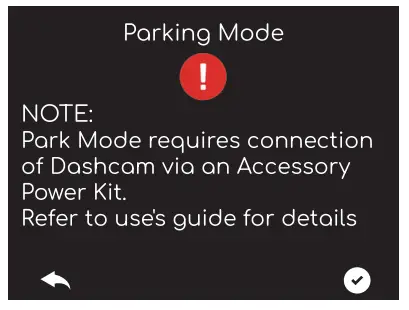
- Parking Mode: On/Off (Default: Off)
- The dosh cam detects ACC power off (car parking off, the camera stops recording and saves the current video, the camera shuts down into parking monitoring mode (stondby mode).
- The cor collision G-SENSOR is triggered, then the dash cam will stort recording a 30-second lock video, the video is saved to the Emergency File. (The camera screen will not open during the recording video).
- If the G-SENSOR continues to detect a collision during a 30-second locked video recording, the dosh camera will switch to loop video mode. Record a video for about 5 minutes (maximum set time for loop recording), and save the video to the Normal File.

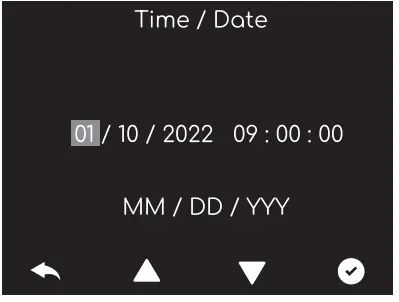
- Time/Date:
- Press the UP or DOWN button to select date and time values.
- Press OK to switch to the next item.
- After all the items are changed, press the OK button to save and exit.
Note:
All the time and date settings won’t be saved if you press the back button to exit.
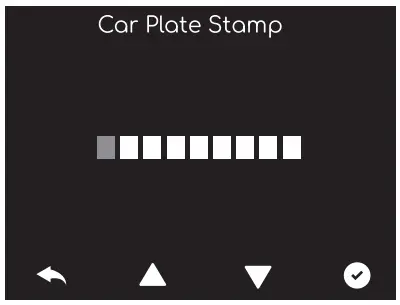
- Car Plate Stamp:
Preset 9-character positions, each with the optional letter o-z, A-Zand the number 0-9.
If you set your car license plate, they will be printed on videos as watermarking.
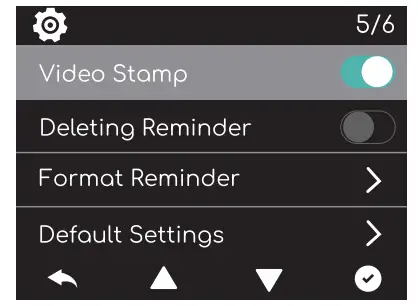
- Video Stamp: On/Off. (Default: On)
If you turn it off, the COOAU, GPS information and time watermark will be removed from the videos.  Deleting Reminder: On/Off. (Default: Off)
- The camera will overwrite the oldest Locked video once the emergency file accumulates 40% of the card capacity.
- When the emergency file is over 30%, the camera will remind you every 5 minutes. If you turn it off, the system will overwrite automatically.
- Prompt Content: Please delete locked files or save them to other devices.

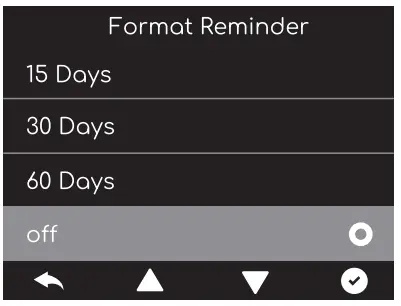
- Format Reminder: On/Off. (Default: Off)
This function is to remind you to format the card regularly.
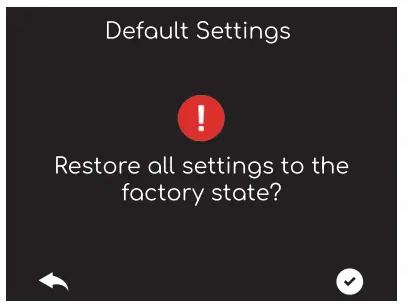
- Default Settings: Pressing ‘OK will restore all settings to the initial factory settings.
- Format If you press “OK bottom, all the dato will be deleted.

- Card Information: You can view the storage information.

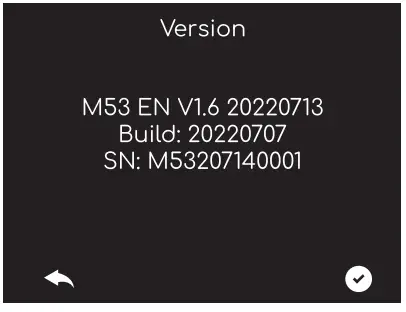
- Version: You can view the software information.


 Deleting Reminder: On/Off. (Default: Off)
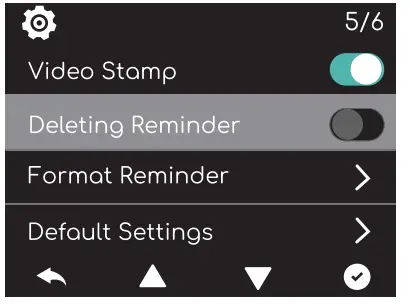


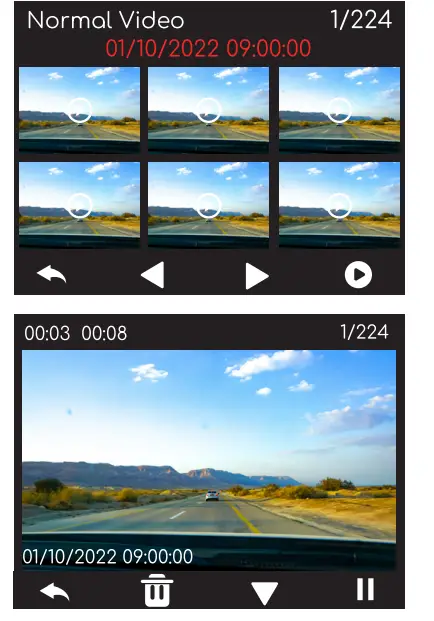
Viewing Video/Photos
- Go to “Playlist
- Press the OK and UP/DOWN buttons to navigate to Normal Video/ “Emergency File”/ ‘Photo” to view and playback videos or photos on the camera.
- Press the UP/DOWN buttons to select the file and press the play button to playback/pause.

Delete Video/Photos
Go to Normol file/ Emergency file/ Photo, ploybock the video on the dosh compress delete button end choose ‘Yes”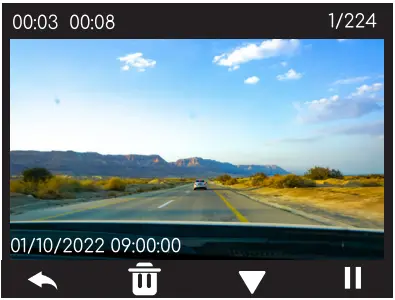
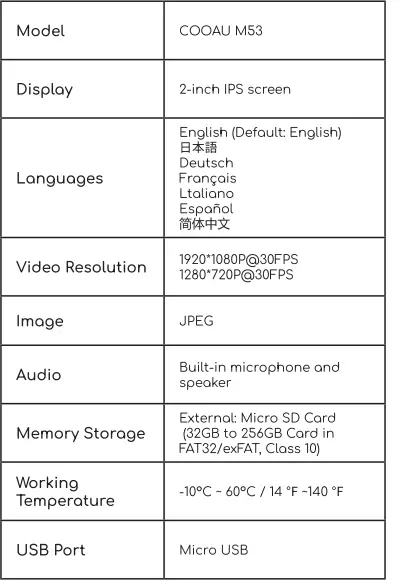
SPECIFICATION
Warranty & Support
The COOAU M53 Dash Cam comes with a full 12-month warranty.
If you have any questions, please contact us at support[email protected], and we will reply to you within 24 hours. COOAU is firmly committed to improving our products, services, and user experience. Any constructive suggestion for the development of our products is welcomed by us.
E-mait [email protected]
Thank you for choosing COOAU! Scan the `’COOAU.COM‘ QR code to extend the warranty
  Follow@Cooau official on Facebook.
Any questions, please feel free to contact us. ([email protected])
FAQS
Camera permission management: How to invite family and friends to use my camera together?
Open the App and select your camera on the home page. Click the share button on the home page or the “Share” in the camera settings to enter the sharing page, and then click “Invite ” to generate a QR code. Your friends can now get some of the access rights by scanning the QR code in your phone.
Why doesn’t the Wi-Fi name appear when I connect to Wi-Fi?
On Apple devices with iOS13 and above, you need to turn on the “location permission” for the app in the system settings and change it to “allow when using.”
Will the camera show red lights when night vision is activated?
The built-in infrared lamp beads make the camera only show some dim red lights when night vision is activated, but the image quality is still clear under a light environment.
What are the requirements for Wi-Fi?
Please use a 2.4GHz wireless network. The device does not support the 5GHz wireless network. Meanwhile, please set the Wi-Fi authentication method to or other lower-level of security method. A password is required.
How far should the camera be placed from the router?
After testing, the Wi-Fi connection distance can normally reach up to 150 meters in the open area. However, the actual situation depends on the strength of Wi-Fi and its surrounding environment (thick walls, electromagnetic devices, large metal objects will all cause interference to the Wi-Fi signals). If the camera connection signal is weak or unstable, please place the camera as close to the router as possible.
What is the maximum length of recording time?
If you set the duration as “Auto”, when someone occurs in the view of the camera, it will start recording a video for up to 3 minutes.\
How to quickly view videos by category?
Click the icon in the upper left corner of the “Library” page to start filtering videos by category. Select the category you want to see and then click “Save” to view the video playbacks.
What should I do when the device is in malfunction?
Long press the power bottom for 3 seconds to restart it. If there is no response, you can remove the rubber plug at the button of the camera. Press the reboot hole with a pointed object to restart the camera. If this device did not function well at last. Contact our customer service e-mail and we will take care of it.


