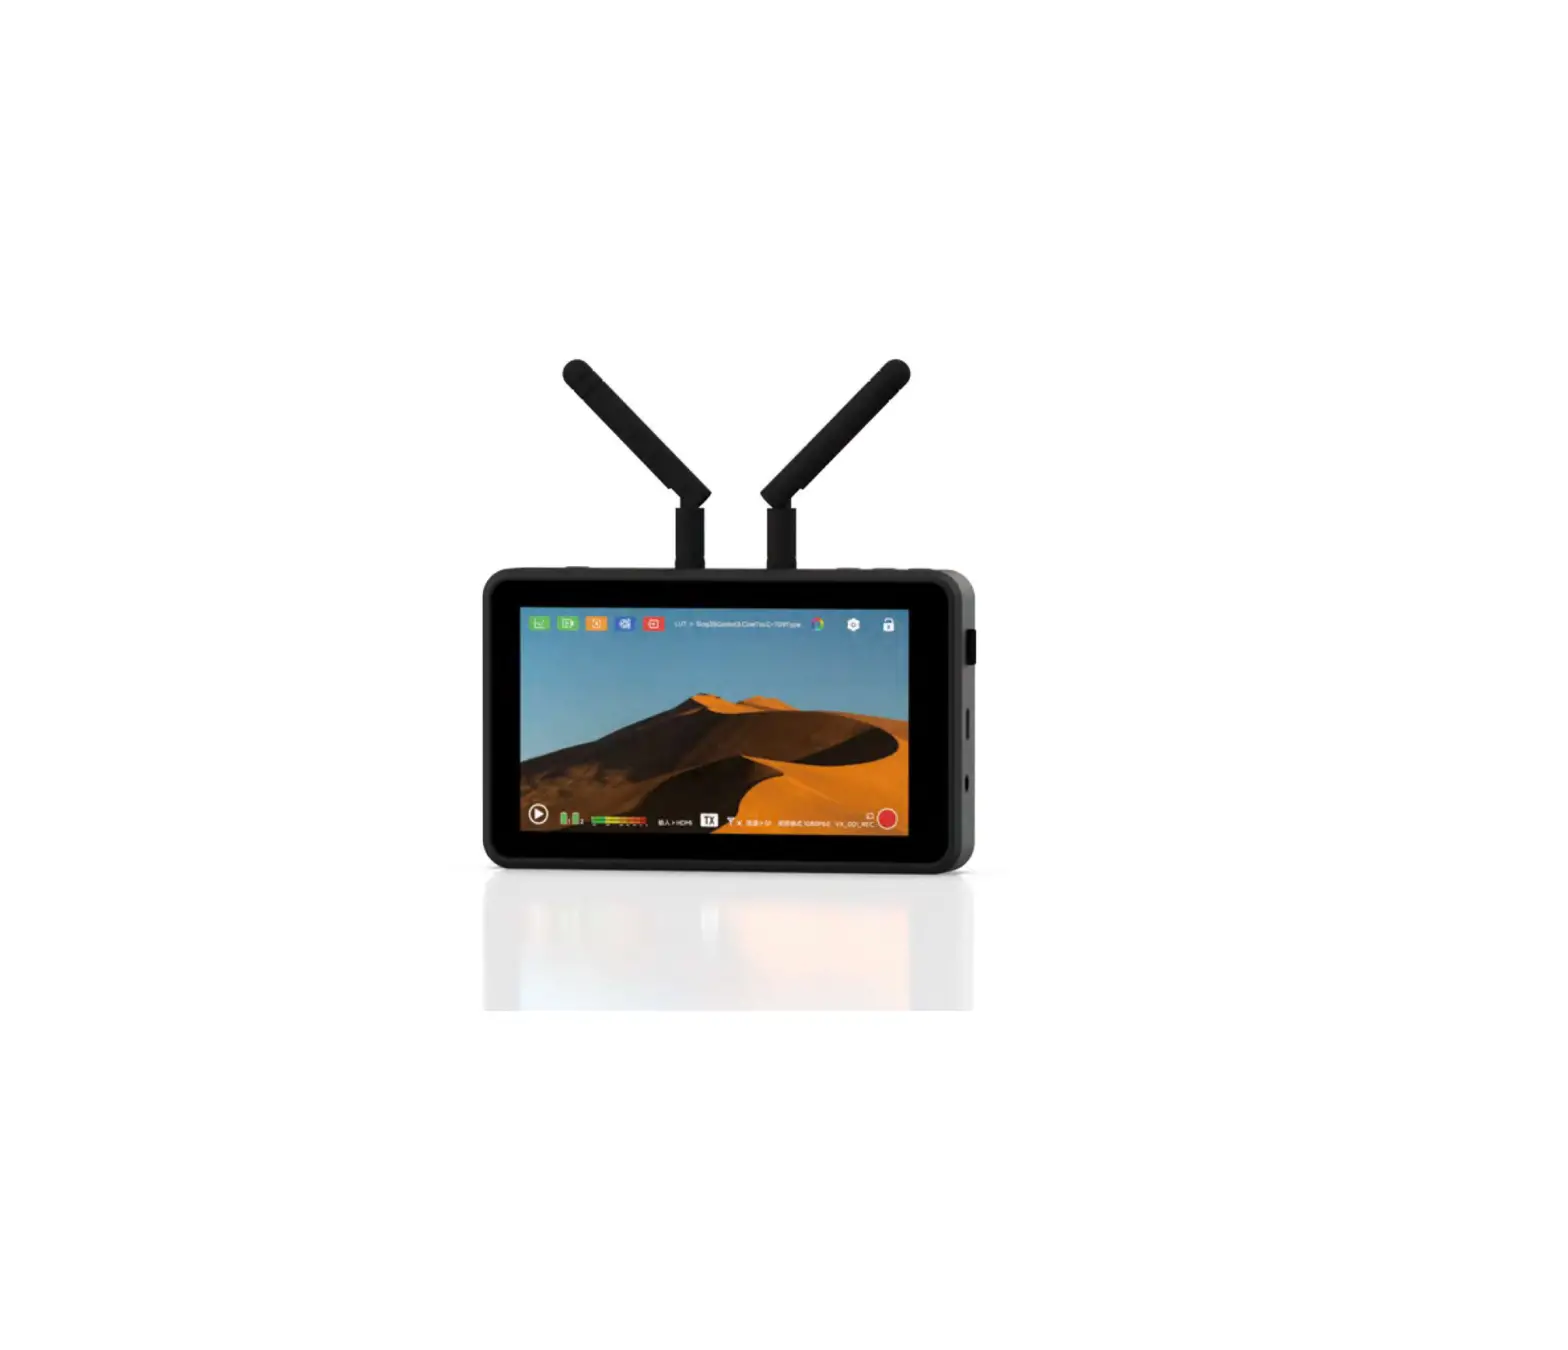
VAXIS Atom A5 5.5 Inch Wireless RX or TX Monitor
Ports
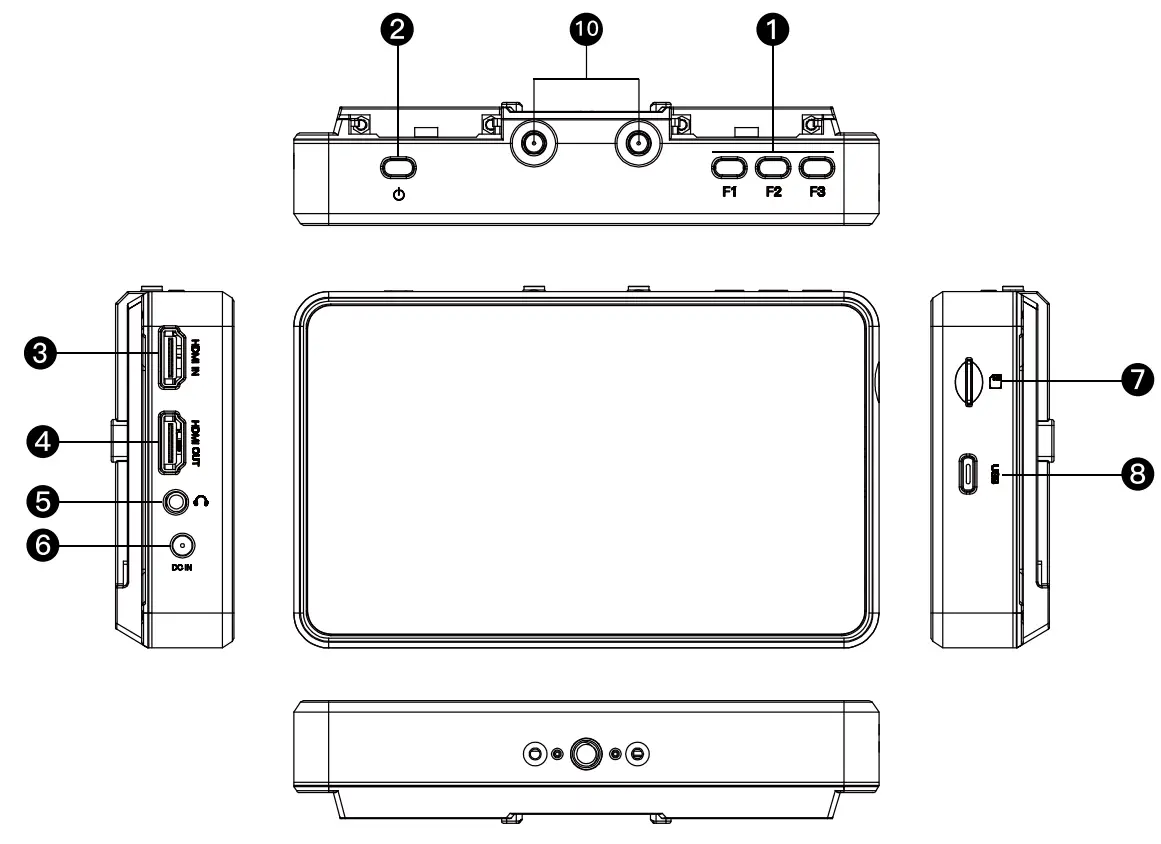
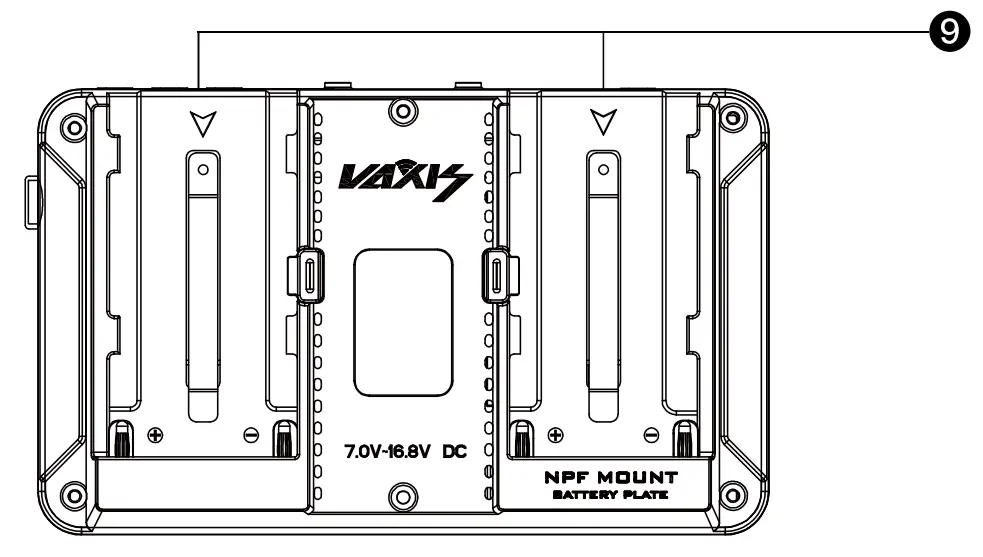
❶ Shortcut
❷ Power Button
❸ HDMI Output
❹ HDMI Input
❺ 0 3.5mm Audio Jack
❻ DC Input
❼ TF Card Slot
❽ USB-C Port
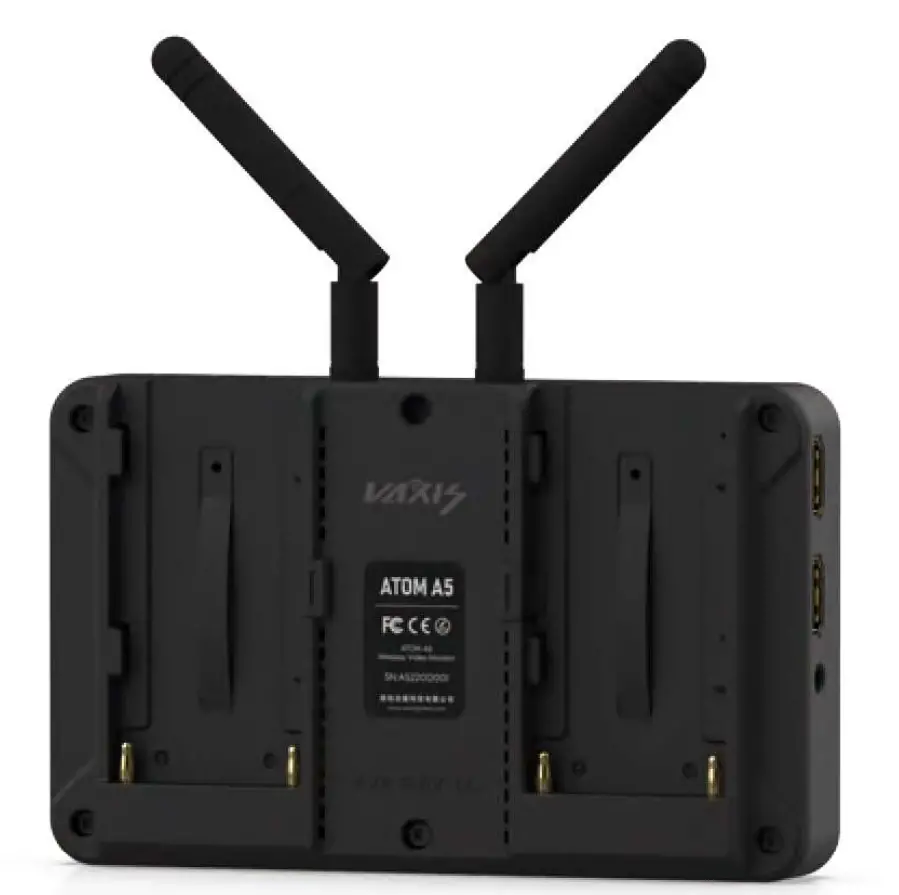
❾ NPF-970 Battery Plate
❿ SMA Antenna Connector
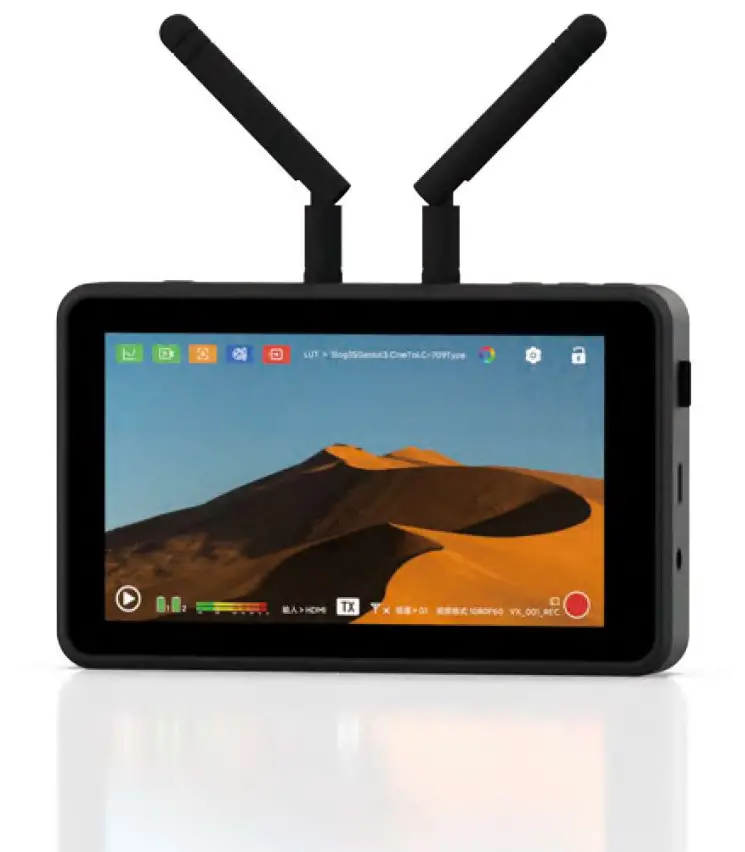
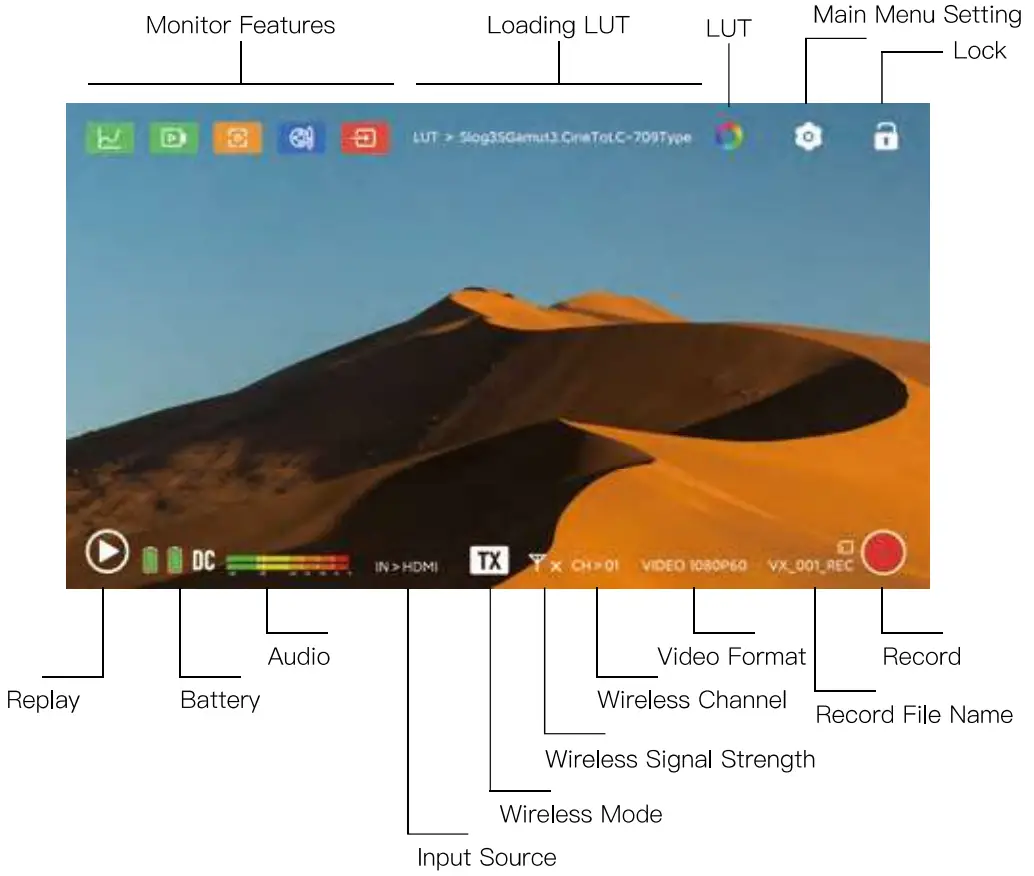
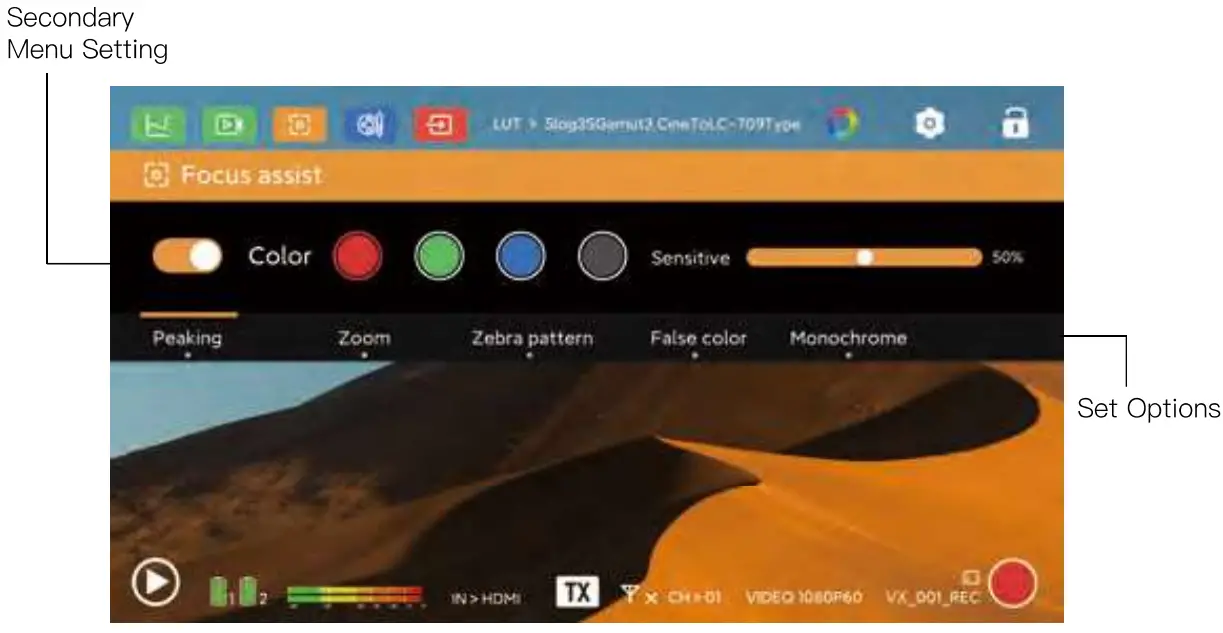
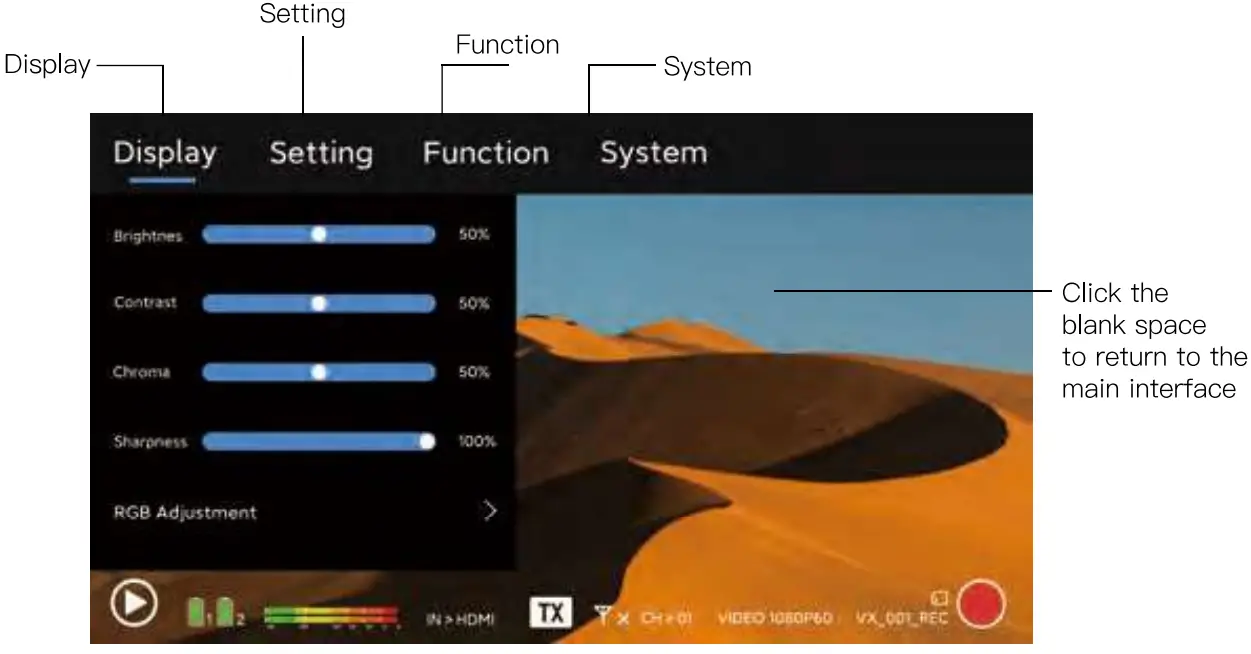
User Interface

Transmitter & Receiver Switching
Select the Signal Menu – Wireless Mode interface, switch TX or RX mode according to your needs, and the current status will be displayed in the status bar at the bottom.
Record & Replay
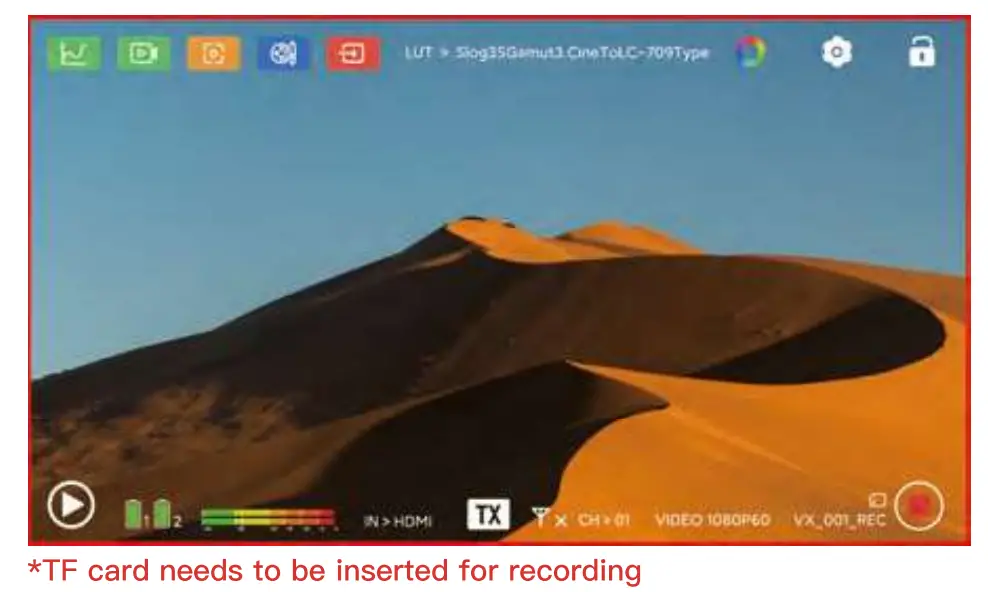
Click Record in the bottom right corner to record the current screen.
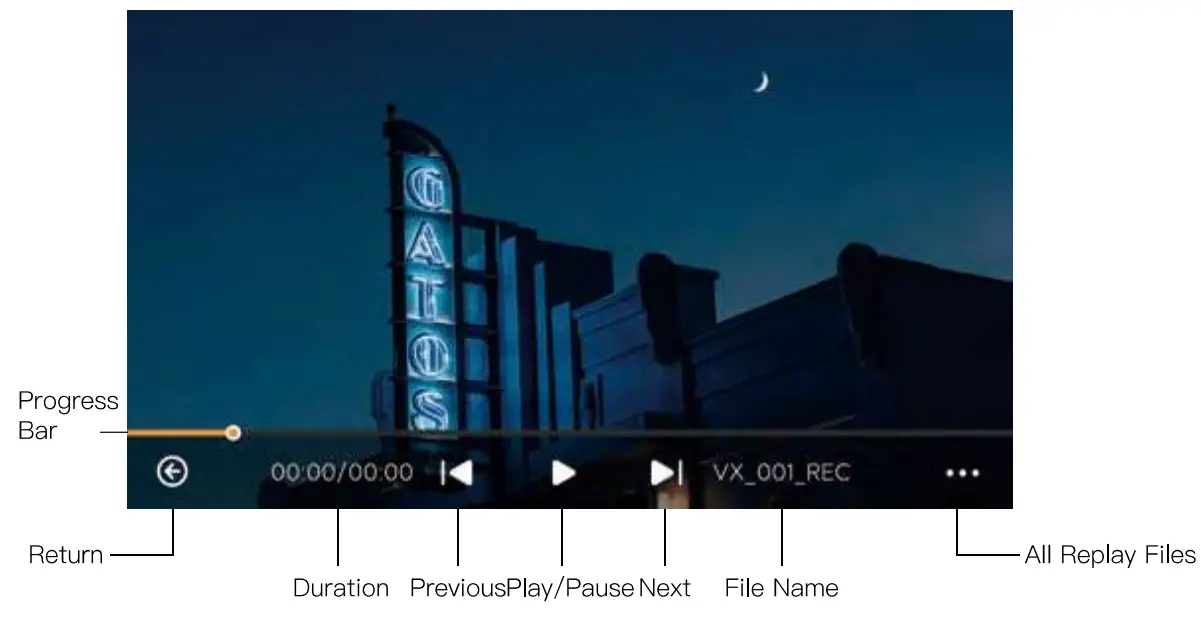
Record & Replay
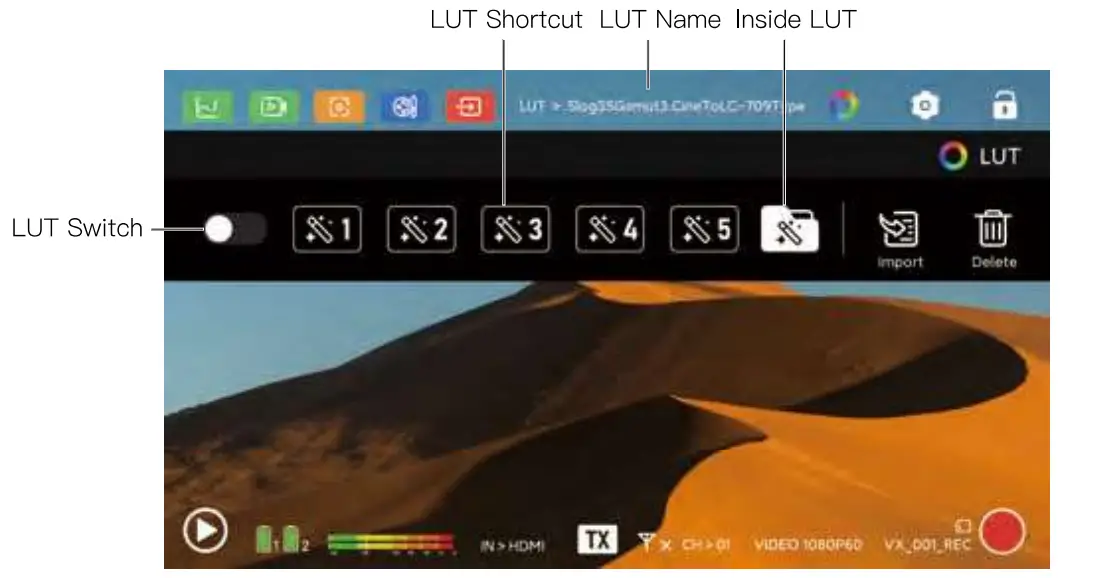
LUT Loading
Put the LUT file into the TF card (LUT format is *.cube, support 1 7×1 7×1 7 and 32x32x32), select the import button
* There must be no spaces or special symbols in the LUT file name, otherwise the import will fail
LUT Loading
* Max Supported Capacity: 256GB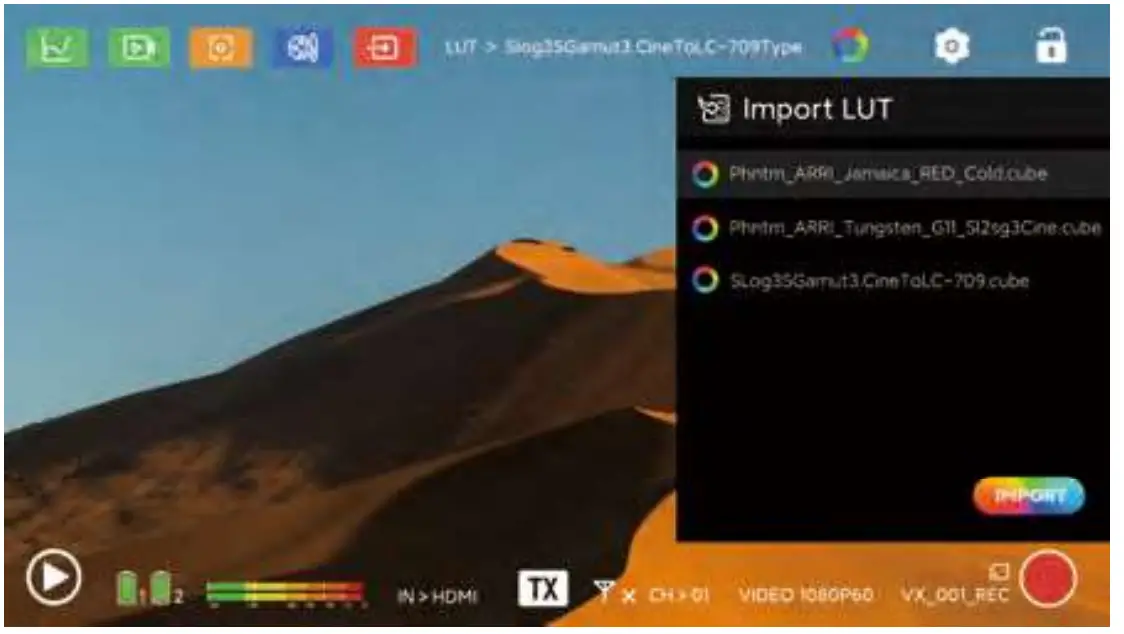
Select the LUT in the TF card and click import, it will be prompted that the current LUT shortcut key can be overwritten during import. If the LUT shortcut key is not currently selected, it will be loaded into the monitor (the monitor can save up to 50 LUTs).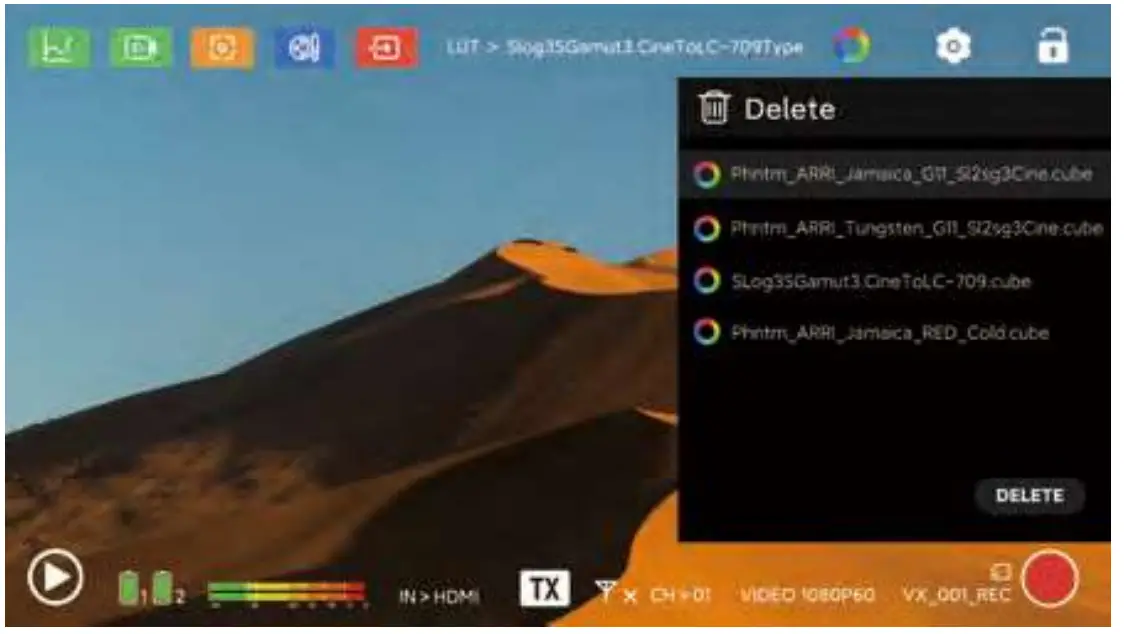
You can only delete the LUT in the monitor, the LUT on the shortcut key cannot be deleted. You need to restore the factory setting, or select a new LUT to overwrite.
The LUT in the TF card also cannot be deleted, the only option is to format the memory card.
APP Download
Search Vaxis Vision on App Store or Google Play to download the iOS, Android, ipadOS application.
Search: Vaixs Vision


- Then open the mobile App to Connect Device, select Scan Code to connect
- Click Wireless Information in the Signal Menu of A5
- Scan the QR code to connect
APP Monitoring
Enter the Settings – System Information interface, select Wireless Information.
Then open the mobile App to Connect Device, select Scan Code to connect, and scan the QR code on the monitor to connect.
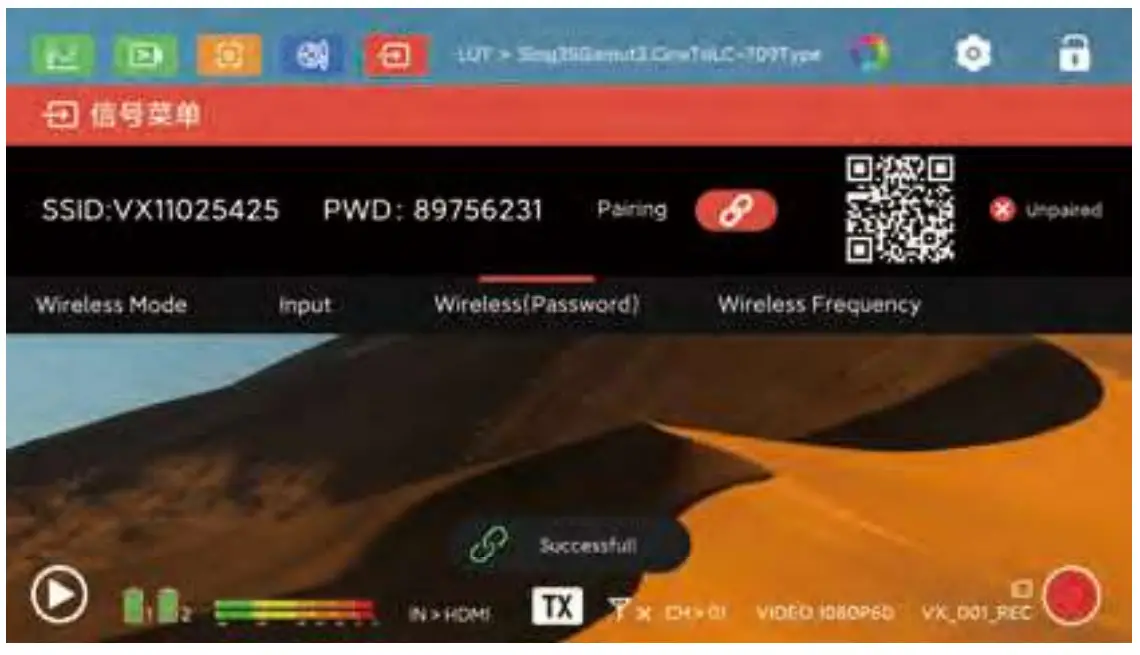
Pairing
Enter the Signal Menu – Wireless Information interface, click the pairing button both on TX & RX simultaneously to pair. The pairing method is the same in TX or RX mode.

If it shows unpaired after scanning the QR code, it means that the current A5 has never been paired after reset. If it shows paired, it proves that a device has been paired with it.
Firmware Upgrade
Put the upgrade folder into the top directory of the TF card(format FAT -32). Open Setting – System – Software Upgrade, if there is a prompt whether to upgrade the software, the upgrade folder has been successfully read. Click Yes to perform firmware upgrade.
Warning
This device is a non-handheld device, and the distance between the device and people is greater than 20cm during work.
FCC 15.1 05 FCC STATEMENT
- This device complies with Part 15 of the FCC Rules. Operation is subject to the following two conditions: (1) This device may not cause harmful interference, and (2) This device must accept any interference received, including interference that may cause undesired operation.
- Changes or modifications not expressly approved by the party responsible for compliance could void the user’s authority to operate the equipment.
This equipment has been tested and found to comply with the limits for a Class B digital device, pursuant to part 15 of the FCC Rules. These limits are designed to provide reasonable protection against harmful interference in a residential installation.
This equipment generates, uses and can radiate radio frequency energy and, if not installed and used in accordance with the instructions, may cause harmful interference to radio communications. However, there is no guarantee that interference will not occur in a particular installation. If this equipment does cause harmful interference to radio or television reception, which can be determined by turning the equipment off and on, the user is encouraged to try to correct the interference by one or more of the following measures:
- Reorient or relocate the receiving antenna.
- Increase the separation between the equipment and receiver.
- Connect the equipment into an outlet on a circuit different from that to which the receiver is connected.
- Consult the dealer or an experienced radio/ TV technician for help.
FCC Radiation Exposure Statement:
This equipment complies with FCC radiation exposure limits set forth for an uncontrolled environment. In order to avoid the possibility of exceeding the FCC radio frequency exposure limits, Human proximity to the antenna shall not be less than 20cm (8 inches) during normal operation
Specification
| Interface | DC IN, HDMI IN, HDMI OUT, 3.5mm Audio Jack, Type-C |
| Input Voltage | NPF970/DC12V |
| Screen Size | 5.5 Inch Touch |
| Screen Resolution | 1920*1080 pixels |
| Screen Brightness | 1000cd/ m2 |
| Contrast Ratio | 1200: 1 |
| Input Video Format | 1920*1080P 60/59.94/50/30/29.97/25/24/23.98 1920*10801 60/ 59.94/ 50 1280*720P 60/59.94/50 |
| Output Video Format | 1920*1080P60/50/30/25/24 1920*1080160/50 1280*720P60/50 |
| Audio Format | 48KHz |
| Net Weight | 348g |
| Size | 151*92*30.5mm |
| Wireless Operating Frequency | 5150-5250GHz,5745-5825GHz |
| Transmitting Frequency | 17dBm |
| Transmission Latency | 80ms, 120ms(under interference environments) |
| Receiving Sensitivity | -80dBm |