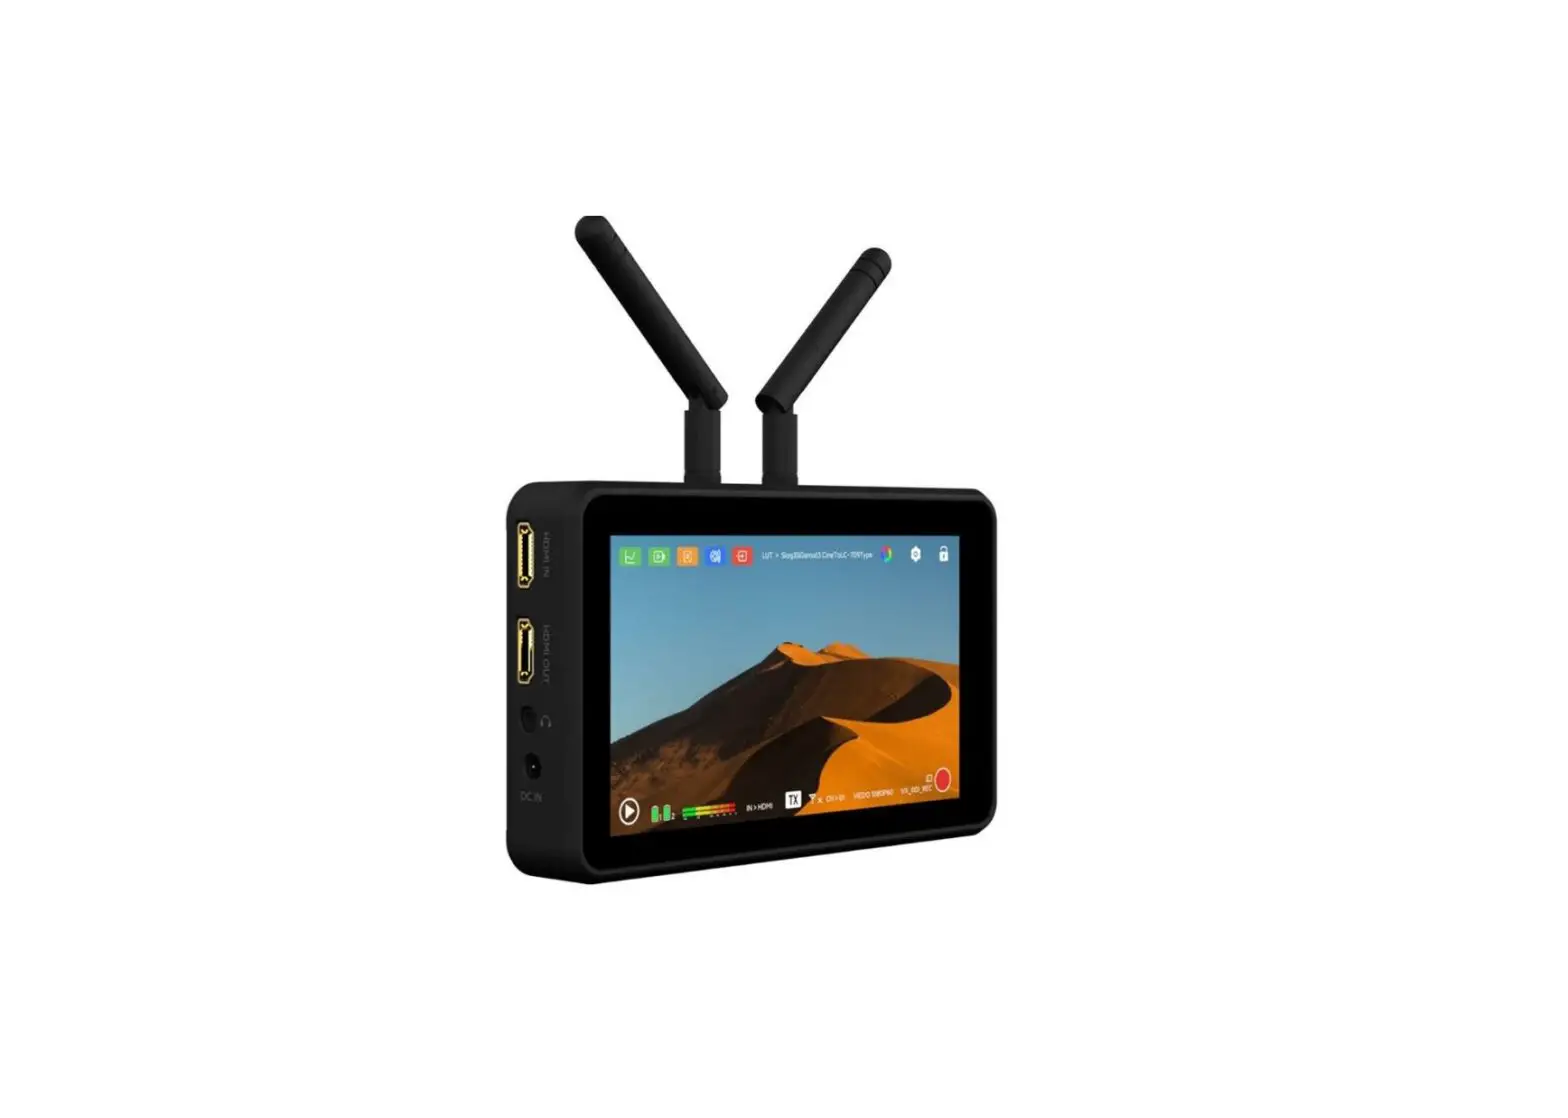
VAXIS Atom A5 Wireless Monitor
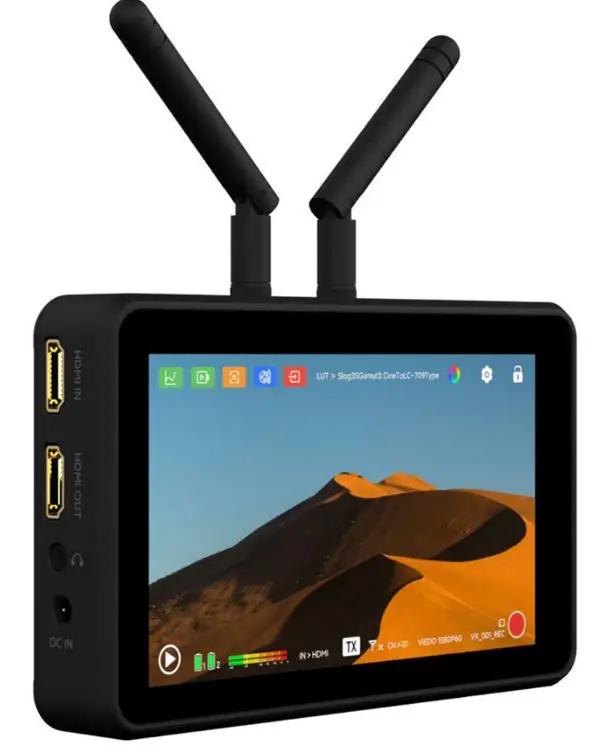
Ports 
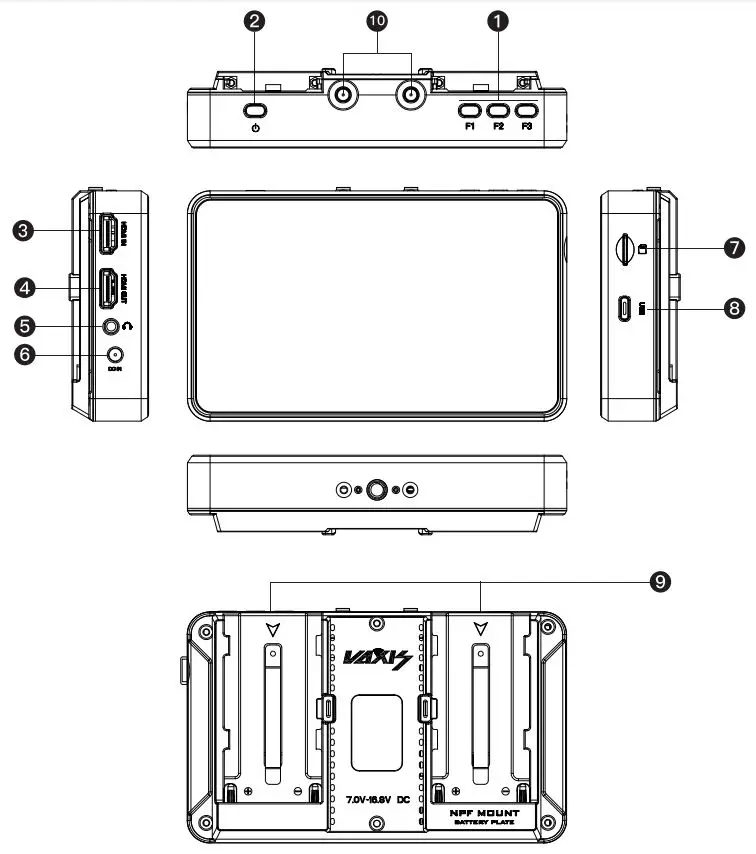
- Shortcut
- Power Button
- HDMI Output
- HDMI Input
- 3.5mm Audio Jack
- DC Input
- TF Card Slot
- USB-C Port
- NPF-970 Battery Plate
- SMA Antenna Connector
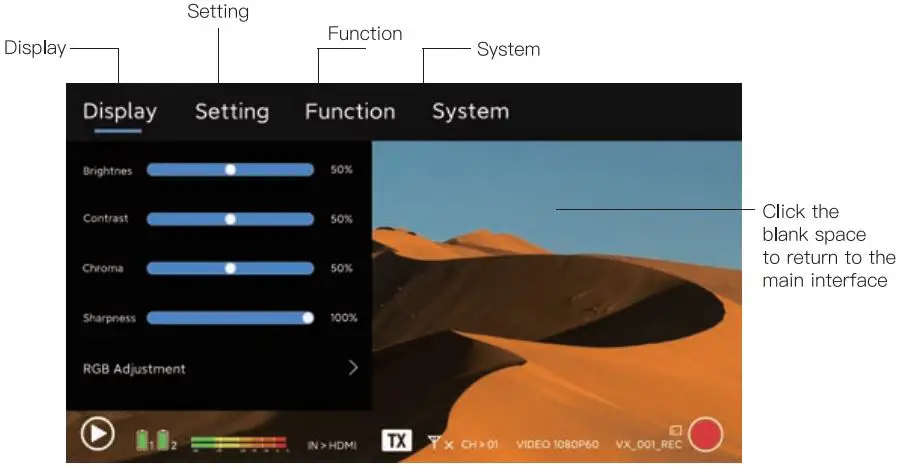
User Interface 

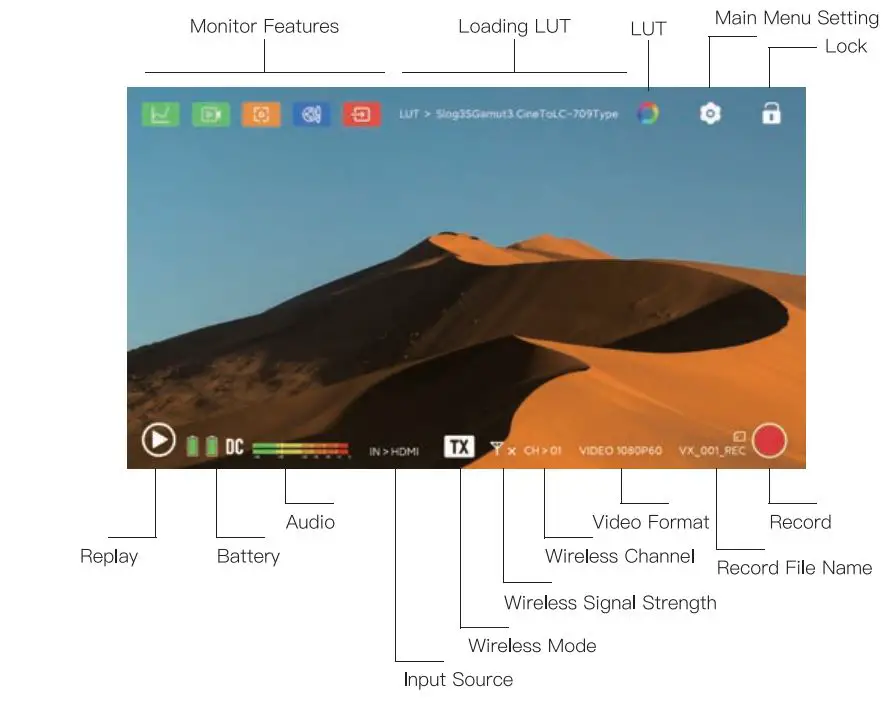
Common Buttons 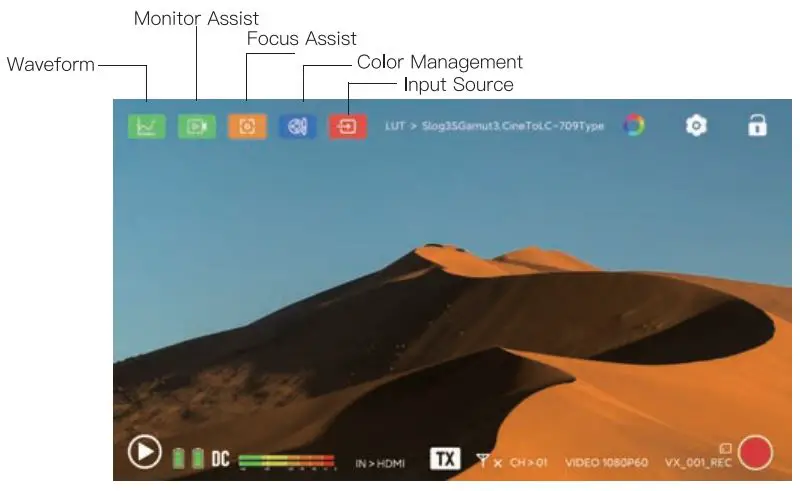
Main Menu 
Transmitter & Receiver Switching 
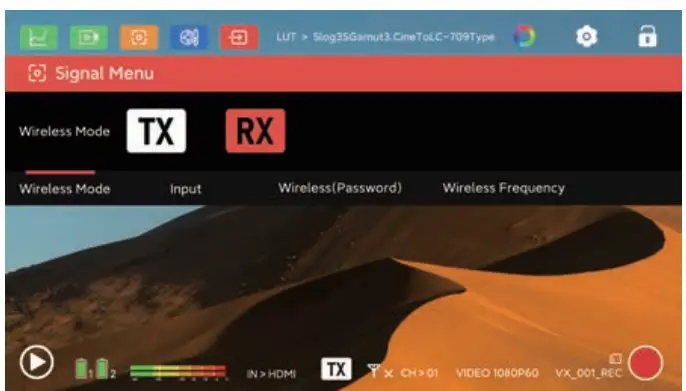
Select the Signal Menu – Wireless Mode interface, switch TX or RX mode according to your needs, and the current status will be displayed in the status bar at the bottom.
Record & Replay 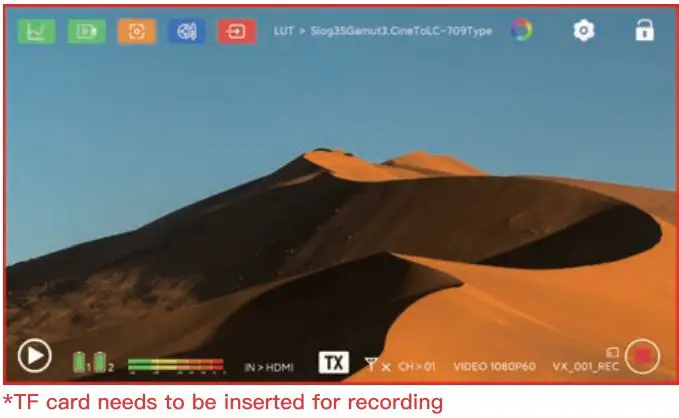
Click Record in the bottom right corner to record the current screen. 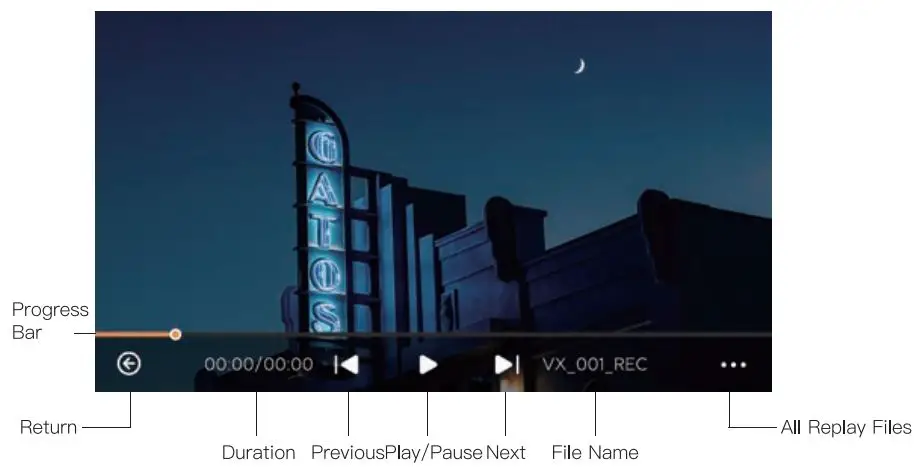
LUT Loading 
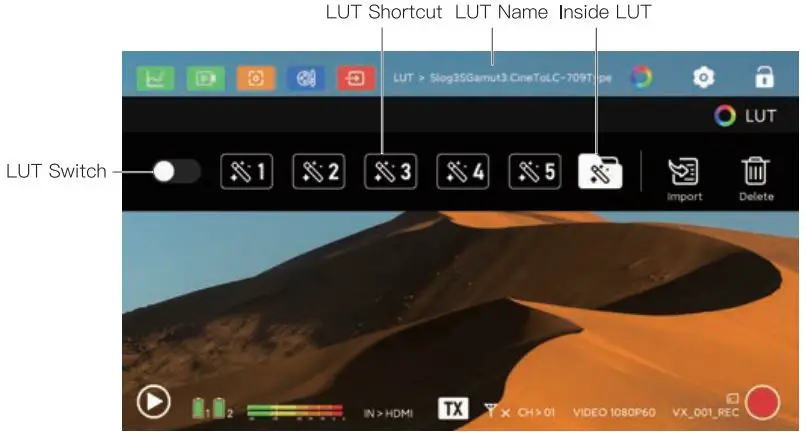
Put the LUT file into the TF card (LUT format is *.cube, support 1 7×1 7×1 7 and 32x32x32), select the import button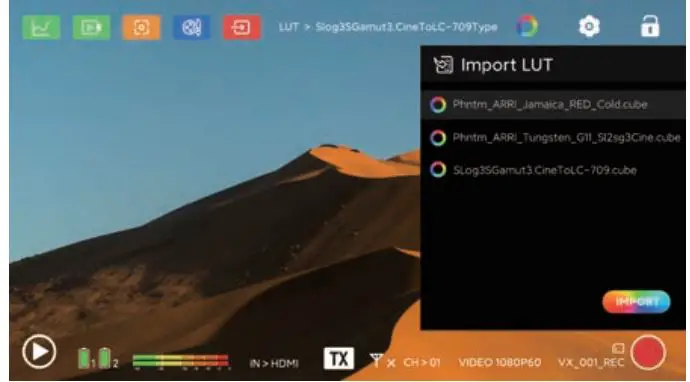
Select the LUT in the TF card and click import, it will be prompted that the current LUT shortcut key can be overwritten during import. If the LUT shortcut key is not currently selected, it will be loaded into the monitor (the monitor can save up to 50 LUTs). 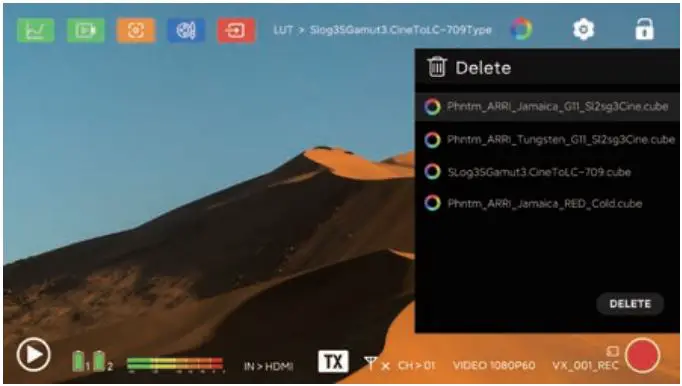
You can only delete the LUT in the monitor, the LUT on the shortcut key cannot be deleted. You need to restore the factory setting, or select a new LUT to overwrite. The LUT in the TF card also cannot be deleted, the only option is to format the memory card.
APP Download
Search Vaxis Vision on App Store or Google Play to download the IOS, Android, lpadOS application.
Search: Vaixs Vision
- Then open the mobile App to Connect Device, select Scan Code to connect
- Click Wireless Information in the Signal Menu of A5
- Scan the QR code to connect
APP Monitoring 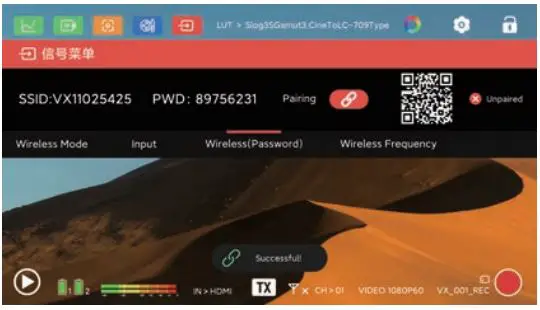
Enter the Settings – System Information interface, select Wireless Information. Then open the mobile App to Connect Device, select Scan Code to connect, and scan the QR code on the monitor to connect.
Pairing 
Enter the Signal Menu – Wireless Information interface, click the pairing button both on TX & RX simultaneously to pair. The pairing method is the same in TX or RX mode. 
If it shows unpaired after scanning the QR code, it means that the current A5 has never been paired after reset. If it shows paired, it proves that a device has been paired with it.
Firmware Upgrade
Put the upgrade folder into the top directory of the TF card(format FAT -32). Open Setting – System – Software Upgrade, if there is a prompt whether to upgrade the software, the upgrade folder has been successfully read. Click Yes to perform -firmware upgrade.
Specification
| Interface | DC IN, HDMI IN, HDMI OUT,
3.5mm Audio Jack, Type-C |
| Input Voltage | NPF970/DC1 2V |
| Screen Size | 5.5 Inch Touch |
| Screen Resolution | 1920*1080 pixels |
| Screen Brightness | 1000cd/m’ |
| Contrast Ratio | 1200 : 1 |
| 1920* 1080P 60/59.94/50/30/29.97/25/24/23 98 | |
| Input Video Format | 1920*10801 60/59.94/50 |
| 1280*720P 60/59.94/50 | |
| 1920*1080P60/50/30/25/24 | |
| Output Video Format | 1920*1080160/50 |
| 1280*720P60/50 | |
| Audio Format | 48KHz |
| Net Weight | 348g |
| Size | 151*92*30.5mm |
| Wireless Operating Frequency | 5.1G-5.8G |
| Transmitting Frequency | 17dBm |
| Transmission Latency | 80ms, 120ms(under interference environments) |
| Receiving Sensitivity | -80dBm |
www.vaxisglobal.com
+86400-014-7080