ACCURIDE FridgiGuard™ Medical Refrigerator Lock Software User Guide
![]()
Ver .1
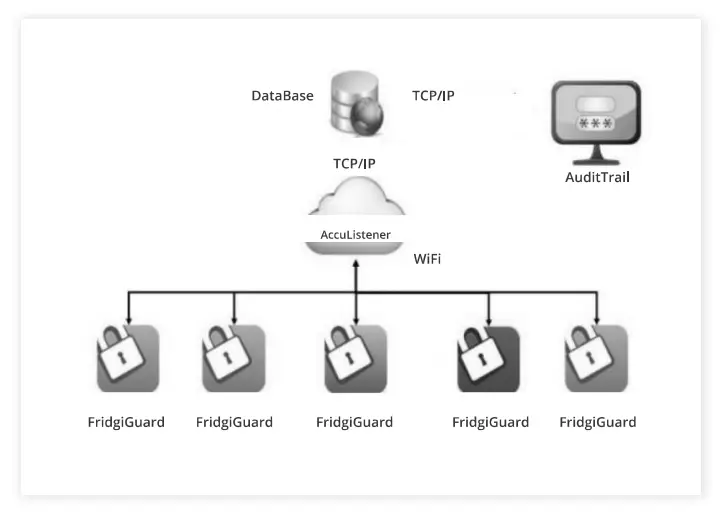
System Architecture, Requirements and Hardware
System Architecture
System Requirements
Operating System:
- MS Windows 7 or Newer
- 64 BIT
Minimum Hardware Requirements:
- 2 GB RAM
- 1280 x768 Resolution
- 1.7 GHz CPU
Included Hardware
- FridgiGuard Electronic Lock
- 5v Power Adapter
- Micro-USB Cable
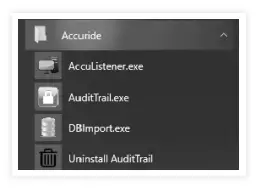
Software Files
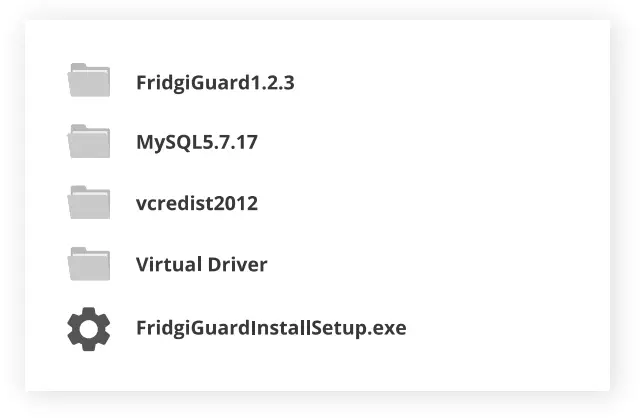
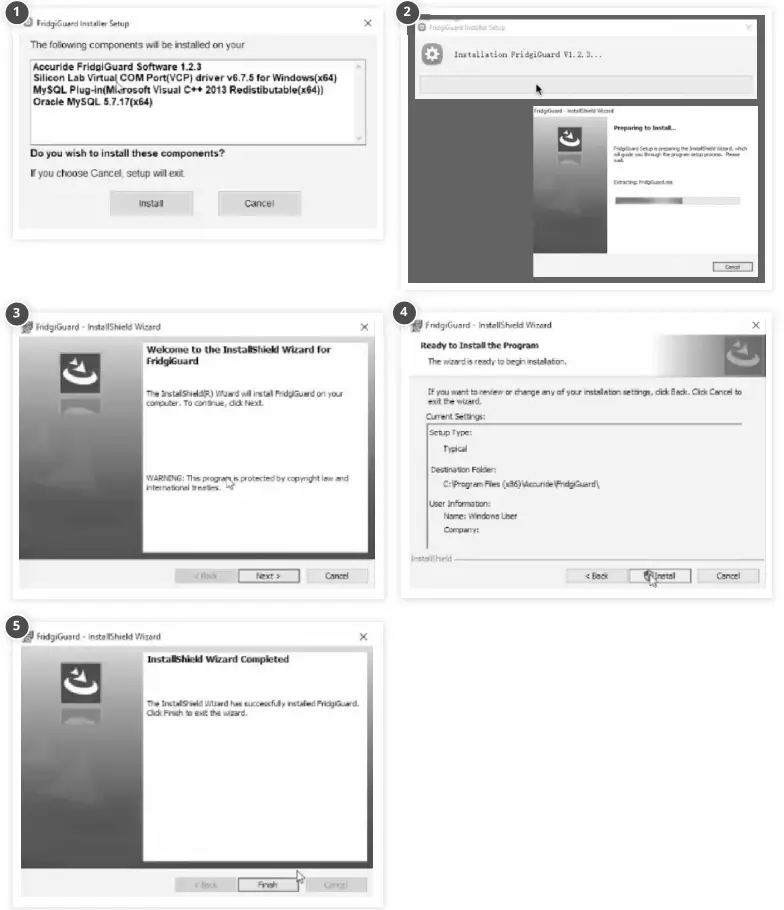
Software Setup
FridgiGuard Trail
Double-click FridgiGuardInstallSetup.exe to install.
Virtual Com Port Driver
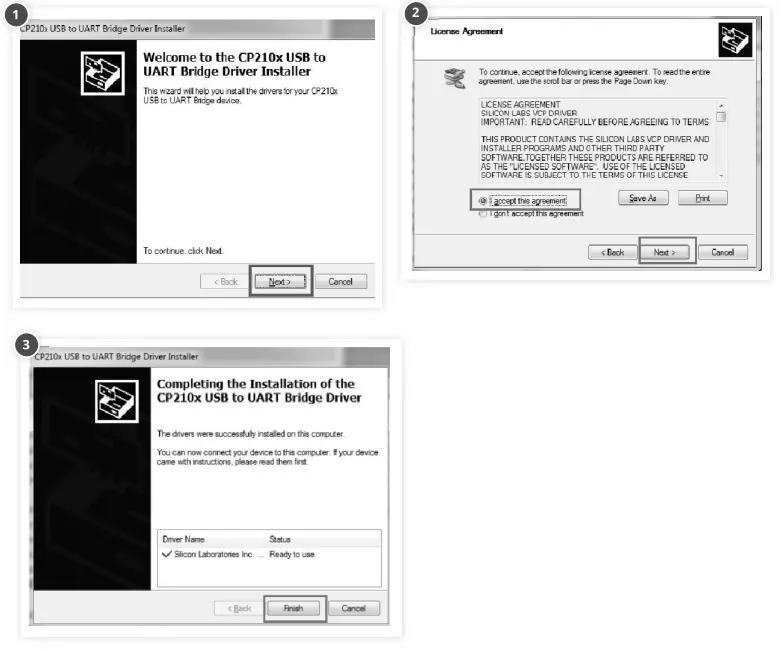
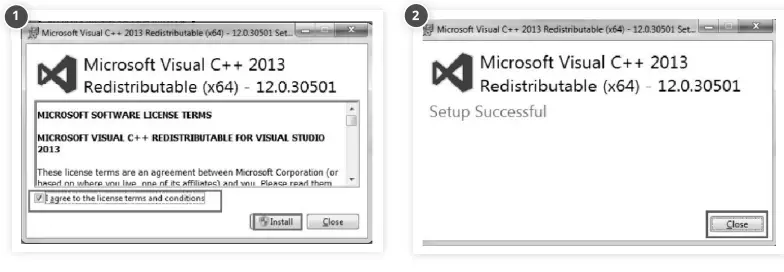
MySQL Plug-In (MS Visual C++ Redistributable)
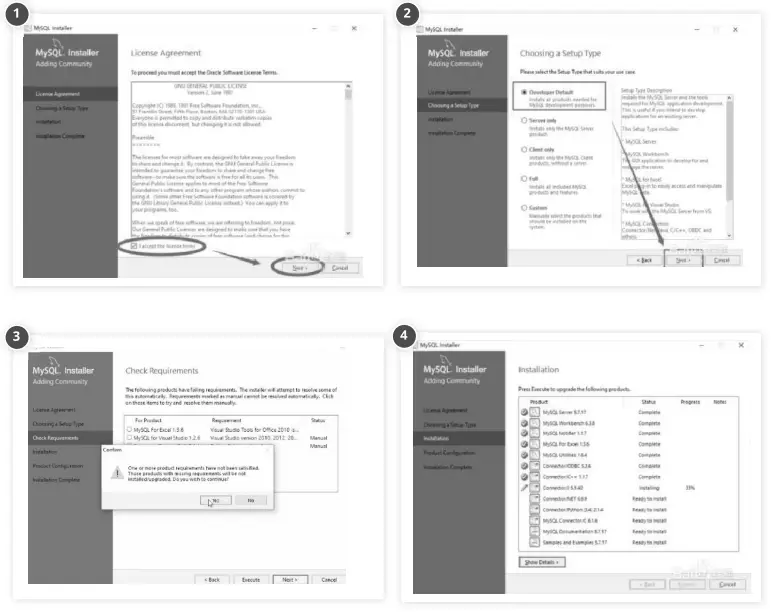
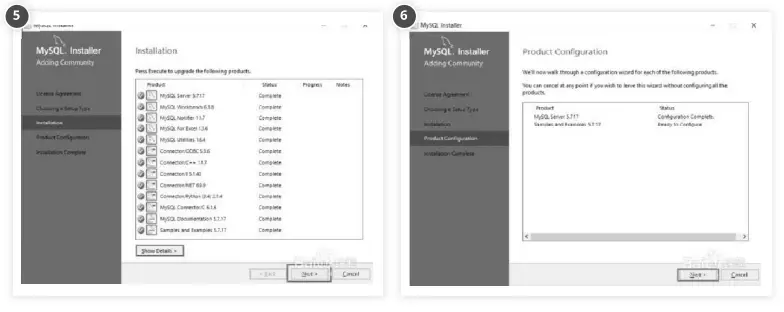
MySQL 5.7.1
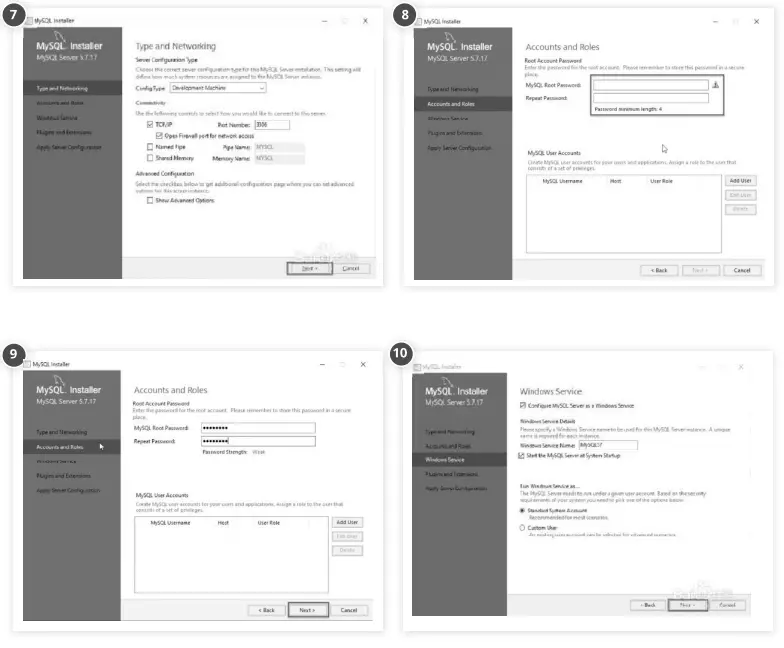
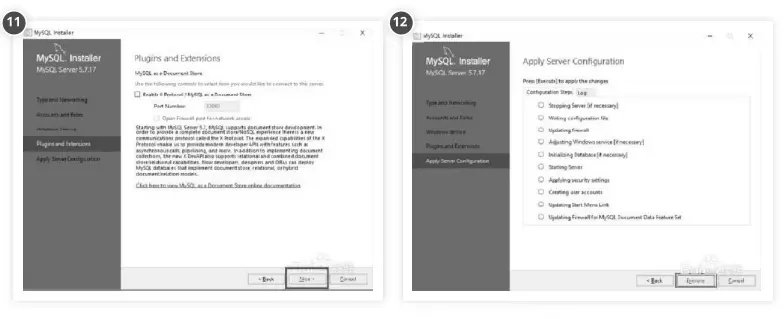
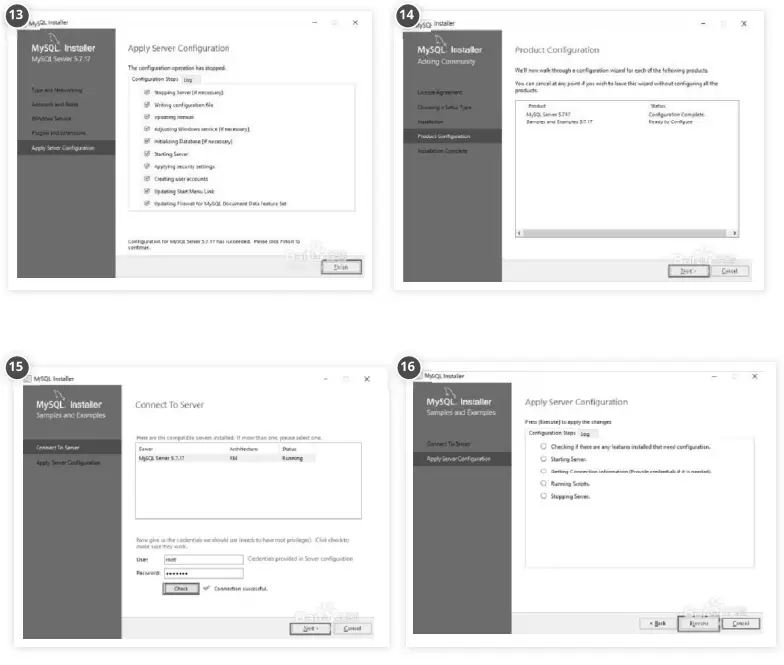
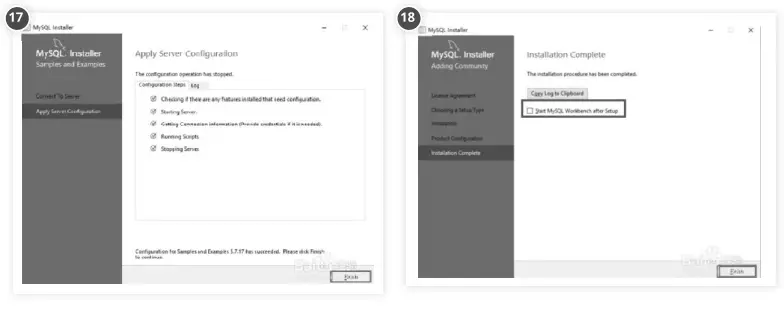
Configure Your Database
- Click Start on your desktop.
- Click the Accuride folder.

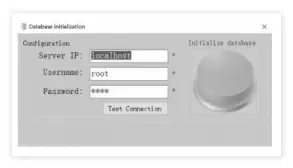
- Click Database initializer.

- You will see a “Database initialization” menu with three areas of configuration and default values:
Server IP → “localhost”
Username → “root”
Password → same as your database’s setting password when installing MySQL. - You do not need to change your Server IP value. You can change your Username value if you created another user name when you installed the database.
- Click Test Connection.
- Once tested, you will receive a prompt confirming a successful test connection.

- The “Initialize database” button on the right will turn green. Click it to complete your configuration.

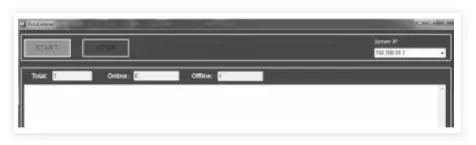
Acculistener
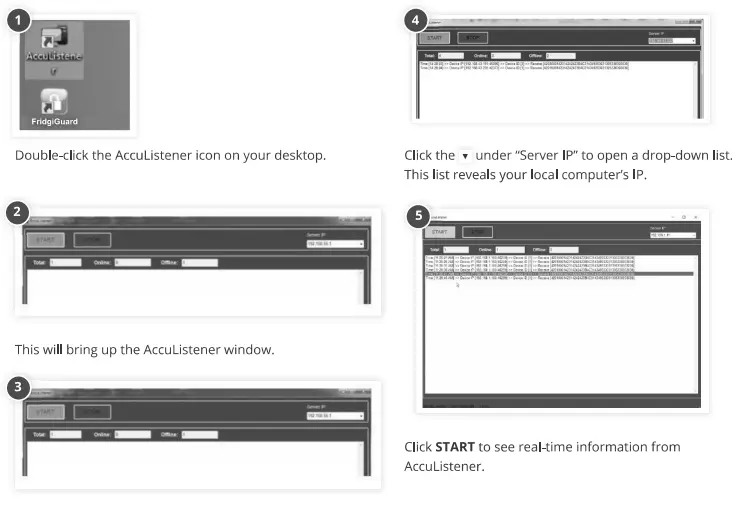
- START sets our system to receive and process messages from your device.
- STOP sets your system to stop receiving messages.
Troubleshooting
NOTE: The AccuListener will not show data until the FridgiGuard lock has been set up properly.
If you have set up the lock properly and AccuListener isn’t receiving messages…
- Your computer’s firewall will block AccuListener from network access until it receives approval.
- Verify that your device’s server IP matches your computer’s IP.
If you receive an error message…
- Check the icon on the lower right of your desktop menu to verify AccuListener is already active.
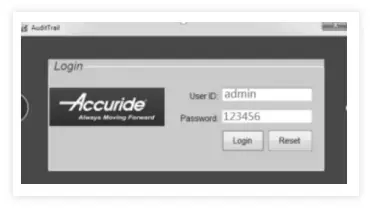
Using FridgiGuard & Audit Trail Operation
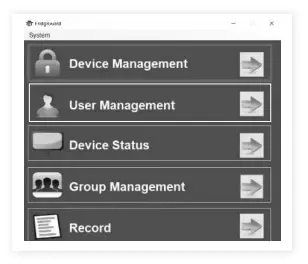
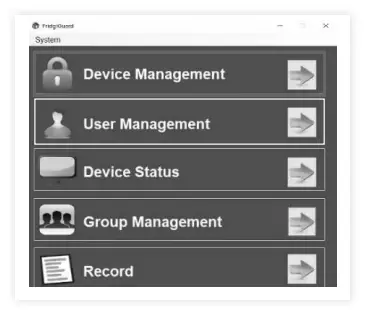
- Login with your user ID and password. Default user is admin and default password is 123456.

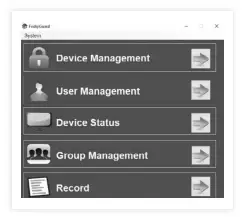
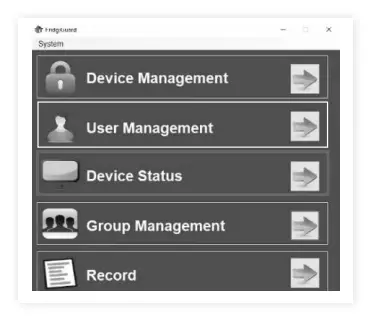
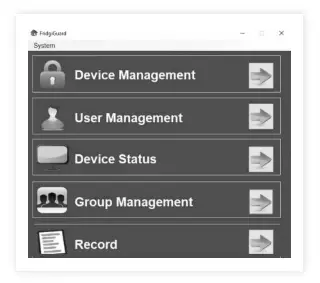
- This is the main menu. Select Device Management.

- Connect the Power Supply to the FridgiGuard Electronic Lock.
- The FridgiGuard’s LED light will turn green to signal its powered.
- Connect the FridgiGuard to your computer via USB.
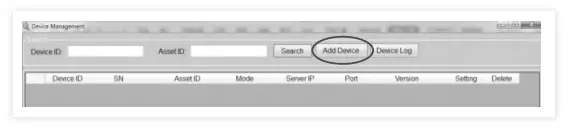
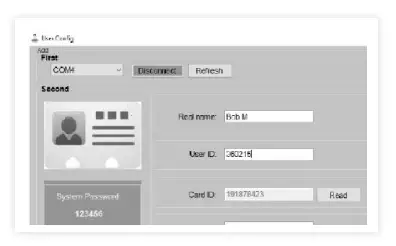
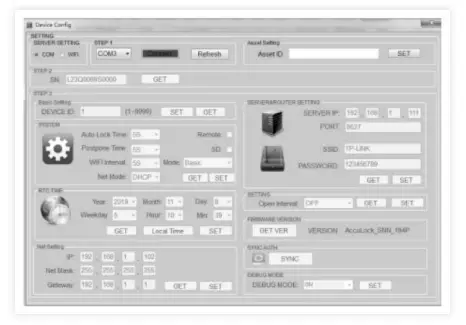
- On your computer, click Add Device. This will bring up a “Device Config” menu.

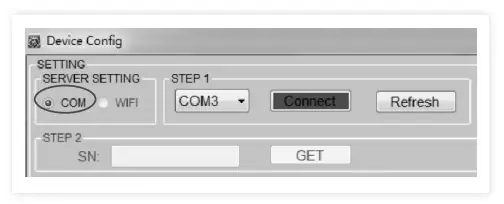
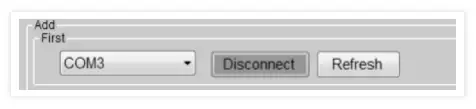
- Select COM on the upper left of the “Device Config” menu.

- Under STEP 1, select the COM number. Click the Connect button next. (The button should turn green once you click Connect.)

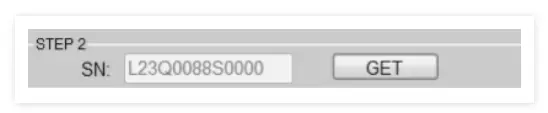
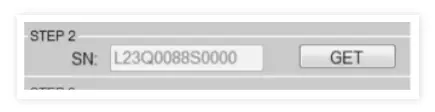
- Under STEP 2, click the GET button to find the Serial Number (SN).

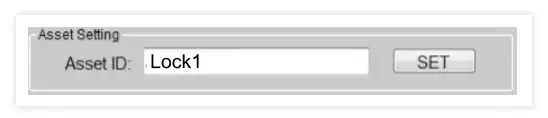
- In the “Asset ID” field, enter an ID for your FridgiGuard Electronic Lock and click the SET button.
NOTE: Your FridgiGuard lock will disconnect and restart after your press “SET.”
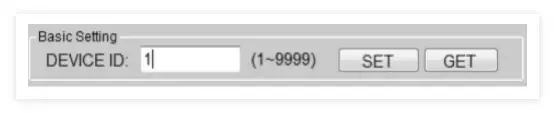
- Next to the “DEVICE ID” field, click SET to your settings. Click GET to retrieve previous settings.


System Settings
In the “SYSTEM” menu, you will find various adjustable settings:
Auto Lock Time
This setting adjusts the time when FridgiGuard automatically relocks an unlocked opening.
Postpone Time
This setting adjusts the time when FridgiGuard’s alarm activates after an opening.
WIFI Interval
This setting determines how often FridgiGuard reports lock status to its server.
Net Mode
This setting lets you choose from DHCP (IP address automatically generated) or STATIC.
Remote
This setting lets you unlock a secured compartment remotely. A ![]() in the box means remote unlocking in on.
in the box means remote unlocking in on.
SD
This setting saves backup data onto an SD card. A ![]() in the box means SD backup is on.
in the box means SD backup is on.
Mode
This setting lets you choose from three modes.
Basic Mode Swipe any card to unlock.
Dual Mode Swipe any two cards simultaneously to unlock.
Authorization Mode An Admin Card can unlock by itself, or swipe the Auth Card first followed by a User Card to unlock.
RTC Time
This setting sets the time for your system.
Net Setting
This setting lets you retrieve and input network information. Note: This mode is only available when the STATIC setting is selected in “Net Mode.”
Firmware Version
This setting shows the version of your FridgiGuard firmware. Click GET VER to update firmware (if an update is available).
Open Interval
This setting determines the interval between unlocking for a user.
Open Interval
This setting determines the interval between unlocking for a user.
Server & Router
This finalizes your FridgiGuard system’s server and router setting. There are four fields:
SERVER IP: Current PC IP
PORT: 9527
SSID: Your WiFi network’s name
PASSWORD: Your WiFi network’s password
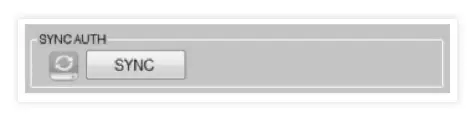
Sync Auth
This setting lets you sync a user to a device. You must add and authorize a user before you can apply this option.
Debug Mode
This mode enables technical staff to debug equipment.
User Management
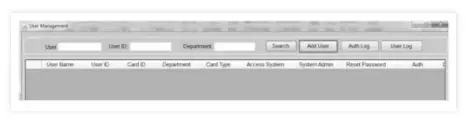
- Select User Management on the main menu.

- On the “User Management” menu, click Add User. NOTE: Adding a user requires a lock to be connected to a computer beforehand.

- Choose a COM from the drop-down menu. Once selected, the Connect button to the right will turn green. This indicates a successful connection.

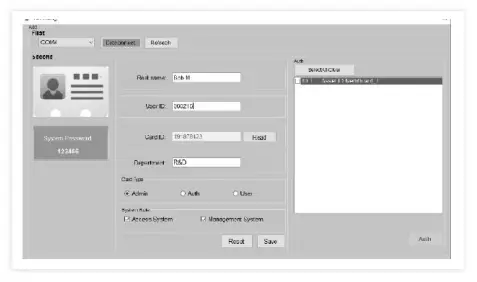
- Fill in user information. Apply the name and User ID manually.

- To populate your Card, place an RFID card in front of your FridgiGuard device and click Read. The device will beep and then populate values.
- Select the appropriate card type: Admin, Auth, or User.

- Check valid boxes for your system role. “Access System” permits access to the management system. “Management System” grants an administrator all authorizations. The initial password for both is 123456.

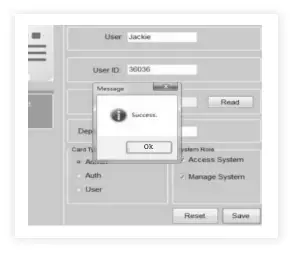
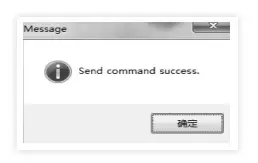
- Click Save. You should receive a message labeled “Success.”

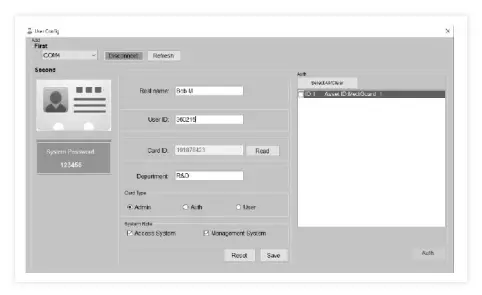
- Within the same menu. you can see a list of devices add to your system.

- Check the box next to a device that needs authorization. Click the Auth button in the lower right. You should receive a message labeled “Success.

Synchronize Permissions
- You synchronize permissions via COM or WiFi.
- To synchronize via COM, connect your FridgiGuard device to its plugged-in power supply. You will see a green LED light flash on the device to signal its powered.
- Next, connect the FridgiGuard to your computer via USB.

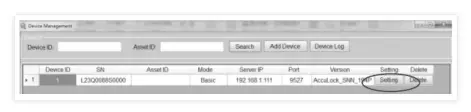
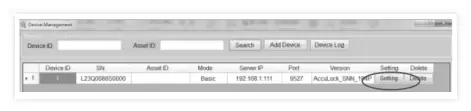
- Select Device Management on the main page.

- Select your device in the “Device Management” screen.

- Click Setting.

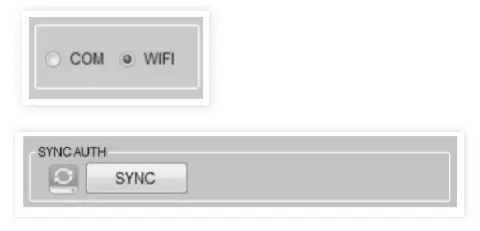
- Select “COM” under “SERVER SETTING” in the upper-left.

- Click Connect.

- Click GET next to “SN” so you can retrieve the serial number.

- Click SYNC in the lower right (under “SYNC AUTH”).

- You should receive a “Success” message.


- To synchronize via WiFi, first verify AccuListnener is open and can receive messages from the FridgiGuard.
- In the “Device Management” screen, select “WIF|” in the upper-left.
- Click SYNC.
- You should receive a success message. Wait several seconds as permissions with the connected device will update automatically.

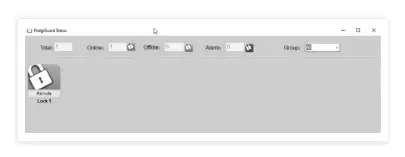
Device Status
- Verify AccuListener is open and able to receive messages from your FridgiGuard device.

- Click Device Status on the main menu.

- The top of the next screen lists number of FridgiGuards in your system, their status, and any alarms.

- The “Group” option on the right lets you display devices by group.
- Selecting a group will bring up a list of devices in that category.

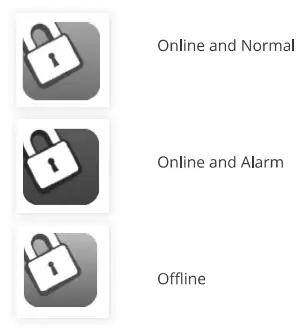
Status Types
Remote Unlock
- Click the “Remote” button on a device icon to unlock that device by computer.
- Hover your mouse over that a device icon to bring up its ID.
- Right-click a device icon to view that last record of it being unlocked.
- The “LastRecord” window will load relevant, including the User ID, User Name, and Open Time that device was last opened.
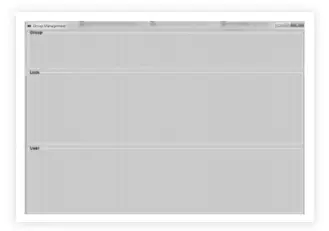
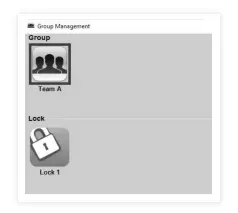
Group Management

- For simplified management of devices, click “Group Management” on the main menu.

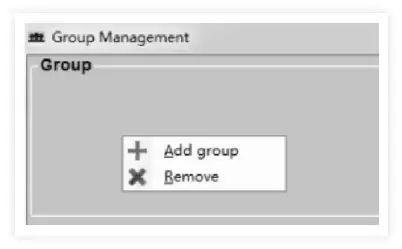
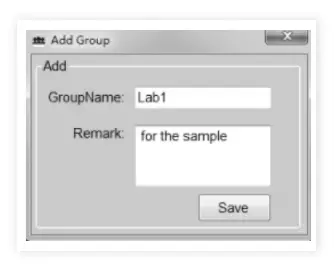
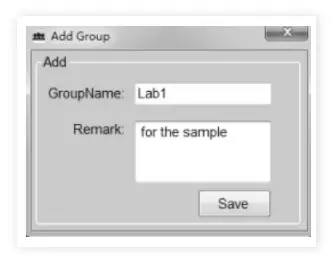
- In “Group Management” screen, right-click the “Group” area.

- This will create a prompt to add or remove a group.

- When adding a group, type in a group name and a remark/description.

- Click Save.
Adding a Device to a Group
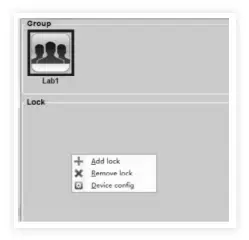
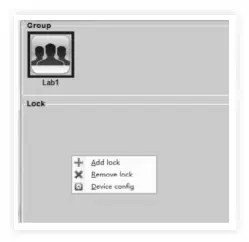
- Under “Group,” left-click the group you want for the device to be added.

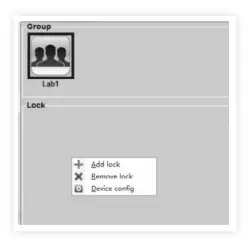
- Right-click the “Lock” area below.
- Left-click “Add Lock.”

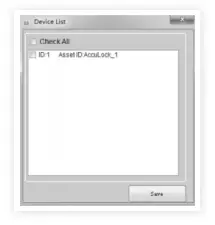
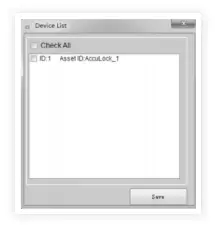
- Check the device(s) you want added from the “Device List.”
- Click Save.

- You should now see the device in the “Lock” area.

Add User
- Left-click on a device under “Lock.” This will list authorized users in the “User” area below.

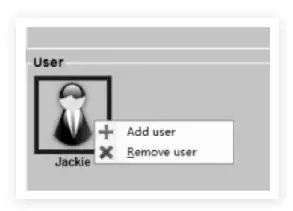
- To authorize a user, right-click the “User” area.

- Left-click “Add User”.

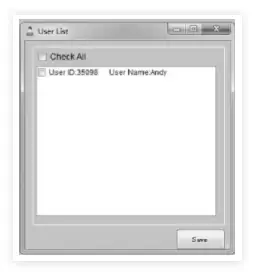
- Check the user you wish to add from the “User List.”
- Click Save.

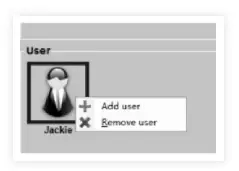
Remove User
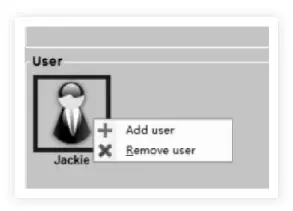
- To remove authorization, right-click over the user you wish to remove.

- Left-click “Remove User.”
- Click Save.
- NOTE: Each lock must Sync to finalize any addition.
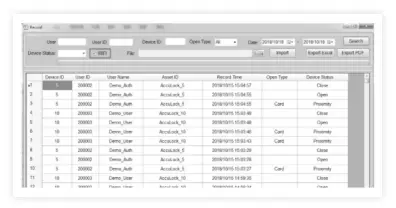
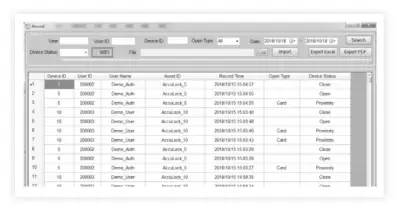
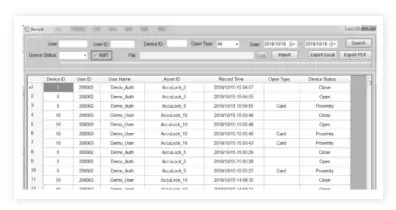
Record
- Click Record on the main menu.

- The “Record” menu lists online/offline records, data transfers to SD cards, and an export option to Excel or PDF.

- You can query by date. The same start and end dates signal all data queried.
- Unchecking the WiFi box means data comes by SD card solely. (SD card data must be imported manually.) Click Search to yield results.
- Checking the WiFi box will show data received from WiFi and SD. Click Search to yield results.
- You can import offline records by clicking the Folder icon and selecting the folder you wish to import.
- Click Import to proceed.


Last Steps
- Swipe your FridgiGuard RFID card to unlock.
- The lock will begin to alarm after the set opening time is exceeded.
- The alarm will stop after the door is closed and locked.
![]()


