![]()
Availability of spare parts and Repair and Maintenance Information
HOUSEHOLD
WASHING MACHINES
Availability of spare parts
The following spare parts can be ordered by professional repair shops at this email address: [email protected], with the subject of the message „Spare parts order (a)“ motor and motor brushes; transmission between motor and drum; pumps; shock absorbers and springs; washing drum, drum spider, and related ball bearings (separately or bundled); heaters and heating elements, including heat pumps (separately or bundled); piping and related equipment including all hoses, valves, filters, and aqua stops (separately or bundled); printed circuit boards; electronic displays; pressure switches; thermostats and sensors;
software and firmware including reset software;
In the e-mail message, attach a photo of the rating label of the product for which you are ordering a spare part, the name of the spare part and the number of ordered units.
The following spare parts can be ordered by professional repair shops and end-users at this email address: [email protected], with the subject of the message „Spare parts order (b)“ door, door hinge and seals, other seals, door locking assembly and plastic peripherals such as detergent dispensers,
In the e-mail message, attach a photo of the rating label of the product for which you are ordering a spare part, the name of the spare part, and the number of ordered units.
Maintenance Information – W1
Model W1, EAN: 4251539600322, Serial number: 1xxxxxxxxx21153960032x
 Important information
Important information
Purpose
These repair hints support consumers to repair appliances by themselves according to the applicable eco-design regulation (as of 03/2021).
They contain information on how to exchange defined spare parts including warnings and risks.
In case of questions, please contact our customer service. We will only be liable for damages if the repair hints have been followed properly.
Explanation of symbols
Danger levels
The warning levels consist of a symbol and a signal word. The signal word indicates the severity of the danger.
| Warning level | Meaning |
 Danger Danger | Non-observance of the warning message will result in death or serious injuries. |
| Warning | Non-observance of the warning message could result in death or serious injuries. |
| Caution | Non-observance of the warning message could result in minor injuries. |
| Notice | Non-observance of the warning message could result in damage to property. |
Table 1: Danger levels
Hazard symbols
Hazard symbols are symbolic representations that give an indication of the kind of danger.
The following hazard symbols are used in this document:
| Hazard symbol | Meaning |
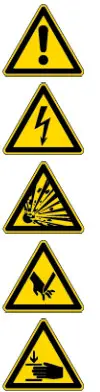 | General warning message |
| Danger from electrical voltage | |
| Risk of explosion | |
| Danger of cuts | |
| Danger of crushing |
| Hazard symbol | Meaning |
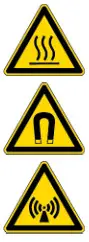 | Danger from hot surfaces |
| Danger from the strong magnetic field | |
| Danger from non-ionizing radiation |
Table 2: Hazard symbols
| Gen. symbol | Meaning |
 | Identification of required tools |
 | Identification of required preconditions |
 | Identification of a condition (if …, then …) |
 | Identification of a result |
| Start | Identification of a key or button |
| [00123456] | Identification of a material number |
| Status | Identification of displayed text/window (in the appliance’s display) |
Table 3: General symbols
Structure of the warnings
Warnings in this document have a standardized appearance and a standardized structure.
 | Danger Type and source of danger! Possible consequences of ignoring the danger/warning. ▶ Measures and prohibitions for preventing the danger. |
The following example shows a warning that warns against electric shock due to live parts. The measure for avoiding the danger is mentioned.
| Danger Risk of electric shock due to live parts! Death by electrocution ▶ Disconnect appliances from electrical supply at least 60 seconds before starting repairs. |
General symbols
The following general symbols are used in this document:
| Gen. symbol | Meaning |
 | Identification of a special tip (text and/or graphic) |
| Identification of a simple tip (only text) | |
| Identification of a link to a video tutorial |
 Safety
General Safety instructions
All domestic appliances
Risk of electric shock due to live parts!
- Errors by repairs involving electrical components can lead to electrical shock!
- Disconnect the appliance from the mains for at least 60 seconds before starting work.
- After the repair has a safety test according to VDE 0701 or country-specific regulations performed.
Risk of injury from sharp edges!
- Wear protective gloves.
Risk of crushing during repair, maintenance, troubleshooting, and service due to heavy and moving components
- Wear protective shoes.
- Secure heavy components from falling down.
- Do not stick body parts into moving components.
Risk to the appliance’s safety/function!
- Only use original spare parts.
Risk of damage to electrostatically sensitive components (ESDs)!
- Do not touch the modules, including connections and conductor paths.
 Tools and aids
 Tools and aids
| Designation | Details | Images |
| Auxiliary tool [15000155J | Tool for loosening out of plastic parts | 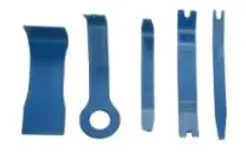 |
| Screwdriver Torx T20 with borehole [00340764J | 100 mm, for screws with safety pin |  |
| Torque spanner [150004411 | Torque spanner 20 – 100 Nm | |
| Slot screwdriver [00340854J | Blade 3.5 mm x 0.6 mm x 100 mm, Protective Insulation 1000 VAC | |
| Slot screwdriver [00340855J | Blade 5.5 mm x 1.0 mm x 125 mm, Protective Insulation 1000 VAC | |
| Needle-nose pliers, angled pattern [003412691 | Length 200 mm | 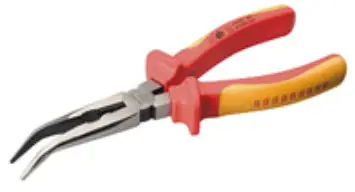 |
| Side-cutting pliers [00342182J | Length: 200 mm | 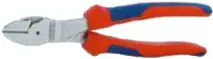 |
| Designation | Details | Images |
| Combination wrench [00340811] | Wrench size 10°mm, M6 |  |
| Combination wrench [00340814] | Wrench size 13°mm, M8 | |
| Combination wrench [00340817] | Wrench size 17 mm, M10 | |
| Combination wrench [15000459] | Wrench size 16°mm, M10 | |
 Repair
 Repair
Replacing door
| Open hinge area! Finger crushing/entrapment ▶ Do not reach into the hinge area. ▶ Wear protective gloves. |
Prerequisite:
- The appliance is disconnected from the power supply.
- The appliance is disconnected from the water supply.
- The door is opened.
- The furniture panel has been removed.
Removing door
1.
| Risk of falling parts due to released screws! Damage to other parts of the appliance or at customers’ home e.g. bottom. ▶ Secure component from falling down. |
| Risk of falling parts due to released screws! Injury because of falling parts. ▶ Secure component from falling down. |
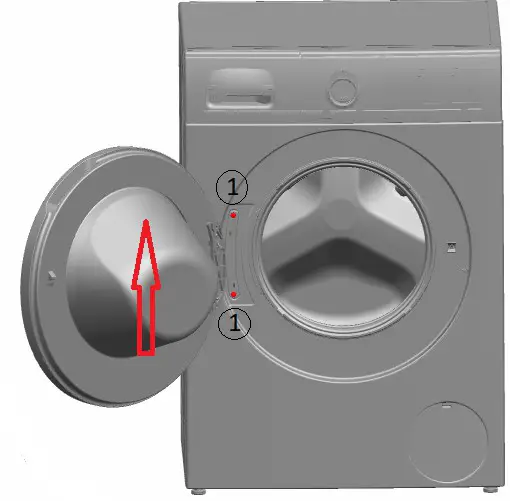
2. Remove door upwards.
Installing door
▶ Install in reverse order.
Replacing door seal
Prerequisite:
- The appliance is disconnected from the power supply.
- The appliance is disconnected from the water supply.
- The detergent drawer has been removed.
- The fascia panel has been removed.
- The door has been removed.→ Page 57
- The front panel has been removed.
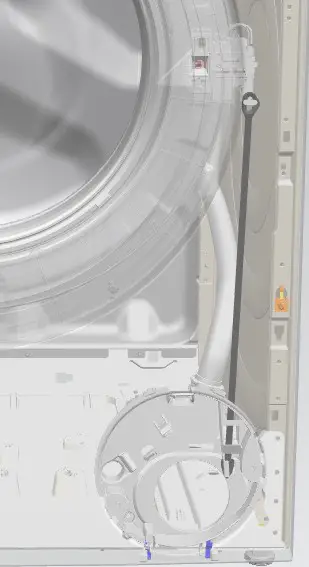
Replacing door seal
- Detach transmitter hose from water level controller.
- Detach siphon from detergent dispenser and housing.
- Detach door sear air conductor from upper-air infeed of door seal.
- Remove four screws.
Always keep hold of bolt nuts. - Remove weight and front base.
Installing door seal
 | When installing the front base, ensure that the supporting surface is clean (no pieces of concrete, …) |
▶ Install in reverse order.
Replacing door lock
Prerequisite:
- The appliance is disconnected from the power supply.
- The appliance is disconnected from the water supply.
- Open front door.

Notice
Risk of damaged surface!
The surface of the appliance can be scratched by using the wrong tools.
▶ Only use plastic tools.Remove spring and push away the seal.
- Remove screws on the door lock.
- Release door lock.
- Remove opening line upwards from guide.
- Disconnect cable connector.
Installing door lock
The door lock must be in the right position to ensure the emergency door opening function of the appliance.
▶ Install in reverse order.
Replacing bottom cover
Prerequisite:
- The appliance is disconnected from the power supply.
- The appliance is disconnected from the water supply.
Removing bottom cover
- Open quick-release fastener with a slotted screwdriver.
- Remove cover.
Installing bottom cover
▶ Install in reverse order.
LORD Hausgeräte GmbH
Greschbachstraße 17
762 29 Karlsruhe
Deutschland
www.lord.eu
[email protected]


