Geeetech Rostock 301 3D printer
Assembly Manual
GEEETECH
SUPPROT
Thanks for choosing Geeetech, we strive to provide a satisfied and pleasant shopping experience for you, but we do understand there may be some questions you may encounter in using our product. If so, you can contact us directly or post on our forum, our technique staff will help you resolve it. For more detailed information, please visit Geeetech website.
For detailed building videos, please check at YouTube:
https://goo.gl/adghBa
Subscribe our YouTube channel for more videos.
https://www.youtube.com/user/geeetech
Join our geeetech 3D printer user club.
https://goo.gl/GhJbe3
Feel free to drop a line at [email protected] .
– 1 –
GEEETECH
INTRODUCTION:
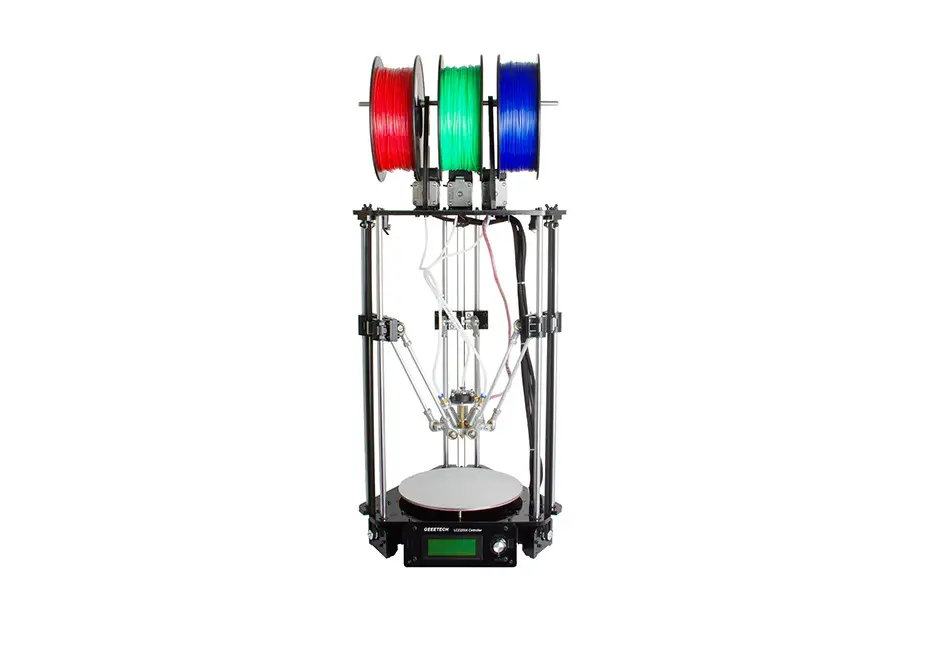
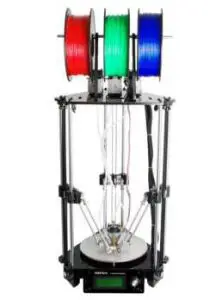
Geeetech Rostock 301 is an affordable desktop 3D printer for tech enthusiasts, serious hobbyists and educators. This printer provides you with excellent printability and triple-color, mix color capability, offering an intuitive 3D printing experience.
Rostock 301 is a perfect combination of the delta type construction and the 3-in-1-out mix color 3D printing hotend. Delta type construction features faster printing speed and high printing accuracy; the 3-in-1-out mix color 3D printing hotend gives a rich mixture of color combination of the printing object.
Rostock 301 maintains DIY property, with which you can unleash your creativity to refit or modify it as you like. This kit is just the beginning; you can get more out of it.
– 2 –
GEEETECH
PACKAGE LIST:
This list includes all the parts required to assemble your Rostock 301 3D Printer. After you received your package, please check if all the parts listed are included. Also make sure all the components are in good condition and not damaged during shipping. If anything is missing please contact with our customer service straight away, provide us the NO. , Name, and Qty.
Mechanical parts | ||||
| No | Name | Specifications | Qty | Pic |
| 1 | Smooth Rod | ф10 L500mm (±2mm) | 6 |  |
| 2 | Filament Spool | ф8 L318mm (±2mm) | 1 |  |
| 3 | Rod-end bearing holder | ф6.5 20mm | 12 | |
– 3 –
GEEETECH
| 4 | Diagonal Rod | With rod-end bearing | 6 |  |
| 5 | M3 Washers | M3 | 125 |  |
| 6 | M4 Washers | M4 | 30 | |
| 7 | M8 Washers | M8 | 15 | |
| 8 | Nut | M2.5 | 8 |  |
| 9 | Nut | M3 | 15 | |
| 10 | Nut | M5 | 25 | |
| 11 | Lock nut | M4 | 5 |
– 4 –
GEEETECH
| 12 | Wing nut | M3 | 8 | |
| 13 | Square nut | M3 | 35 | |
| 14 | Hex sunk screw | M3x12 mm | 5 |  |
| 15 | Hex sunk screw | M3x30 mm | 5 | |
| 16 | Round head screw with pad | M3 x 8 mm | 15 | |
| 17 | Screw | M2.5x16mm | 8 |  |
| 18 | Screw | M3x5mm | 15 | |
| 19 | Screw | M3x8mm | 20 | |
| 20 | Screw | M3x12mm | 40 | |
| 21 | Screw | M3x16mm | 40 | |
| 22 | Screw | M3x20mm | 10 |
– 5 –
GEEETECH
| 23 | Screw | M3x25mm | 8 | |
| 24 | Screw | M3x40mm | 5 | |
| 25 | Screw | M4x8mm | 15 |  |
| 26 | Screw | M4x12mm | 15 | |
| 27 | Screw | M4x20mm | 5 | |
| 28 | Screw | M5x16 | 15 | |
| 29 | Screw | M5x20 | 15 | |
| 30 | Spring | 4.0x 20 (for heat bed) | 5 |  |
| 31 | Spring | 3.5*30 (for endstop trigger) | 5 |  |
| 32 | locking ring | M8 With Jimmy bolt | 4 | |
| 33 | Ball Bearing | MR84zz (Placed in No.34) | 6 |
– 6 –
GEEETECH
| 34 | Driven wheel | 3 |  | |
| 35 | Driven wheel holder | Sheet metal part | 3 |  |
| 36 | Pulley | 20 tooth | 3 |  |
| 37 | Linear Bearing | PCS10UU | 6 |  |
| 38 | Timing Belts | 2GT L= 1200mm | 3 | |
| 39 | Spacer | With Aircraft type end | 8 |  |
– 7 –
GEEETECH
| 40 | Nylon ties | 20 |  | |
| 41 | bowden tubes | PTFE L=600mm | 3 | |
| 42 | Spiral Coil | 1 meter | 1 | |
| 43 | Sticker | 2 | ||
| 44 | Heat sink | 9*10*5mm | 6 | |
| 45 | Cable Clip | 1 |  | |
| 46 | Hex copper spacer | 6 |  |
– 8 –
GEEETECH
| 47 | End stop | Blue–1pcs Red– 1pcs Black–1pcs | 1 |  |
| 48 | Fan | 40x40x10mm | 1 |  |
| 49 | Extensio n wire | 3Pin Male-3Pin Female | 1 |  |
| 50 | 3-1 motor wire | For X/Y/Z motors | 1 |  |
| 51 | Extruder Motor wire | 6-4pin | 3 |  |
– 9 –
GEEETECH
| 52 | Extruder wire | 3 |  | |
| 53 | Knob | For LCD control | 1 | |
| 54 | LCD kit | LCD2004+ FPC Ribbon cable | 1 |  |
| 55 | Control board kit | GTM32 pro + 6 A4988 | 1 set | 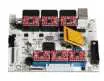 |
| 56 | Heatbed set | with Heating wire + Thermistor wire | 1 |  |
– 10 –
GEEETECH
| 57 | Stepper motor | For X/Y/Z axis | 3 |  |
| 58 | Extruder | 3 | 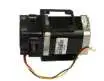 | |
| 59 | Extensio n board | 3 | 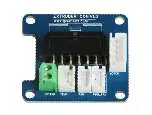 | |
| 60 | Hotend | 3-in-1-out hotend | 1 |  |
– 11 –
GEEETECH
| 61 | Power Supply Unit | 12V/20A | 1 |  |
| 62 | 3D printer Power Cable | With plug | 1 | 
|
| 63 | Power Cable | Connect board to PSU | 1 |  |
| 64 | USB cord | A-BA | 1 |  |
Acrylic parts | ||||
– 12 –
GEEETECH
| A1 | Top plate | RK-01 | 1 |  |
| A2 | Base plate | RK-02 | 1 |  |
| A3 | Motor holder | RK-03 | 3 |  |
| A4 | Motor holder support | RK-04 | 6 |  |
| A5 | Drive wheel mount | RK-05 | 3 | |
| A6 | Endstop mount | RK-06 | 3 |
– 13 –
GEEETECH
| A7 | Fan mount | RK-07 | 1 |  |
| A8 | LCD frame | RK-08 | 1 | 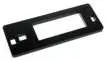 |
| A9 | LCD support | RK-09 5mm | 2 |  |
| A10 | Spool holder Side panel | RK-10 | 1 |  |
| A11 | Spool holder Side panel | RK-11 | 1 |  |
| A12 | Carriage mount | RK-12 | 3 | 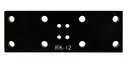 |
– 14 –
GEEETECH
| A13 | PSU case part1 | 1 |  | |
| A14 | PSU case part2 | 2 |  | |
| A15 | PSU case part3 | 1 |  | |
| A16 | PSU case part4 | 1 |  | |
metal parts | ||||
| M1 | Spider | 1 |  | |
– 15 –
GEEETECH
| M2 | Belt mount | 3 |  | |
| M3 | Endstop trigger mount | 3 |  | |
| M4 | Diagonal Rod joint | 6 | ||
| M5 | Building platform | Round aluminum plate | 1 |  |
| M6 | Extension board cover | 3 |  | |
Free add-on | ||||
| F1 | Ejector pin | 1 | ||
– 16 –
GEEETECH
| F2 | File | 1 | ||
| F3 | Screw-driver | 1 |  | |
| F4 | Starter filament | 3 meters Random color | 1 |  |
– 17 –
GEEETECH
GENERAL CARE AND MAINTENANCE
As with all the electronic equipment, it is important to keep your printer clean to extend its life. Regularly remove dust and debris with a microfiber cloth or compressed air. Dredge the tube and the nozzle after use every time to ensure fluent performance.
- Don’t leave the heaters on the printer turned on for a long periods of time when not used.
- Don’t leave your printer in shady and moist places, which may exacerbate the problems associated with erosion.
- Lubricated the linear bearings on the three axes with grease to avoid oxidation for smooth operation.
- Avoid positioning your power supply unit in such a way that the brick is hanging, pulling, or putting any unnecessary stress in the electrical wires and components.
– 18 –
![]()
GEEETECH


