ICP DAS PET-7200 PoE Ethernet i/O Module User Manual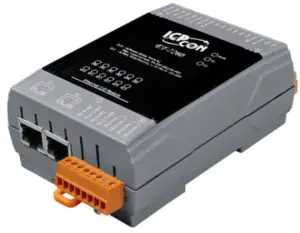
What’s in the Box?
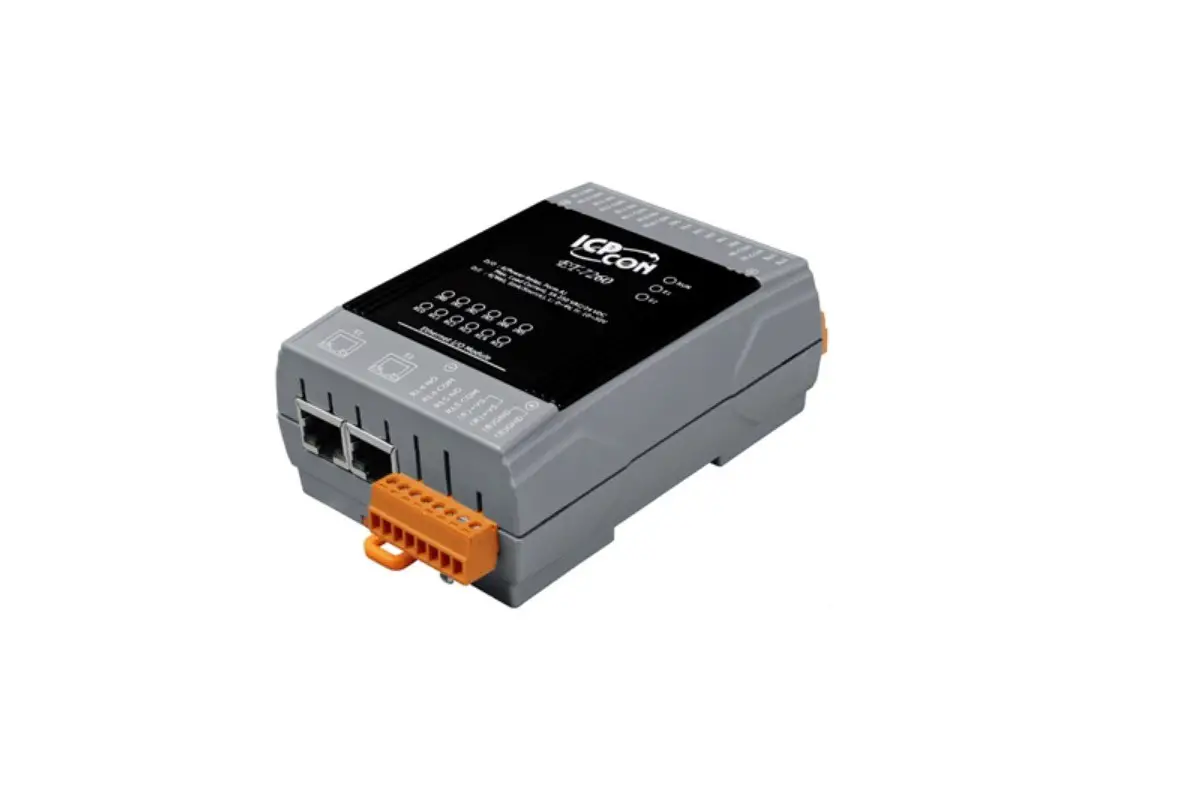
- PET-7200/ET-7200 Module

- Quick Start


Factory Default Settings
Network Connection | Default | Authentication | Default |
IP Address: | 192.168.255.1 | User name: | Admin |
Subnet Mask: | 255.255.0.0 | Password: | Admin |
Gateway: | 192.168.0.1 |
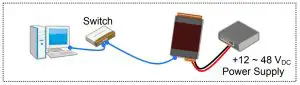
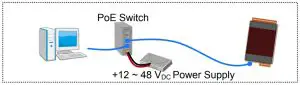
Connecting to Network, Computer and Power
- Non-PoE

- PoE
Assigning a Valid IP Address – Method 1
- Install eSearch from
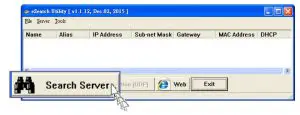
http://ftp.icpdas.com/pub/cd/6000cd/napdos/software/esearch/ - Launch eSearch and click “Search Server”

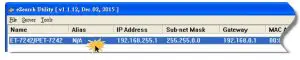
- Double-click the name for your module on the list

- Enter the network configuration and click “OK”

- Repeat Step 2. to search the module again
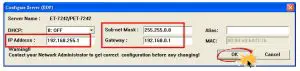
To make sure your modifications take effect.
Assigning a Valid IP Address – Method 2
- Set the IP configuration on your computer
The ET-7200 module comes with the default IP address of 192.168.255.1, you must chose an IP address for the computer in the range of 192.168.255.2 – 192.168.255.253 that is not in use. - Launch your web browser to go to the ET-7200 web interface
Enter the factory default IP address 192.168.255.1 for the ET-7200 as the URL in browser and press Enter. - Fill out the User name and Password
Fill out the factory default user name and password “Admin” and then click “OK”. - Assign a valid IP address for your ET-7200 module
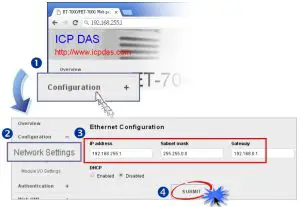
- Click “Configuration”
- Click “Network Settings” in the sub-menu
- Enter a valid IP address for your ET-7200 module.
- Click the “SUBMIT” button.

- Restore the original IP address to your computer

Logging in to the ET-7200 Module
- Enter the new IP for the ET-7200 as the URL in browser
- Fill out the User name and Password “Admin” again
- Welcome to ET-7200 web site
Supported Products
- ET-7200 Series
- ET-7200-UT Series
- PET-7200 Series
Technical Support
PET-7200 / ET-7200 User Manual
http://ftp.icpdas.com/pub/cd/6000cd/napdos/et7000_et7200/document/


