![]() NT40 (W/Z/B) Smart and Remote Control RGB+W LED Controller
NT40 (W/Z/B) Smart and Remote Control RGB+W LED Controller
User Manual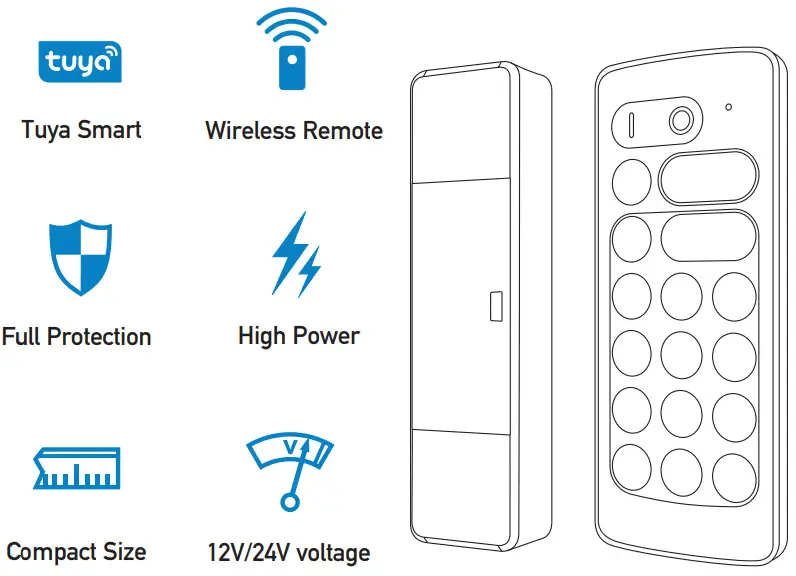
Introduction
NT40 RGB+W LED controller is designed to drive constant voltage LED products with common anode connection in voltage range of DC12-24V. It can be controlled by smart phone with Tuya smart app connection or by the stand alone RF remote controller. user can setup white and RGB LED color, brightness, scene and dynamic effects with the rich function on smart phone Tuya app or the easy operation remote controller.
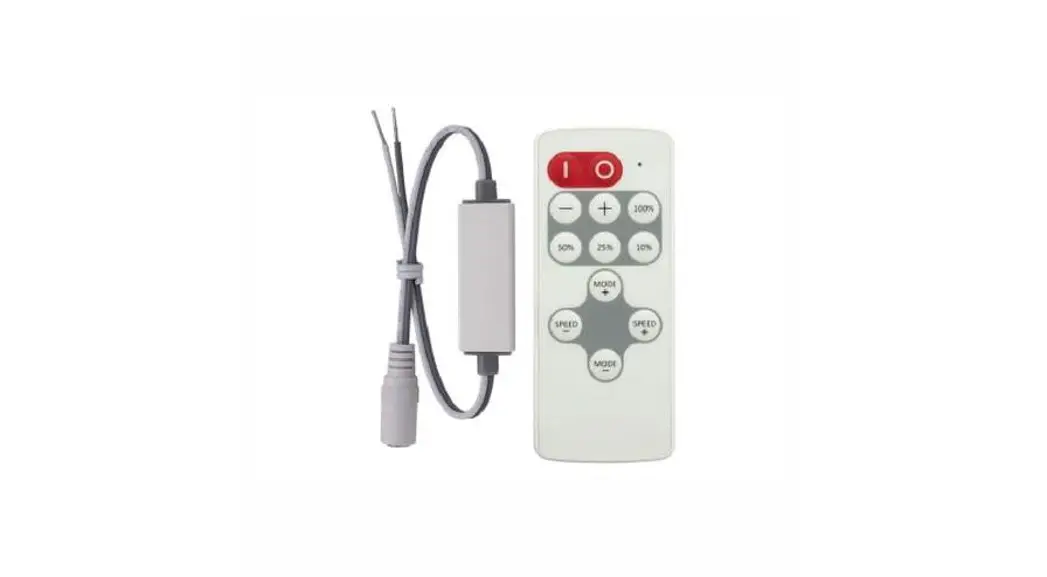
Dimension

Wiring & Indicator
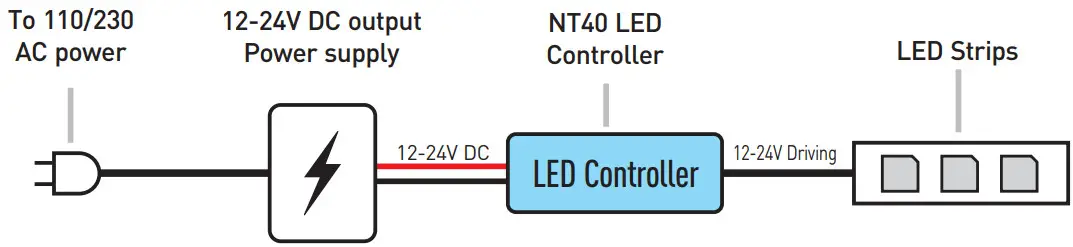
- Power supply input
Install positive power cable into the terminal marked with ‘+’ and negative power cable into the terminal marked with ‘-’. The controller can accept DC power from 12 to 24V, the output is PWM driving signal with same voltage level as the power supply, so please make sure the LED rated voltage is same as the power supply. - LED output
Connect LED fixtures to this terminal. Install LED common anode cable into the terminal marked with ‘+’ and each channel LED cables into the terminal marked with R, G, B and W. Please make sure the LED rated voltage is same as the power supply and each channel’s maximum load current is below the controller rated current.
The controller will run into protection if the output been overloaded or short circuited. The indicator will flash red color and stop working in this case, Please check the wiring and load current to remove the fault. - Work status indicator
This indicator shows all working status of the controller. It displays different events as following:
Steady yellow: Remote only mode, Tuya disconnected.
Steady green: Remote and Tuya smart mode.
Single green blink: Command received.
Long single yellow blink: Brightness or speed reach limit.
Red flash: Overload protection.
Yellow flash: Over heat protection.
Green flash 3 times: Setup command received. - Wiring diagram
Functions
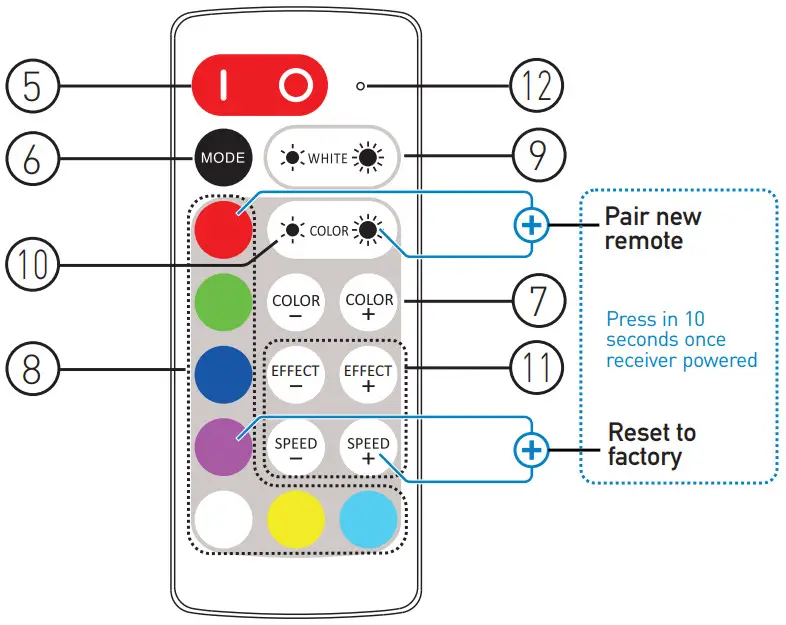
- Turn ON/OFF
Press ‘I’ key to turn on unit or press ‘O’ key to turn off. The power on status can be set to last status or default status from app. At last status mode, the controller will memorize the on/off status and will restore to the previous status on next power on. Please use remote controller or app to turn on if it was switched to off status before power cut. - Light mode switch
Press this key to switch between RGB, white and RGB+White mode. In RGB mode, white channel will be disabled; In white mode, RGB channel will be disabled; In RGB+White mode, all channels are usable. - Select static RGB color
Press and
and  key to select color from the preset library colors.
 - Shortcut color select
Shortcut key to static colors. LED will run the relevant color when pressing the specific color key. The shortcut color is included in and content. - White brightness control
Press key to increase white LED brightness and press
  key to decrease.
 - RGB brightness control
Press key to increase RGB LED brightness and press key to decrease. - RGB dynamic effect
These keys control the RGB dynamic effects. Press and
and  to select dynamic effects, press
  and
and  key to set the running speed of the dynamic effects.
 - Remote indicator
This indicator blinks when remote controller is working. If the indicator flash slowly when pressing keys, it means the remote battery is nearly empty and please change the remote battery (CR2032 type).Operation
- Using the remote controller
Please pull out the battery insulate tape before using. The RF wireless remote signal can pass through some nonmetal barrier. For proper receiving remote signal, please do not install the controller in closed metal parts. - Setup Tuya connection
Please install the Tuya app to setup the smart connection. Before setup, please make sure the controller is at factory default mode and not connected to other gateway or router. The controller indicator should be yellow color at this status. - Pair a new remote controller
The remote controller and receiver is 1 to 1 paired as factory default. It’s possible to pair maximum 5 remote controllers to one receiver and each remote controller could be paired to any receivers.
To pair a new remote controller, please follow two steps:
1). Plug off the power of receiver and plug in again after more than 5 seconds.
2). Press and
and  key simultaneously for about
3). Seconds, within 10 seconds after the receiver powered on.
After this operation, the indicator will flash 3 times to acknowledge that remote pairing is accomplished. - Reset to factory default
To reset the controller’s Tuya setting and unpair all remote controllers, please operate with following two steps:
1). Plug off the power of controller and plug in again after more than 5 seconds.
2). Press and key simultaneously for about 3 seconds, within 10 seconds after the receiver powered on.
After this operation, the indicator will flash yellow color for 3 times and the controller will be reset to factory default, the Tuya connection and remote pairing will all be reset.
Protection Function
The controller has full protection function against wrong wiring, load short circuit, overload and overheat.
The controller will stop working and the indicator will flash with red / yellow color to indicate the malfunction.
The controller will try to recover from protection status in a short time when the working condition is good.
For protection issues, please check the situation with different indicator information:
Red flash: Check the output cables and load, make sure no short circuit and the load current is in rated range. Also the load must be constant voltage type.
Yellow flash: Check the installation environment, make sure in a rated temperature range and with good ventilation or heat dissipation condition.
Specification
| Model | NT40(W/Z/B) |
| Output Mode | PWM constant voltage |
| Working voltage | DC 12-24V |
| Rated output current | 4x3A |
| Tuya connection | W: Wifi; Z: Zigbee; B: Bluetooth |
| Remote frequency | 433.92MHz |
| Remote control distance | >15m at open area |
| PWM grade | 4000 steps |
| Overload protection | Yes |
| Overheat protection | Yes |
| Controller dimension | 87x24x15mm |
| Remote dimension | 86.5x36x8mm |
![]() Model: NT40 (W/Z/B)
Model: NT40 (W/Z/B)
Powered by![]() Inteligence inside
Inteligence inside


