![]() CGP24G1D Gravity Fed Grill
CGP24G1D Gravity Fed Grill
Instruction Manual
CGP24G1D Gravity Fed Grill
![]() CAUTION
CAUTION ![]()
- Always remove plug from outlet before servicing your grill.
- Make sure your grill has fully cooled to avoid burns.
- Some components may have sharp edges. Use caution to avoid injury.

Remove: grates/griddle, warming racks, manifold, charcoal from hopper, ash grate, ash can, grease tray, slides, hopper ash door, any other accessories on the grill.
Disassembly
 | |
| Remove the manifold support bracket (2 screws) | Remove front folding shelf (4 screws) |
 | |
| Unplug wires from the controller. | Remove side shelf (4 screws) |
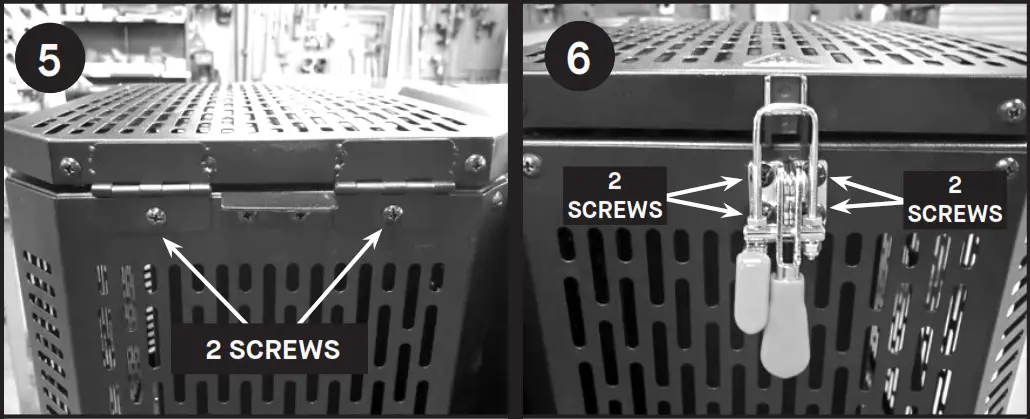 | |
| Remove hopper lid (2 screws) | Remove hopper latch (4 screws) |
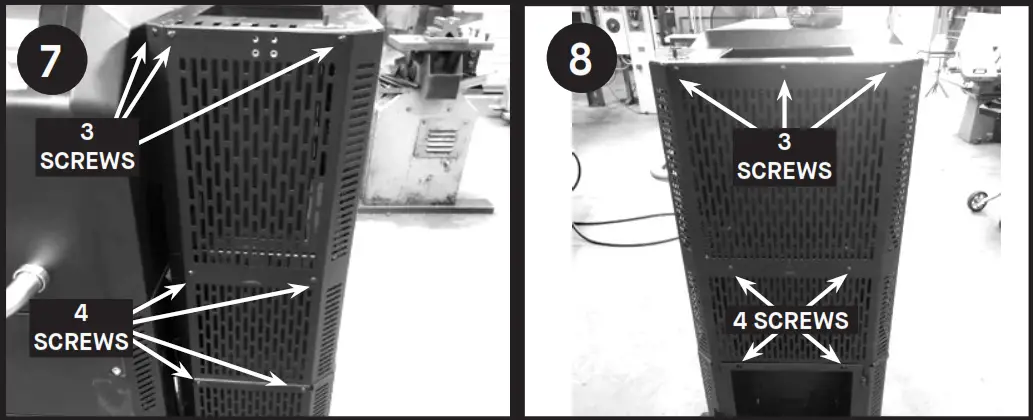 | |
| Remove shroud (7 screws) | Remove shroud (7 screws) |
 | |
| Remove shroud (7 screws) | Unplug the wiring harness. |
 | |
| Pull the hopper wires through the leg brace hole. | Remove hopper (6 screws). Pull the hopper off the body and set to the side. |
 | |
| Turn the grill upside down on the lid. | Remove 6 screws from the legs. |
 | |
| Remove 6 screws from the legs. | Take the legs off the body. |
 | |
| Remove 2 bolts that hold the lid to the body. | Remove the body from the lid. |
Assembly
- Screw the lid onto the body (see step 18).
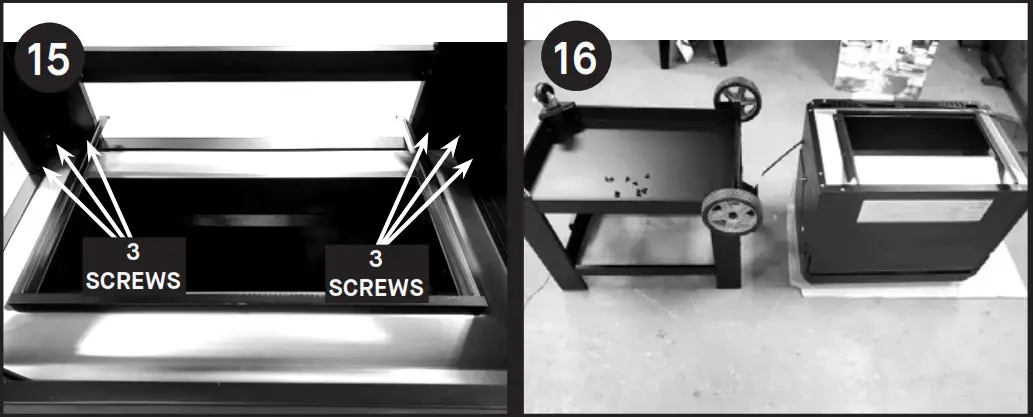
- Screw in the leg assembly to the new grill body (see steps 14 and 15).
- Screw in the hopper to the grill’s body using six (6) screws (see step 12).
- Plug the wiring together (see steps 10 and 11).
- Screw in the heat shield to the hopper using twenty one (21) screws (see steps 7,8, and 9).
- Attach the hopper lid and latch using six screws (6) (see steps 5 and 6).
- Attach the side shelf using four screws (4) (see step 4).
- Plug in wires to the controller (see step 3).
- Attach the front folding shelf using 4 screws (4) (see step 2).
- Replace the manifold support bracket using 2 screws (2) (see step 1).
- Replace: grates/griddle, warming racks, manifold, charcoal from hopper, ash grate, ash can, grease tray, slides, hopper ash door, any other accessories on the grill.
![]() @masterbuilt
@masterbuilt![]()
masterbuilt.com
Customer Service:
masterbuilt.com/contact-us
masterbuilt.com/warranty
masterbuilt.com/collections/parts


