![]() INSTALLATION GUIDE
INSTALLATION GUIDE
DROP-IN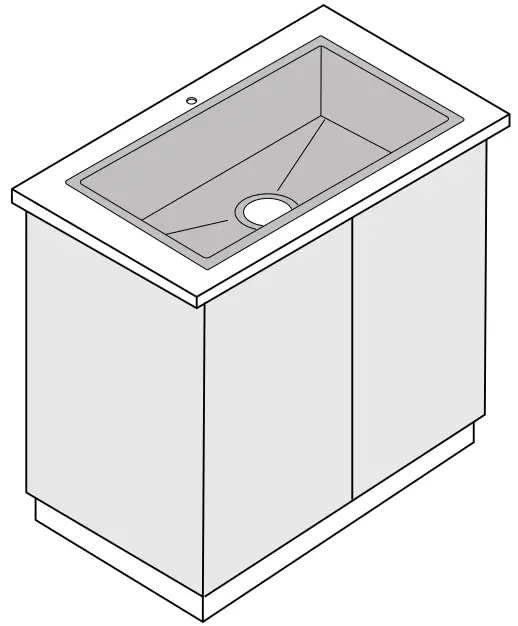
Mounting System – Type B
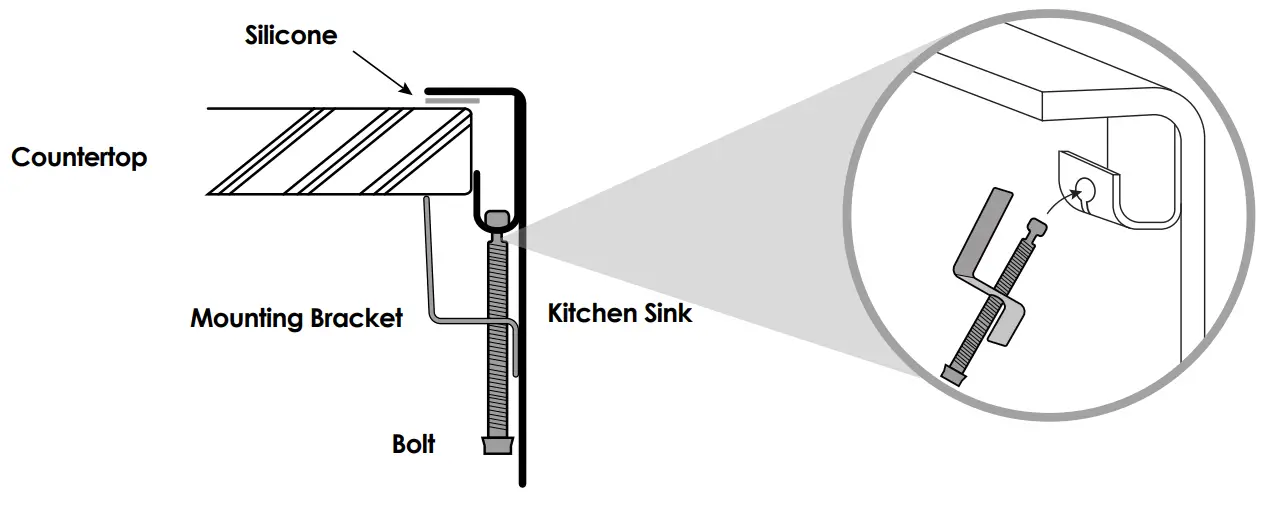
Mounting clip bolt insert into sink side bracket
THANK YOU FOR CHOOSING STYLISH®
We work hard to provide innovative and beautiful designs that last and delight your home.
We would love to hear from you. Tell us what you think of the product by leaving a review through the dealer where you have purchased this product.
Your feedback is important for our continuous improvement and will also let other customers make the correct choice.
Prior to installation:
Make sure that you have all necessary parts by checking the parts list. If any part is missing, please contact Stylish®
Customer Service at +1-855-789-5352 for a replacement.
Inspect the sink prior to installation to make sure that it has not been damaged during shipping.
You may use the cut-out template provided or download DXF file from www.stylishkb.com, the file is available under each sink model.
Observe all plumbing and building codes according to your state requirements.
| Stylish® model name | Stylish® model | Top mount cut-out model dimensions | |
| Inches | mm | ||
| Avila | S-414T | 28-1/2″ x 16-1/4″ | 724 x 413 |
| Lugo | S-412T | 22-1/4″ x 16-1/4″ | 556 x 413 |
| Malaga | S-411T | 28-1/8″ x 16-1/4″ | 715 x 413 |
| Bilbao | S-407T | 20-1/4″ x 16-1/4″ | 514 x 413 |
| Palma | S-408T | 18-1/4″ x 16-1/4″ | 464 x 413 |
| Soria | S-417T | 7-1/2″ x 16-1/4″ | 191 x 413 |
Check sink model for recommended cut-out dimension.
For models S-200T, S-200XT, S-201T, S-202XTG, S-203T follow enclosed hard template with sink or download DXF file from www.stylishkb.com website.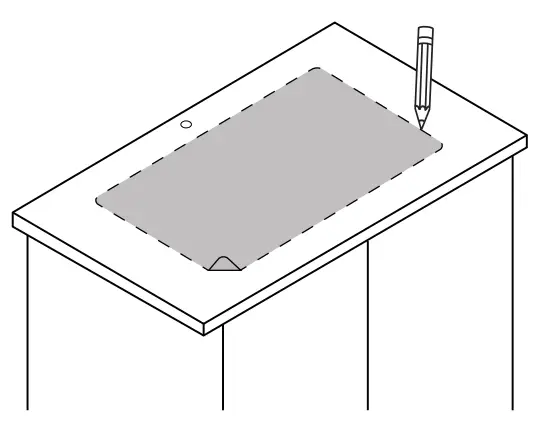
Place cut-out template in desired position on countertop locating center of the bowl over cabinet.
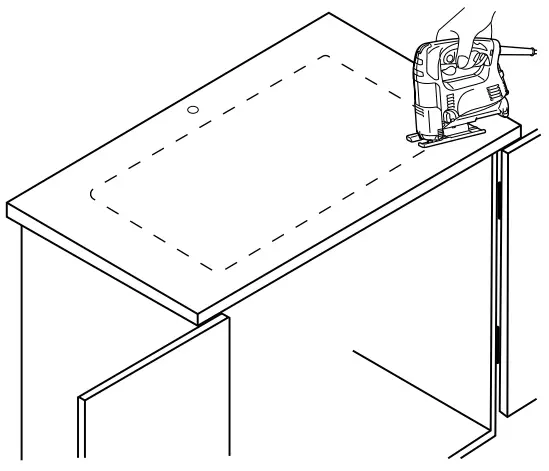
Trace the outline of the template and cut countertop according to templated outline using appropriate cutting tools. Template is for guide only. Use physical sink to ensure accurate cut-out opening.
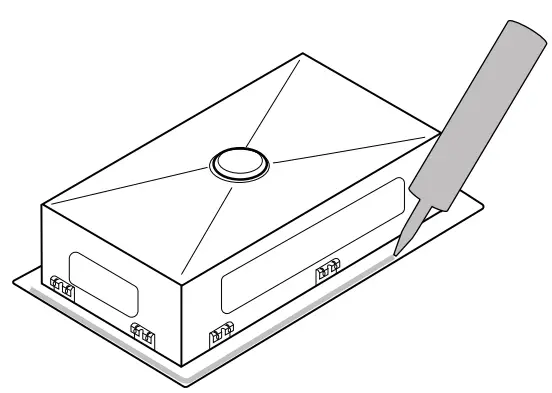
Clean sink flange and underside of cut-out area of countertop, making sure that the area is smooth and free of debris. Apply continuous bead of silicone.
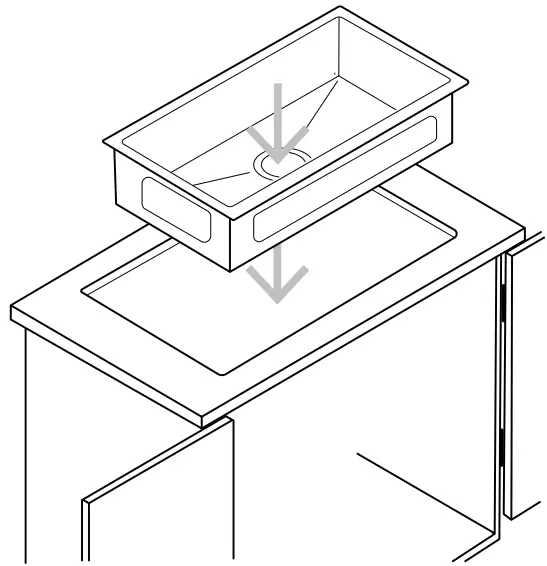
Drop-in on countertop opening.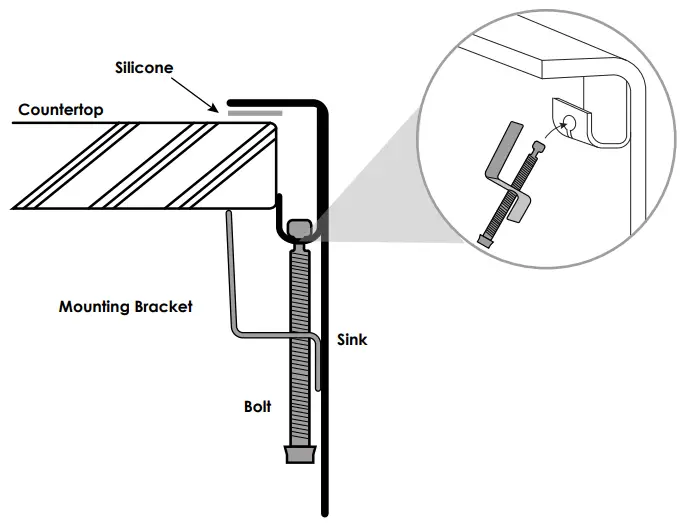
Mounting clip bolt insert into sink side bracket.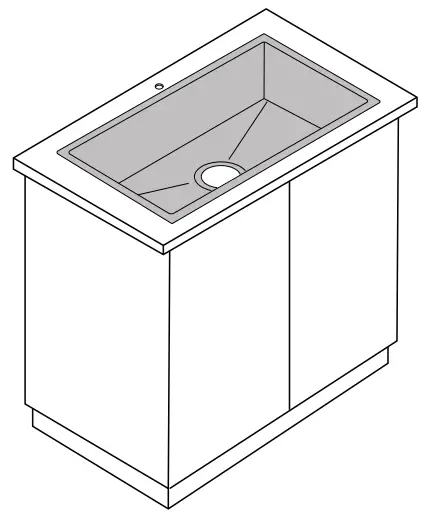
Check alignment of sink again and tighten fasteners to secure sink. Wipe away excess silicone caulk with damp cloth. Connect drain and water supply according to manufacturer’s instruction.
CARE AND CLEANING
- Rinse the sink with water.
- Coat the sink with baking soda, Flitz or Barkeepers friend.
- With sponge, scrub all sink walls in the direction of the steel grain.
- Spray on undiluted vinegar.
- Rinse again.
- Buff with a few drops of olive oil.
- If necessary, repeat procedure.
- We recommend the use of a stainless steel bottom grid that will protect the sink from scratches that could be caused by the utensils and pots.
WARRANTY
For additional technical assistance or for any questions or concerns about your kitchen sink’s warranty, please contact us.
www.stylishkb.com/warranty
Stylish International Inc.![]() www.stylishkb.com
www.stylishkb.com![]() stylish.international.inc
stylish.international.inc![]() [email protected]
[email protected]![]() +1-855-789-5352
+1-855-789-5352
Products and specifications shown are subject to change without notice.
Please contact our technical support at [email protected] for any further queries, replacement parts requests, etc.
©2021 Stylish® all right reserved.


