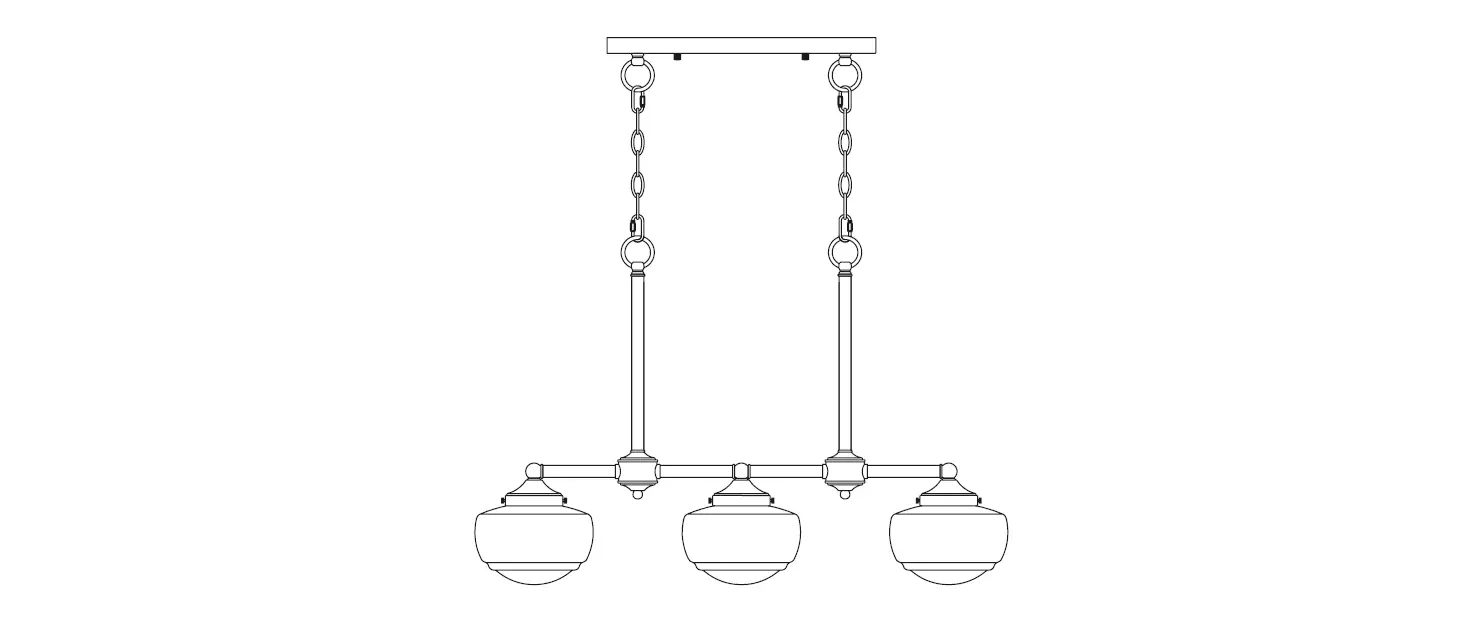
Hunter 19488 3 Light Linear Chandelier
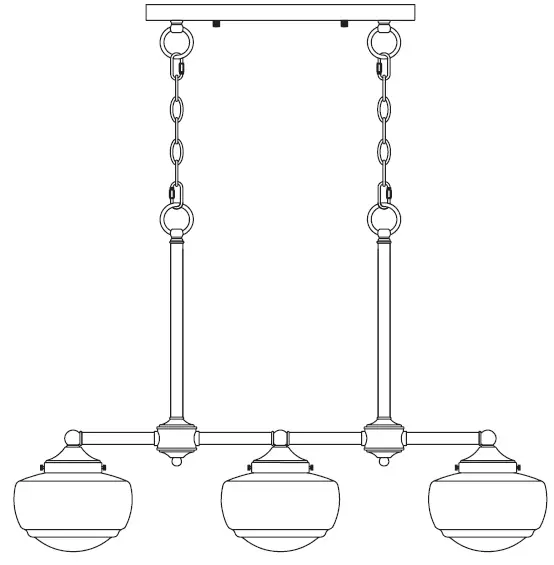
3 Light Linear Chandelier
For Models:
- 19488
- 19489
- 19490
- 19491
FEATURES
- Fixture weight ±2 lbs:
- Peso ±2 lb:
- Poids fixe ±2 lbs:
- 11.4 lbs (5.17 kg)
| Hardware Service Kit | ||
| Part # | Model | Finish |
| 19488 | Brushed Nickel | |
| KG20602214 | 19489 | Nickel Brossé |
| 19490 | Noble Bronz | |
| KG20601834 | 19491 | Bronze Noble |
| Glass/Domo De Vidrio/Verre | ||
| Part #/Pieza #/Pièce # | Model/ | Type |
| 19488 | Cased White Glass | |
| KG21000136 | 19490 | Vidrio Blanco |
| KG21000046 | 19489 19491 | Clear Seeded Glass |
Here are the tools you’ll need to complete your installation
- Ladder

- Screwdriver

- Pliers

- Wire Strippers

- Drill

INSTALLATION INSTRUCTIONS
WARNING
- To avoid possible electrical shock, before installing your light fixture, disconnect the power by turning off the circuit breakers to the outlet box associated with the wall switch location.
- The lighting fixture must be grounded. If the ground wire for the installation site is not present, immediately STOP installation and consult a qualified electrician.
- All wiring must be in accordance with national and local electrical codes ANSI/NFPA 70. If you are unfamiliar with wiring or in doubt, consult a qualified electrician.
PREPARING FOR INSTALLATION
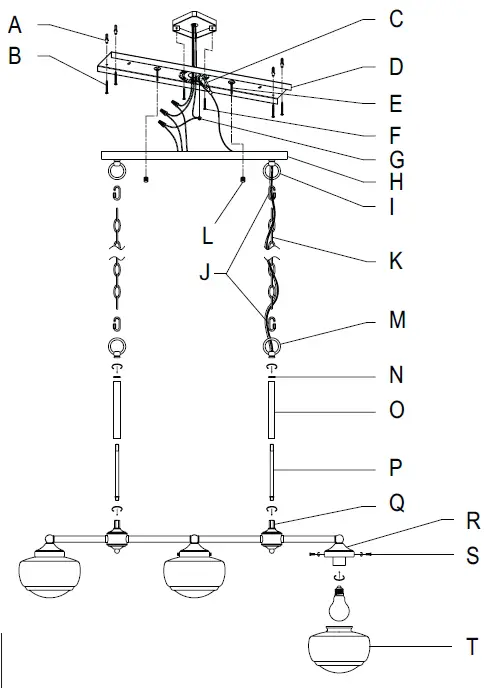
Carefully remove all contents from the carton. Shut off the power at the circuit breaker and completely remove the old fixture from the ceiling, including the old mounting bracket. Remove the new mounting bracket assembly from the bag. Then remove cap nuts (L) from mounting screws (E). Place the mounting plate (D) over the junction box so that mounting screws (E) extend out away from the ceiling. Put the drywall anchor (A) inside the hole in the ceiling, then insert the drywall screw (B) through the mounting plate (D) into the drywall anchor (A). Pull the house wires through the center of mounting plate (D). Secure mounting plate (D) to the junction box by tightening the screws (F).
ASSEMBLING THE FIXTURE
Thread the wires through and screw the center rod (P) into the hexagon nut (Q), then slide the rod cover (O) and lock ring (N) over the center rod (P) and secure with the hanging ring (M). By measuring, determine the correct number of chain links needed for proper hanging height. If necessary, use a pair of pliers to open and remove any excess chain. Attach one quick-connect link (J) to each end of chain (K). Use one quick-connect link (J) to attach chain (K) to hanging ring (M) and securely close. Feed the fixture wires up through the chain (every three links or so), pulling the wires until taut. Use the remaining quick-connect link (J) to attach chain (K) to canopy ring (I). To shorten the fixture, trim the wires to desired length. Leave at least 8 to 10 inches of wire in addition to the desired length. Pull the fixture wires through the top of the canopy (H). Secure the screw collar loop (C) to mounting plate (D).
CONNECTING THE WIRES
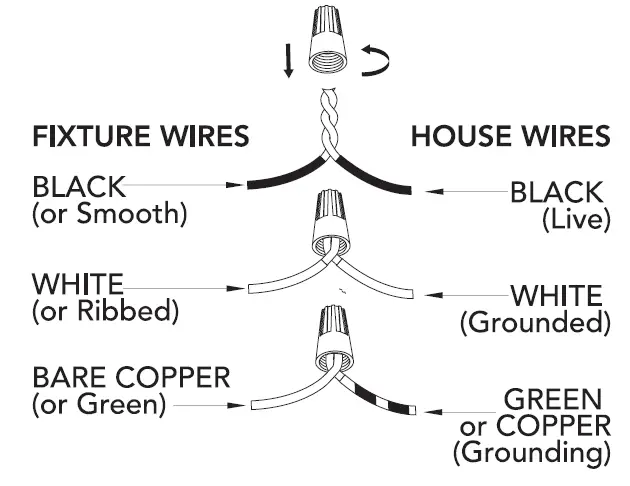
Have a helper support the fixture’s weight while completing the wiring. Attach the fixtures wires to the power supply wires from the junction box. Connect black to black (Live); white to white (grounded); grounding to grounding (green or copper). Twist the ends of the wire pairs together. Then, twist on a wire connector. Make sure all twists are in the same direction. Loop fixture’s ground wire around grounding screw (G) and tighten. If there is no ground wire (green or copper) from the junction box, contact a qualified electrician.
FINISHING THE INSTALLATION
Raise canopy (H) to mounting plate (D) and position mounting screws (E) so that they protrude through the openings of canopy (H). Secure canopy (H) in place with cap nuts (L). Install light bulb (not included) in accordance with the fixture’s specifications. Do not exceed the recommended wattage. Secure glass (T) onto the socket (R) with screws (S). Your installation is now complete. Turn on the power and test.
CLEANING TIPS
Treat the fixture gently! Regular cleaning will reduce the need for deep cleaning. For regular cleaning, turn off the light and wipe down the fixture with a clean lint-free cotton or microfiber cloth. Never spray cleaner directly onto the fixture.
Hunter Pro Tip:
Let the tool do the work! Use chain pliers to easily open and close chain links to shorten your fixture.
NOTICE
Drill 9/64″ pilot holes in support structure to aid in securing light fixture.
Hunter Pro Tip:
Twist or tape wire ends together to make it easier to pass them through the downrods. Threaded post may also be removed for easier wire access.


