![]() Smart Robot Vacuum Cleaner and Mop
Smart Robot Vacuum Cleaner and Mop
User Manual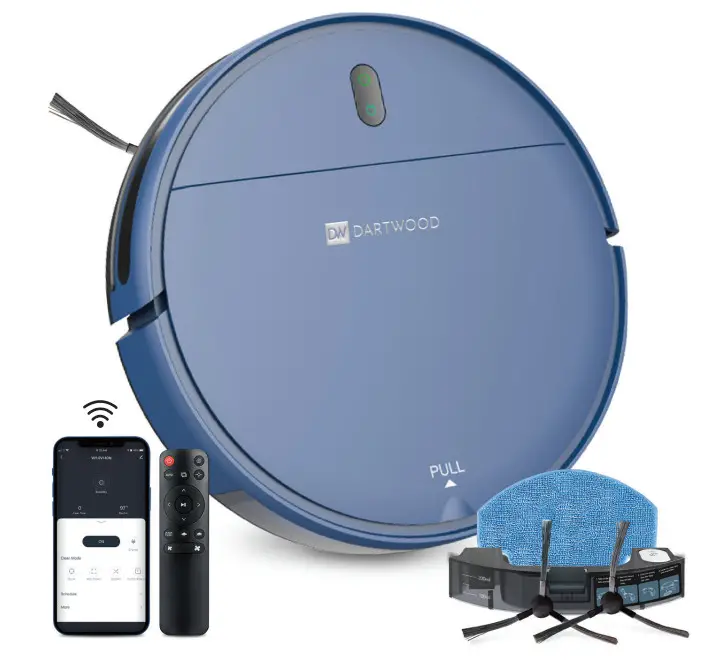
Contents hide
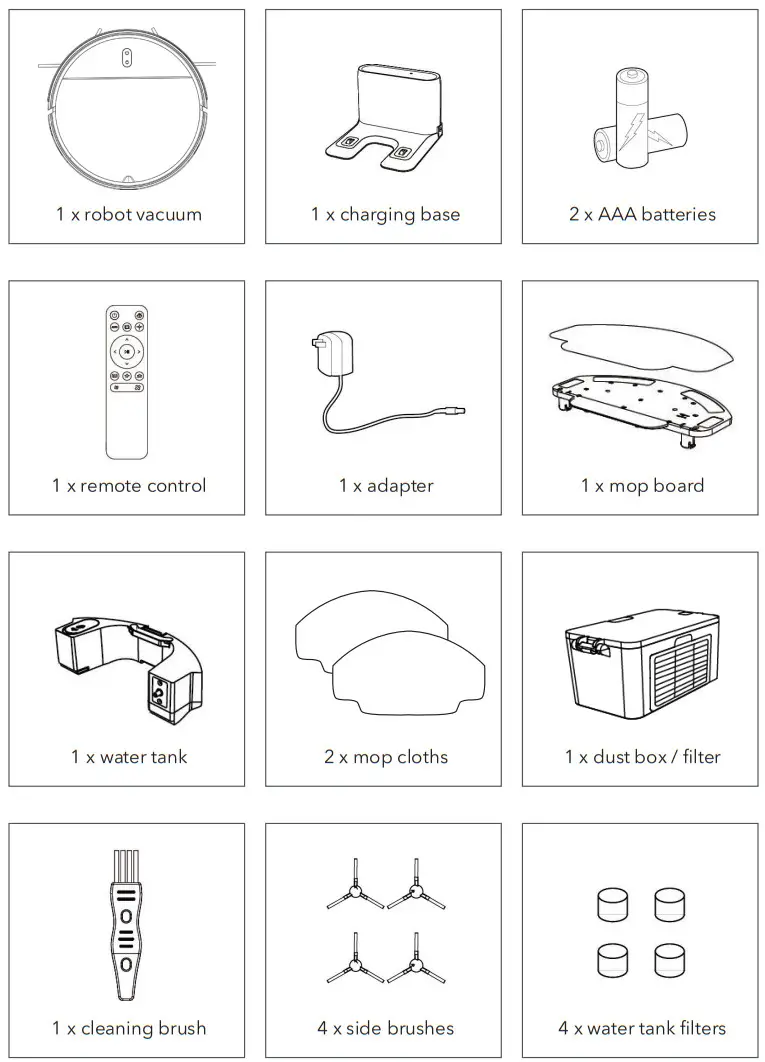
In the Box
Warning
- Make sure power cords and small items on the floor will not jam the vacuum.
- Please follow the instructions in this the manual to use the product. Only use product accessories recommended or sold by the manufacturer.
- Make sure that the power supply voltage matches the voltage marked on the charging stand.
- Ensure that the dust box and filter material are installed properly before using the product.
- Do not use it if the power cord is damaged.
- Turn off and unplug power supply before any cleaning or maintenance of the product.
- Turn the power off when not using it.
- This is not a toy, do not leave children unsupervised with this item.
- For indoor use only.
- Do not use this product if it has been dropped or damaged.
- Keep away from smoke and fire.
- Do not use this product in a wet place.
- Do not use this product in a high temperature environment.
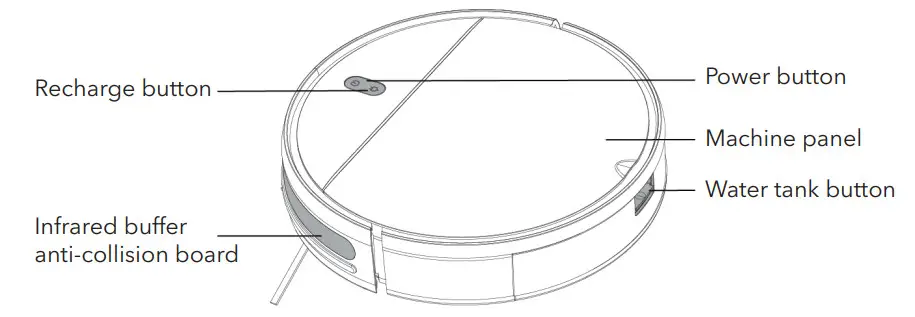
Introduction to Parts
- Front of the vacuum

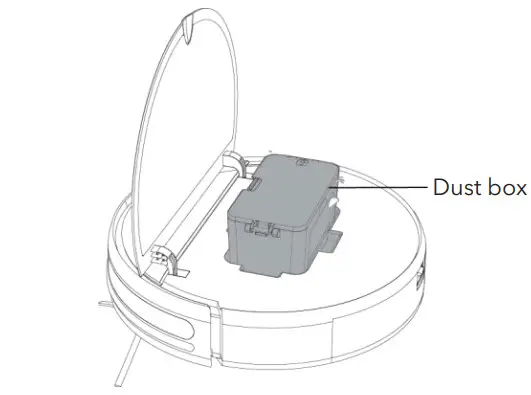
- Open front panel

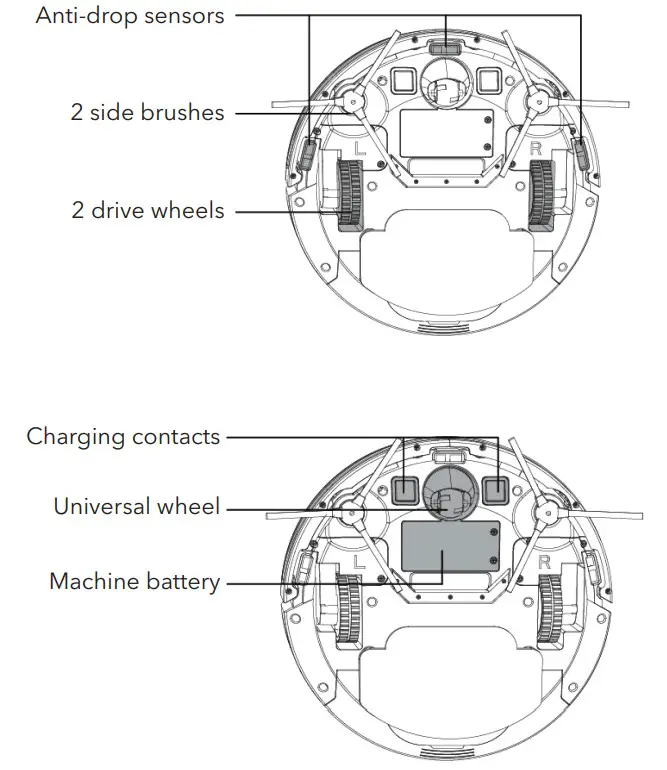
- Back of the vacuum

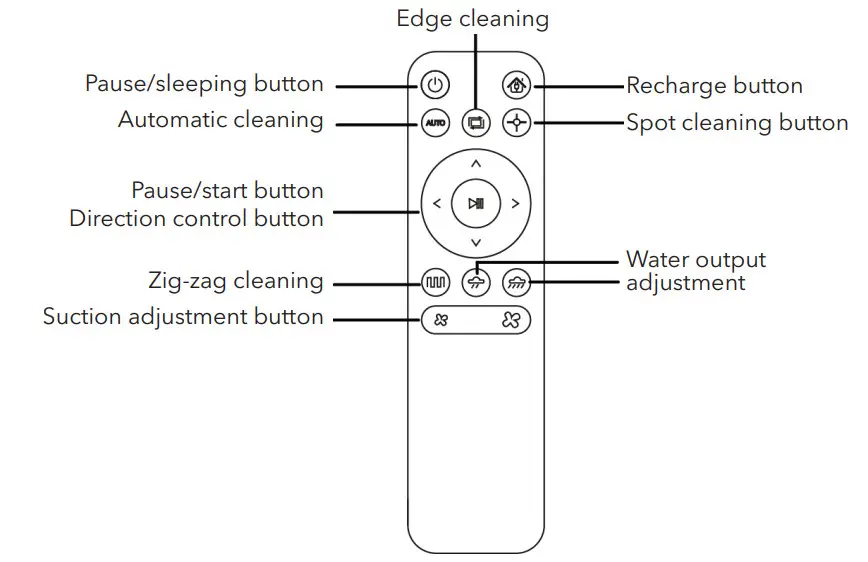
- Remote control

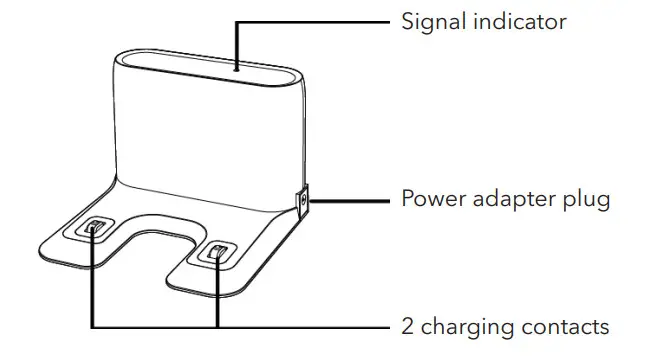
- Charging base

- Dust box

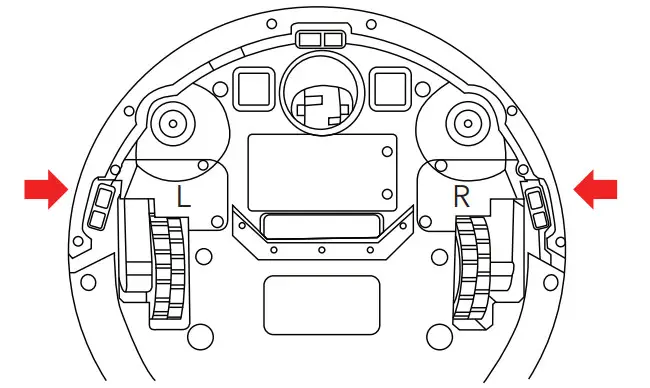
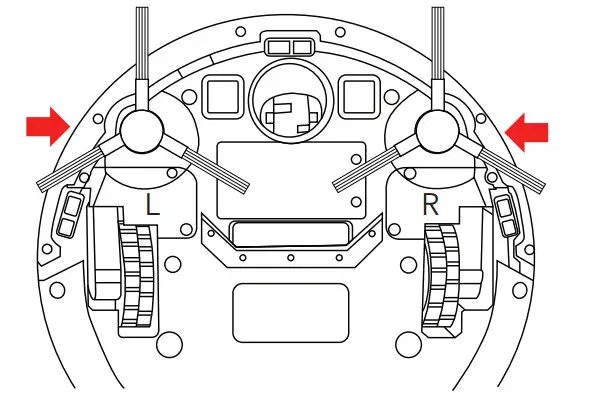
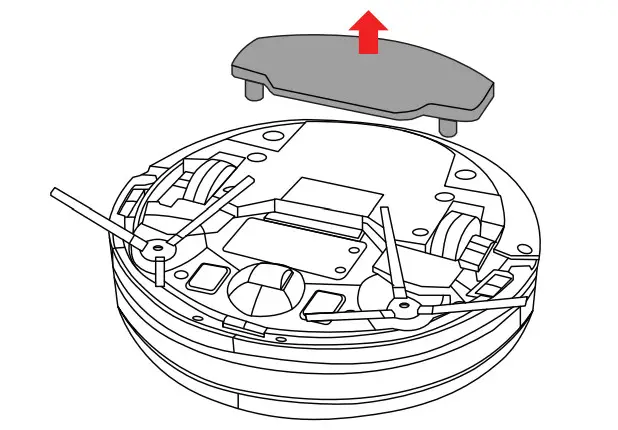
Installing the Brushes
- Flip the vacuum over and locate the two square pegs labeled L and R.

- Place the brush labeled L on the peg labeled L and push down until it clicks into place. Repeat for the other side.

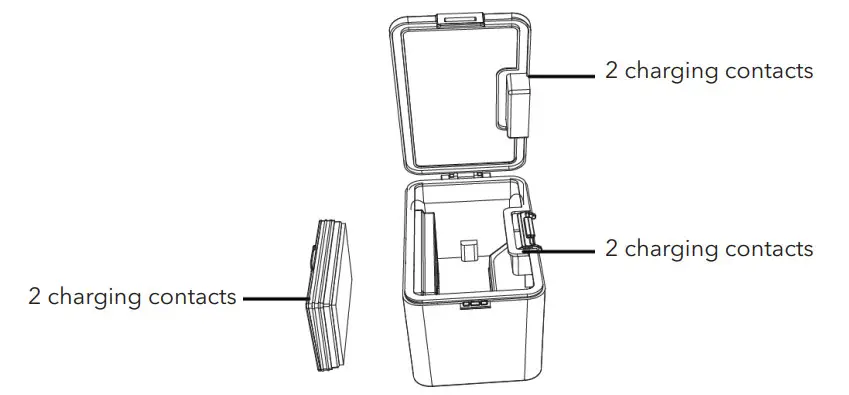
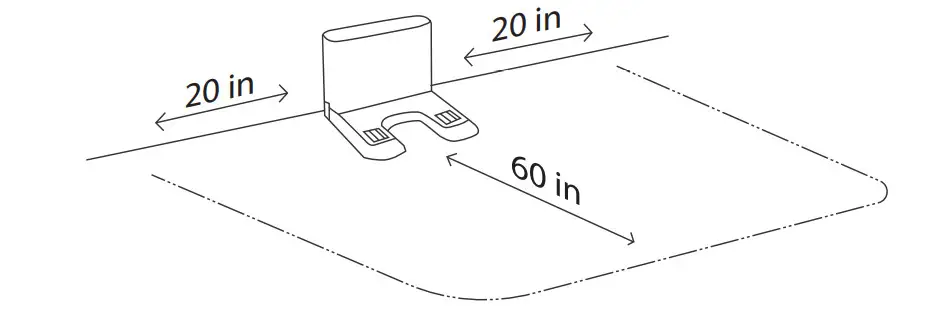
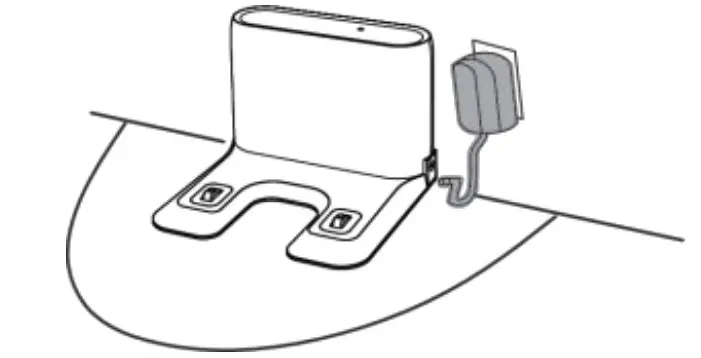
Installing the Charging Base
- Place the charging base on the flat ground against the wall (make sure there is 20 inches of open space on both sides and 60 inches in front).

- Plug one end of the USB adapter into the charging unit and the other end into the outlet.

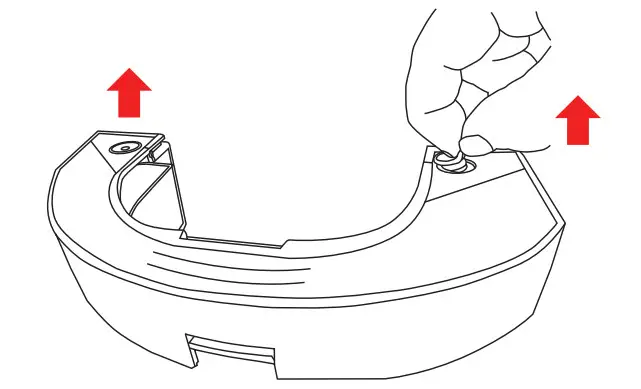
- Remove the water tank from the vacuum.

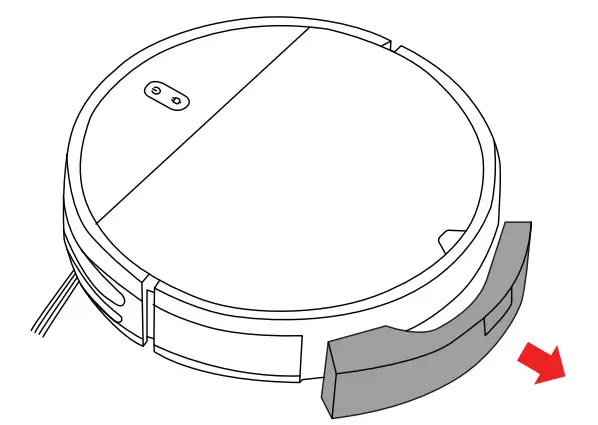
- Remove the mop board.

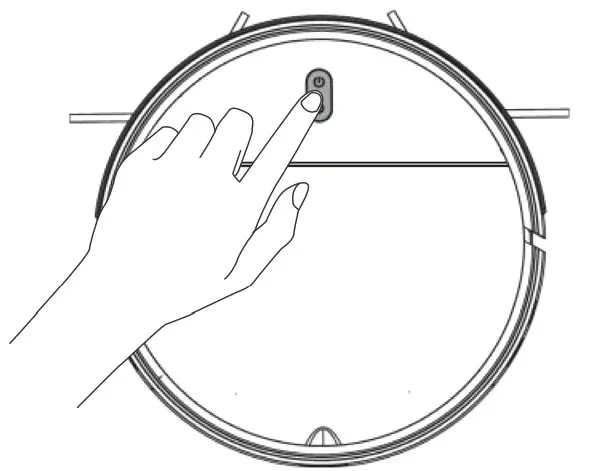
- Press the power button on the vacuum to begin charging.


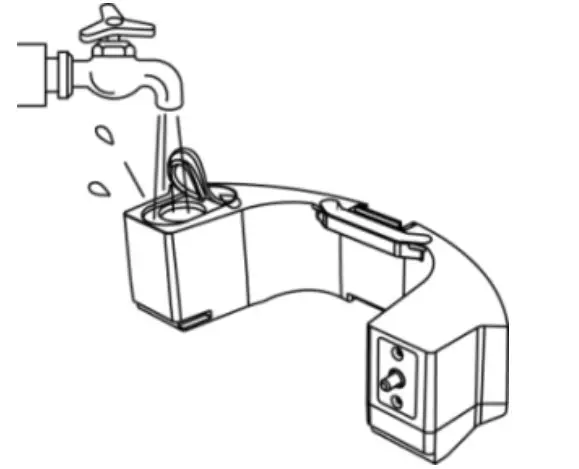
Installing the Water Tank
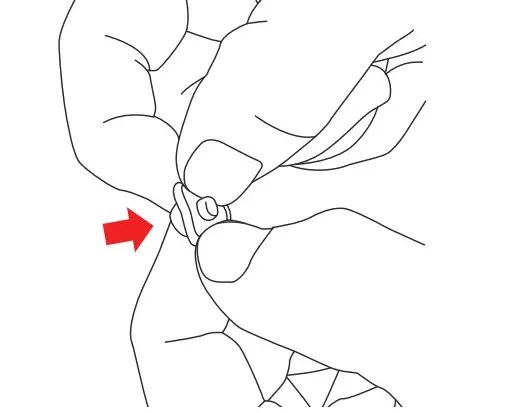
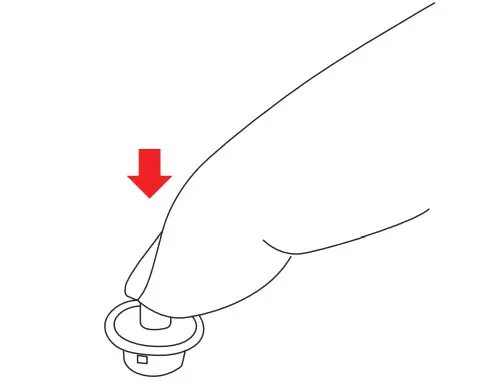
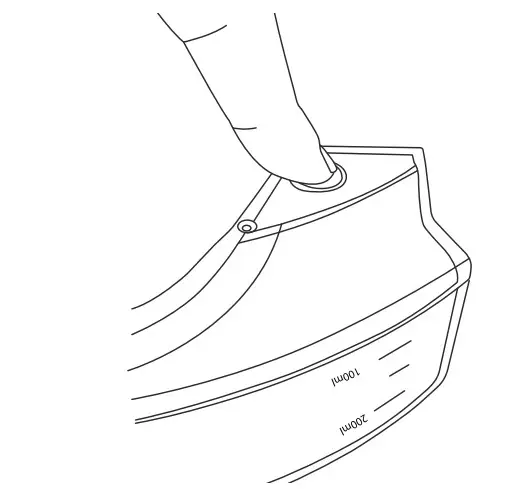
- Open the water tank plug and fill with clean water.

- Place the water tank back into the vacuum.

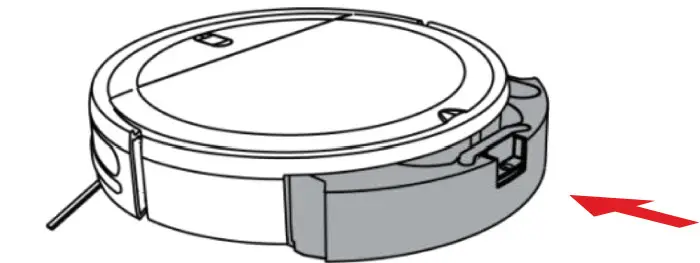
Installing the Mop Board
- Dampen the mop cloth.

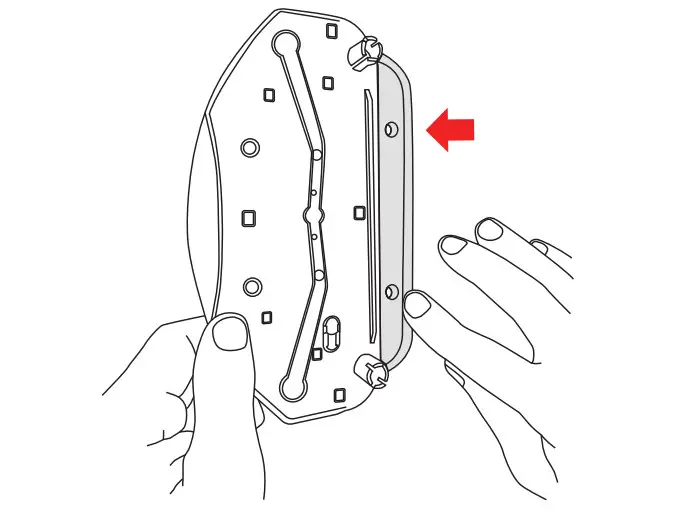
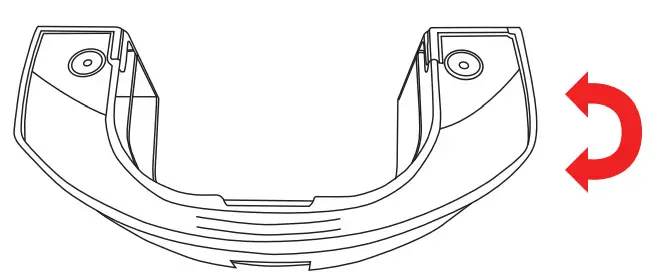
- Hook the inside edge of the mop board to the ‘pocket’ at the back of the mop cloth.

- Locate the velcro at the back of the mop board. Press down firmly.

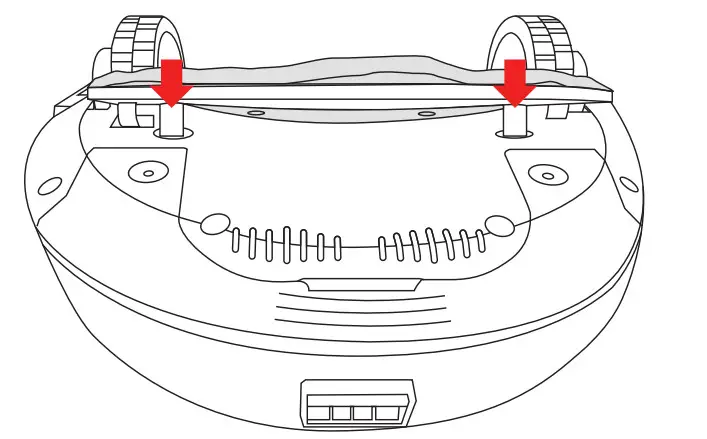
- Place the two round pegs on the back of the mop board into the holes at the bottom of the vacuum. Press down firmly.


How to Use
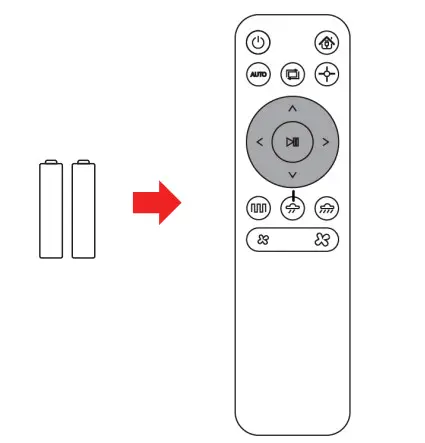
- To power ON/OFF place and hold the power button for 2 – 3 seconds.

- Insert two AAA batteries into your remote control. Make sure the vacuum is in standby mode and select your preferred cleaning mode.

Cleaning Mode
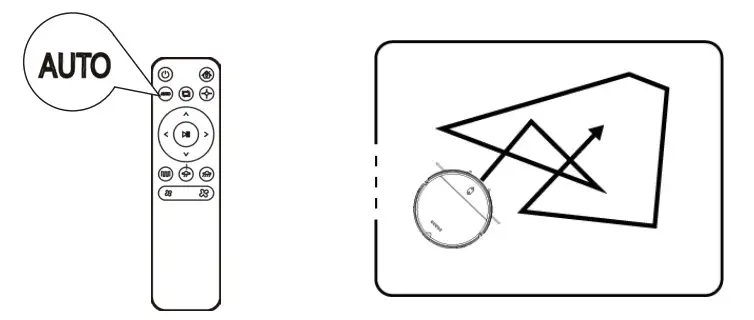
- Automatic cleaning
Cleans randomly for 90 minutes, automatically recharges after the cleaning is complete. Setting method:
In standby mode, press the start/pause button, or the AUTO button on the remote control. - Spot cleaning
Cleans in a clockwise spiral from the inside to the outside, with a maximum radius of 24 inches. Then from the outside to the inside, and returns to the starting position. Setting method:
In standby mode, press on the remote control.
 - Edge cleaning
Cleans along the perimeter of a room. Setting method:
In standby mode, press on the remote control.
 - Zig-zag cleaning
Cleans in a long straight line, with a distance of 197 inches, and zig zags back and forth. Setting method:
In standby mode, press on the remote control.
 Setting method:
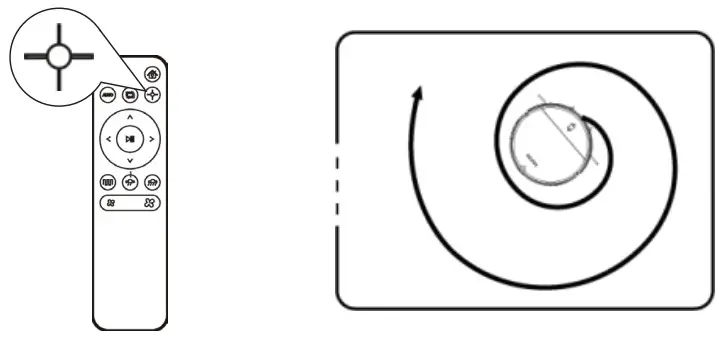 Setting method:
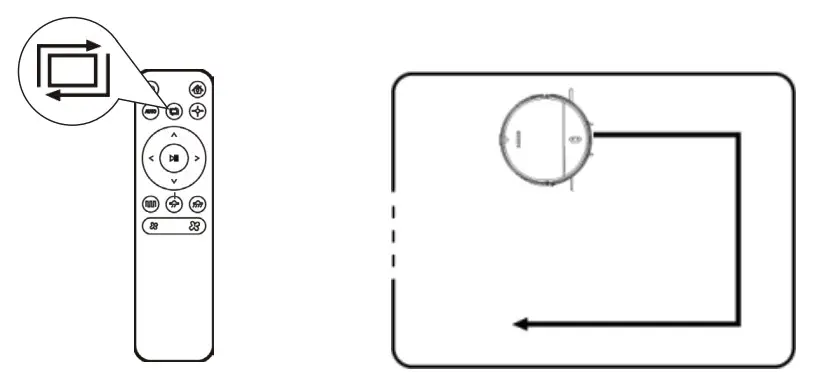 Setting method:
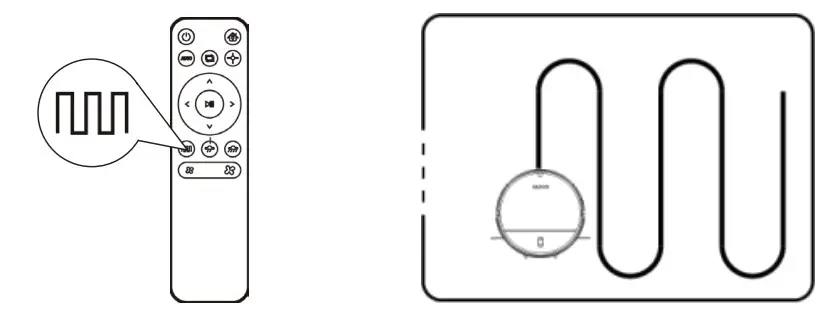 Setting method:
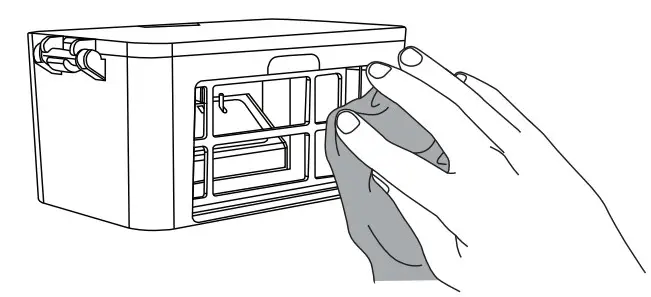
Cleaning/Maintenance of Parts
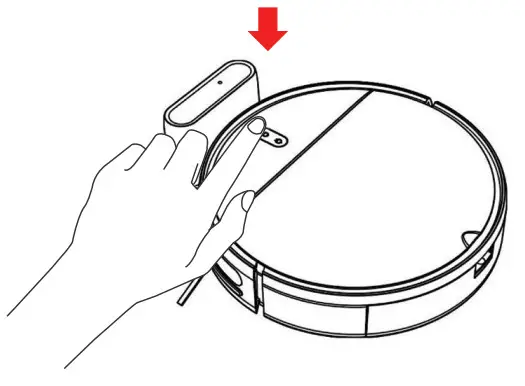
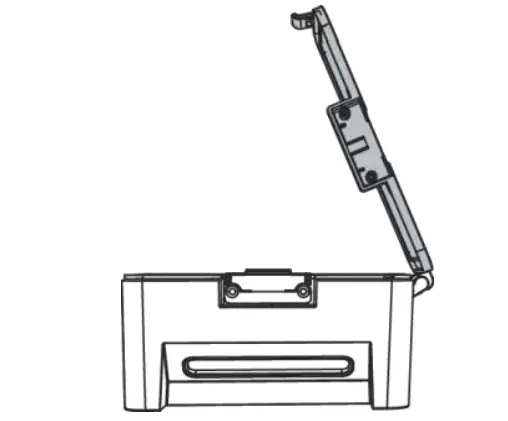
- Open the compartment at the top of the vacuum. Press the tab to remove the dust box.

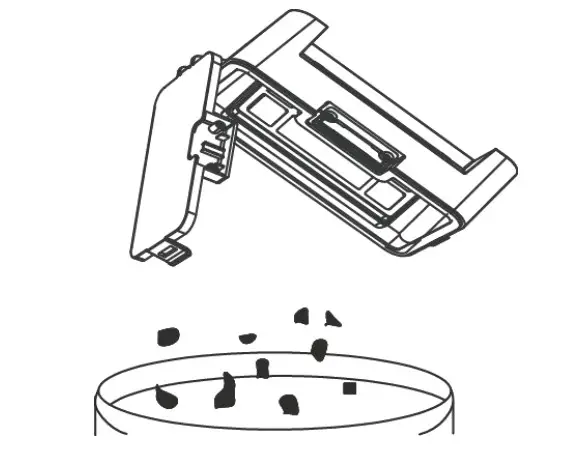
- Open the dust box lid.

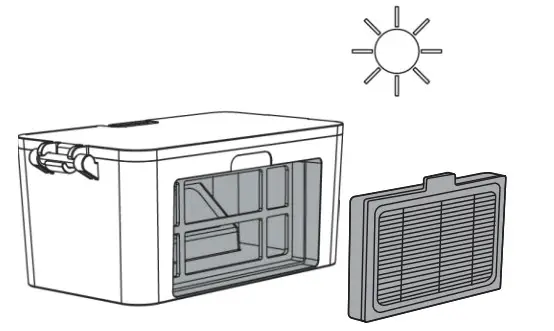
- Dump the contents into the trash bin.

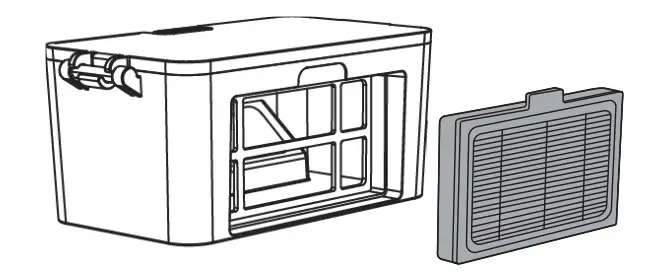
- Remove the filter.

- Wipe the dust box clean.

- Rinse the filter with clean water.

- Make sure the dust box and filter are completely dry before putting back together.


Replacing the Water Tank Filters
- Pull the water tank out of the vacuum.

- Turn it upside down.

- Pull out the two plugs on each side.

- Squeeze the top and bottomtogether until the old filter pops out.

- Press the new filter in.

- Place the plug back into the waterman and place the water tank back into the vacuum.

Light Indicator
| Item | Contents | Color | Power Definition of light Status | Recharging Three color Status | |
| 1 | Power on | Green | lights always on | – | Lights off |
| 2 | Power off | lights off | – | lights off | |
| 3 | Cleaning | Green | lights always on | – | Lights off |
| 4 | Recharging | Green | lights always on | Yellow | Ughts alway: on |
| 5 | Low battery recharge | Green G | Lights always on | Red | Lights alway: on |
| 6 | char in charging | Green | Lightson always | Green | Slow flash |
| 7 | Charging finished | Green | Lights always on | Green | Ughts alway: on |
| 8 | Abnorma l warning | Red | Quick flash | – | Lights off |
| 9 | Standby moce | s eer, | lights always on | Lights off | |
| 10 | Sleeping moce | _:ghts off | – | Lights off | |
| 11 | Low battery | Red | atack flash | Lights off | |
| 12 | Not calibrates | Red | Quick flash | Red | Quick flash |
| 13 | Calibrated | ?een | Lights on always | – | Lights off |
Troubleshooting
| Fault | Fault tone | Fault handling method Check whether the bumper can rebound normally. | ||
| Fault content | Bass (beep) | Treble (beep) | ||
| 1 | Bumper placed incorrectly | |||
| 2 | Anti-drop sensors error | 0 | 2 | Clean the anti-drop sensor or change the location and start again. |
| 3 | Bad charging / poor battery life | 0 | 3 | Only use the original adapter to charge. Try recharging the machine for 5 hours. |
| 4 | Low battery | 1 | 1 | Put the machine back on the charging station to charge. |
| 5 | Machine trapped | 1 | 2 | Use the machine in an open place. |
| 6 | Side brush error | 2 | 1 | Check whether there is any foreign matter entangled in the side brush and clean thoroughly before starting. |
| 7 | Wheels error | 2 | 2 | Check whether there is any foreign matter entangled in the wheel and clean thoroughly before starting. |
| 8 | Suction power low | 2 | 3 | Check if the fan port is blocked or if the dust box is full. |
| 9 | Encoder error | 2 | 4 | Try to restart the machine. |
Specifications
| Model: | WH-RV140M |
| Control: | Via remote or app |
| Diameter: | 11.8 in |
| Height: | 2.9 in |
| Unit weight: | 5.5 lb |
| Battery Capacity: | 2500 mAh rechargeable lithium battery |
| Dust box capacity: | 0.8 oz |
| Cleaning mode: | Auto / spot / edge / zigzag cleaning |
| Charging time: | 300 mins |
| Cleaning time: | 100 mins |
| Rated power: | 28 W |
| Operation voltage: | 14.4 V |
Get More Support
Scan the QR code below or email us at [email protected]
 https://qrco.de/bcN3bf
![]() www.wasserstein-home.com
www.wasserstein-home.com
Made in China


