
SOLTECH-Sundial-Solar-Bollard-Light-3W
Introduction
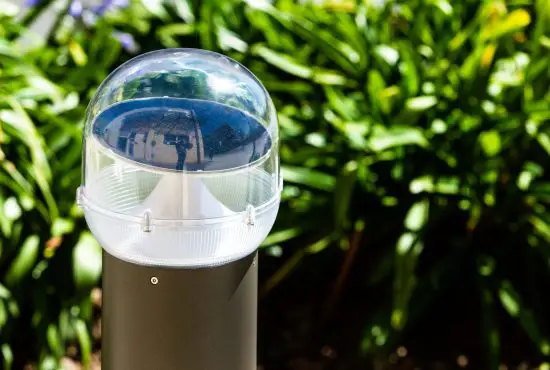
Thank you for purchasing SUNDIAL Solar Bollard Light.
Important
Please read these instructions before installation to ensure optimum results and longevity of your lights. The solar panel should be charged in full sunlight for 8 to 9 hours before initial first use to provide optimum results.
Features
- Full 360-degree design to track the full solar trajectory
- Three heights to meet various site planning needs
- No trenching, wiring, or electricity costs
- IK10 impact rating on PC cover
Notice & Warning
- The SUNDIAL will provide optimum performance where there is enough sunshine.
- Please note that the duration of illumination depends on sunshine exposure and weather.
- The lamp will automatically turn on at dusk.
- Disassembling the fixture head voids the product warranty.
- The battery contains hazardous chemicals. Please dispose of used batteries properly.
Please Note
Continuous rain or cloudy days will not fully charge the battery, so the light’s output length will decrease.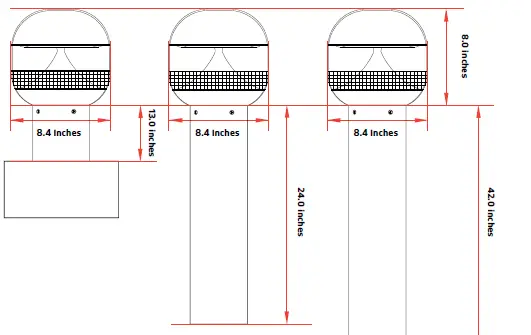
Specification
| Specifications | SUNDIAL 3W 13“ | SUNDIAL 3W 24” | SUNDIAL 3W 42“ |
| LED Nominal Power | 3W | ||
| Solar Panel | Mono-Crystalline 4.3V 3W | ||
| Lithium-Ion Battery | 3.7V 10AH | ||
| CCT | 3,000K | ||
| Lumen Output@3000K | 300 | ||
| CRI | 70 | ||
| Light Head | 8.4 X 8.0 Inches | ||
| Ground Mount | 13 Inches | 24 Inches | 42 Inches |
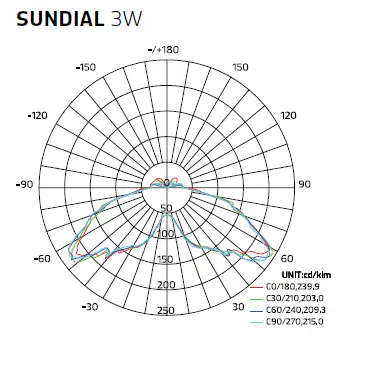
| Beam Angle | 217° | ||
| IP Rating | IP65 | ||
| Casting | PC & Aluminum | ||
| Efficiency@3000K | 100 lm/W | ||
| * Charging Time | 14hrs (1000W/m2) | ||
| Run Time (@Full Power) | 48 Hrs | ||
| Operation Mode | 1 Mode | ||
| * Operating Temperature | -4 °F to 130 °F | ||
| * Charging Temperature | 5 °F to 140 °F | ||
GROUND MOUNT

- Drill three holes in the base material, then use the screw kit to secure the ground mount base.
- Use the screw kit to fix the pole onto the ground mount base.
- Press the red button on the bottom of the fixture to turn it on.
- Use the screw kit to fix the light onto the pole.
WALL MOUNT
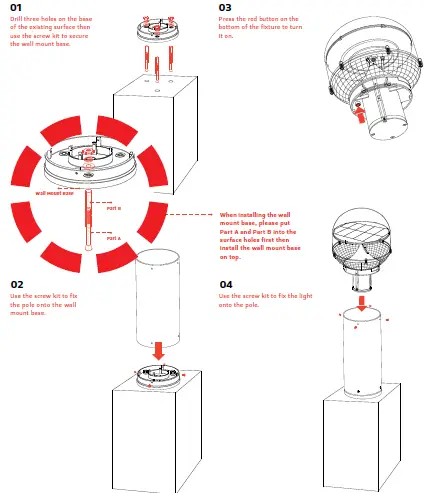
- Drill three holes on the base of the existing surface then use the screw kit to secure the wall mount base.
- Use the screw kit to fix the pole onto the wall mount base.
- Press the red button on the bottom of the fixture to turn it on.
- Use the screw kit to fix the light onto the pole.
Light Distribution
Warranty
SUNDIAL is covered by a 3-year limited warranty. SOLTECH urban light warrants to the original purchaser that this product is free from defects in materials and workmanship for the period of 3 years from the date of purchase. To obtain warranty service please contact your local distributor or sales
rep for further instruction.
1460 Park Avenue. Emeryville, CA 94608 USA
www.soltechlighting.com
SOLTECH LLC reserves the right to update all product data sheets at any time. Consult SOL TECH marketing specialists for publication updates at
[email protected]


