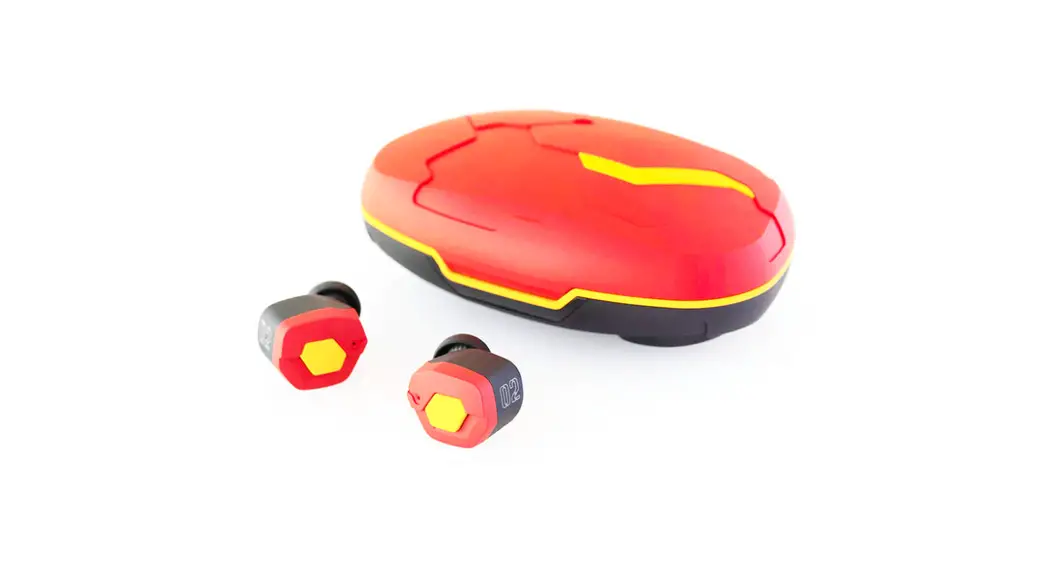
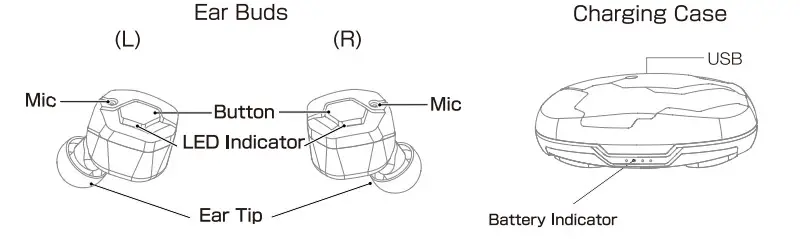
Product Diagram
True Wireless Earphone
FI-EVANS
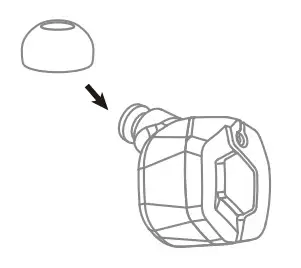
※ Please choose and replace Ear Tip to suit your preference.
Accessory
Before Use
- Remove Insulating Sheet
Remove the Insulating sheet from the backside of the earbuds.
- Battery Charge
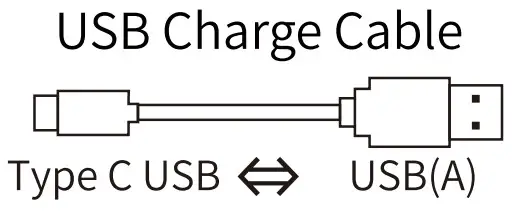
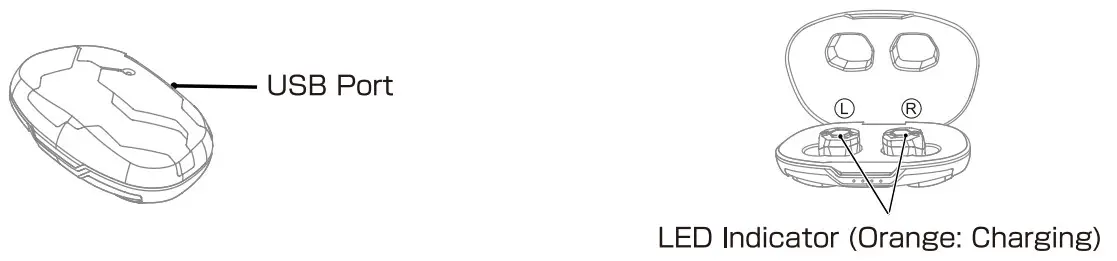
Insert USB type A connector of USB Charge Cable to USB AC charger or USB port of PC, and insert Type C USB connector to the USB port of Charging Case.
Put the Ear Buds into the Charging case.
While charging, the LED light constantly.
When charging is completed, the LED will turn off.
- Power On/Power Off
Put the Ear Buds into the Charging Case, and Ear Bud’s power OFF automatically. When picking up the Earbuds, power ON automatically.
※ When the Case battery is low, this function does not work.

Pairing
- Pairing
To use Ear Buds the first time, you must pair Ear Bud with a mobile phone or player. Once your EarBuds is paired with other devices, they will remain paired and automatically recognize each other.
(First time to use]
- Turn on the Bluetooth function of your mobile phone.
- Turn on the power of both earbuds.
- Select “EVATWO1” in the discovered device list of the phone.
- Click “Pair” on the phone display.(Twice)
(Re-pairing or Pairing with a second mobile phone]
- Turn on the Bluetooth function of your mobile phone.
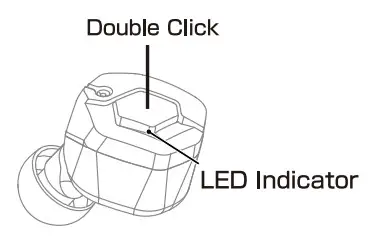
- Double click L or R Button.(White and Orange LED will quickly flash)
- Select “EVATWO1-L” or “EVATWOIR” in the discovered device list of the phone.
- Click “Pair” on the phone display.(Twice)
Charging Case
| Battery Indicator | Remaining |
| 1∼25% | |
| 25∼50% | |
| 50∼75% | |
| 75∼100% |
- Charge Case Battery
Insert USB type A connector of USB Charge Cable to USB AC charger or USB port of PC, and insert Micro USB connector to the USB port of Charging Case. Depending on the battery level, the number of lit LEDs will change. - Charge EarBuds
Put the Ear Buds into the Charging case. While charging, the Orange LED light constantly. When charging is completed, the LED will turn off.
- Auto Power ON/OFF
Put the Ear Buds into the Charging Case, Ear Bud power OFF automatically. When picking up the Earbuds power ON automatically.
※ When the Case battery is low, this function does not work.
Switching Master and Slave
The role of the Master unit / Slave unit, when the earbuds have been taken out from the charging case, the earbud with the larger battery remaining becomes the Master unit, and the one with the low battery level becomes the Slave unit.
For this reason, there is a possibility that the Master unit and Slave unit may be switched each time the earbuds are taken out from the charging case.
Also, by periodically putting the earbuds in and out of the charging case, you can efficiently use the batteries of the left and right earphones. So it will be able to operate for a longer time.
The master earbud is displayed as “Connected” on the Bluetooth screen of the connected device.
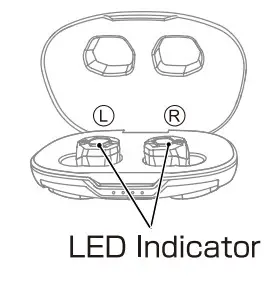
Meaning of LED
| Master | Slave | |
| Power ON | White 1 Second | |
| Power OFF | Orange 1 Second | |
| No connection | White 1 time each 7Seconds | |
| Connected | White 1 time each 7Seconds | |
| Calling | White 1 time each 7Seconds | |
| Incoming Call | Flashing White | White 1 time each 7Seconds |
| Talking | White 1 time each 3Seconds | White 1 time each 7Seconds |
| Pairing | Flashing White and Orange | White 1 time each 7Seconds |
| Reset mode | Flashing White continuously | |
| Update mode | Orange 3times each 3Seconds | |
| L | R | ||
| Power | ON | 1 Click | 1 Click |
| OFF | Long press 3seconds until beep twice | Long press 3seconds until beep twice | |
| Music | Play | 1 Click | |
| Pause | 1 Click | ||
| Next Track | – | Long press until a beep | |
| Previous Track | Long press until a beep | – | |
| Volume | Volume Up | 2Click | – |
| Volume Down | – | 2Click | |
| Phone | Answer Call | 1 Click | |
| Hang Up | 1 Click | ||
| Reject Call | 2Click | ||
| Pairing | Pairing Mode | 2Click L or R button with no connection | |
| Reset | Reset | Long press the L and R buttons for 5seconds while charging | |
| Voice Command | Start | 2Click without Music play (Master) | |
| Update Mode> | Start | Long press over 1 2seconds | |
※ To cansel the update mode. power off by button or reset operation are required.
Frequently Asked Questions
Q)Suddenly I heard no sound from one earbud.
A)Please turn off the earbud and turn on it again.
Q) The white LED lamp of the earphone is continuously blinking.
A) Please try to reset for earbuds.
Q) Bluetooth connection has dropped.
A) Please delete rEVATWOU from the Bluetooth device list and pairing with your device again.
Q) The pairing between L and R earbud has dropped.
A) Turn off both earbuds and turn on them again.
A) Please try to reset for earbuds.
Q) When I place the earbud in the case, it won’t turn off itself.
When I get the earbud out from the case it won’t turn on.
A) While the case’s power is low, the automatic on-off function will not be active. Please turn on/off it manually.
Q) The case has run out of charges.
A) The case will discharge itself, please recharge the case regularly.
Q) I want to know about warranty and repair outside of Japan.
A) The warranty for this product is valid for 1 year from the day of purchase. During the warranty period, we will repair the product. The warranty is only valid in the country in which the product was purchased. Please contact the purchased store directly for the specific repair of the goods.
Specification
Product Specification | |
| Driver | Dynamic type Φ6mm |
| Frequency Response | 20∼20,000Hz |
| Microphone | Omni-direction /CVC Noise Canceling |
| Bluetooth Specification | Version5.0/Class2/Multi-Pairing(8) |
| BluetoothProfile | A2DP, HFP, HSP, AVRCP |
| Bluetooth Codec | aptX, AAC,SBC |
| Battery | Earbuds: DC3.7V/50mAh Li-Po Battery Charger Case: DC3.7V/800mAh LiPo Battery |
| Continuous Playtime (Max) | 9.5hour(SBC/AAC), 6.5hour(aptX) |
| Continuous Talk time (Max) | 10hour |
| Charging Time (Min) | 2hour |
| Operation Temperature | 5∼50°C |
| Waterproof Level | IPX7 |
| Accessories | Earpieces: S/M/L, Ear-loop, Charger Case, Charging USB cable, User’s guide |
FCC Statement
Changes or modifications not expressly approved by the party responsible for compliance could void the user’s authority to operate the equipment.
This equipment has been tested and found to comply with the limits for a Class B digital device, pursuant to Part 15 of the FCC Rules. These limits are designed to provide reasonable protection against harmful interference in a residential installation. This equipment generates uses and can radiate radio frequency energy and, if not installed and used in accordance with the instructions, may cause harmful interference to radio communications. However, there is no guarantee that interference will not occur in a particular
installation. If this equipment does cause harmful interference to radio or television reception, which can be determined by turning the equipment off and on, the user is encouraged to try to correct the interference by one or more of the following measures:
- Reorient or relocate the receiving antenna.
- Increase the separation between the equipment and receiver.
- Connect the equipment into an outlet on a circuit different from that to which the receiver is connected.
- Consult the dealer or an experienced radio/TV technician for help
This device complies with part 15 of the FCC rules. Operation is subject to the following two conditions (1)this device may not cause harmful interference, and (2) this device must accept any interference received, including interference that may cause undesired operation.


