 Roku 3700 Express Remote Compatible User Manual

Background
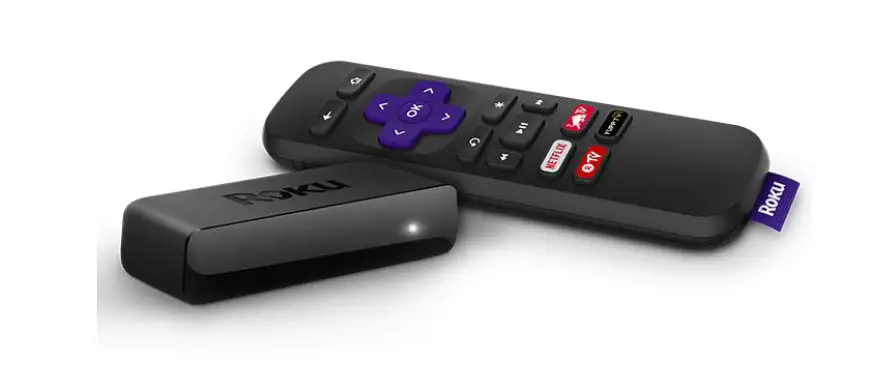
Roku Express (model: 3900) supports resolutions up to 1080p Full HD and ships with a Standard IR remote. This article describes the product in more detail and outlines the setup steps.
- Note: Roku Express model 3900 is 5x more powerful and replaces the Roku Express model 3700. The same steps can be used to set up both models.
Will Roku Express work with my TV?
Roku Express will work for any television with an HDMI® connection. We recommend using the High-Speed HDMI Cable that came with your Roku Express. You can order additional cables from the Roku accessories store.
Setting up your Roku Express
- Follow along with the tutorial video below, or download the Quick Start Guide.
- If necessary, attach your Roku Express using the adhesive strip.
Make sure the correct TV input is selected on your TV (the input to which your Roku Express is connected). You should see the Roku logo on the TV screen as your Roku Express powers on.
Going through Guided Setup
- Choose a language
- The first screen you see will allow you to choose a language. All text and dialog within the Roku application will be displayed in the selected language.
- Scroll up and down the list and press on your Roku remote to choose the OK button a language.
- Note: It is the responsibility of the channel publisher to translate their channel and some channels may not support your chosen language.
- Connect your Roku Express to the internet
- Choose your wireless network from the list of available networks and enter your password. This is most often the same network you use to connect your computer or smartphone to the internet. If you do not see your network, select Scan again to see all networks. For more assistance, see help finding your wireless network and password.
- If you want to see your password as you type, choose Show password. This can help prevent entering the wrong password. Remember, passwords are case-sensitive. Use the shift button on the on-screen keyboard to enter a capital letter.
- Once you have entered your password and selected Connect, your Roku Express will automatically connect to the internet. Alternatively, you can get more help if you are unable to connect to your wireless network.
- Wait for your Roku Express to download the latest software
- Once connected to the internet, your Roku Express will download the latest version of Roku OS software and then reboot.
- Set the display type
- Select Set display type and let your Roku Express auto-detect the best display resolution so you don’t have to manually configure the settings. To change the display type at a later time, go to Settings > Display type.
- Create a Roku account and activate your Roku Express
- In order to activate your Roku Express, it must be linked to a Roku account. Your Roku account keeps track of which Roku devices you own and allows you to add free and purchase channels from the Roku Channel Store.
- Note: There is NEVER a charge to create a Roku account.
- Instructions for activating your Roku Express will be displayed on your TV, including an activation code; e.g. “XCV5TG”. You will be required to visit roku.com/link on your computer or smartphone, enter the code and follow the instructions to activate your Roku Express.
- Note: Roku does NOT charge for device activation. When entering roku.com/link into your web browser, type it carefully to avoid fraudulent websites.
- You are done! Once you have completed all the activation steps, your Roku Express will be ready to use.
Tips: You can personalize your Roku Express by changing your theme or screensaver. You can use the Roku Channel Store to add new streaming channels, games, themes, screensavers, and other apps.
How to use screen mirroring with your Android™ or Windows® device
Background
When you want to display content from your phone or tablet on a nearby TV, you may be able to use screen mirroring. This feature allows you to replicate (or “mirror”) the screen of your compatible Android™ or Windows® device wirelessly onto your TV screen. With screen mirroring, you can send web pages, videos, photos, music, and more to your compatible Roku® streaming player or Roku TV™. In other words, whatever you see and do on your mobile device appears on your TV. To use screen mirroring, you must first set up and enable the feature on your Android or Windows device and then request a connection to your Roku device. Once a connection is established, you can see your mobile screen on your TV and control it from your phone or tablet.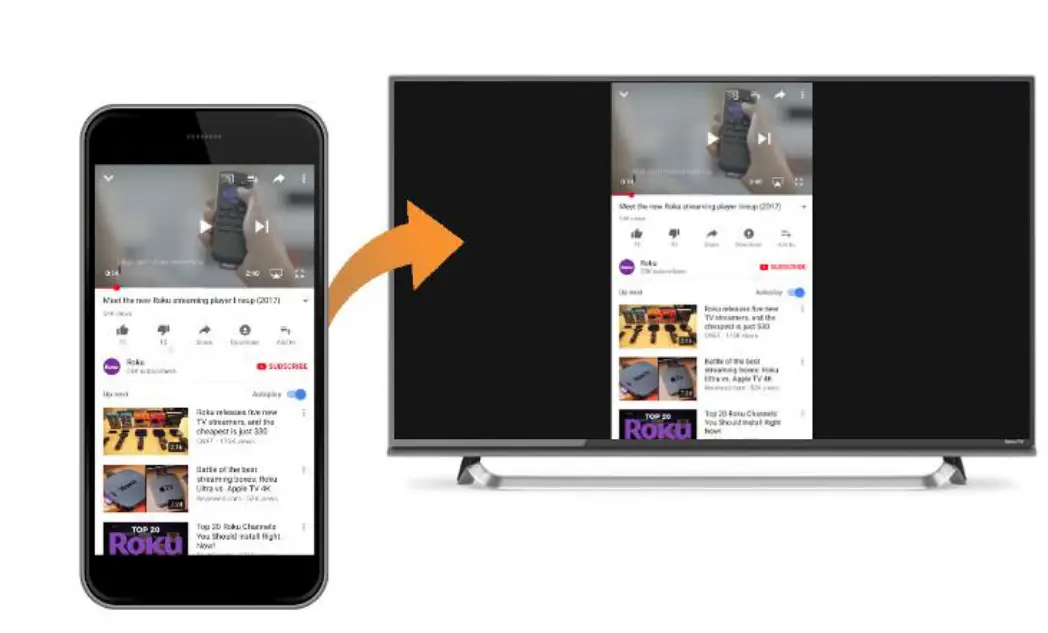
Is screen mirroring supported on my iPhone or iPad?
No. Screen mirroring with a Roku device is not supported with iOS® or Apple devices. You can, however, use your iPhone or iPad to:
- Cast content from compatible apps like YouTube and Netflix to your Roku device.
- Display personal photos, videos, and music using the Play on Roku feature built into the free Roku mobile app.
Are casting and screen mirroring the same?
Even though the terms “casting” and “screen mirroring” are commonly interchanged in the industry, there are differences when using them with your Roku device.
- What content you can send. When casting, you can only watch content available from a mobile app that specifically supports casting. Screen mirroring allows you to view content from any app installed on your mobile device.
- What you see on your TV. With casting, you only see a playback of the selected piece of content, whereas with screen mirroring, you see the entire screen of your mobile device including buttons and menus – every action is mirrored on your TV.
- How you control playback. Casting gives you the option to use your mobile device for control or you can choose to use your Roku remote. During a screen mirroring session, all actions are controlled on your mobile device.
- The power state of your phone or tablet. Once playback begins, casting lets you use your mobile device to do something else or you can power it off entirely. Screen mirroring requires that your mobile device remain powered on for the duration of playback.
- Supported mobile devices. Casting is supported on most mobile devices – if you see a casting icon in the app, you can send content to your TV. Screen mirroring is limited to compatible Android™ and Windows® devices.
To learn more about directing content from supported mobile apps like YouTube and Netflix to your TV, review the detailed article about casting.
Can I share my personal photos and videos on my TV?
If you want to specifically share your personal photos and videos, or songs from the music library stored on your mobile device, you can use the Play on Roku feature of the Roku mobile app. The Roku mobile app is a free application for iOS® and Android devices. To learn more about sharing personal media files from your compatible mobile device, read the detailed article about Play on Roku.
Does my Roku device support screen mirror?
Most current generation Roku streaming players and Roku TVs support screen mirroring with notable exceptions listed below. To find the model of your Roku device, go to Settings > System > About.
- Roku Express: Screen mirroring is only supported on model 3900 (introduced in 2017), and not on model 3700.
- Roku Express+: Screen mirroring is only supported on model 3910 (introduced in 2017), and not on model 3710. With model 3910, screen mirroring is only supported on the HDMI output, and not on the composite, or A/V output.
You can use the Roku device comparison chart to determine the current products that support screen mirroring for Android and Windows devices.
Do I need to enable screen mirroring on my compatible Roku device?
If your Roku device supports screen mirroring and is running Roku OS 7.7 or later, the feature is enabled automatically and there is no action required to enable it. To check the software version of your Roku device, go to Settings > System > About. If an older version is installed, connect your Roku device to the internet and have it manually check for a software update.
With a long list of companies manufacturing Android devices, each with a variety of models, it may be difficult to determine if your Android device supports screen mirroring. In general, if your Android device is running version 4.2 or later (and is not a Google-branded device running OS 6.0 or later like a Google Nexus or Pixel), it likely supports screen mirroring. However, it is not uncommon for manufacturers to use a different term when describing this feature. To assist with setting up and enabling screen mirroring on your Android device, here are some common terms used for screen mirroring.
- Smart View
- Quick Connect
- SmartShare
- AllShare Cast
- Wireless display
- Display mirroring
- HTC Connect
- Screencasting
- Cast
Once you identify the term used by the manufacturer of your Android device, the screen mirroring feature is generally enabled from within the settings menu; often on a cast, connection, network or display submenu. After you enable the feature, select your Roku player or Roku TV from the list of discovered devices to request a connection. To learn more about setting up screen mirroring on your Android device, refer to the documentation for your device, or contact the manufacturer. You may also want to try an internet search using the term “screen mirroring” along with the brand and model of your device.
How do I screen mirrors from my Windows device?
How you enable screen mirroring is dependent on the version of Windows running on your device.
Windows 8.1
The following Microsoft article describes how to project to a wireless display (your Roku device).
Windows 10
- Open the action center on your Windows device. Refer to this Microsoft article if you need help locating the action center.
- Select Connect.
- After a moment, you will see a list of wireless display and audio devices.
- Select your Roku device and follow the on-screen instructions.
- If you are unable to “project to a wireless display” on your Windows device, contact Microsoft for further help.
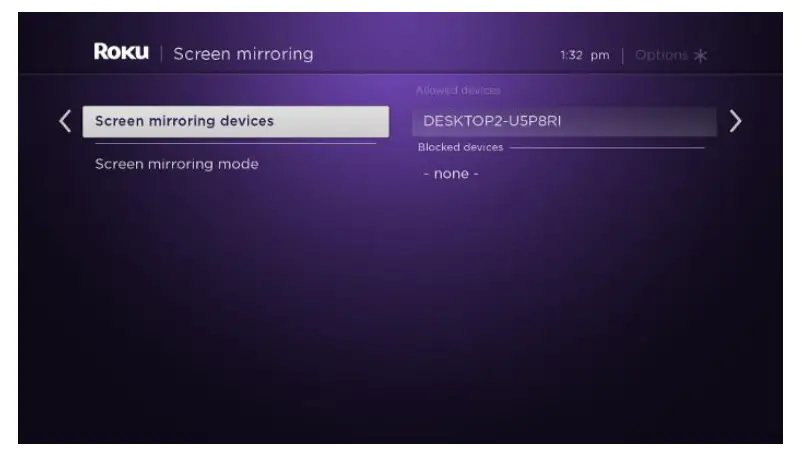
How do I allow or block a screen mirroring request?
When a screen mirroring request is made from your Android or Windows device, your Roku device displays an on-screen prompt across the bottom of your TV screen.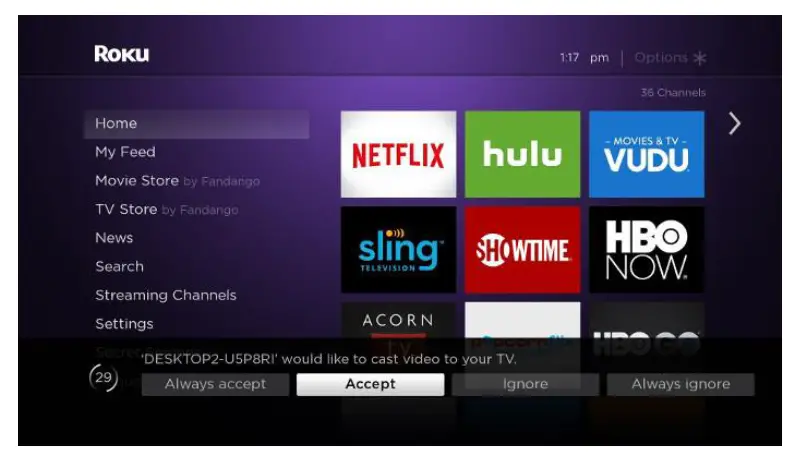
From the prompt, you can choose from the following options to allow or block the request.
- Always accept – Always allow content from the device to be screen mirrored to your Roku device without displaying the on-screen prompt for each future attempt. This action adds the device to a list of ‘Allowed devices’.
- Accept – Allow content from the device to be screen mirrored on your Roku device for this one attempt.
- Ignore – Block the current attempt and do not allow the device to connect to your Roku device.
- Always ignore – Always block an attempt from the device, and do not display an on-screen prompt for future attempts. This action adds the device to a list of ‘Blocked devices’.
Can I adjust screen mirroring settings?
You can define how an incoming screen mirroring request is handled by changing the screen mirroring mode on your Roku device. You can also remove a device that was added to the list of ‘Allowed devices’ or ‘Blocked devices’.
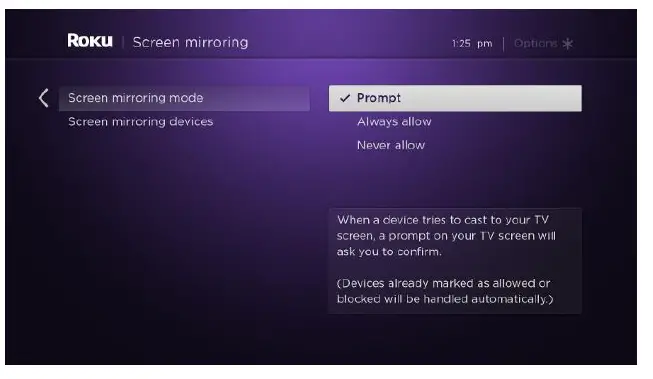
- Screen mirroring mode – Select one of the choices to define how an incoming screen mirroring request is handled.

- Prompt – Each time a screen mirroring request is made, your Roku device will display an on-screen prompt, except in the case where ‘Always accept’ was selected from the prompt for a specific device.
- Always allow – A request from any device to mirror or cast its screen will be accepted without an on-screen prompt appearing.
- Never allow – Always blocks a screen mirroring request from any device without an on-screen prompt appearing. This is essentially a way to disable screen mirroring on your Roku device.
- Screen mirroring devices – Select a device in the list of ‘Allowed devices’ or ‘Blocked devices’ and choose to remove it. It is expected that either list will be empty if ‘Always accept’ or ‘Always ignore’ has never been selected from the screen mirroring prompt.

Why can I not find Spotify in the Roku Channel Store?
Background
On a supported Roku® streaming player or Roku TV™, Spotify lets you discover, manage and share over 35 million songs for free, or upgrade to Spotify Premium to access exclusive features including improved sound quality and ad-free listening. Once Spotify is installed on your Roku device, you can control music playback using your Roku remote, or via Spotify Connect on a smartphone, tablet, or computer. This article lists the Roku devices that support Spotify and tells you how to find and install the channel.
What Roku devices support Spotify?
The most likely reason you cannot see Spotify in the Roku Channel Store is that your Roku device does not support Spotify. To help determine if your Roku device supports Spotify, you need to know the software version and device model. To find this information, go to the home screen on your Roku device and select Settings > System > About.Spotify is supported on all Roku TV models and select Roku streaming players (models 3600 and above). The minimum required software version is Roku OS 8.2. Your Roku device checks for an update every 24-36 hours or you can manually check for a software update if necessary.
Where do I find Spotify?
To find and install Spotify on your supported Roku device, open the Roku Channel Store by selecting Streaming Channels from your home screen, and then browse the Music genre or select Search Channels and search for ‘Spotify’. When you add the channel, it will appear at the bottom of the list of channels under Home on the main screen of your Roku device. If you prefer, the channel can be moved higher in the list. You can also add Spotify from the Roku Channel Store on the web. Once added, the channel will not immediately appear on your supported Roku device. Your Roku device checks every 24 hours for any new channels, themes or screensavers you have added from the web and automatically installs them. If you would like to download and install the channel immediately, go to your Roku device and select Settings > System > System update > Check now.Note: If you add Spotify to your Roku account from the web, it will only be installed on supported Roku devices. It will not be added to any unsupported devices linked to your Roku account.
How to set up your Roku® streaming player (any model)
Background
The setup procedure for all Roku players is essentially the same. This document describes the basic setup instructions for any Roku streaming player. There is a separate article explaining how to set up a Roku® Streaming Stick®.
Connecting the Roku player to your TV
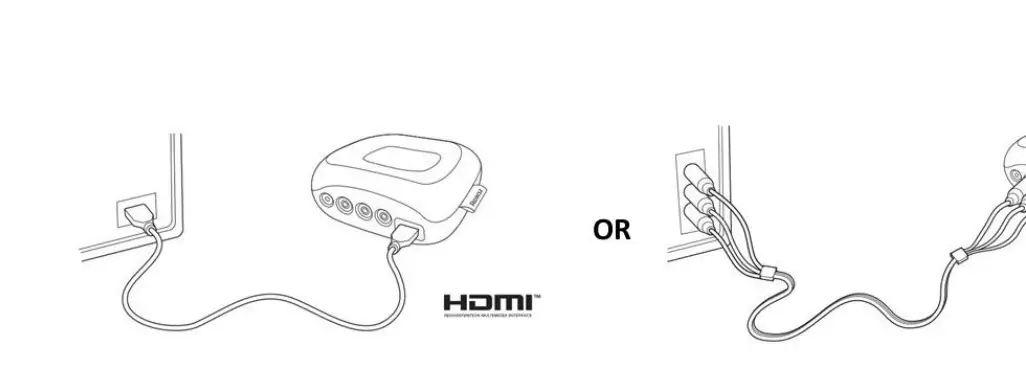
All Roku streaming players will work with any television with an HDMI® connection. When connecting your Roku streaming player to your TV using an HDMI connection, we recommend that you use a High-Speed HDMI Cable.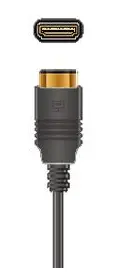
For connecting to older televisions, some Roku models include a standard composite video connection, in addition to the HDMI connection. 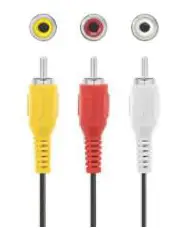
- Connect your Roku streaming player to your TV using either a High Speed HDMI Cable or composite cables.

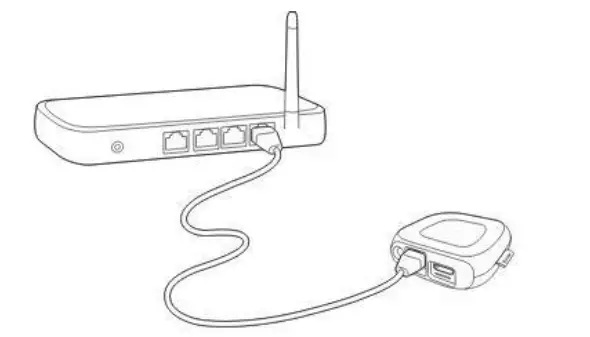
- If your Roku player has an Ethernet port, you can use an Ethernet cable to connect the Roku player to an available Ethernet port on your router or Ethernet switch.

- Connect the power connector to the Roku player and connect the power adapter to a wall outlet.

- Note: Select Roku players can be powered by connecting the included USB cable directly to a USB port on the TV. The USB port on some TV’s may be unable to power a Roku player. Open the battery cover of your remote and insert batteries.


Make sure the correct TV input is selected on your TV (the input to which your Roku player is connected). You should now see the Roku logo on the TV screen as your Roku player powers on. Help is available if you do not see any pictures on your TV or you have problems with your remote control.
Going through Guided Setup
- Choose a language When your Roku Player powers on, the first screen will prompt you to choose a language. All text and dialog within the Roku application will be displayed in the selected language.Note: It is the responsibility of the channel provider to translate their channel and some channels may not support your chosen language.
- Connect your Roku player your network and the internet Choose your wireless network from the list of available networks and enter your password. This is most often the same network you use to connect your computer or smartphone to the internet. If you do not see your network, select Scan again to see all networks. For more assistance, see help finding your wireless network and password. If you want to see your password as you type, choose Show password. This can help prevent entering the wrong password. Remember, passwords are case-sensitive. Use the shift button on the on-screen keyboard to enter a capital letter. Once you have entered your password and selected Connect, your Roku player will automatically connect to the internet. You can get more help if you are unable to connect to your wireless network.
- Wait for your Roku player to download the latest software Once connected to the internet, your Roku player will check to see if a software update is available. If there is, it will download the latest version and then reboot.
- Set the display type
- Your Roku player will analyze the HDMI connection to determine the best display resolution so you don’t have to manually configure the settings. To change the display type at a later time, go to Settings > Display type.
- Create a Roku account and activate your Roku player
- In order to activate your Roku player, it must be linked to a Roku account. Your Roku account keeps track of which Roku devices you own and allows you to add free and purchase channels from the Roku Channel Store.
Note: There is NEVER a charge to create a Roku account. - Instructions for activating your Roku player will be displayed on your TV, including an activation code; e.g. “XCV5TG”. You will be required to visit my.roku.com/link on your computer or smartphone, enter the code and follow the instructions to activate your Roku player.
- Note: Roku does NOT charge for device activation. When entering roku.com/link into your web browser, type it correctly to avoid fraudulently
- You are done!
Once you have completed all the activation steps, your Roku player will be ready to use.
Tips: You can personalize your Roku player by changing your theme or screensaver. You can use the Roku Channel Store to add new streaming channels, games, themes, screensavers, and other apps.
Why is the image not displayed in HDR or the picture quality poor when I watch 4K HDR content?
When you specifically watch a 4K HDR movie or TV show on your HDR-capable Roku device, you may notice the image is not displayed in HDR, or the picture quality is poor. If you encounter this behavior, you may need to update the software on your HDR-capable TV. You can typically find instructions how to do this along with the latest software on the TV manufacturer’s website. Once you confirm that your TV is running the latest software, check that it is properly configured to enable HDR on the specific input to which your Roku player is connected. Some TVs that support HDR do not enable this feature by default.
![Roku Express User Guide [r1012]](https://static-data1.manualsee.com/1/img/269/2790/2018/09/Roku-Express-User-Guide-R1012-featured.jpg "Roku Express User Guide [r1012]")


![Roku Express+ Guide [r1019]](https://static-data1.manualsee.com/1/img/266/2798/2018/09/Roku-Express-featured-1568x807.jpg "Roku Express+ Guide [r1019]")


