![]()
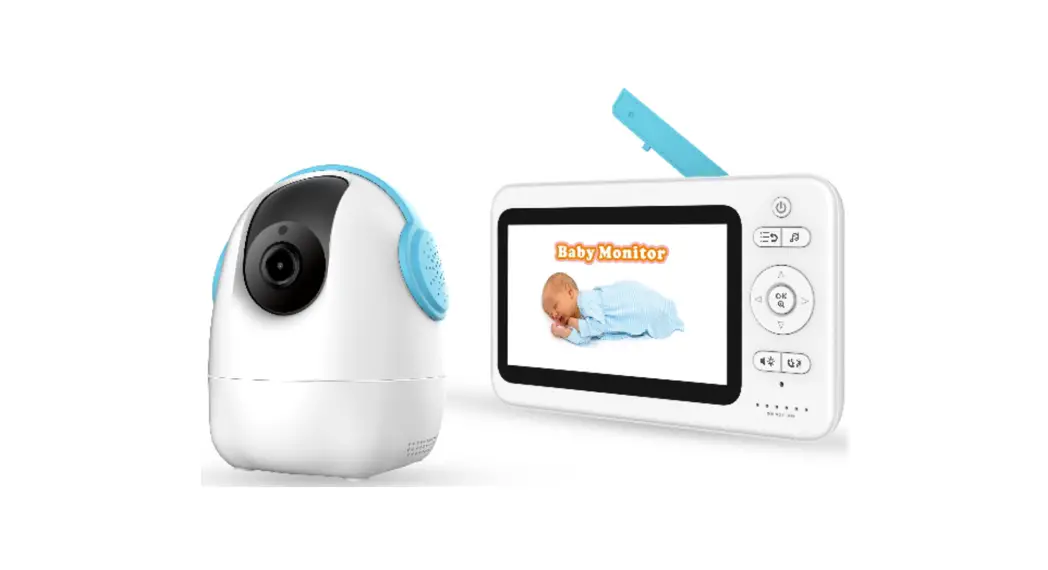
GD8205 Digital Wireless Baby Monitor
User Manual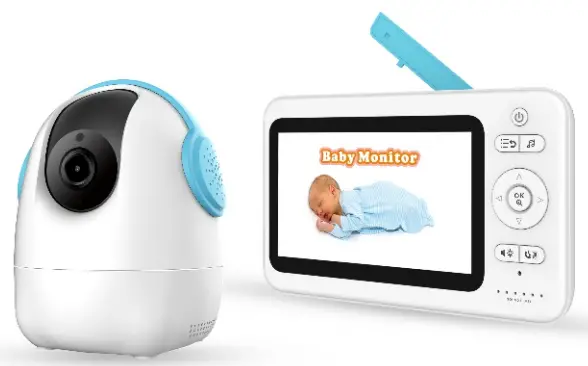
Model No.: E3205KG
Version 1.0
Please read this user manual carefully before using this product. Failure to understand operation procedures may result in injury.
Introduction
Thank you for choosing our baby monitor. Please read the instruction carefully in case of
product damage due to improper operation.
Parts in the package  Product structure
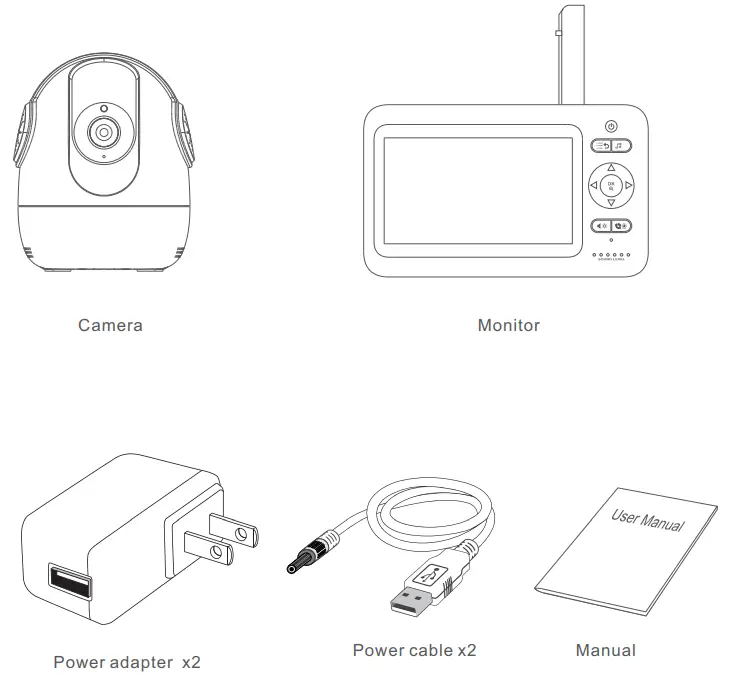 Product structure
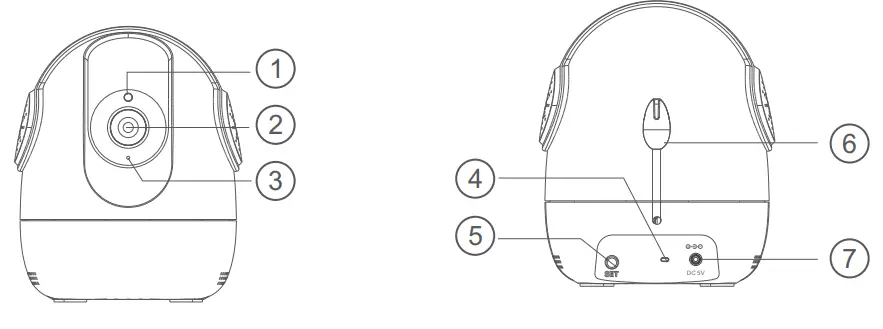
1.camera sensor
2.Lens
3.Microphone
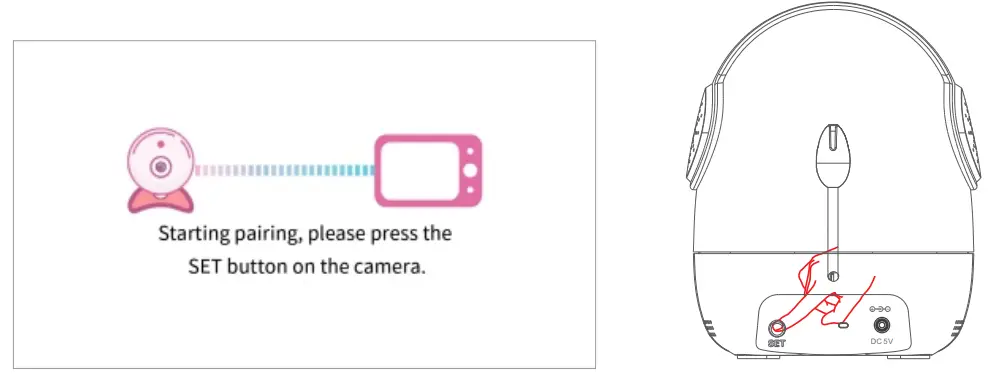
5.SET
4.Indicator LED6.Temperature sensor
7. DC power interface
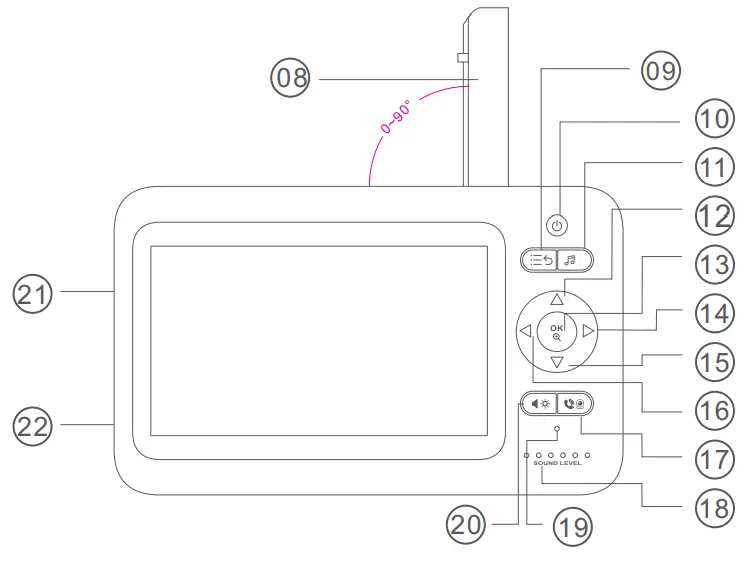
| 08. Antenna 09. Menu button/Return 10. Power on/off button 11. Lullabies button 12. Turn UP/ Brightness+ | 13. Confirmation button/Zoom button 14. Turn right/Volume+ 15. Turn down/Brightness 16. Turn left/Volume 17. Dialogue key —-> Talking Key | 18. Status indicator 19. Microphone 20. Shortcut button 21. RESET button 22. DC power interface |
Icon Description
Status Bar Icon
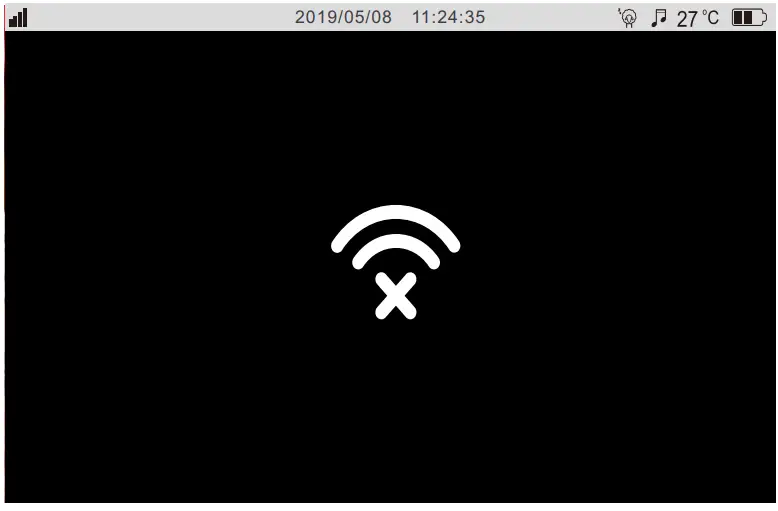
| No signal connection between the receiver and the camera | |
| Signal strength between the receiver and the camera | |
| The Lullaby function is enabled. | |
| 27°C | Displaying current room temperature |
| Indicating the current battery level. When the battery is too low, this icon will change to | |
| The temperature alarm is enabled |
Message push icon![]() No camera is added or the camera is disconnected from the receiver
No camera is added or the camera is disconnected from the receiver![]() Temperature alarm
Temperature alarm
The explanation for the status indicator LED![]()
The first green indicator is steady indicating a successful connection between the camera and the receiver.
The first to the fifth green indicator slowly flashes simultaneously: indicating power on, but the camera not connected.
The second to the fifth green indicators slowly flash from low to high: indicating the received volume
The second to the fifth green indicators slowly flash simultaneously: indicating that the alarm signal is received.
The sixth red indicator is steady on indicating that the lithium battery is being charged; (displayed whether it is turned on or off)
The sixth red indicator is off: indicating that the battery is fully charged.
Using the Monitor
Place the Camera Unit in a convenient location (e.g. on a table or a shelf) and point the camera lens toward the area you want to monitor.
NOTE:
Do not place the Monitor Unit within the baby’s reach. If there is interference with the picture or sound, try moving the units to different locations, and ensure they are not close to other electrical equipment.
WARNING
Strangulation Hazard:![]()
Children have STRANGLED in cords.
Keep this cord out of the reach of children (more than 3 feet (0.9m) away). Never use extension cords with AC Adapters. Only use the AC Adapters provided.
Preparation before using the camera
1. Powering the Camera Unit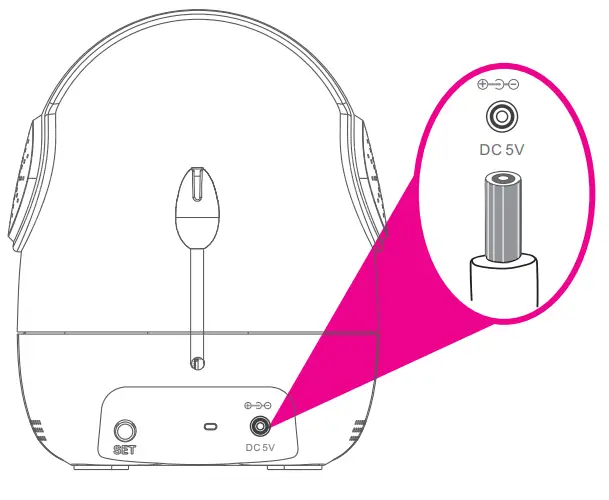 Insert one end of the included charging cable into the USB jack on the back of the camera.
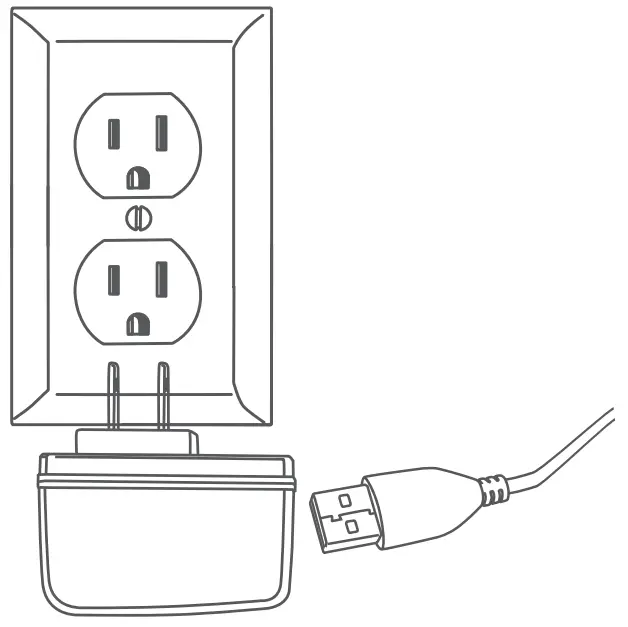
Insert the other end into the included power adapter. Then insert the adapter into the socket.
 After being powered on, the camera will automatically turn on. (The green light on the base of the camera is on for a few seconds. At this point, the camera is turned on successfully).
Preparation before using the receiver
- Power on the receiver (The receiver is provided with a lithium battery, if the receiver has enough power, please go directly to the Step 2).
 Insert one end of the charging cable into the USB charging jack on the side of the receiver.
Insert the other end into the included power adapter. Then insert the adapter into the socket. - Receiver starting up
Press and hold the button on the receiver to start the receiver
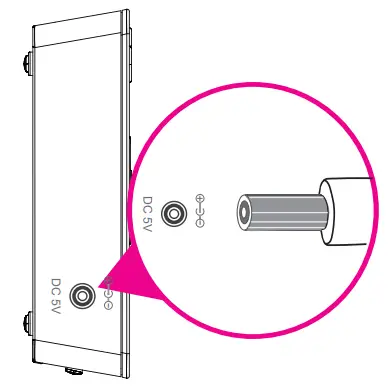 Insert one end of the charging cable into the USB charging jack on the side of the receiver.
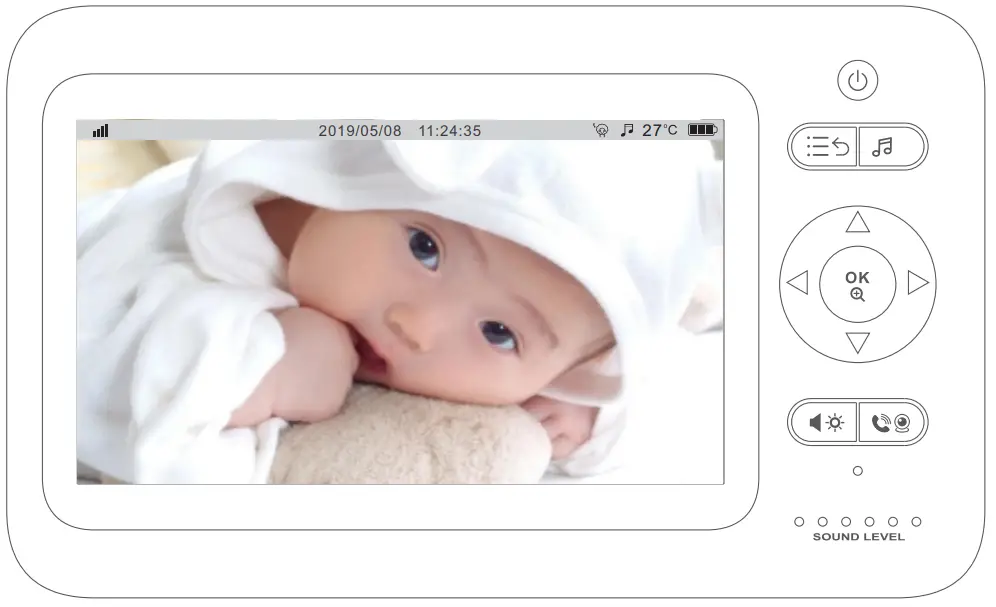
At this point, a monitor screen will appear on the receiver.
Note: This device has been paired before leaving the factory. If the receiver fails to display on the monitor screen as described above, please re-try the device pairing operation. For detailed steps, please refer to Page 9 “Camera Pairing”.
Receiver function settings
The functions of the Babysitter are user-definable, to best satisfy your demands. Audio and temperature alarms may offer automatic notification to you. This chapter will introduce the user-definable settings item by item.
In states of live view, pressing the MENU button on the monitor can enter into the MENU list; In states of non-live view, pressing the MENU button on the monitor can return to the previous interface level. 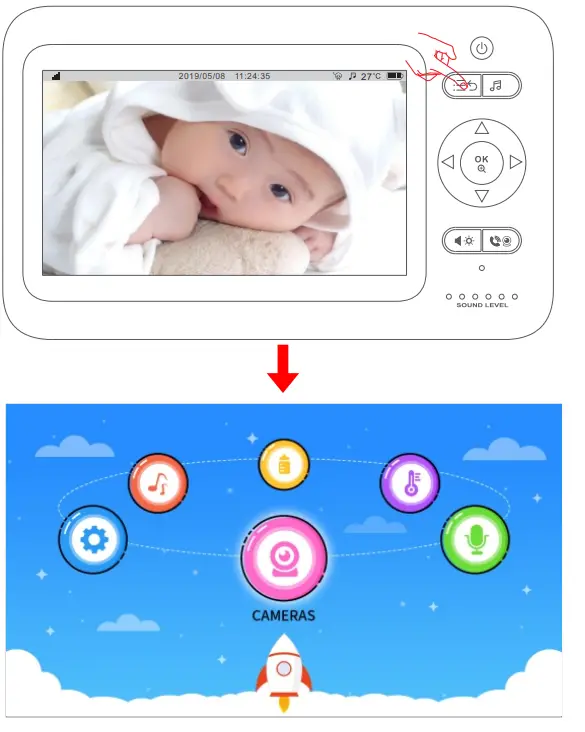
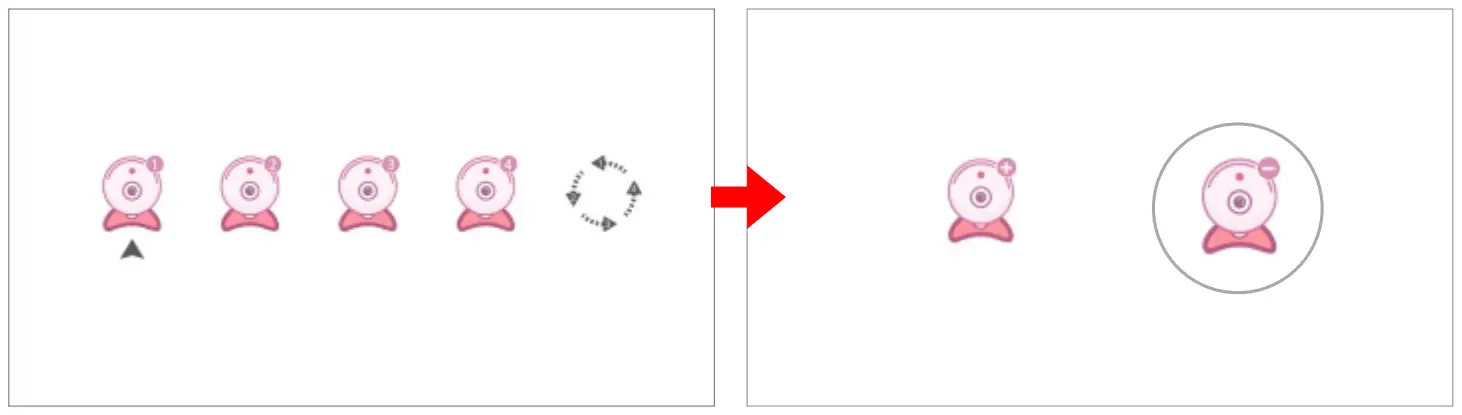
Camera settings (camera pairing and deletion)
Add camera
- Select
 Icon and press OK to enter.
 - Select the channel to be paired, press OK to confirm, select
 and press OK to confirm.
- When the device prompts “camera is No paired”, press OK to confirm.

- When the device prompts “Start pairing, please short press the camera SET key”, press the SET key of the camera shortly to enter the pairing mode.”

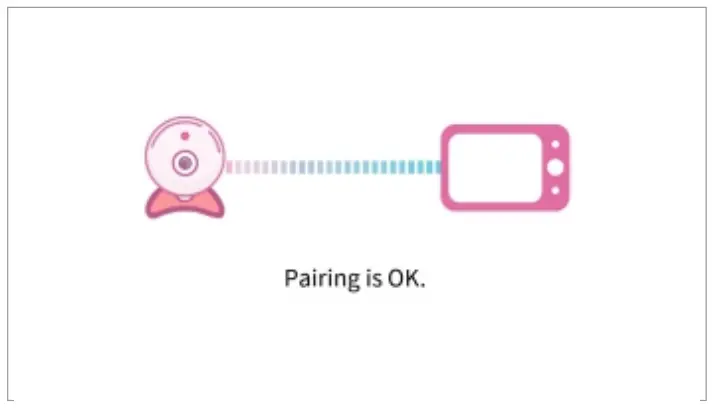
- When the device prompts “Pairing is Ok”, which indicates that the device is successfully paired, the menu will skip to the real-time monitoring menu, and the first indicator light of the receiver is constantly on in green.


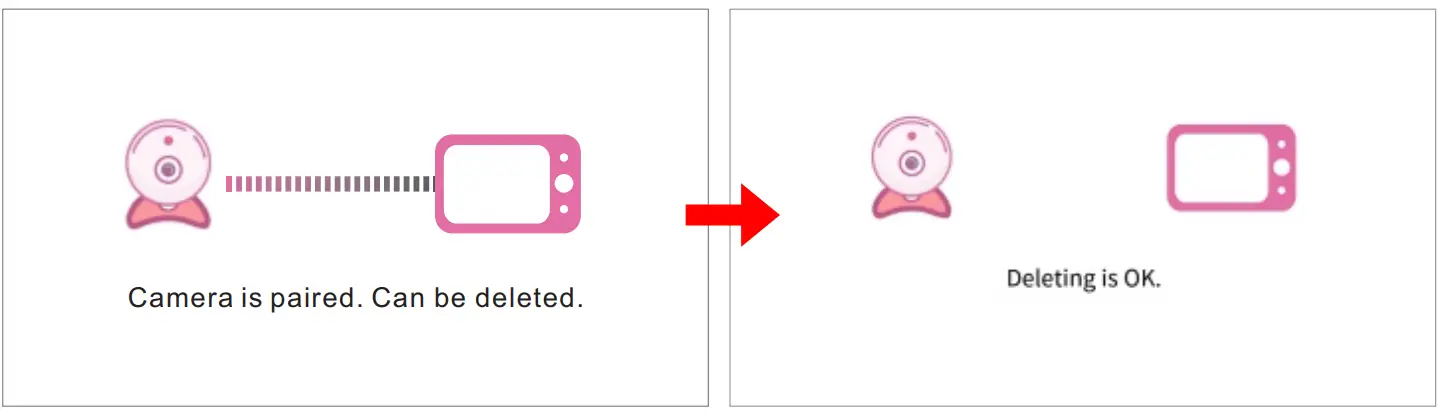
Delete the camera
- Select Icon and press OK to enter.
- Select the channel to be deleted, press OK to confirm, select and press OK to confirm.

- When the device prompts “Camera is paired. Can be deleted” Press OK to confirm. When the device prompts “Deleting is OK”, the camera is successfully deleted.
![]() Audio alarm settings
Audio alarm settings
Set the range of the sound sensitivity alarm. Set the sound sensitivity alarm range. This function recognizes the intensity of the baby’s crying, and when the value is above the threshold, the receiver will sound an alarm.
- Select the
 icon and press OK to confirm
 - Select the 、
 、 icon as needed and press OK to confirm.
The audible alarm setting is completed. Press MENU to return.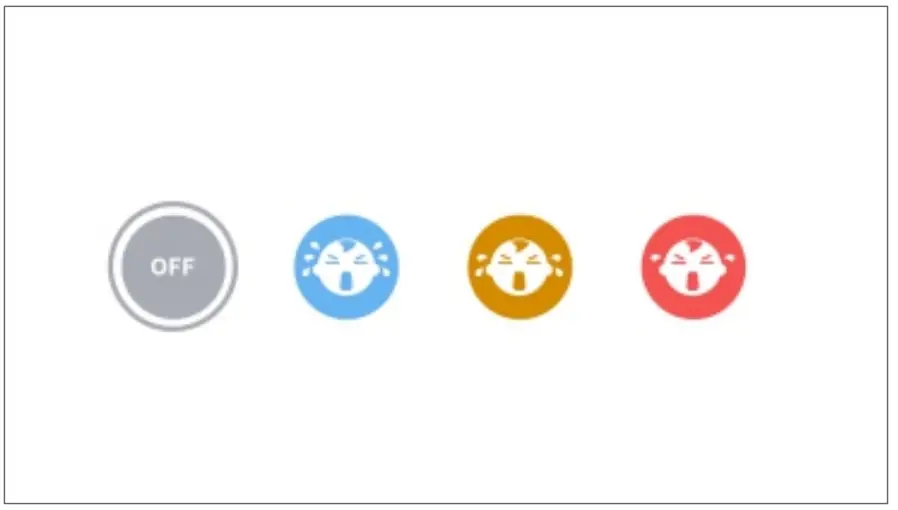
Note: The audible alarm will last for 1 minute. The audible alarm notification can be switched off by pressing any button on the receiver, and the notification will not be received again within 3 minutes thereafter.![]() Temperature alarm settings
Temperature alarm settings
The temperature alarm gives a push notification to your receiver when your baby’s room is too hot or too cold.
- Select
 and press OK to enter the setting page
Celsius setting
Set to Celsius: Select ![]() a °c press OK to confirm.
a °c press OK to confirm.
Temperature switch: Select ![]() ON and press OK to confirm
ON and press OK to confirm
After setting, press MENU to return.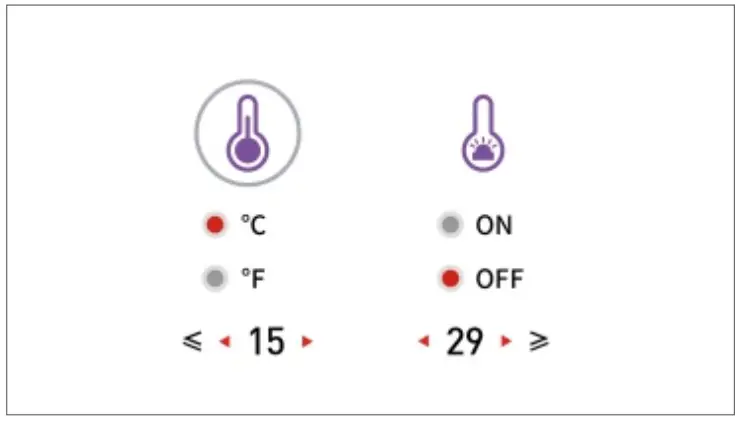
Fahrenheit setting
Set to Celsius: Select ![]() °F and press OK to confirm.
°F and press OK to confirm.
Temperature switch: Select ![]() ON and press OK to confirm
ON and press OK to confirm
After setting, press MENU to return.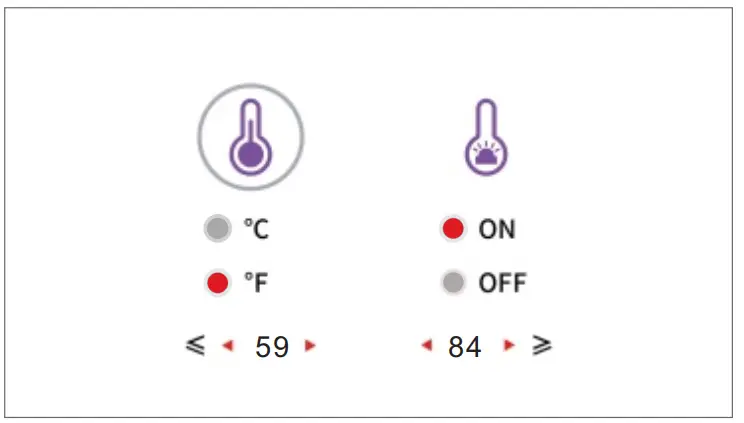
Note: The setting of the temperature alarm defaults to 15~29°C (59°F~84°F). When the baby’s room temperature is outside this range, the receiver will receive a temperature alarm. The audible alarm will last for 1 minute. The audible alarm notification can be switched off by pressing any button on the receiver, and the notification will not be received again within 3 minutes thereafter.
 Feeding timer
You can set the receiver to auto-feeding timer mode. This setting will automatically switch to sleep mode depending on the length of such setting.
- Select and press OK to enter the setting page.
- Select the length of sleep as needed. Press OK to confirm. At this point, the receiver will automatically sleep according to the time setting. After the setting is completed, press MENU to return.
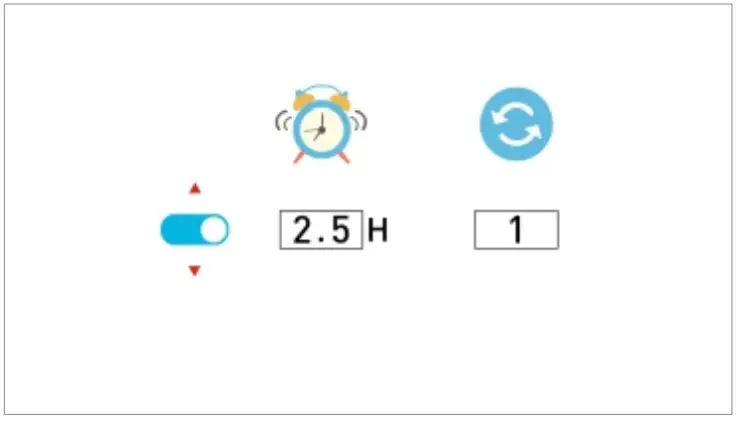
![]() Lullabies
Lullabies
The babysitter has 5 pieces of lullabies to help you sleep your baby.
- Select the
 icon and press OK to enter the setting page.
 - Select the music you want to play, press OK to confirm, and the camera will play the selected lullaby, press OK again to pause the lullaby. Select “All” to play all the lullabies in a loop. When the setup is complete, press MENU to return.

Note: In this screen, press![]() to switch the lullaby and press
to switch the lullaby and press ![]() to adjust the volume.
to adjust the volume.
Setting
This setting includes time settings, factory reset, and viewing hardware version
Time setting
Calibrate the time on the receiver.
- Select
 and press OK to enter the setting page.
 - Select
 and press OK to enter the setting page.

3. You may press ![]() to select the item to be adjusted; press
to select the item to be adjusted; press ![]() to edit the selected item. After the setting is completed, press OK to confirm. Press MENU to return.
to edit the selected item. After the setting is completed, press OK to confirm. Press MENU to return.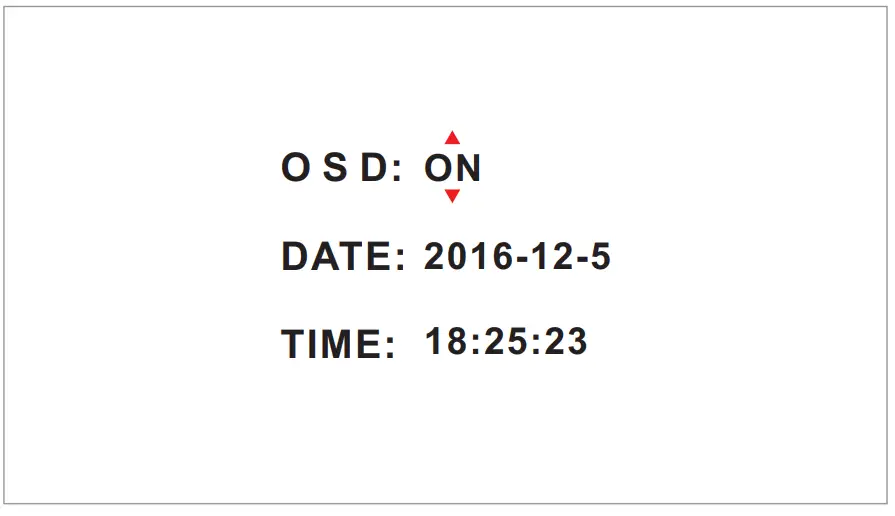
Language setting
Switch language displayed on the receiver.
- Select Settings, and press OK to enter the settings page.
- Select
 Language Settings, and press OK to enter the settings page. Select a language you need and press OK to confirm.
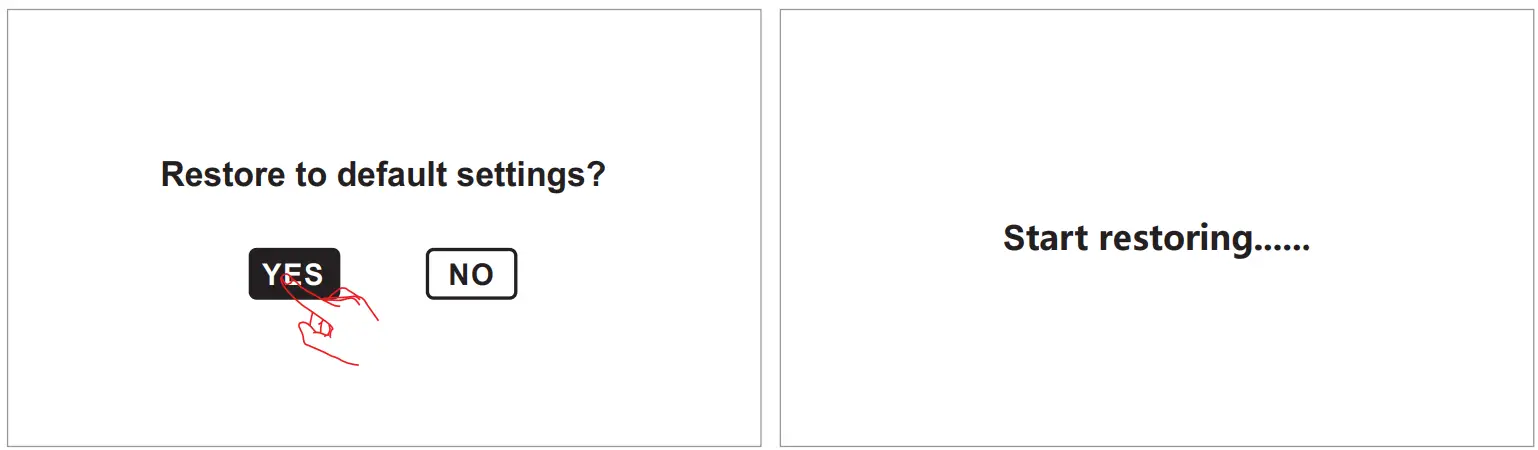
Reset default settings
Format all settings on the receiver and delete the camera.
- Select and press OK to enter the setting page.
- Select
 and press OK to enter the setting page.
  At this time, the device will prompt “Restore to default settings?”. Select YES and press OK to confirm. The device will start resetting to default settings
- After the default settings are restored, the receiver will automatically switch to the monitoring interface with an icon indicating that no camera is added.

Version information
View the version information of the receiver
- Select and press OK to enter the setting page.
- Select
 and press OK to enter .
  The receiver will display the corresponding version information. Press MENU to return after reviewing the version information.
 The receiver will display the corresponding version information. Press MENU to return after reviewing the version information.
Specifications
| Camera | |
| Image sensor | 1/4″ CMOS |
| Video resolution | 720P |
| Horizontal Viewing Angle | 60±5° |
| Rotation angle | Pan: 350° Tilt:58° |
| Night visual range | 5m |
| Power supply | DC 5V/1A |
| Operation temperature | -10°C-50°C |
| Storage temperature | -20°C-60°C |
| Operation humidity | 15-85%RH |
| Dimensions W*D*H | 97x87x111 mm |
| Receiver | |
| LCD | 5″ TFT LCD monitor |
| Number of pixels | 1280*720P |
| Wireless transmission Way | 2.4GHz FHSS |
| Battery | 2000mAH |
| Power supply | DC 5V/1A |
| Operation temperature | -10°C-50°C |
| Storage temperature | -20°C-60°C |
| Operating humidity | 15-85%RH |
| Dimensions(W*D*H) | 167x101x29 (mm) |
All the specifications are subject to minor change without prior notice.
CE and FCC Certification Information
NOTE: This equipment has been tested and found to comply with the limits for a Class B digital device, pursuant to part 15 of the FCC Rules. These limits are designed to provide reasonable protection against harmful interference in a residential installation.
This equipment generates uses and can radiate radio frequency energy and, if not installed and used in accordance with the instructions, may cause harmful interference to radio communications.
However, there is no guarantee that interference will not occur in a particular installation. If this equipment does cause harmful interference to radio or television reception, which can be determined by turning the equipment off and on, the user is encouraged to try to correct the interference by one or more of the following measures:
– Reorient or relocate the receiving antenna.
– Increase the separation between the equipment and receiver.
– Connect the equipment into an outlet on a circuit different from that to which the receiver is connected.
– Consult the dealer or an experienced radio/TV technician for help
Changes or modifications not expressly approved by the party responsible for compliance could void the user’s authority to operate the equipment. This device complies with Part 15 of the FCC Rules.
Operation is subject to the following two conditions:
(1) This device may not cause harmful interference
(2) This device must accept any interference received, including interference that may cause undesired operation.
RF Exposure Information:
FCC RF Exposure requirements: The highest 1g SAR value reported under this standard during product certification for use body exposure condition with the minimum separation distance of 0mm is 0.02W/Kg. This transmitter must not be collocated or operating in conjunction with any other antenna or transmitter. This product is in compliance with FCC RF exposure requirements and refers to the FCC website https://apps.fcc.gov/oetcf/eas/reports/GenericSearch.cfm search for FCC ID: TW5GD7605
This equipment complies with radiation exposure limits set forth for an uncontrolled environment.
This transmitter must not be co-located or operating in conjunction with any other antenna or transmitter. This equipment should be installed and operated with a minimum distance of 20cm between the radiator& your body. This product is in compliance with FCC RF exposure requirements and refers to the FCC website https://apps.fcc.gov/oetcf/eas/reports/GenericSearch.cfm Search for FCC ID: TW5GD8205
Hereby, we declare that this device is in compliance with the essential requirements and other relevant provisions of Directive 2014/53/EU.
Notice: Observe the national local regulations in the location where the device Is to be used. This device may be restricted for use in some or all member states of the European Union (EU)
EU Environmental Provisions
E-waste cannot be mixed with household garbage; the corresponding local government sector or recycling stations shall be responsible for the circular process. ![]()
![]()


