TORO 133-1009 Wide Angle Mirror Kit Instruction Manual
Installation
Loose Parts
Use the chart below to verify that all parts have been shipped.
| Description | Qty. | Use |
| No parts required | – | Prepare the machine. |
| No parts required | – | Remove the canopy support bracket (for GTX models with a canopy—Model 07921 or 07922). |
| Mirror bracket Carriage bolt (1/4 x 3/4 inch) Locknut (1/4 inch) | 2 2 2 | Install the mirror brackets (for GTX models with a canopy—Model 07921 or 07922). |
| Mirror bracket Carriage bolt (1/4 x 3/4 inch) Locknut (1/4 inch) Carriage bolt (1/4 x 1-1/2 inches) | 2 2 2 2 | Install the mirror brackets (for GTX models with a 2-person canopy—Model 07140, or 4-person canopy—Model 07141). |
| Mirror bracket Carriage bolt (1/4 x 3/4 inch) Locknut (1/4 inch) | 2 2 2 | Install the mirror brackets (for Vista models with a canopy). |
| Wide angle mirror Handle knob Carriage bolt (1/4 x 3/4 inch) | 1 2 1 | Install the mirror (for GTX and Vista models with a canopy). |
Preparing the Machine
- Park the machine on a level surface.
- Engage the parking brake.
- Shut off the machine and remove the key.

g038447
© 2023—The Toro® Company
8111 Lyndale Avenue South
Bloomington, MN 55420
Register at www.Toro.com.
Original Instructions (EN)
Printed in the USA
All Rights Reserved

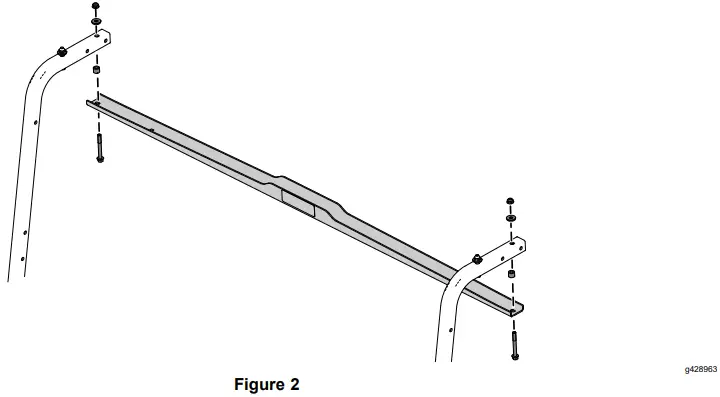
Removing the Canopy Support Bracket
For Workman® GTX Models with Canopy Model 07921 or 07922
Remove the canopy support bracket as shown in Figure 2.
Note: Retain the support bracket and hardware for later installation.
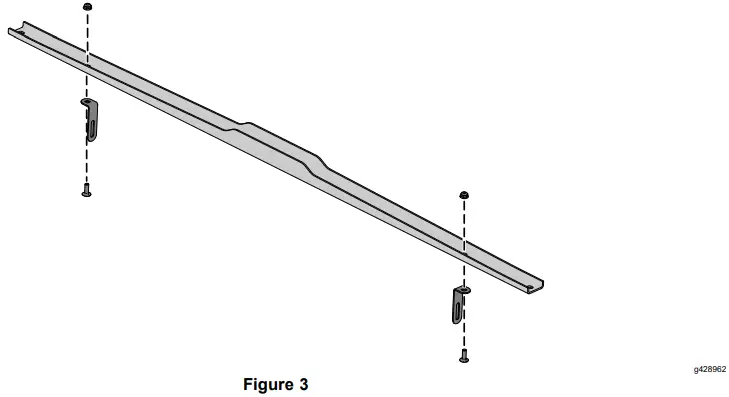
Installing the Mirror Brackets
For Workman GTX Models with Canopy Model 07921 or 07922
Install the 2 mirror brackets to the canopy support bracket using the 2 carriage bolts (1/4 x 3/4 inch) and 2 locknuts (1/4 inch) as shown in Figure 3.
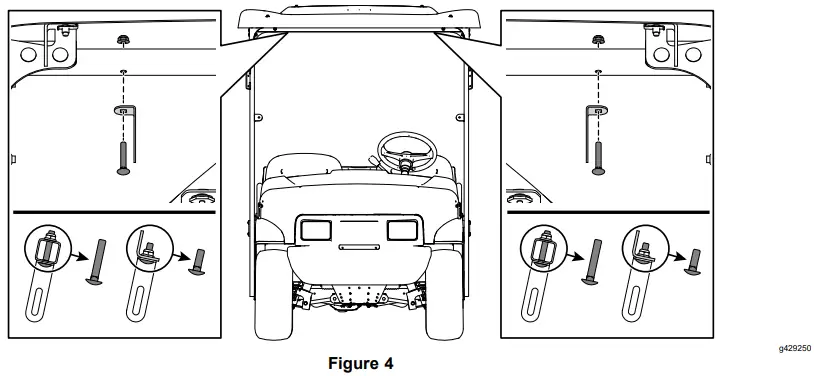
For Workman GTX Models with 2-Person Canopy Model 07140 or 4-Person Canopy Model 07141
Install the 2 mirror brackets using the 2 carriage bolts (1/4 x 3/4 inch or 1/4 x 1-1/2 inches) and 2 locknuts (1/4 inch) as shown in Figure 4.
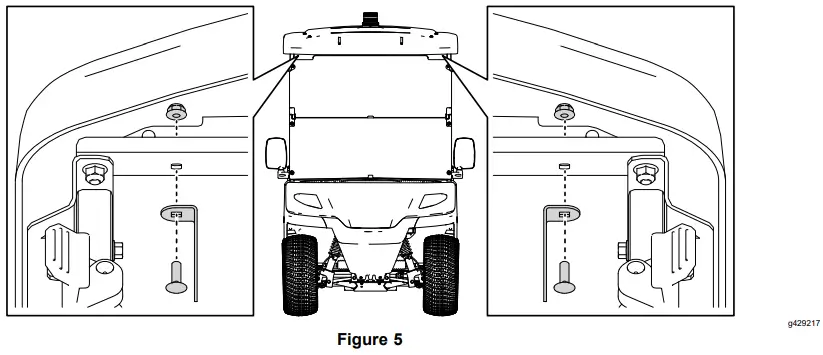
For Vista™ Shuttle Vehicles with a Canopy
Install the 2 mirror brackets using the 2 carriage bolts (1/4 x 3/4 inch) and 2 locknuts (1/4 inch) as shown in Figure 5.
Installing the Mirror
For GTX and Vista Models with a Canopy
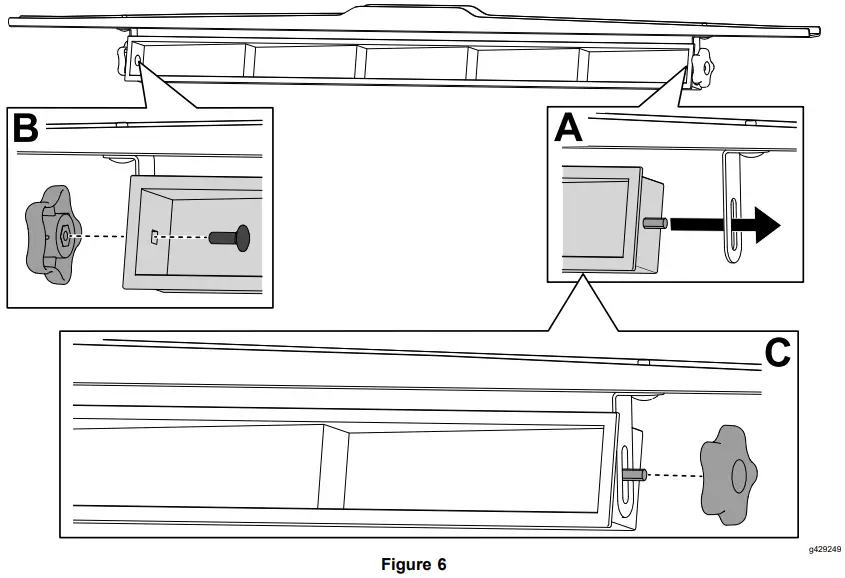
- Slide the mirror onto the mirror bracket (A of Figure 6).
- Secure the left side of wide angle mirror to the mirror bracket using a carriage bolt (1/4 x 3/4 inch) and a handle knob (B of Figure 6).
- Secure the right side of the wide angle mirror using a handle knob (C of Figure 6).
- Adjust the height and angle of the mirror; refer to Adjusting the Height and Angle of the Mirror (page 5).
- If required, install the canopy support bracket to the machine using the previously removed hardware; refer to Figure 2.
Operation
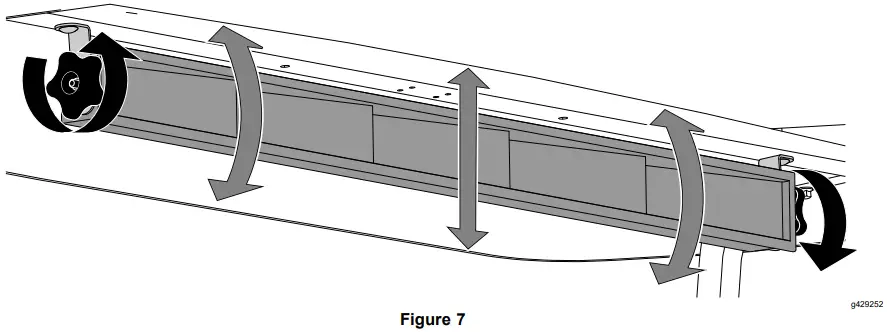
Adjusting the Height and Angle of the Mirror
Adjust the height and angle of the mirror as shown in Figure 7.
Notes:
![]()


