![]() Motherboard
Motherboard
PRIME B760M-A WIFI
Quick start guide
Prime B760M-A WiFi Motherboard
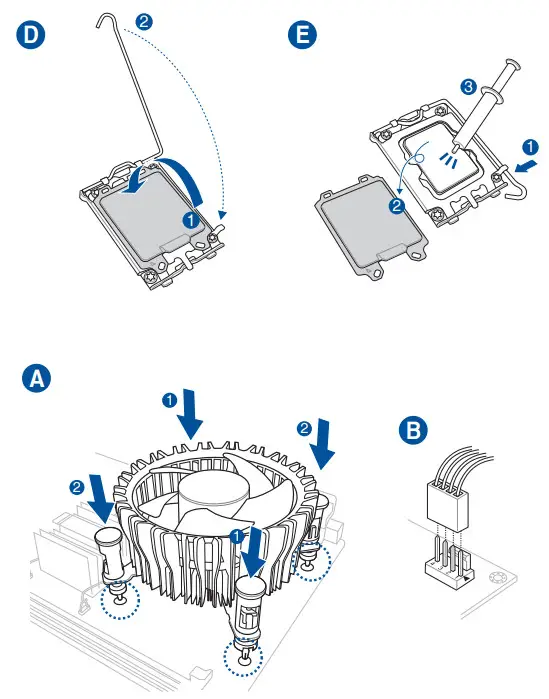
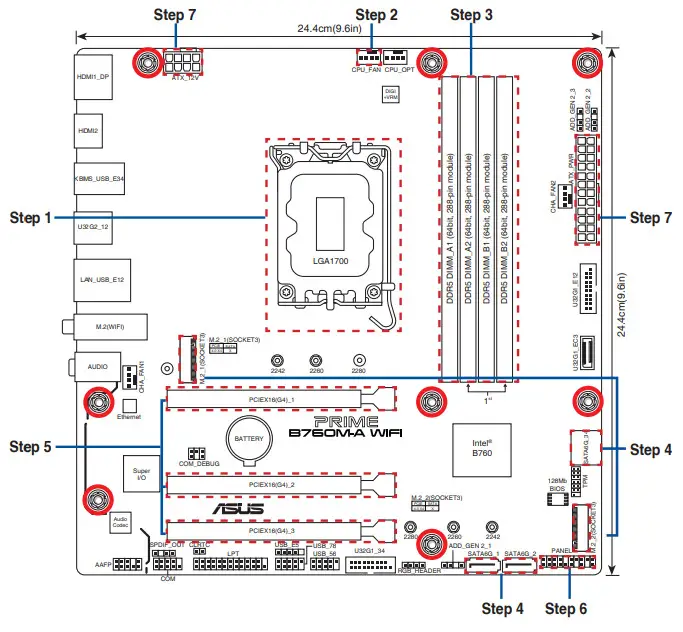
Step 1
Install the CPU
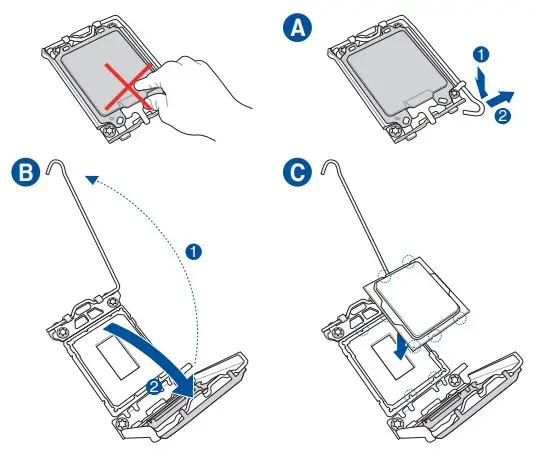
Step 1
Install the CPU
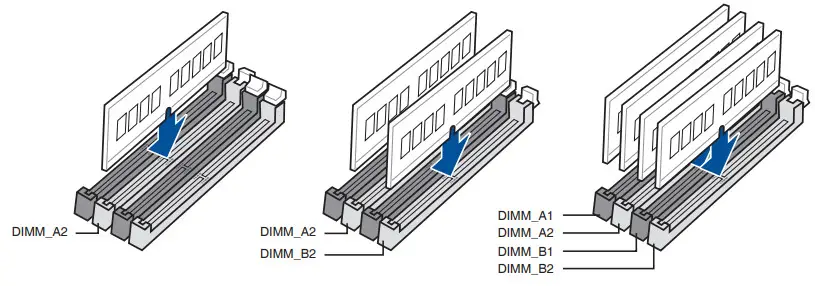
Step 3
Install memory modules
Step 4
Install storage devices. Toinstall M.2, referto user guide.
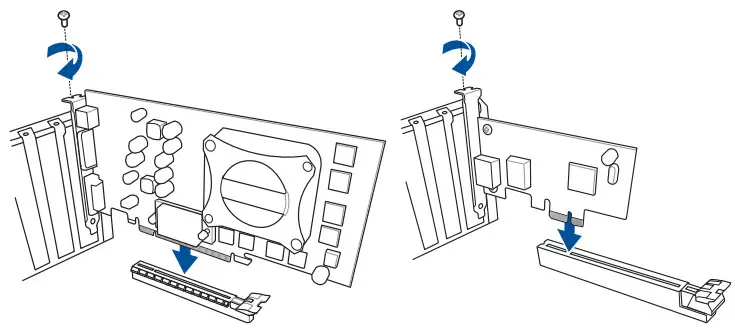
Step 5
Install expansion card(s)
Step 6
Install the system panel connector

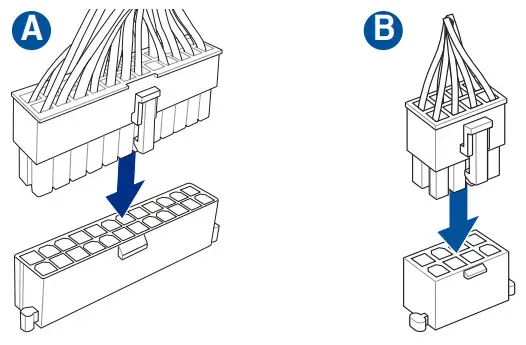
Step 7
Install ATX power connectors
Step 8
Connect input/output devices
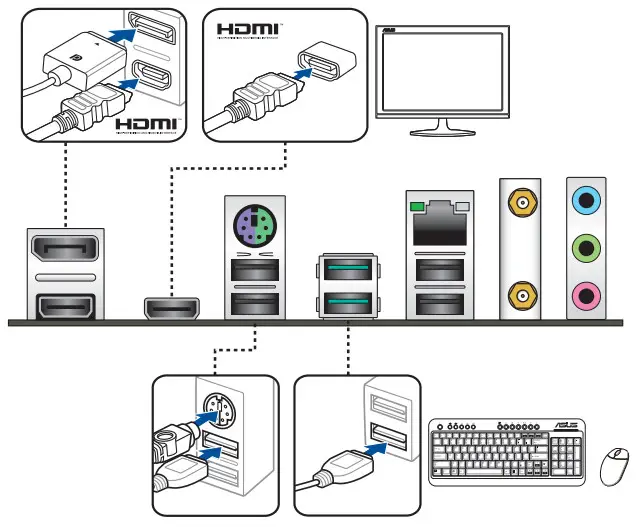
Step 9
Power on the system and install operating system and drivers
Motherboard Layout
Australia Statement Notice
From 1 January 2012 updated warranties apply to all ASUS products, consistent with the Australian Consumer Law. For the latest product wartanty details please visit https://www.asus.com/support/.
Our goods come with guarantees that cannot be excluded under the Australian Consumer Law. You are entitled to a replacement or refund for amajor failure and compensation for any other reasonably foreseeable loss or damage. You are also entitled to have the goods repaired or replaced if the goods failto be of acceptable quality and the failure does not amount to a major failure.
If you require assistance please call ASUS Customer Service 1300 2787 88 or visit us at hitps://www.asus. com/support/
India RoHS
This product complies with the‘India E-Waste (Management) Rules, 2016″and prohibits use of lead, mercury, hexavalent chromium, polybrominated biphenyls (PBBs) and polybrominated diphenyl ethers (PBDESs) in concentrations exceeding 0.1% bywe:‘gm in homogenous materials and 0.01 % by weight in homogenous materials for cadmium, except for the exemptions listed in Schedule Il of the Rule.
Tiirkiye RoHS
AEEE Yonetmeligine Uygundur
HDMI Trademark Notice
The terms HDMI, HDMI High-Definition
Multmedia Interface, HOMI Trade dress, and the HDMI Logo are trademarks of registered trademarks of HDMI Licensing Administrator, Inc.
Q21693
First Edition
February 2023
Copyright
© ASUSTeK Computer Inc.
Al Rights Reserved