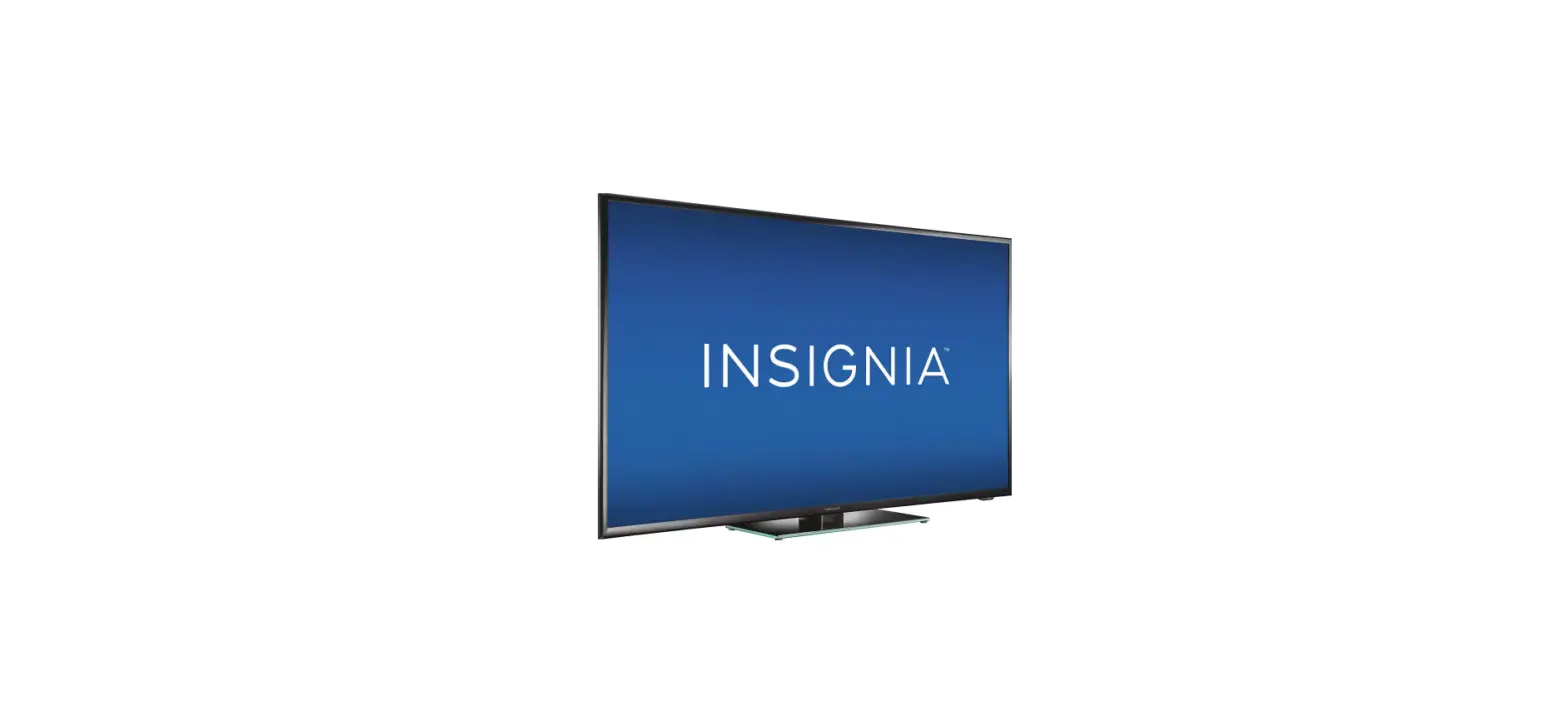
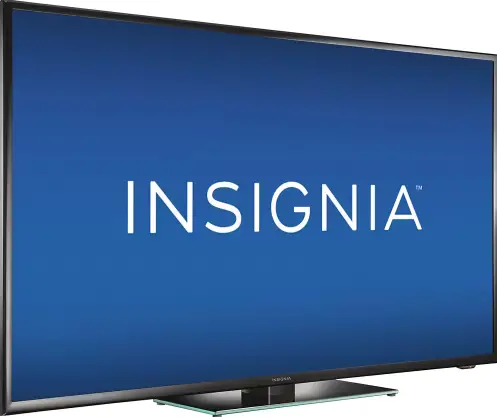
insignia 32″42″120Hz LED-LCD
SETUP GUIDE
Thank You!
Enter into the connected world! Your Insignia LED-LCD
Connected TV is constructed with high quality components and assembled with precision to consumers the best picture possible and easy
access to your favorite online movies, music, TV shows, web videos and other web content
How to set up your TV
Note:
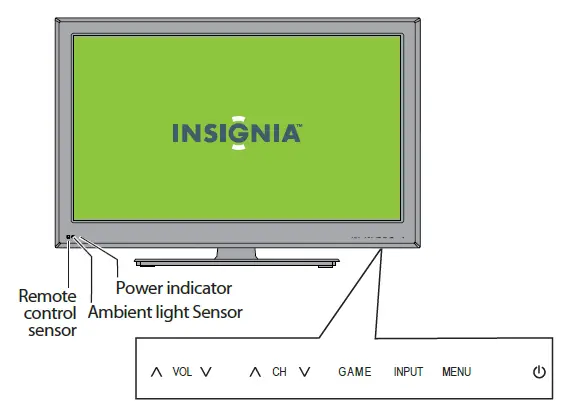
- Press (power) to turn on your TV. The power indicator turns blue.
- Press again to put your TV in Standby mode. The power indicator turns red.
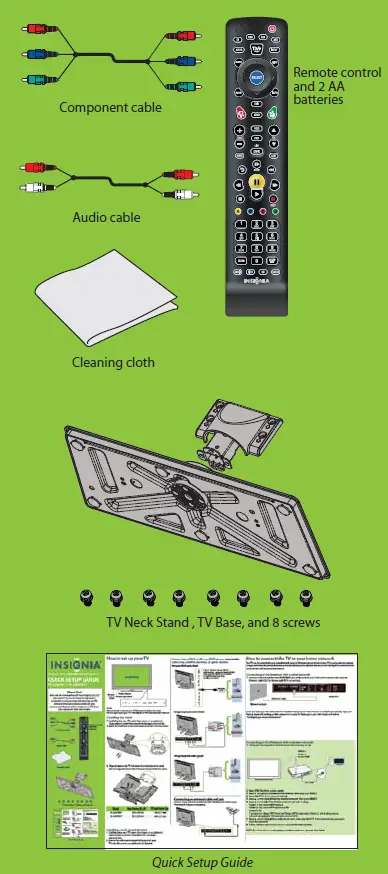
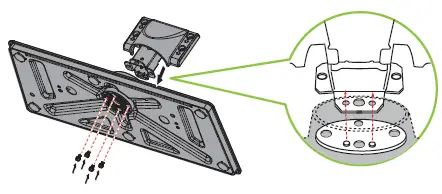
Installing the stand
- Carefully place your TV screen face-down on a cushioned, clean surface to protect the screen from damage and scratches.
- Attach the stand neck to the stand base and secure it with four screws.

- Align the stand on the TV , then insert the metal tabs on the stand into the designated slots on the TV base and secure it with four screws.


Installing a wall-mount bracket
- Carefully place your TV screen face-down on a cushioned, clean surface to protect the screen from damages and scratches.
- Secure the wall-mount bracket to the back of your TV using the screws provided with the bracket.
Connecting a DVD or Blu-ray DVD player, camcorder, cable box, satellite receiver, or game station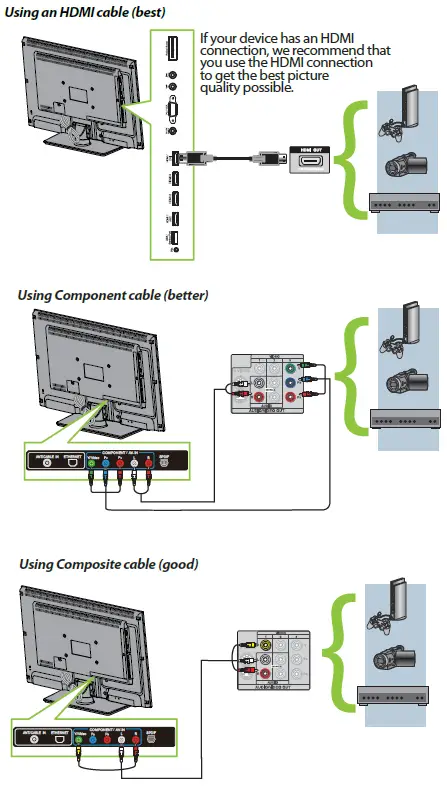
Connecting an antenna/cable wall jack
Connect a coaxial cable (not included) to the ANT/CABLE IN jack on the back of your
TV and the RF OUT jack on the antenna.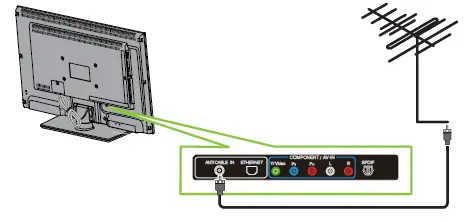
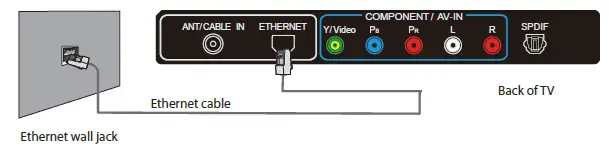
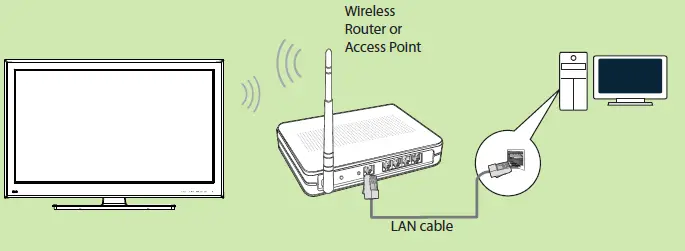
How to connect the TV to your home network
Your TV can be connected to your wired network using the Ethernet port on the back of your TV or using a wireless network. Using a wired network provides the best performance, because the attached devices connect directly to the network and are not subject to radio frequency interference.
Connecting to the Internet with a wired network:
- Connect a network cable to the ETHERNET jack on the back of your TV and into a wired router using an Ethernet cable (Cat 5 or better, with RJ45 connectors).

Once you have your TV connected thru the Ethernet jack your TVshould be connected automatically. If you are having issues with setting up the connection to your TV please go to your User Guide and look at
“Configuring a wired connection”.
Connecting to the Internet with a wireless network:
- Set up your access point or wireless router (if not already set up).

- Press TiVo. The Home screen opens.
- Press ▼ to highlight Connect to the Internet, then press ►or SELECT.
- Press SELECT to go to network settings.
- Press ▲ or ▼to highlight Set up wireless network, then press SELECT.
- Press ▲ or ▼to select the Wireless network you wish to setup
- Option 1- Yes, I have a WPS button
- Option 2- Yes, I have a WPS and use a PIN
- Option 3- No
If you are not using a WiFi Protected Setup (WPS) router select Option 3, which allows you to connect using regular WiFi security, such as WPA2.
- Press ▲ or ▼to highlight the network you want, then press SELECT. If your network has a password,
enter the password. - Follow the on-screen instructions to complete the network setup.
NOTE: For information on configuring a wireless connection, see your User Guide.
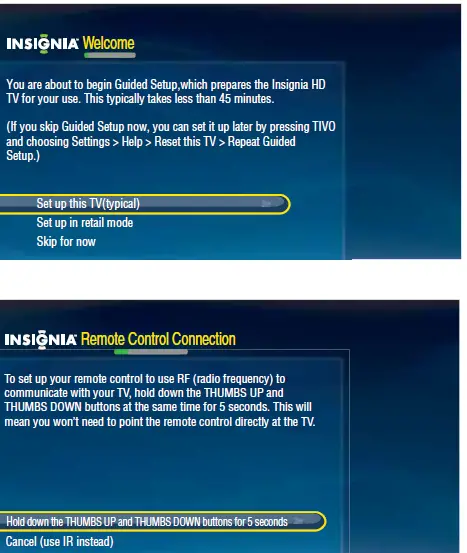
How to set up your TV for the first time
- Make sure that you have: Installed the remote control batteries.
- Press (power) to turn on your TV.
- The Welcome screen opens. Press ▲ or ▼ to highlight Set up this TV (typical), then press SELECT.

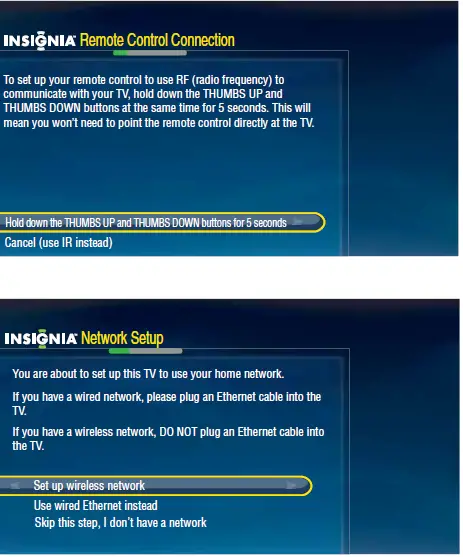
- The Remote Control Connection screen opens. Press
 and on your remote control to pair the remote control. Press SELECT when the RF Connection Successful screen opens.
 - The Network Setup screen opens. Press ▲ or ▼ to highlight your network connection type, then press SELECT and follow the on-screen instructions to set up your network and run the network speed test.

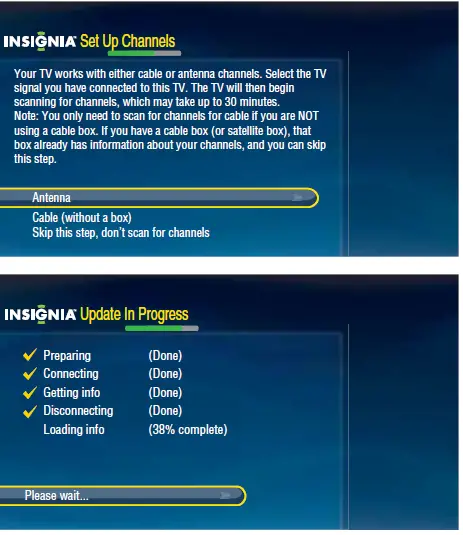
- The Set Up Channels screen opens. Press ▲ or ▼to highlight your
signal type, then press SELECT to start the channel scan.
NOTE: If you are using a cable or satellite box and you have connected it to the TV using a Coaxial (RF) cable, you should select the Cable option. If you use a cable or satellite box, you do not need to scan for channels. - If you connected to a network in Step 5 and a software update is available, the Update in Progress screen opens. Follow the on-screen instructions to install the software update.

- The Date and Time Setup screen opens. Press ▲ or ▼to highlight Set date and time manually, then press SELECT and follow the on-screen instructions to set your time zone, daylight saving option, and date and time.
- The Congratulations screen opens. Press TiVo to enjoy your new TV.
- If you selected in step 6 Channel Scan to skip the channel scan because you were setting up a cable or satellite box, then you will need to go and select the Video Input Source for your TV. Press INPUT on your remote to select the video input source.


How to set up your Insignia remote control
Programming your Universal remote control
One of the great benefits of the TV is Easy Remote Setup for your Insignia universal remote control. You can program the mode buttons on your TV remote control (DVD, STB, or AUX ) to control the corresponding device using your TV remote control. Please Note: your remote must be in RF mode to use the remote setup.
To program the mode buttons:
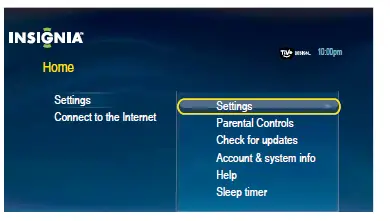
- Press TiVo. The Home screen opens. Press▲or▼ to highlight Settings, then press ►or SELECT.
- Press▲or▼to highlight Settings, then press ►or SELECT.

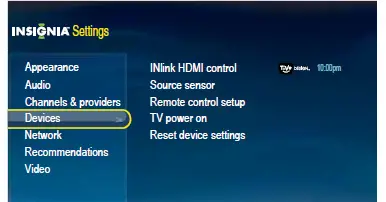
- Press ▲ or ▼ to highlight Devices, then press ► or SELECT.

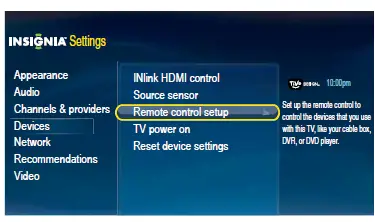
- Press ▲ or ▼ to highlight Remote control Setup, then press ► or SELECT.

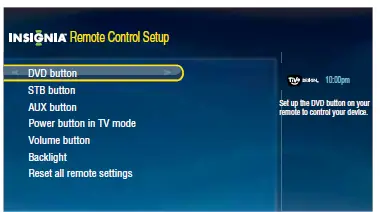
- Press ▲ or ▼ to highlight which button you want to program on your remote control, then press ► or SELECT.

- Follow the on-screen instructions to finish remote setup.
NOTE: For more information on “Programming your universal Insignia remote control”, see your User Guide.
How to access connected services
- The only TV that combines the power of the Internet with the legendary TiVo user interface, all in stunning HD. You’ll find entertainment from the Internet with just a few clicks of
your remote control. Now get what you want, when you want it. - With CinemaNow on your TV, you can rent some of your favorite movies from the comfort of your couch. All you need is your Insignia remote. Once you have a CinemaNow account from CinemaNow.com, grab some popcorn and enjoy the show.
- With Netflix on your TV, if you have a Netflix unlimited plan, you can instantly watch thousands movies and TV episodes streamed from Netflix to your TV. Just add shows to your Netflix instant Queue, and
start watching. - Pandora on your TV lets you choose exactly the music you want to hear and creates personal Internet radio stations that play it for you. Just enter a song title or band name that represents the kind of music you want to hear, and Pandora will start a unique “Pandora station” that plays music similar to it. Add variety by entering other titles and bands to your station, and even more variety by creating multiple Pandora stations
(up to 100!). - Listen to what you want, when you want with Napster, the ultimate online jukebox. Access instantly your choice of over 11 million songs—anytime, anywhere. Kick back with ad-free
radio stations, recommendations, and Billboard® charts back to 1955. Create your own playlists for a customized listening experience. - View your favorite Internet content on your TV with apps from chumby industries.Tweet your friends, post a Facebook comment, check the stocks, play photos from Photobucket and more!
Stay connected while watching your favorite shows.
Two-year limited warranty
Visit www.insigniaproducts.com for details.
Need additional help?
See your User Guide! This comprehensive guide includes everything from basic how-to steps to more advanced features.
Check out our online community forum at www.insigniaproducts.com for helpful information from other Insignia TV owners.
We’re here for you
www.insigniaproducts.com
For customer service, call:
877-467-4289 U.S.
Distributed by Best Buy Purchasing, LLC
7601 Penn Avenue South, Richfield, MN USA 55423-3645
RFC#BBI0802114Q2
© 2011 BBY Solutions, Inc.
All rights reserved. INSIGNIA is a trademark of BBY Solutions, Inc. Registered in some countries. All other products and brand names are trademarks of their respective owners.


