HOSA EIO-BG-AT ICE Omnidirectional Audio
Specifications
- CONNECTIVITY TECHNOLOGY: AUXILIARY
- POLAR PATTERN: Omnidirectional
- ITEM WEIGHT: 03 Pounds
- ITEM DIMENSIONS LXWXH: 8 x 6 x 6 inches
- POWER SOURCE: Corded Electric
- PRODUCT DIMENSIONS: 8 x 6 x 6 inches
- ITEM WEIGHT:48 ounces
- ITEM MODEL NUMBER: EIO-BG-AT
What’s in the box?
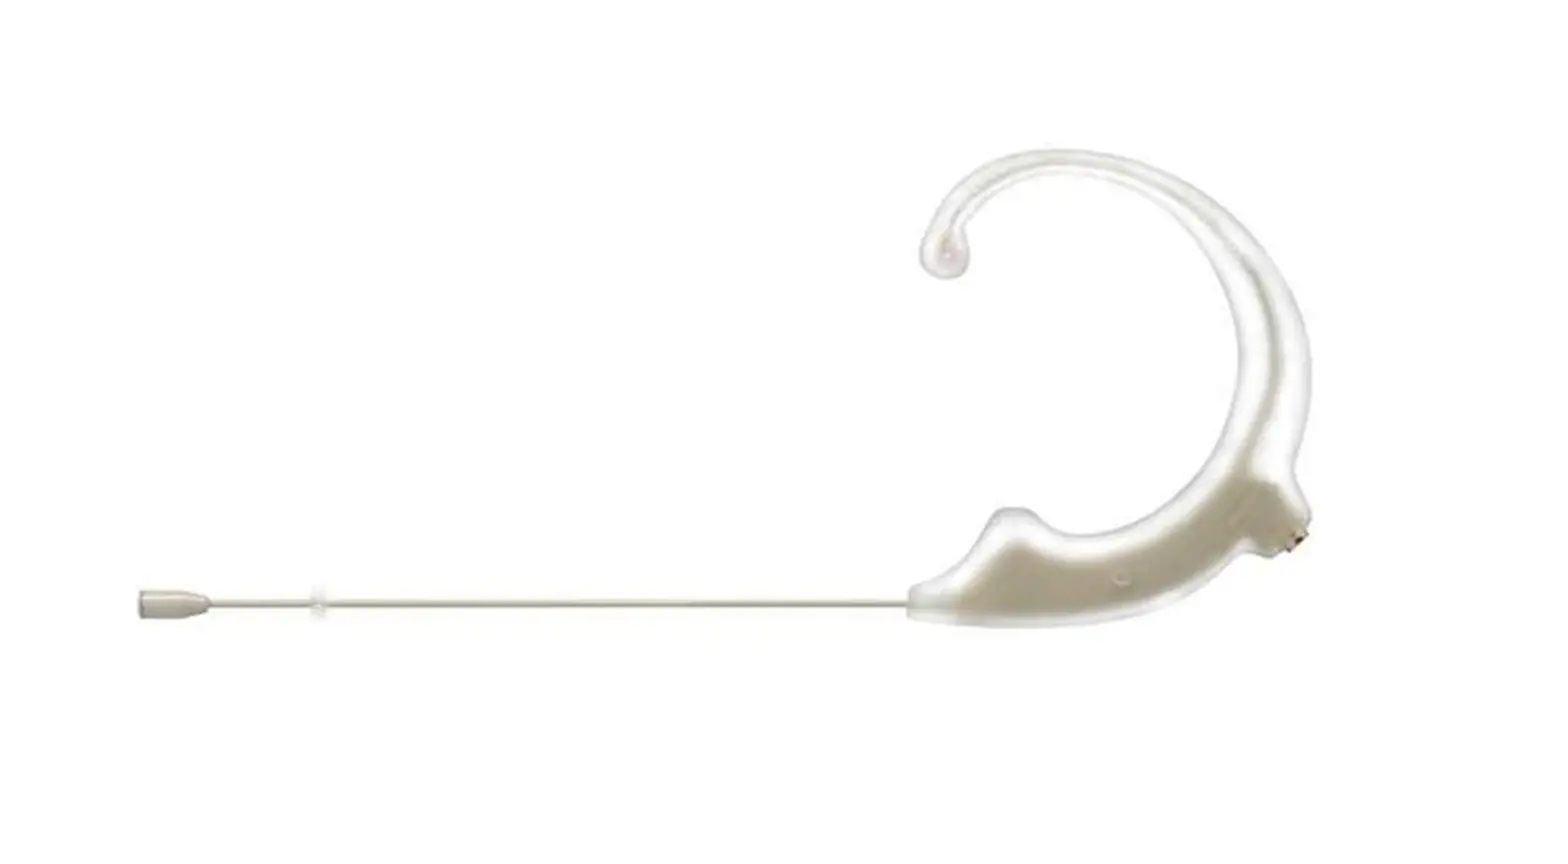
- Mogan EIO-BG-AT, Elite ICE Omnidirectional Audio Technica Earset Microphone Beige
Product Descriptions
- Elite Ice Omnidirectional Audio Technica Ear Set Microphone, Morgan eio-bg-at, Beige
- Hosa is the manufacturer of this product.
Features
- 4 cm (L) x 10.8 cm (W) x 19.2 cm (Package Dimensions) (H)
- Packaged audio or video products Number: 1
- USA is the country of origin.
- Open and unforced audio.
- Unparalleled stability and flexibility.
- A sturdy container.
- flexible system of adapters
Warranty and Support
You can get in touch with the manufacturer directly or find out more information on their website if you’d want a copy of the warranty for a product you saw on Amazon.com. Manufacturer’s warranties might not always be applicable, depending on things like how the product is used, where it was bought, and who sold it to you. If you have any issues, please read the guarantee, and then get in touch with the seller.
Frequently Asked Questions
Headworn microphones are widely used because of how simple they are to use, how great the sound is, and how flexible they are.
The head attachment that comes with the headset microphone enables hands-free operation. It provides a great deal of mobility and turns spoken words into electrical impulses that may be sent. Using earbuds or headphones in combination
Given that the cable for headphones is typically on the left, it makes logical for the microphone to be there as well. By eliminating the need for the cable to cross completely to the right side, less wiring and complexity are required.
One or more of the following can be used to assist.
Displace the microphone from your mouth.
Reduce mic gain.
Attach a hardware filter to the microphone.
Push to talk is used.
Buy a good microphone.
Check to see if the mute button on your headset is turned off. Check to see if your computer and microphone are properly connected. Ensure that the system default recording device is your microphone or headset.
Putting the headset microphone in place To eliminate breathing sounds, place the microphone element to the side of your mouth. Maintain a 1-inch distance between the microphone element and your mouth.
Internal Microphone
Right-click “Audio” in the lower right corner of your screen.
Press the Open Sound Settings button.
Your computer’s sound options are shown; scroll down until the “Test your microphone” option appears.
One active microphone transmitter at a time can only have its signal demodulated by a wireless receiver.
Green bars on the volume metre indicate that the device is correctly picking up sound. Change the microphone by using the drop-down menu. Try unplugging and replugging the microphone you’re trying to use if you can’t see it.
Given that the cable for headphones is typically on the left, it makes logical for the microphone to be there as well. By not having the mic cable cross all the way to the right side, less wiring and complexity are required.
Ratings for Active Microphone Sensitivity A common sensitivity rating for an active microphone (condenser or active ribbon) is between 8 and 32 mV/Pa (-42 and -30 dBV/Pa). This 8 mV/Pa to 32 mV/Pa range corresponds to good active microphone sensitivity ratings.
Things to Know
Launch Menu: Select the mic by clicking Settings > System > Sound > Device Properties. To increase mic volume, use the slider.
Admin panel: Select the Recording tab under Hardware and Sound > Sound.
To increase the volume, type a higher number in the text box or adjust the volume using the slider.
If your wireless microphone operates between the frequencies of 520 and 694 MHz, you should only use it at the appropriate frequency for your location. In the frequency range of 694 to 820 MHz, wireless microphones are no longer permitted.
Speaking more expressively makes it easier for your listeners to understand you. A microphone will only increase the volume of a poor presentation.
It can be difficult to do this, though, as interference, faulty antenna cables, antenna distribution issues, frequency selection, and antenna positioning are just a few of the problems that can result in wireless system dropouts.
Examine the equipment, such as your microphone. Turn up the volume. Windows’ sound settings allow you to examine your microphone. If you notice that the volume on your microphone is far too low. set it to its maximum loudness.


