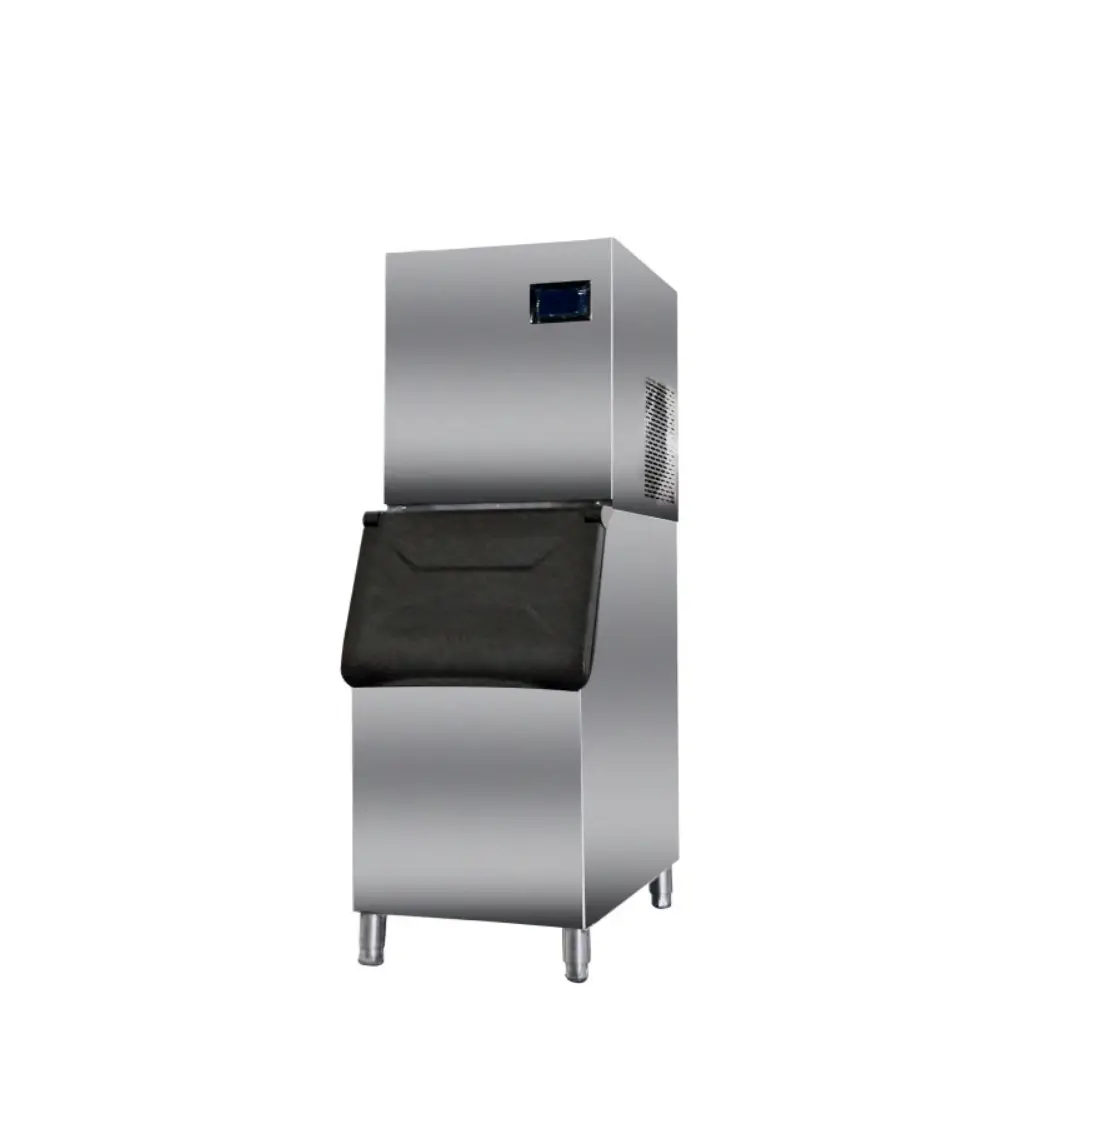
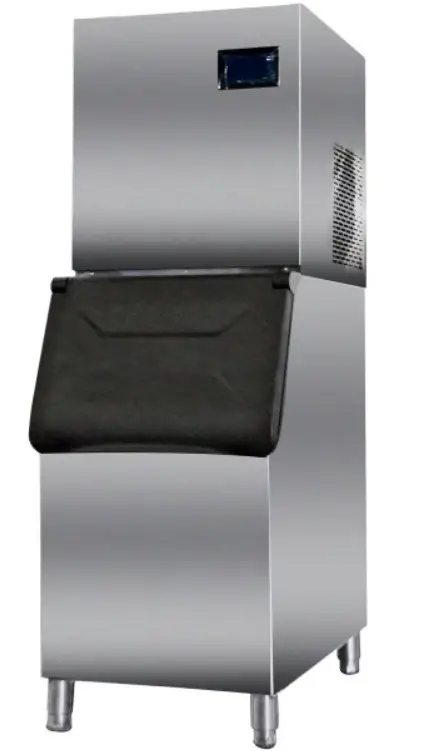
ADEXA CIM400 Commercial Ice Cube Machine
Thank you for purchasing our products. In order to facilitate correct operation and obtain the best results, please read the [Instruction Manual] carefully before use.
Dear Users
Thank you for using our company’s automatic ice machine. In order to obtain the best use effect and safety performance, please read this manual carefully and keep it properly for future reference.
Important note
With the continuous update and progress of technology, our products are also constantly improved and upgraded. The contents of this manual are for reference only. Any changes will not be notified. If you have any questions, please consult your local dealer or call our company.
Warm reminder
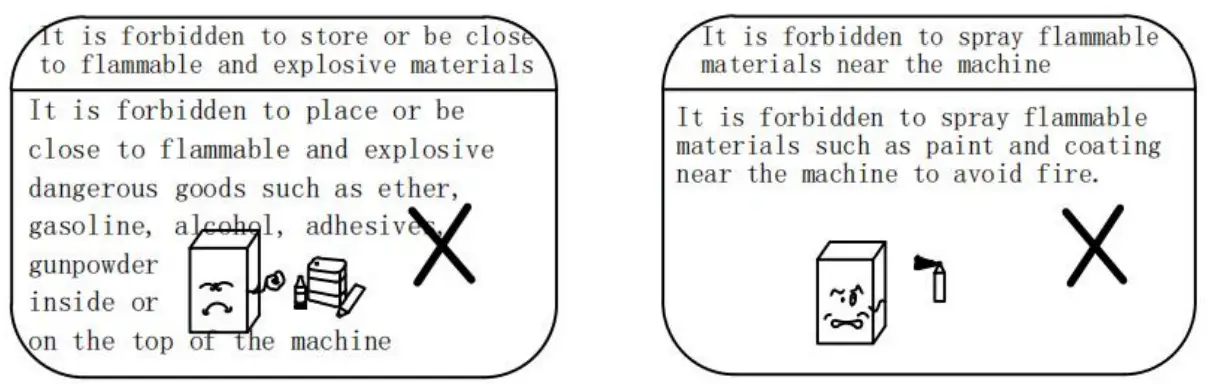
- To prevent dangers such as electric shock, please do not expose the device to rain or moisture.
- In order to prevent electric shock, please do not disassemble the shell. There are no user-serviceable parts inside. If you have any questions, please consult qualified maintenance personnel.
- Do not let the power cord be close to the compressor or immersed in water, so as to avoid high temperature or damp damage its insulation performance and cause safety accidents.
- Do not place heavy or hot items on top of the ice machine.
Product Description
- The company adopts advanced technology, advanced structure and manufacturing methods, strict and comprehensive testing technology, and applies a series of imported equipment to ensure excellent product quality.
- This series of products adopts the world’s advanced roller-type ice-making technology, with excellent quality and long-lasting cooling effect.
- This series of products adopts world famous brand compressors. The refrigeration system is reasonably matched, reliable in performance and low in power consumption.
- Brushed stainless steel shell, luxurious appearance, anticorrosion, impact-resistant, durable, suitable for use in various environments.
- The box body is made of polyurethane foam, which has good heat insulation performance and light weight.
- Adopt advanced computer automatic control, water supply, ice making, deicing are completed automatically, safe and convenient to use.
Security Advice
- The electrical control system 1s directly connected to the AC power. Do not open or touch it at will during use. If you need maintenance, please contact the manufacturer or ask professional technicians to handle it.
- When the ice machine is out of use, unplug the power plug, cut off the power supply of the whole machine, and close the valve of the main water inlet pipe at the same time.
- After the ice machine has been used for a period of time, if it is not used for a long time, it should be powered on for at least six hours every six months.
Security Advice
When choosing the location of the machine, pay attention to the following items, otherwise the ice production will be seriously reduced.
- Around the machine: leave a space of 500mm from the wall to keep the convection smooth.
- Ensure smooth and clean air.
- Keep away from heat sources, and keep away from direct sunlight.
- The minimum operating room temperature is 10° C
- The maximum operating room temperature is 32° C
- The minimum water supply pressure is 0.2MPa
- The minimum water supply pressure is 0. 5MPa
- Minimum use water temperature 2’C
- Minimum use water temperature 32’C
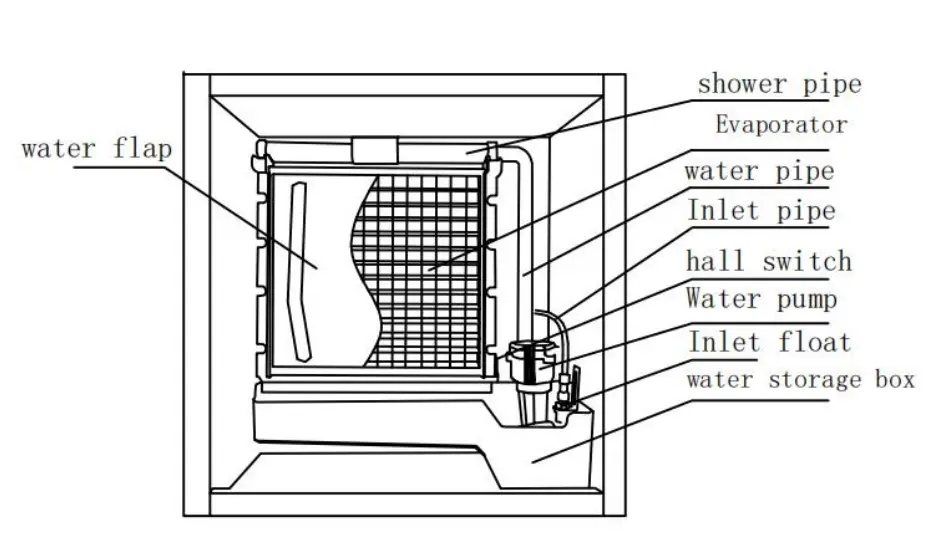
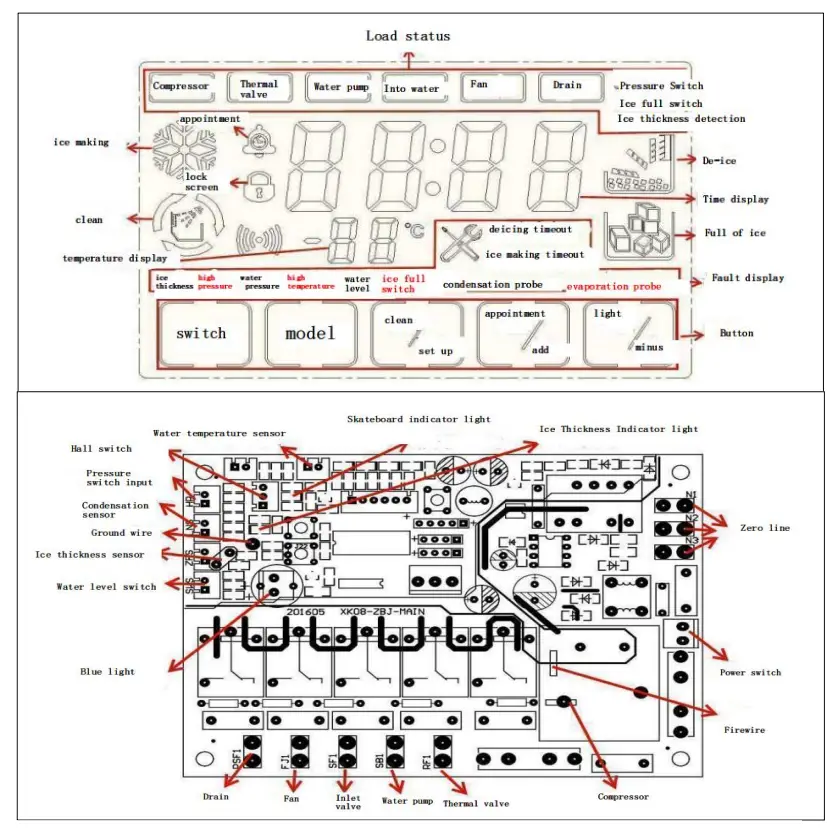
Operating device an composition
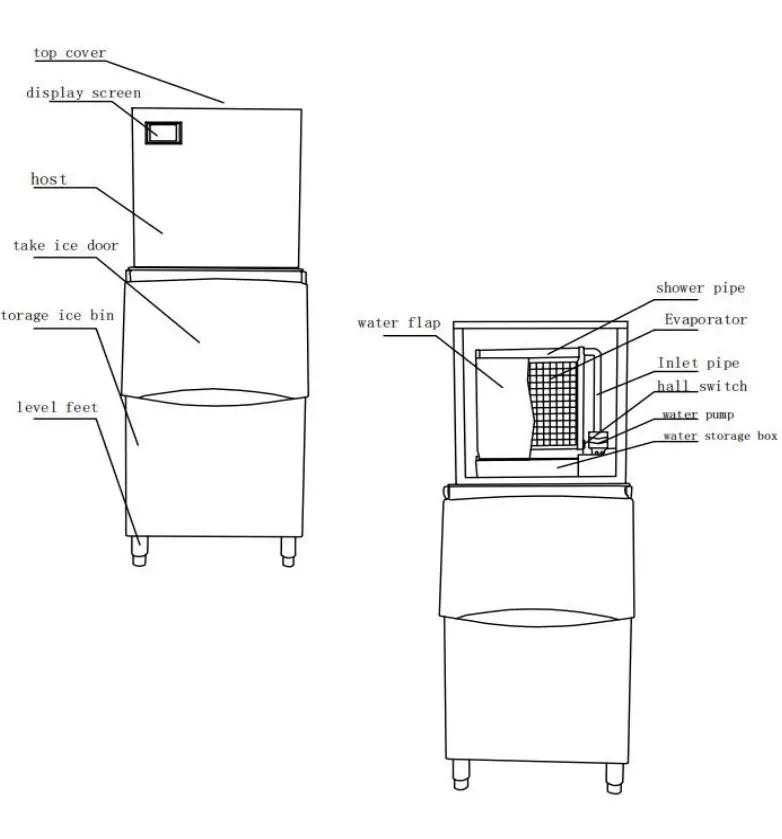
Function and Operation
- This machine is fully automatic controlled by microcomputer, water filling, ice making, deicing, ice full and stop automatically.
- When starting the machine for the first time or turning it on again after shutting down, turn on the water supply switch, the machine will automatically fill with water, and when the set water level is reached, the water supply valve or the water inlet float will automatically close, and the water supply will stop. Turn on the power, the machine enters the program running state, and prepares before making ice (pressure balance, heating valve opens for 15 seconds)
- During the ice-making period, (the compressor starts, the evaporator is Pre-cooled for 60 seconds, the water pump starts to work and enters the ice-making state, and the condensing fan is controlled by the temperature sensor to start and stop.
- Deicing period (controlled by the temperature of the evaporator ice thickness sensor probe, when the thickness of the ice cube reaches the set thickness, the machine enters the deicing delay state. After 15 seconds of ice thickness detection, the water pump stops working, and the heating solenoid valve opens to enter the deicing state. state.
- The next ice making (controlled by the Hall switch on the skateboard, after the machine de-ices, the heating valve is automatically closed, the water pump is turned on, and then the next ice making state is entered.
- Automatic stop when ice is full (when the storage bin is full of ice, the machine will de-ice, and the skating board cannot be reset. After 40 seconds, the machine will automatically stop)
 Ice Thickness Time Adjustment
In the countdown state of ice making, press the M+M key to enter the ice making time setting, the time on the screen will flash, and the original temperature display will change to show the ice making compensation time. At this time, press the plus key once, the time will be increased by 60 seconds, and the ice making time will be increased by one minute. Press the minus key to decrease by 60 seconds, and the ice making time will be reduced by one minute. If there is no key operation for 10 seconds, Lhe selling will be saved and exit, Lhe Lime will Lake effect in time, and the ice making compensation time value will also be saved. Ice making compensation time – 9 minutes to 20 minutes, the factory default value is 0.
Maintenance and cleaning
Be sure to cut off the power of the machine before cleaning. The cleaning interval depends on the environmental conditions and water supply conditions of the location where the ice machine is located.
Usually, the cleaning and maintenance work should be carried out six times a year. After a period of use, the following parts should be cleaned and maintained.
Cleaning of the water tank:
Open the front panel of the main unit of the ice machine, and wipe off the water and scale in the water box with a clean towel. (In order to ensure the quality of ice cubes, the ice machine will not be used for a long time, and the water storage box must be cleaned before re-use.
Cleaning of sprinklers:
Open the top cover of the main unit of the ice machine, remove the shower, unplug the end plug, pull out the shower sleeve, remove the scale and impurities in the shower sleeve and the shower pipe, make the water flow through the shower hole smooth, and then assemble OK, put it back in place.
Handling and placement
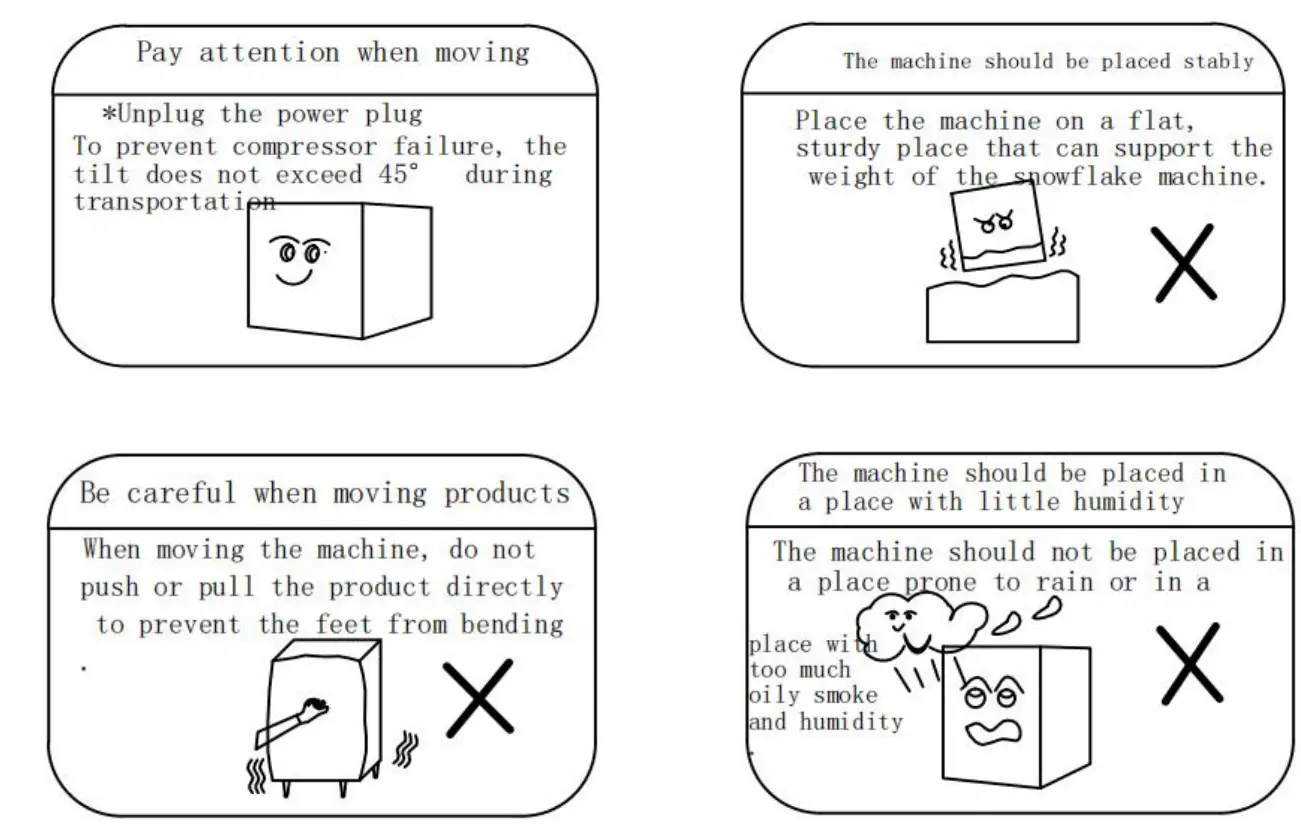

Precautions for use
- Important note:
When choosing the location of the ice machine, pay attention to the following items, otherwise the ice production will be seriously reduced:
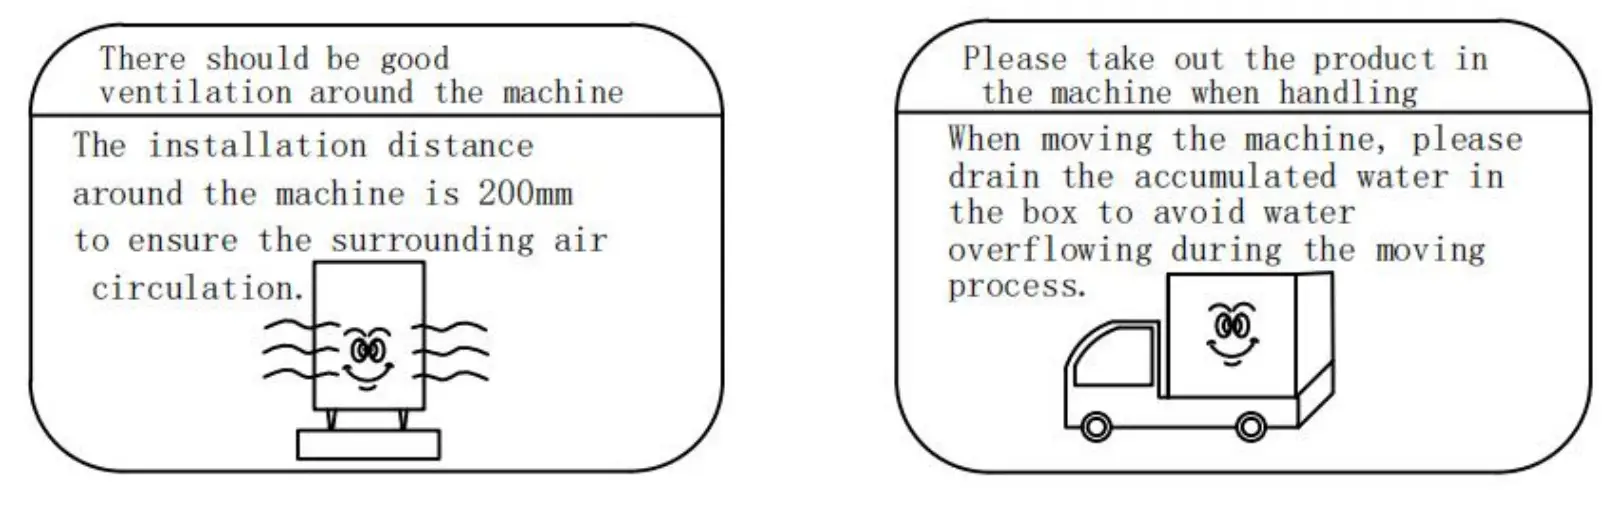
* Around the ice machine, leave a space of 200mm from the wall to ensure sufficient air flow.
*Minimum operating room temperature 1s 10° C
*Maximum room temperature is 32° C
*The minimum water supply pressure is 0. 2MPa.
*The maximum water supply pressure is 0. 5MPa. If the water pressure exceeds the maximum allowable water pressure, please purchase and install a water pressure regulating valve.
*Minimum water temperature 2° C
*Maximum water temperature 32° C - If the power cord is damaged, it must be replaced by special maintenance personnel because special tools are required.
- Do not put fingers, sticks and other things deep into the fan. Otherwise there is a risk of injury.
- Do not touch the compressor with your hands, otherwise there 1s a risk of burns.
- Keep the area in front of the condenser suction area clean to avoid dust flying and being sucked into the condenser, which will affect the cooling effect.
- When the ice machine is not in use for a long time, follow the steps below:
(1) Unplug the power plug of the ice machine and cut off the power.
(2) Turn off the water source of the ice machine.
(3) Take out the ice cubes in the ice storage chamber and drain the water in the sink.
(4) Disconnect the water supply pipe from the rear of the ice machine and drain the water in the water pipe.
(5) Wipe off the moisture in the box, and open the door of the ice machine to let it dry fully.
Circuit Diagram and Packing List
Preparation before use
- After opening the package, take out the accessories inside and carefully check whether the machine is damaged during transportation.
- Unpack the storage bin, take out the accessories, and wipe the storage bin with a clean damp cloth.

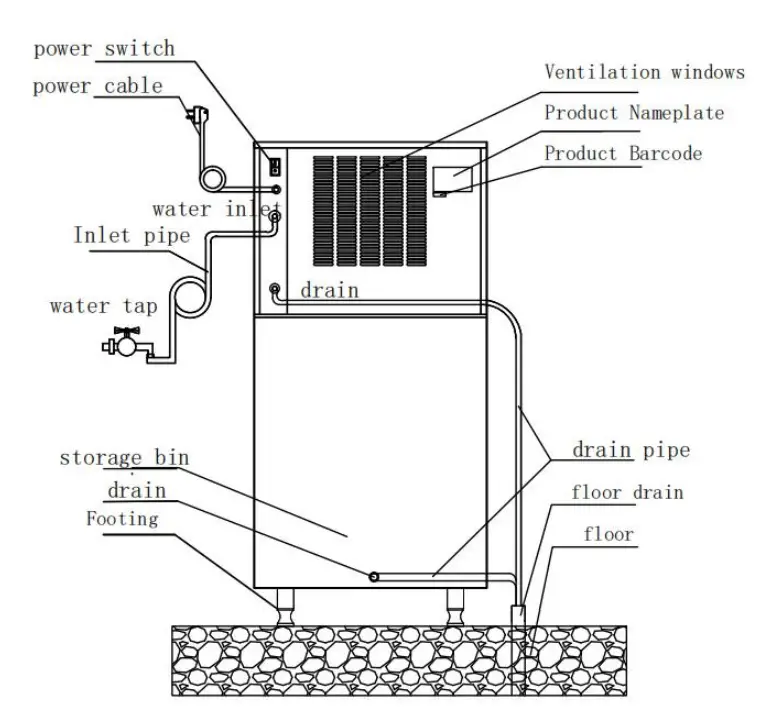
Installation
Foot installation and host placement of the refrigerator
- *Take out the feet from the storage bin, install them in the installation holes at the four corners of the storage bin respectively, and tighten the four feet in place.
- Move the storage bin to the location where the ice maker will be installed, and adjust the storage bin feet to keep it level.
- Place the main unit on the upper part of the refrigerator stably and align it. Waterway connection
- A water supply pipe is provided with the machine, and a soft gasket is added inside the elbow end when connecting, connected to the upper water inlet joint behind the host, and the other end is connected to an external water source.
- A separate water control switch should be installed for the ice machine on the water supply pipe to control the water source.
- This machine uses international drinking water. If the water quality does not meet the requirements, a filter or water purification device can be installed on the waterway.
Drain - Connect a drain pipe provided by the manufacturer to the drain seat at the bottom of the refrigerator, and securely connect it, and insert the other end into the sewer. The drain pipe should be unblocked.
Electrical connections - The voltage requirement is: rated AC220V/50Hz. If the voltage is unstable, a voltage stabilizer should be installed.
- A separate three-hole socket and leakage protector must be provided for the ice machine, and a good grounding must be ensured.
Important note:
For safe use, a reliable grounded power outlet must be used.
Water system cleaning
Open the sliding door of the ice machine, take out the shower, pull out the end plug, pull out the shower casing, remove the scale and impurities in the shower casing and the water pipe, and make the water flow through the shower hole unimpeded , then assemble it and put it back in place.
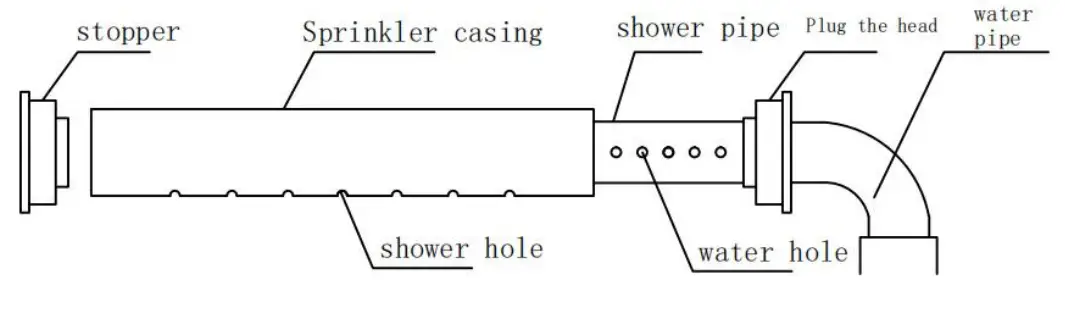
Sprinkler assembly
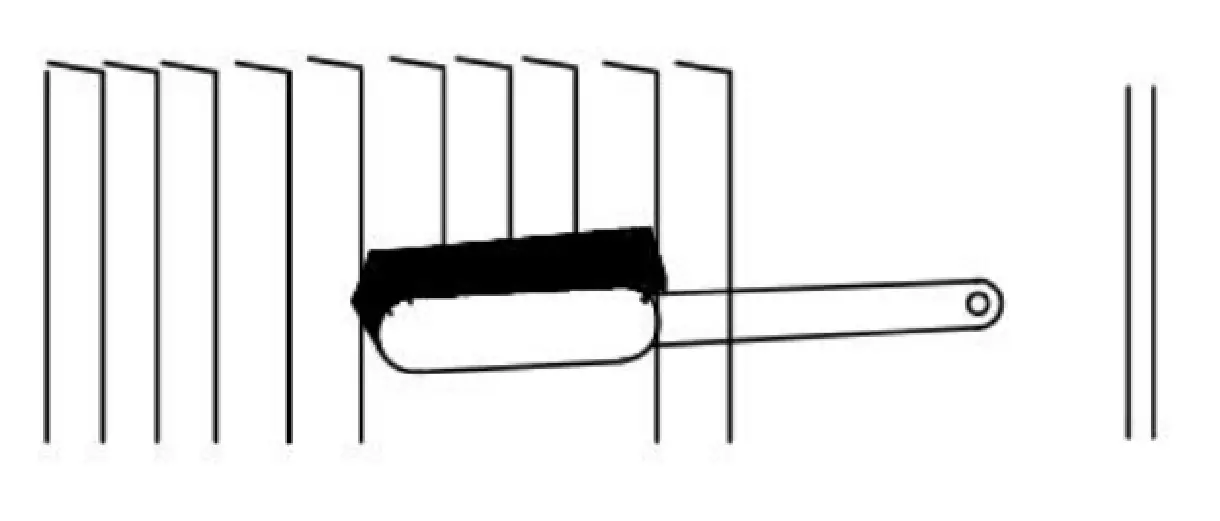
Condenser Cleaning
- Clean the condenser:
(1) The ice machine has not been used for about half a year, and the condenser needs to be cleaned at least once to remove the dust attached to the surface of the condenser.
(2) With the power off, the condenser should be cleaned after cooling down.
(3) When cleaning, please do not touch the fins with your hands to prevent cuts.
(4) After removing the front panel, use a vacuum cleaner or ordinary brush to clean the condenser.
(5) After cleaning the condenser, use a brush to clean the blades of the fan to remove the oi 1 on them.
Common faults and troubleshooting
| Fault phenomenon | Possible Causes | Method of exclusion |
|
|
|
| 2. The ice machine does not work |
|
|
| 3. The ice cubes do not come out of the mold or take off the ice slowly |
|
|
| 4. The ice cubes are too thin or the amount of ice is not enough |
|
|
| 5. The condenser lS overheated and the condensing fan does not turn |
|
|
| 6. The quality of ice cubes 1s not good or full |
|
|
| Error Code | Failure Phenomenon | Cause Analysis | Handling measures |
| EOl | Skate board or ice full failure (seconds before water filling, skate board open continuously for seconds) |
| Check related parts |
| E02 | Overtime ice making fault (10 consecutive ice making time exceeds the maximum set time) |
|
|
| E03 | Overtime deicing fault (3 consecutive deicing time exceeds the maximum set time) |
|
|
| E04 | High temperature failure (condensation temperature sensor exceeds 68° C for 3 seconds) |
| Check related parts |
| E05 | Water shortage fault (the ater inlet solenoid valve is continuously open for more than 5 minutes) |
| Check relatedparts |
| E06 | Pressure overrun fault (pressure switch continuously disconnected for more than 3 seconds) |
|
|
| E07 | Condensing temperature sensor open circuit failure |
| Check related parts |
| E08 | Condensation temperature sensor short circuit failure |
| Check related parts |
| E09 | Evaporator temperature sensor open circuit fault |
| Check related parts |
| ElO | Evaporator temperature sensor short circuit failure |
| Check related parts |
| Ell | The cooling effect is poor (the temperature of the water temperature sensor does not drop to the ice-making temperature) |
|
|


