![]() Installation Instructions
Installation Instructions
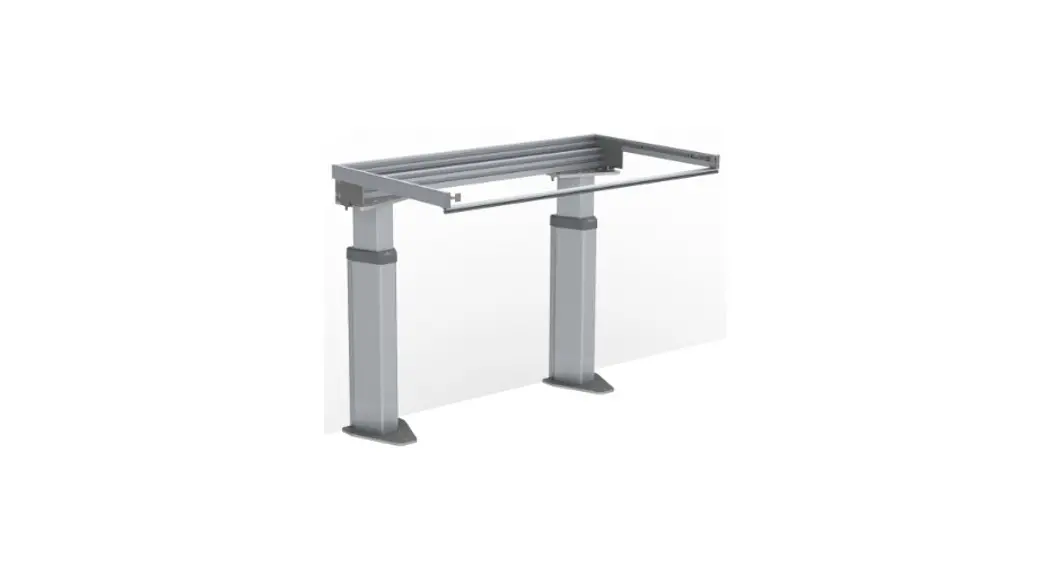
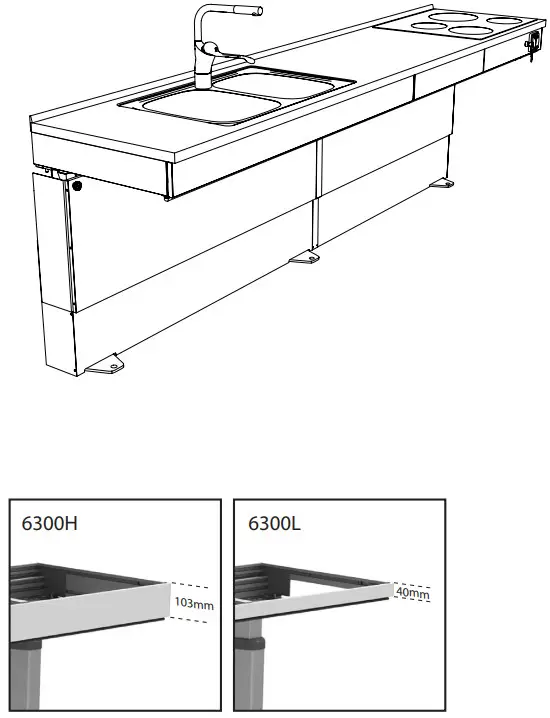
Baselift (with plusmodul) 6310H / 6310L
6310L Baselift Floor, 40mm Front,

![]()
Preparations
Thank you for choosing to install a product from Granberg!
In order for the product to work safely and securely, it is extremely essential that the installation instructions be followed.
The installer should read and understand all the installation instructions before installation begins.
It is the installer who is responsible for floor and wall structures meeting the set requirements and that fasteners can withstand the forces that may occur.
The installer is also responsible for the right authority and skills being available for electric and water works.
After completed installation, the product shall be functionally tested according to sections on p. 27.
Technical data
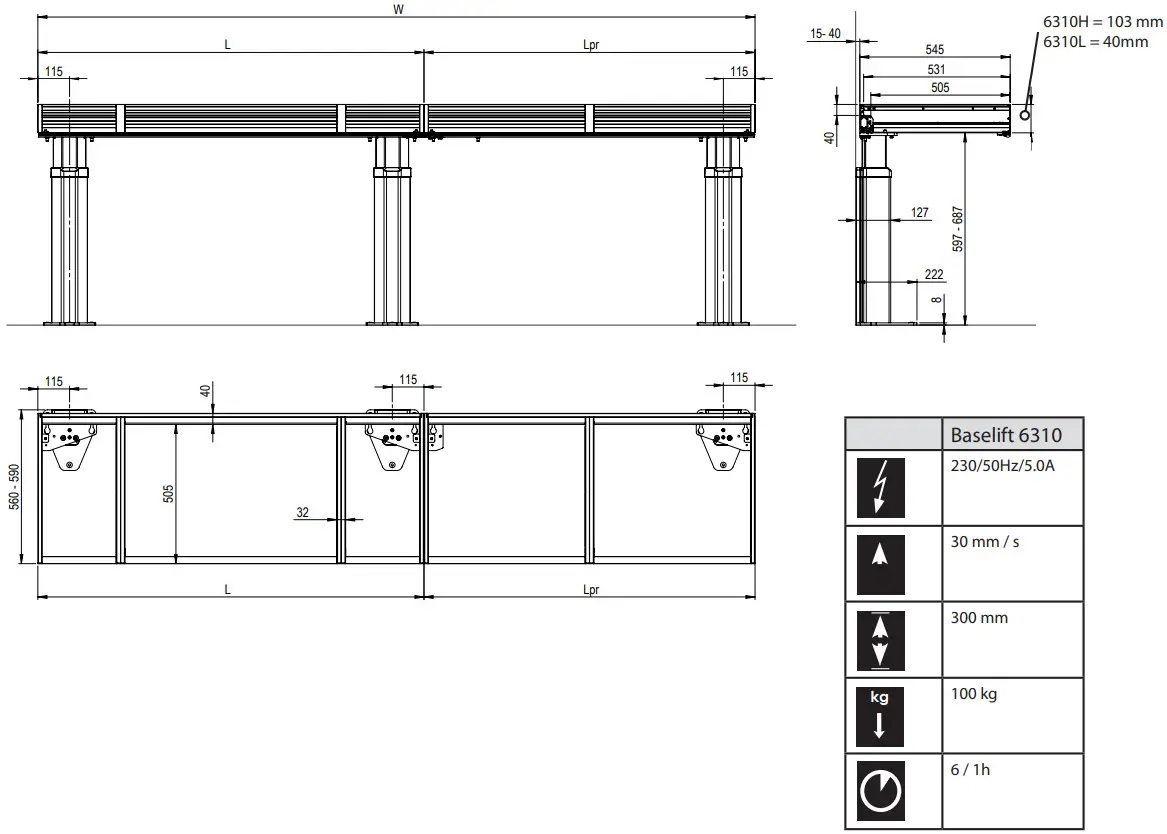 Please note that dimensions above are for standard installation.
The dimensions may vary depending on local design standards and regulations.
See any appendices to the installation instructions.
Planning
Very Important!
Check floor stability before installation.
Maximum load on lifting unit is 100kg and dead load up to 100kg.
Ensure that the wall can withstand the concentrated load that occurs under motor units.
Make sure that the engine units can be fixed to the wall and that the structure is not porous.
In some cases, the wall may need to be reinforced and adapted in order for engine units to be adequately fixed.
Never place the lift so that there is a risk of crushing against other solid interior fittings.
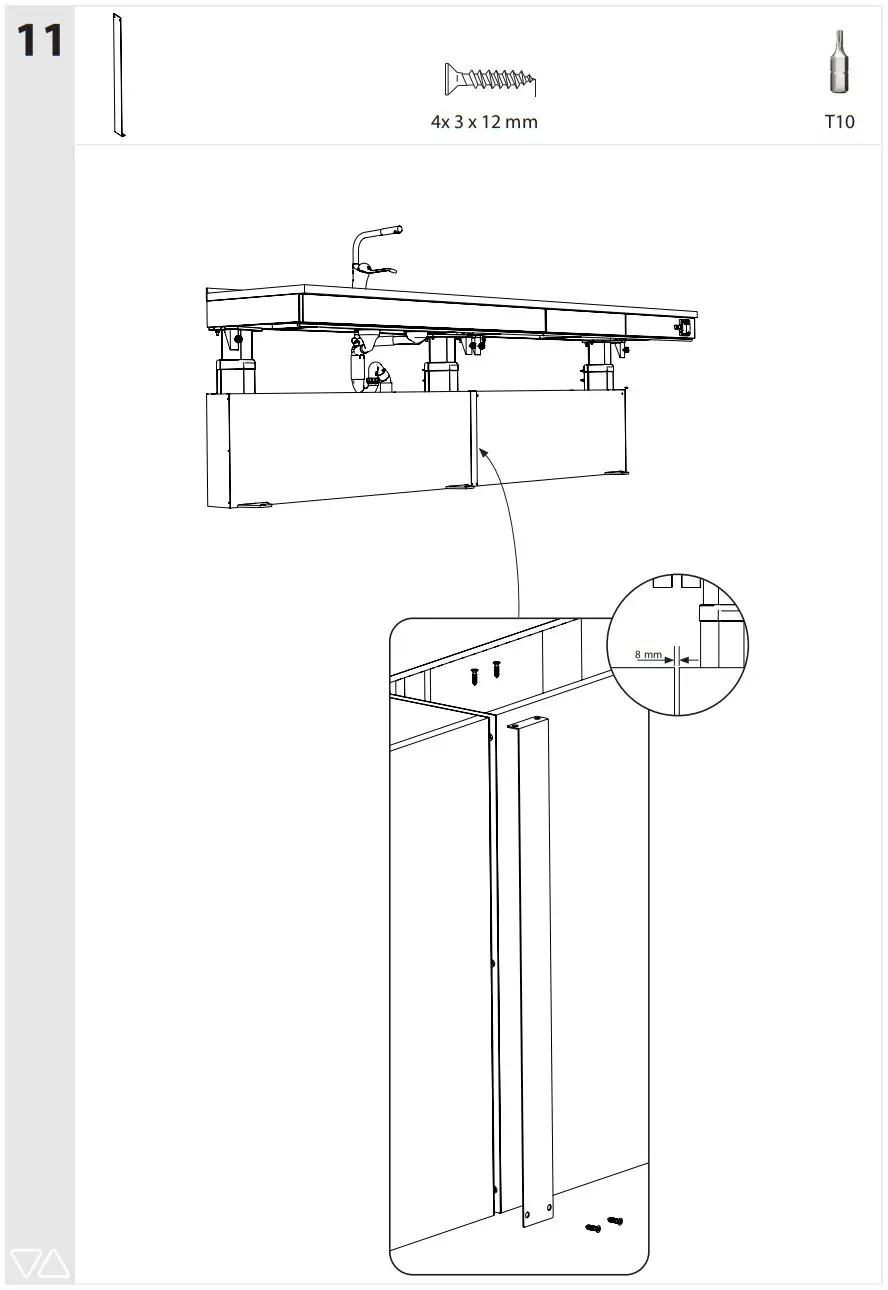
If the lift is placed in front of a flat wall, the gap should not be below 5mm or exceed 8mm.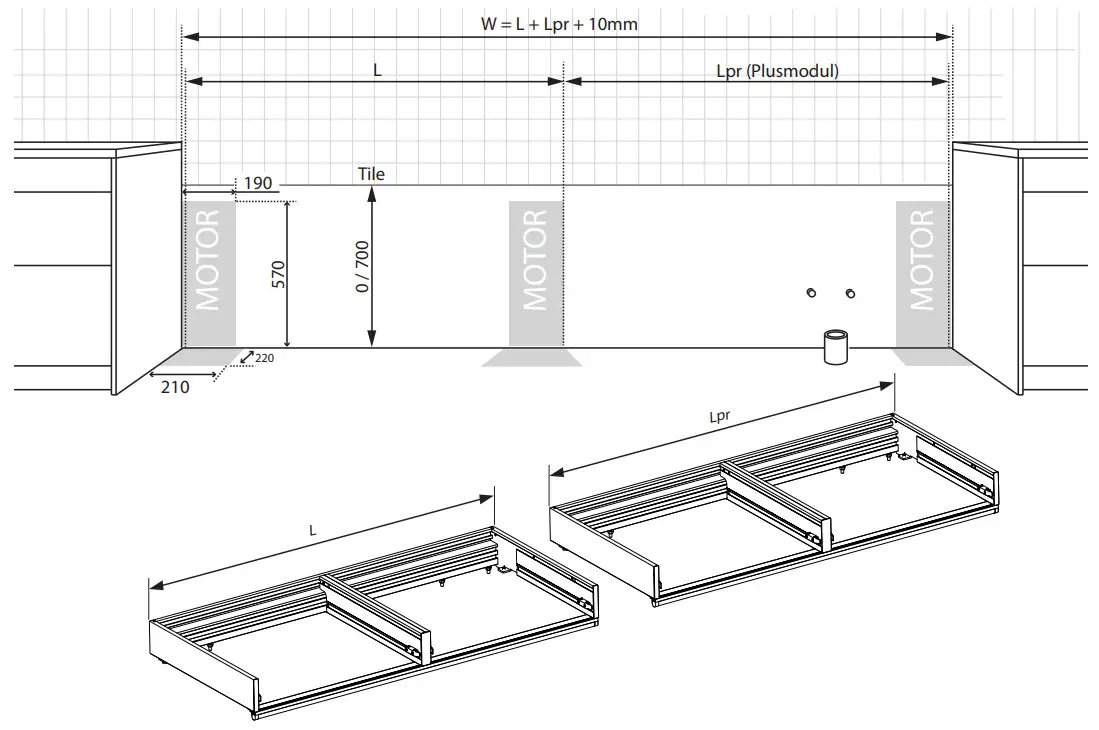
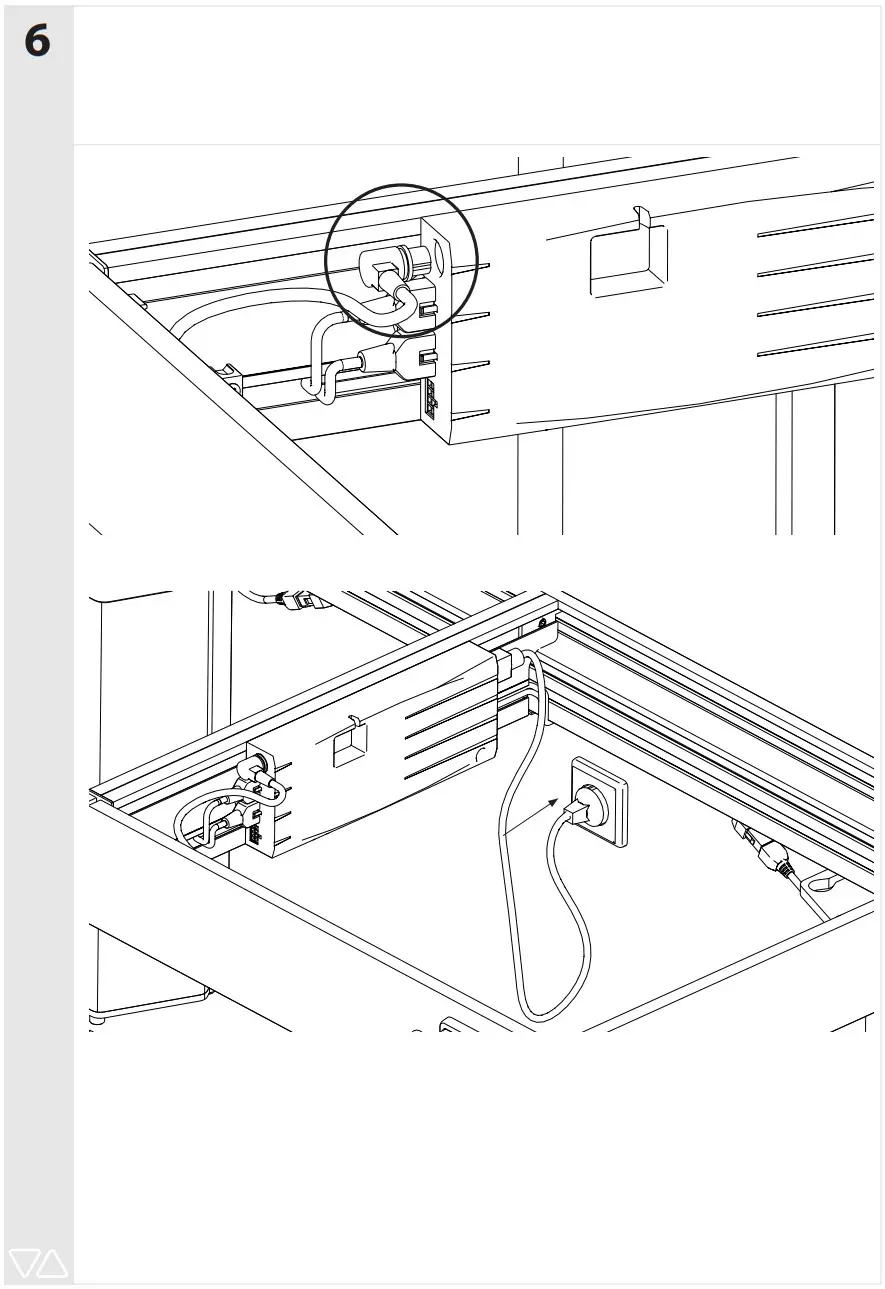
Electricity and Water
(mm)
The lifting unit requires one power outlet and consumes a maximum of 5A.
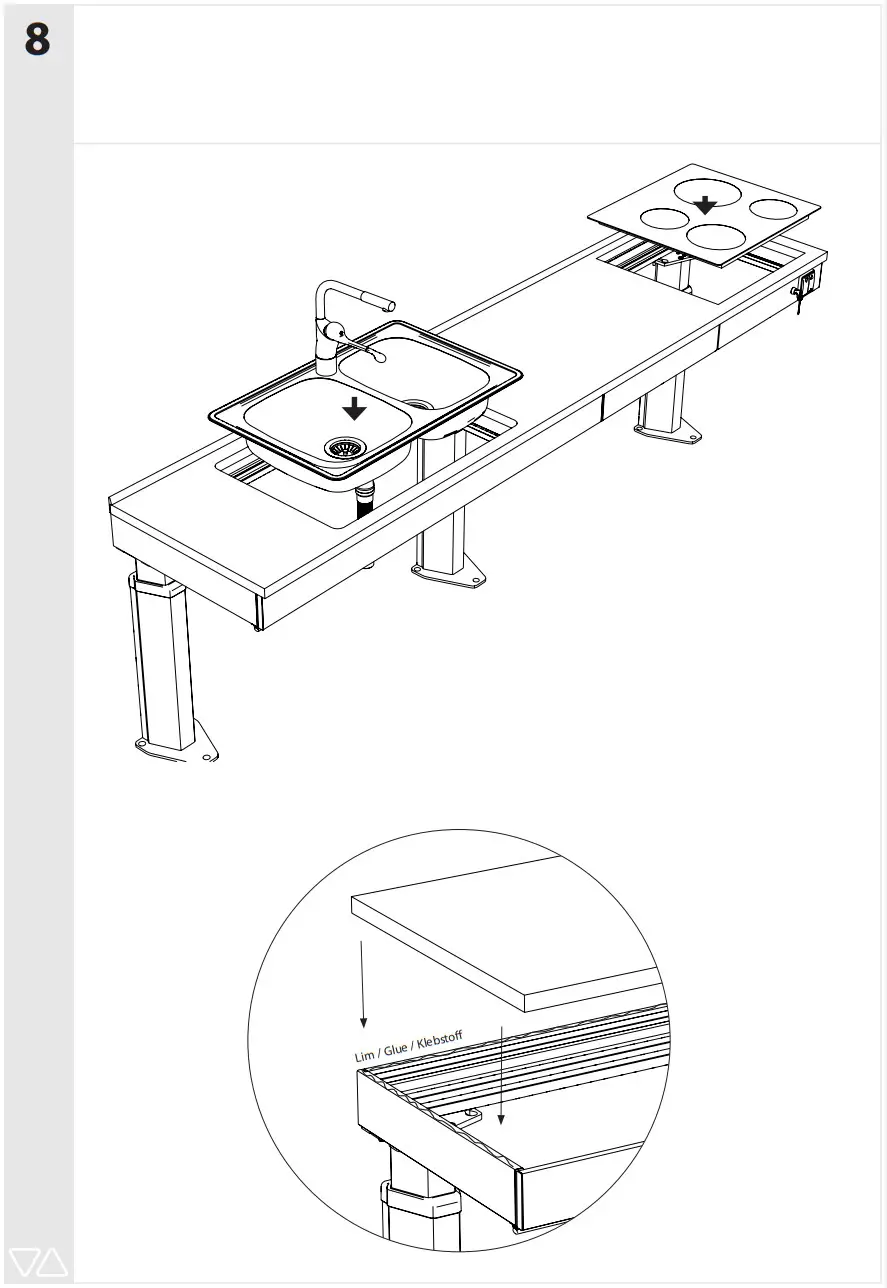
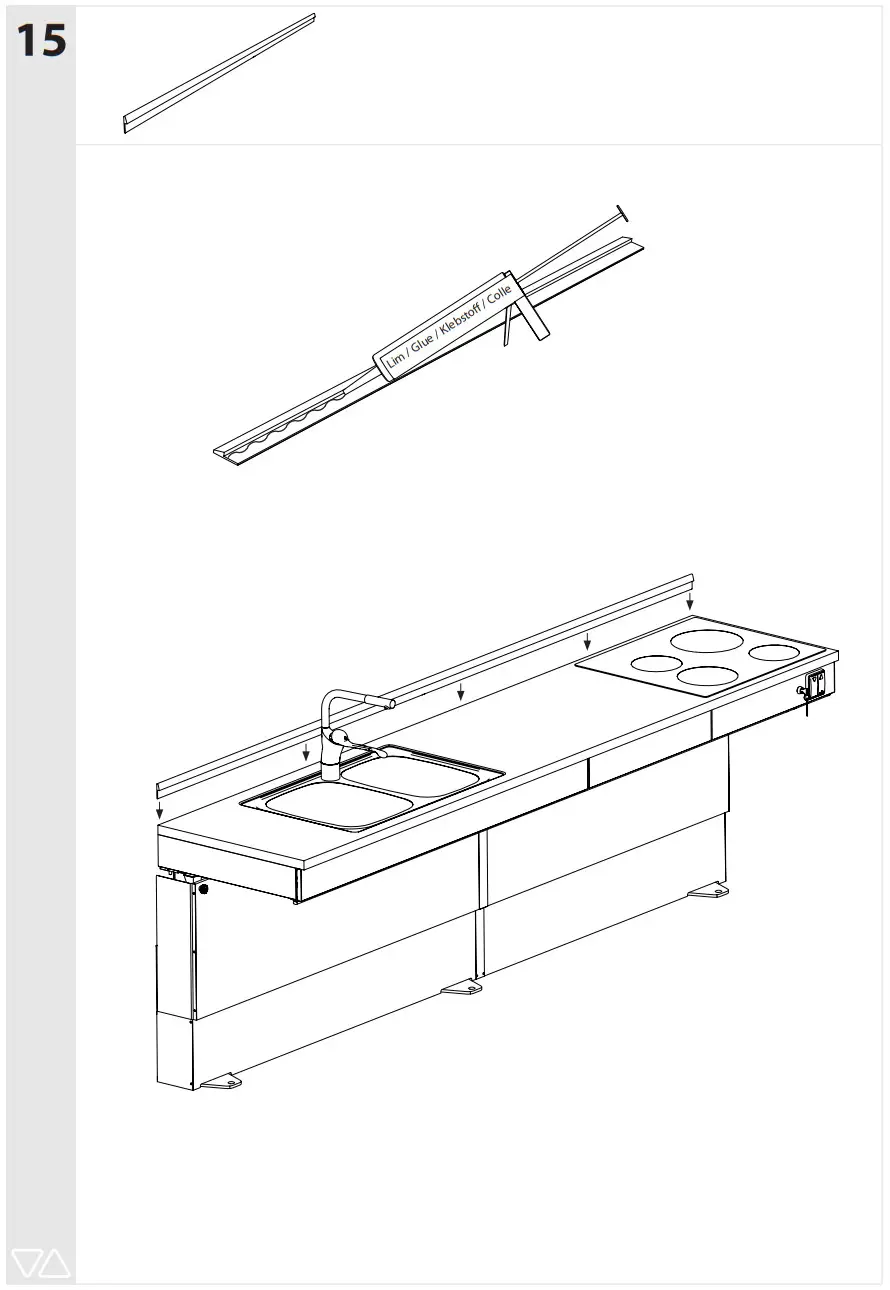
If the counter has a sink, the connections for electricity, water and drain should be placed centrally below the mixer.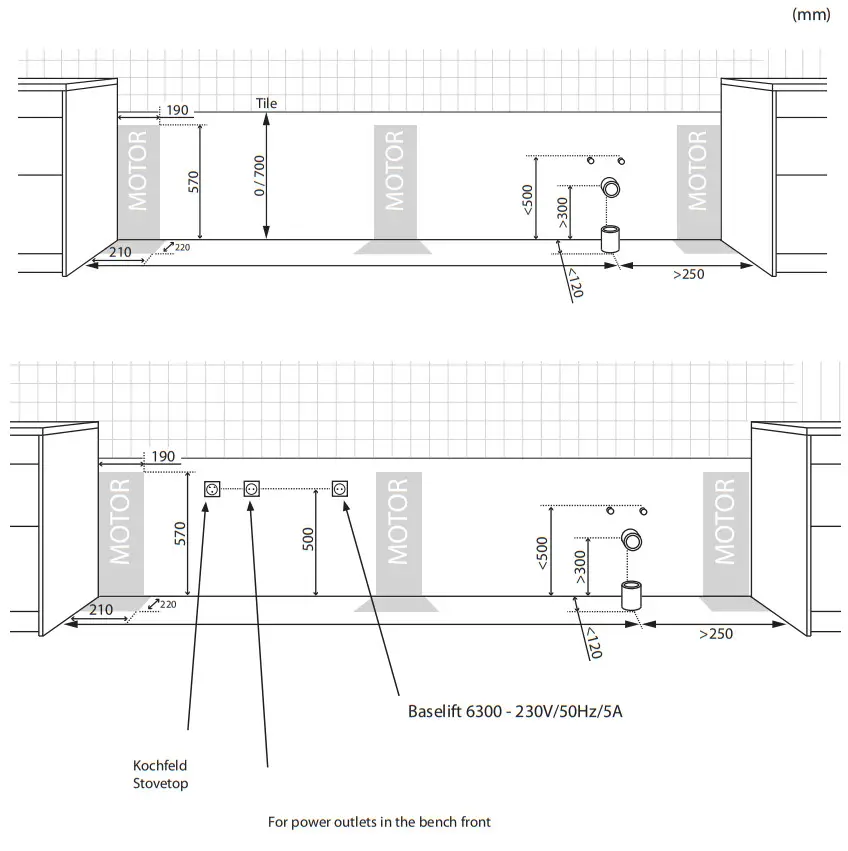
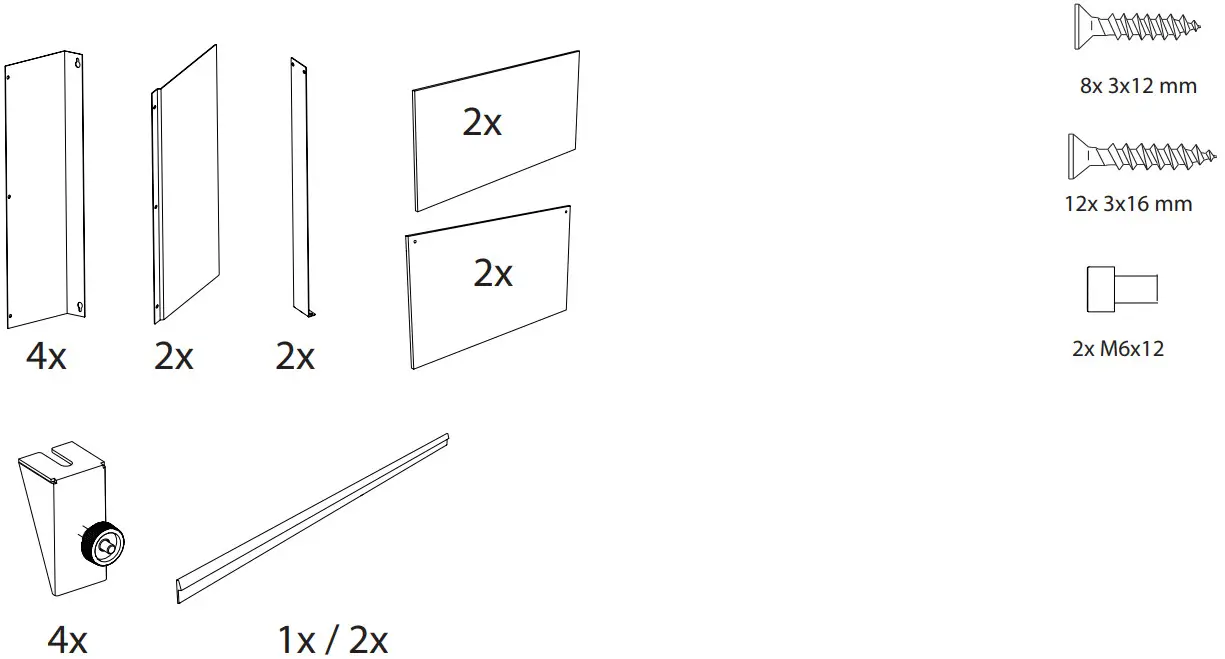
Content of delivery
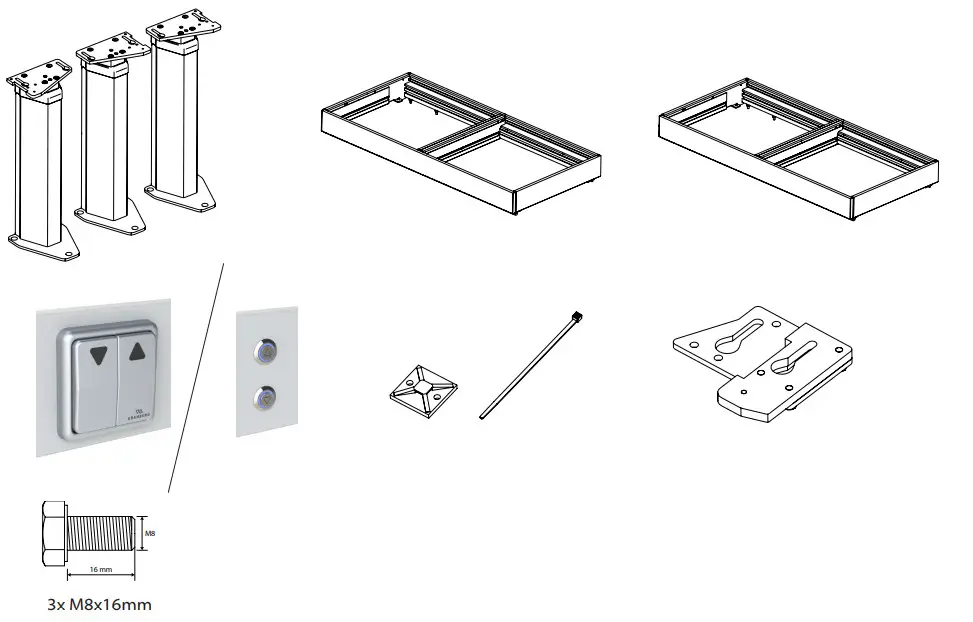
Accessories
 | 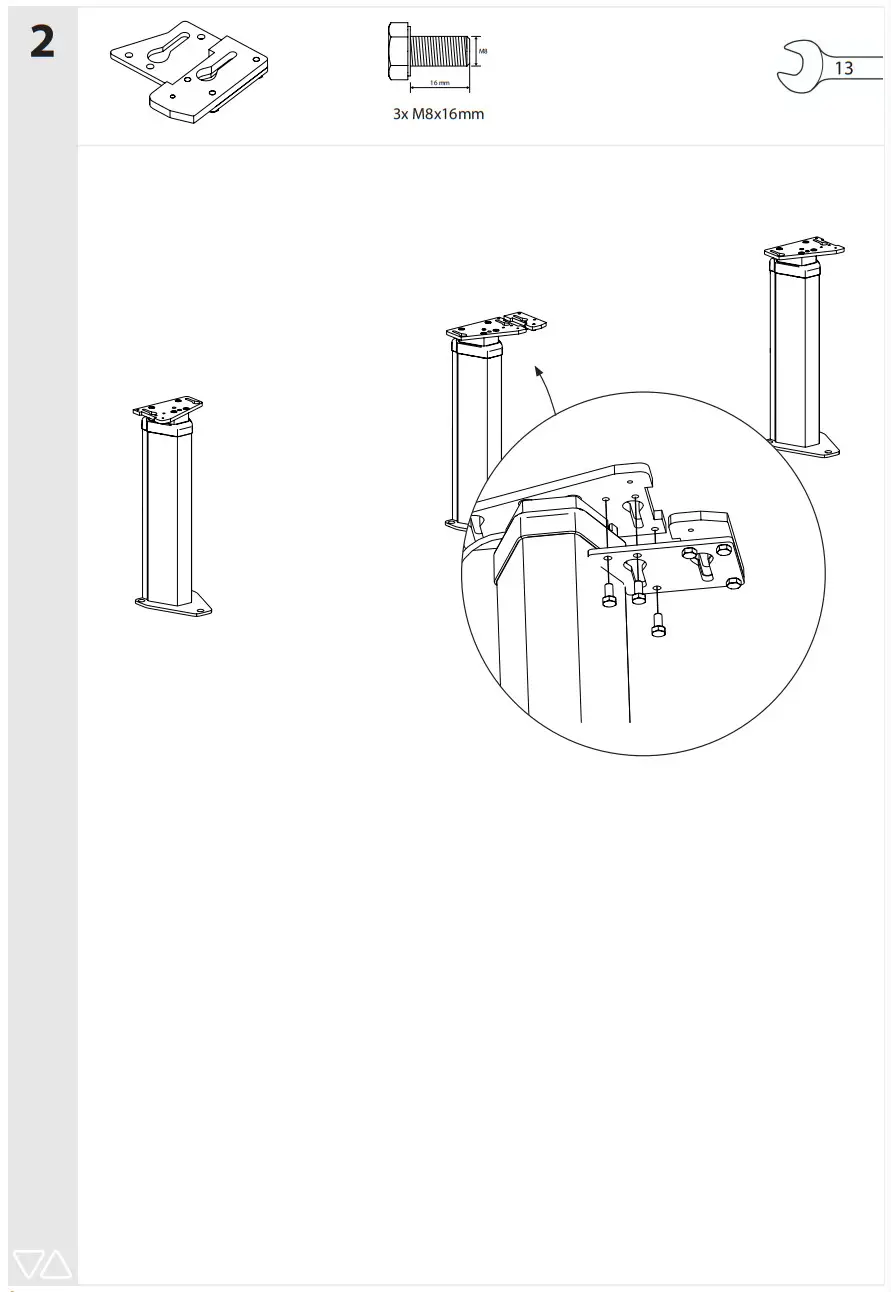 |  |
 |  |  |
 |  |  |
 |  |  |
 |  |  |
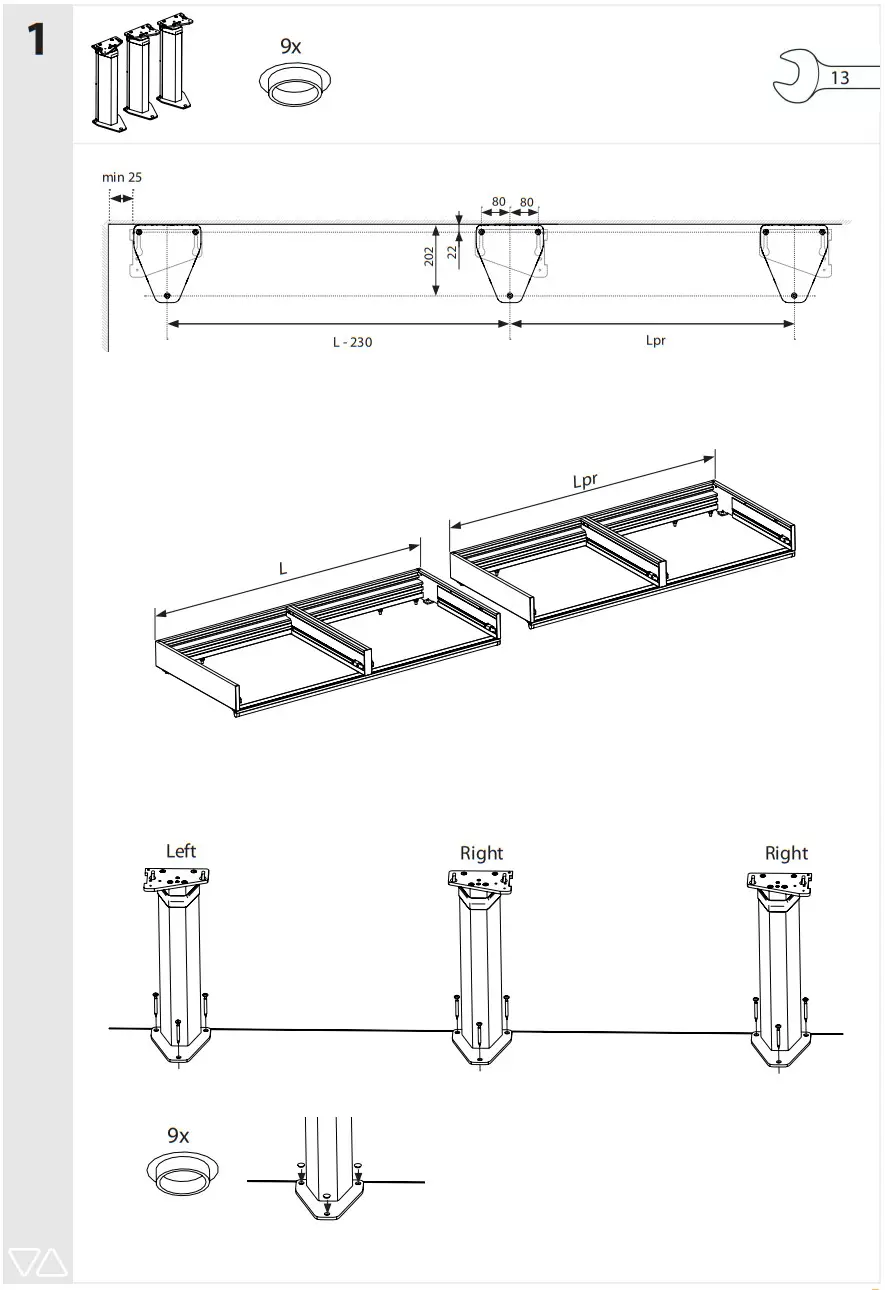
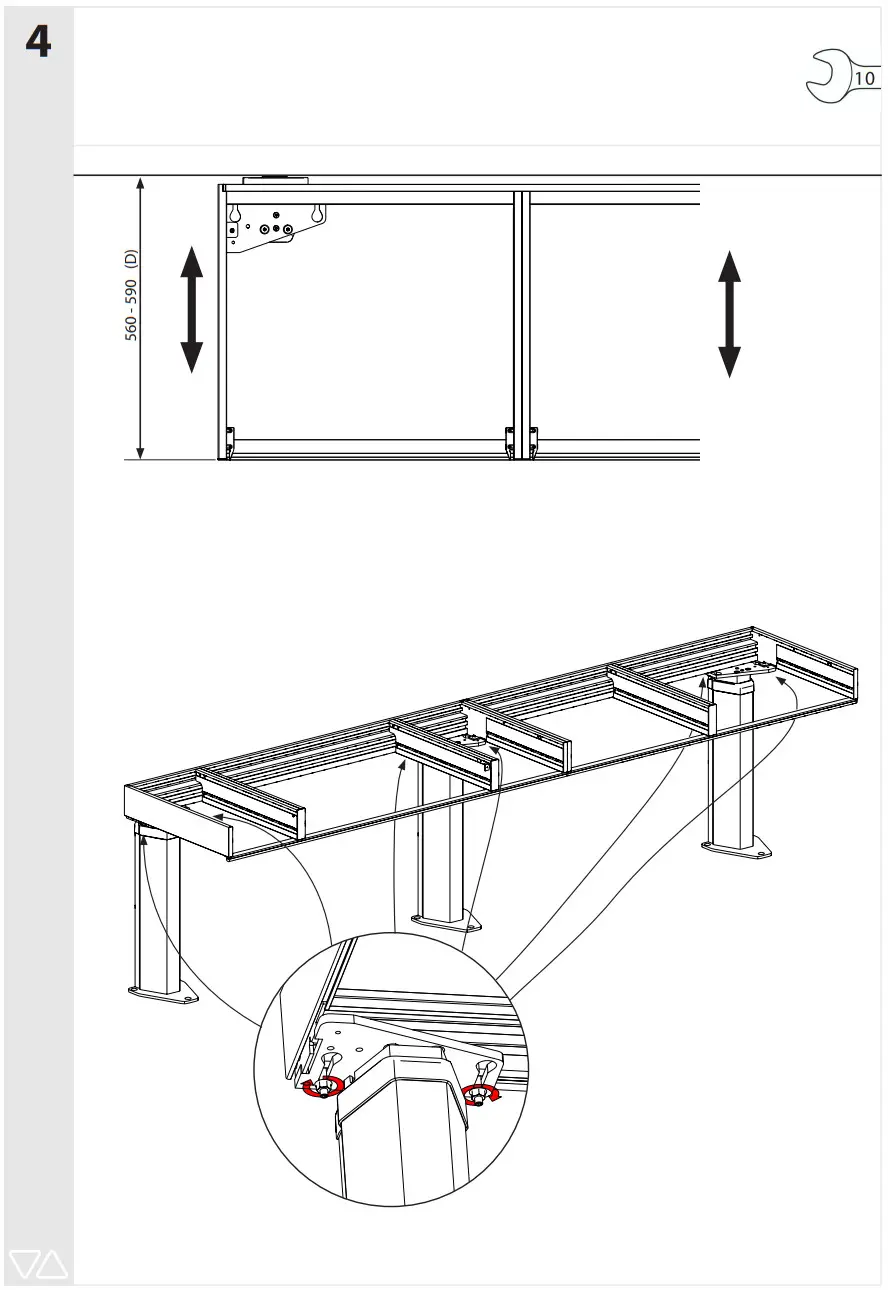
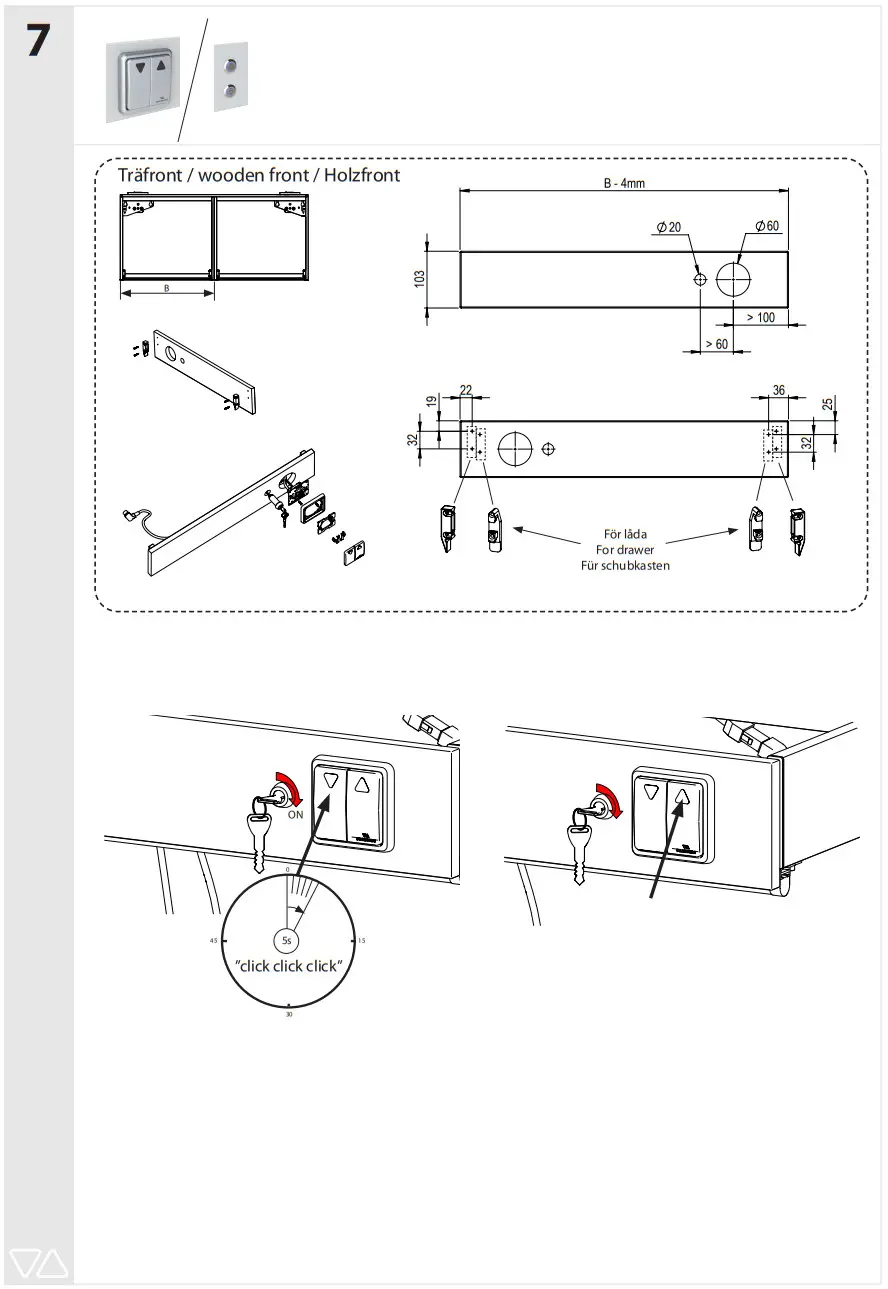
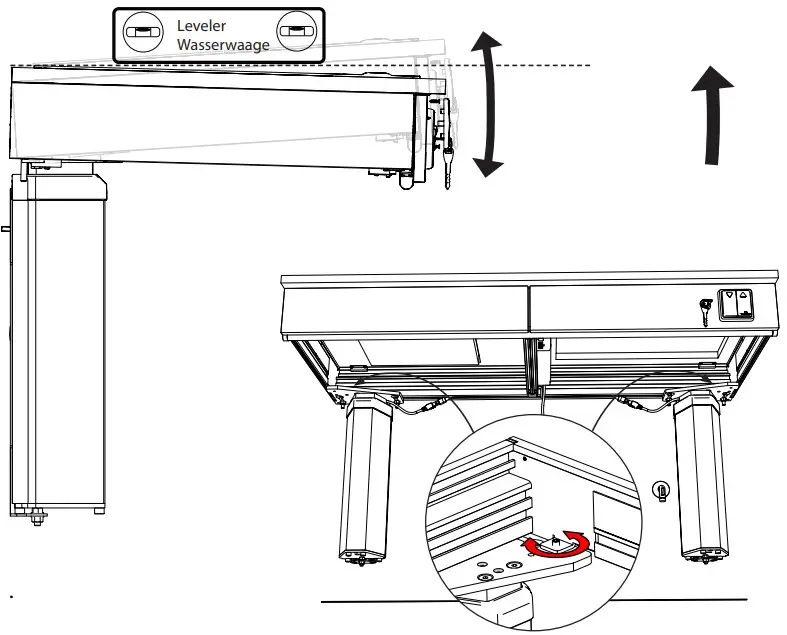
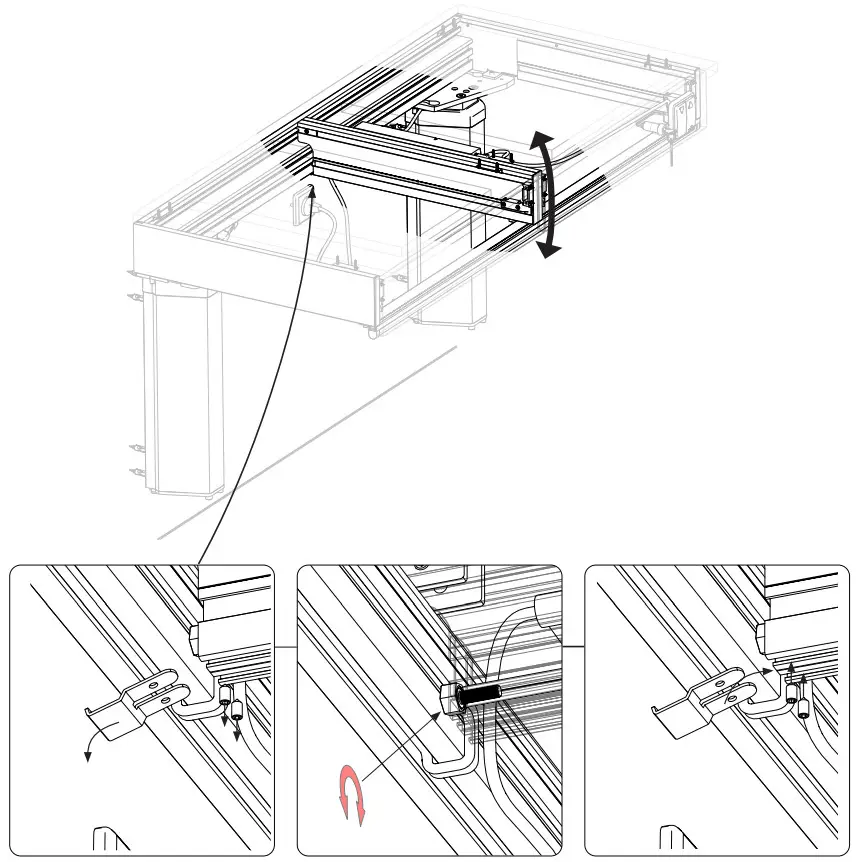
Adjustment
 |  |
Functional tests
Complete functional tests should be carried out after installation:
- Test run the lift unit up and down all the way to each end position. Make sure that the lift runs freely without obstacles, risk of pinching and noise. Make sure it remains at each end position.
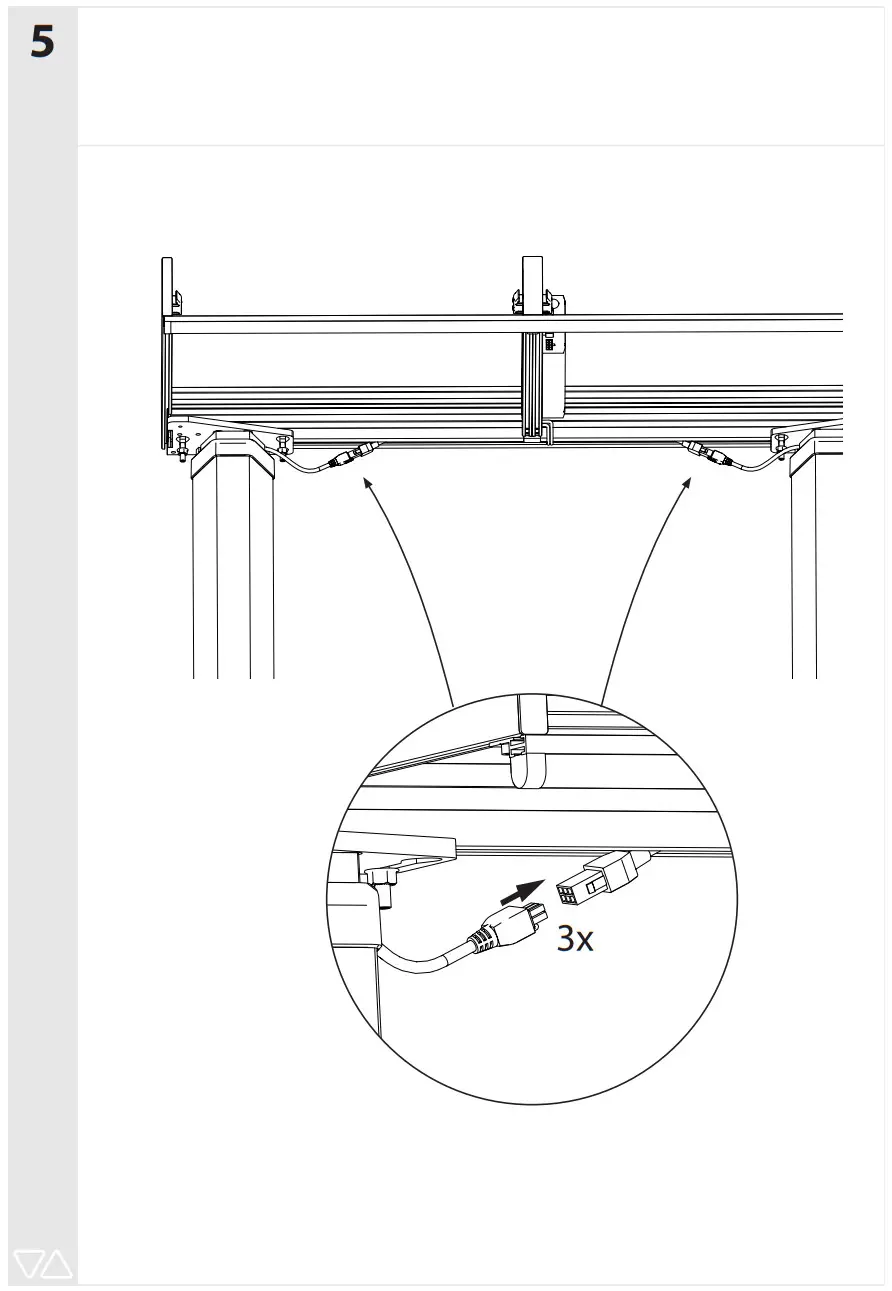
- Make sure that no cables get pinched and that they are fixed.
- Lower the lift and test the function of the anti-pinch strip all around the frame. Press on it while lowering.
The lift should stop immediately and rise to free up space when anti-pinch protection is activated.
Before you use the device – Read the users manual
Only authorized persons may use the this product!
Authorization means obligation to read and follow the instructions.
It is very important that you read and understands the users manual before you use the device.
The user manual is attached as a separate booklet.
All of the accompanying documents shall be available for all concerned persons, be kept in a protected place and shall follow the product, if it is moved to another installation site or another house or apartment owner.
Correct use, operation, inspections and maintenance are decisive for efficient and safe work.
If you have any questions – contact your supplier.![]()
| Granberg Interior AB Box 6112 600 06, Norrköping Tel: 011-19 77 50 E-mail: [email protected] Internet: www.granberg.se | Granberg Deutschland GmbH Eggeweg 91, 33617 Bielefeld Tel: +49 521 1439983 E-mail: [email protected] Internet: www.granberg.de |
![]()


