
![]()
![]()
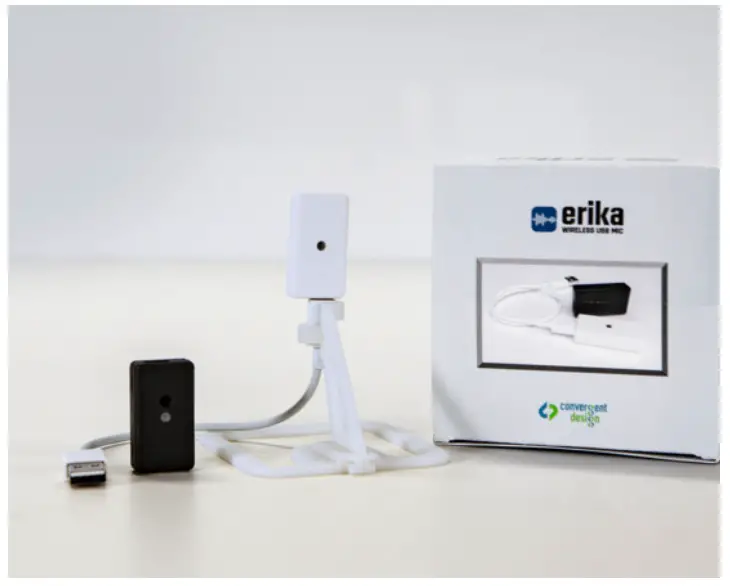
Erika Wireless USB Microphone System
Quick Start Guide
- Erika Quick Start Guide
NOTE: USB 3.0 ports/hubs radiate 2.4 GHz Wi-Fi noise. USB 2.0 Hubs are preferred and sufficient for Erika. - ONE TIME ONLY – Connect the Erika Mic (Black) to a USB Power source. A flashing blue LED indicates that the fully charged battery is enabled.
- Assemble the Receiver stand and insert the Erika receiver with the USB-C end connected to the Receiver as shown in the front photo.
- Connect your Erika Receiver (white) to your laptop using the USB-A to USB-C cable.
- When you pick up the Mic, the Receiver LED will be solid green, indicating that the Mic has paired with the Receiver and is ready for you to speak.
- Attach the Erika Mic to your shirt using the magnet on the backside.
- Launch your online program (Zoom, Google Meet, WebEx, etc.). Check the program settings to ensure that Erika is the selected microphone.
- Power down the Mic by either disconnecting the Erika USB cable/receiver from the laptop or laying the Erika mic face down (mic porthole facing down/magnet facing upward).
- The Receiver LED will flash yellow when battery charging is required. Disconnect the USB cable from the Receiver. Insert the USB-C jack (the small end) into the USB-C port on the Mic. Then connect the USB-A (the big end) to a USB power source (your laptop, for example). The Mic’s blue LED will flash while charging and be solid/on when charging is complete (<3 hours).
- Note Erika ships in Voice mode; if you want to use Erika for Music, please see the User Manual to define each and the procedure to change.
**REMINDER: Keep a copy of your purchase invoice/receipt of Erika to prove warranty status. **
20 Jan 2021
Convergent Design

REGISTER Erika for an extended warranty
![]()


