![]()
CTSMARTLEAD
Patch Lead for Analogue Learning Head Units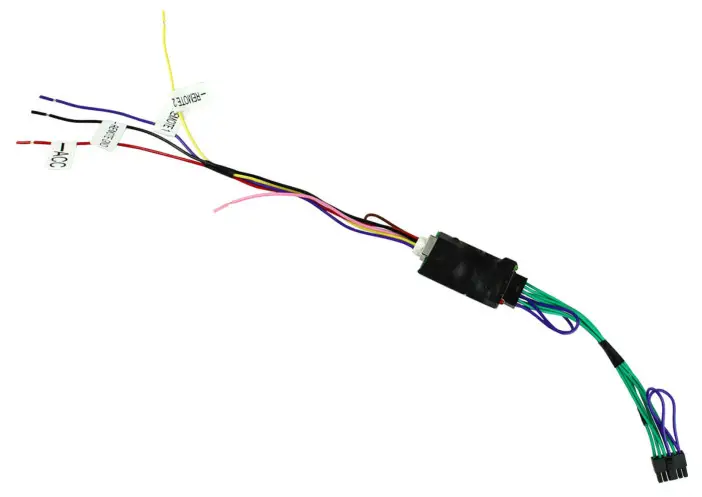 Installation Guide
www.connects2.com
APPLICATION
For use with a Connects2 Steering Wheel Control Interface and Analogue Learning Head Unit
ABOUT THIS PRODUCT
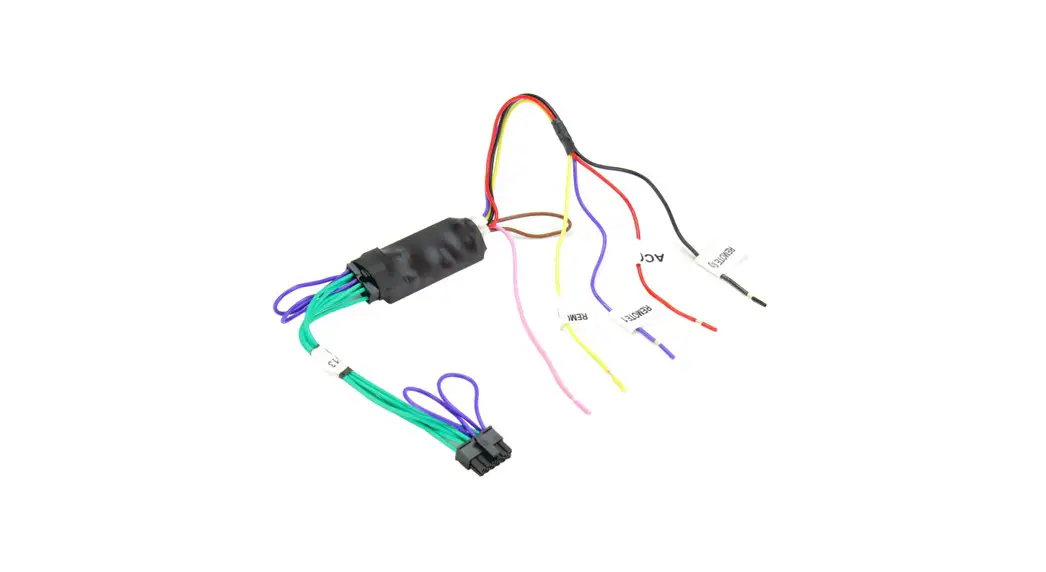
Analogue learning head units often have two analogue inputs, both capable of storing several taught resistive values. The CTSMARTLEAD takes advantage of the dual channel input and converts the Connects2 steering wheel control output into a format that will easily interface with any of the learning-style head units on the market.
This means that you can now store all of the steering wheel buttons from your vehicle’s steering wheel into your aftermarket radio.
Another benefit that the CTSMARTLEAD offers is the ability to allow the programming of scroll wheel buttons. Previously, this has always been impossible due to the fact that the scroll wheel cannot be held down when prompted by the learning head unit. The CTSMARTLEAD has a programming feature where it will allow the hold of the scroll wheel buttons during the teaching process and then returned to normal press function once it has been installed.
See “Installation Guide” overleaf for more information about how to set up the CTSMARTLEAD.
INSTALLATION GUIDE
NB: Before installation, make sure that the head unit is disconnected from the power source
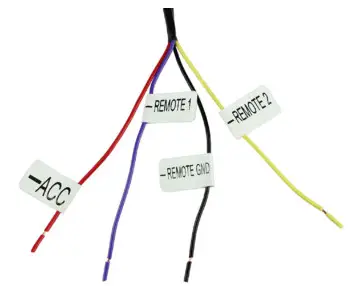
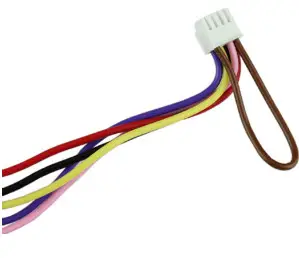
- Connect the flying wires from the CTSMARTLEAD to the head unit
Label Function ACC 12V Ignition Source Remote 1 Remote Wire 1 Remote 2 Remote Wire 2 Remote GND Remote Ground 
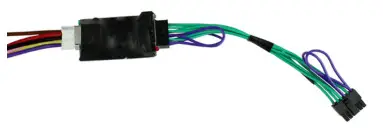
- Connect the molex connector from the CTSMARTLEAD to the Connects2 Steering Wheel Control Interface. Once connected, the head unit can be connected to the power source.

- Once the connections in Step 1 and Step 2
have been made, access the SWC LearningMode on the stereo. After each button press,please wait 3-4 seconds before pressing thenext button.
When all buttons have been pressed, cut thebrown wiring loop
 If you encounter any problems during the set-up of the CTSMARTLEAD, disconnect the patch lead, relink the brown wiring loop and follow the above steps again.
![]() Subscribe to our YouTube Channel for installation
Subscribe to our YouTube Channel for installation
guides and tips… www.youtube.com/connects2
www.connects2.com


