DARIO TD-3128B Blood Pressure Monitoring System
Distributed by DarioHealth Corp.
18 W 18th St,
New York, NY 10011
Made in Taiwan
Toll Free:1-800-895-5921(Mon to Fri / 9AM to 9PM EST)
For assistance outside of these hours, please contact your healthcare professional.
Read instructions before use.
Keep away from sunlight.
311-3128200-018
Dear Dario Blood Pressure System Owner:
Thank you for purchasing the Dario Blood Pressure Monitoring System. This manual provides important information to help you to use this system correctly. Before using this product, please read the following contents thoroughly and carefully.
With the compact size and easy operation of this Dario Blood Pressure Monitoring System, you can easily monitor your blood pressure by yourself at any time or place. In addition, this system can help you and your healthcare professionals to monitor and adjust your treatment plans, and keep your blood pressure under control.
If you have other questions regarding this product, please contact the place of purchase.
IMPORTANT SAFETY PRECAUTIONS
READ THIS BEFORE USE
- Use this device ONLY for the intended use described in this manual.
- Do NOT use accessories which are not specified by the manufacturer.
- Do NOT use the device if it is not working properly or damaged.
- Do NOT use under any circumstances on newborns or infants.
- This device does NOT serve as a cure for any symptoms or diseases. The data measured are for reference only. Always consult your doctor to have the results interpreted.
- Keep the equipment and its flexible cord away from hot surfaces.
- Do NOT apply the cuff to areas other than the place directed.
- Use of this instrument in a dry environment, especially if synthetic materials are present (synthetic clothing, carpets etc.) may cause damaging static discharges that may cause erroneous results.
- Do not use this instrument in close proximity to sources of strong electromagnetic radiation, as these may interfere with the accurate operation.
- Proper maintenance is essential to the longevity of your device. If you are concerned about your accuracy of measurement, please contact local customer service for help.
KEEP THESE INSTRUCTIONS
BEFORE YOU BEGIN
INTENDED USE
The Dario Blood Pressure Monitoring System is intended to be used to measure the systolic and diastolic blood pressure and pulse rate by using a non-invasive technique in which an inflatable cuff is wrapped on the upper arm. This system should only be used for the testing on people over 18 years of age and over.
The Dario Blood Pressure Monitoring System (model no. DH-1160 and DH-1165) provides Bluetooth transmission.
TEST PRINCIPLE
Blood pressure is measured non-invasively at the arm based on oscillometric method.
This device is NOT able to take measurements in the presence of common arrhythmia, such as atrial or ventricular premature beats or atrial fibrillation. It may produce reading error.
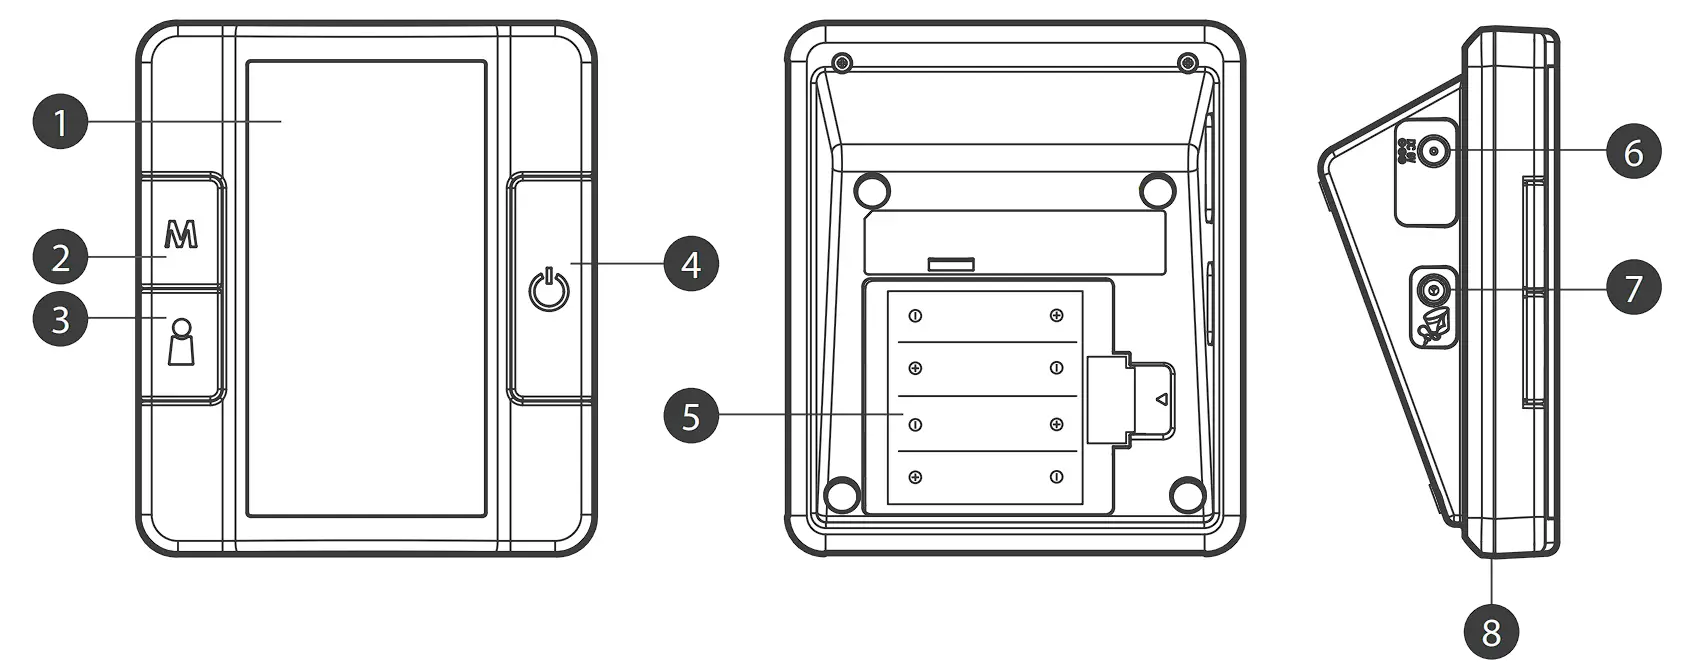
METER OVERVIEW
Pressure Cuff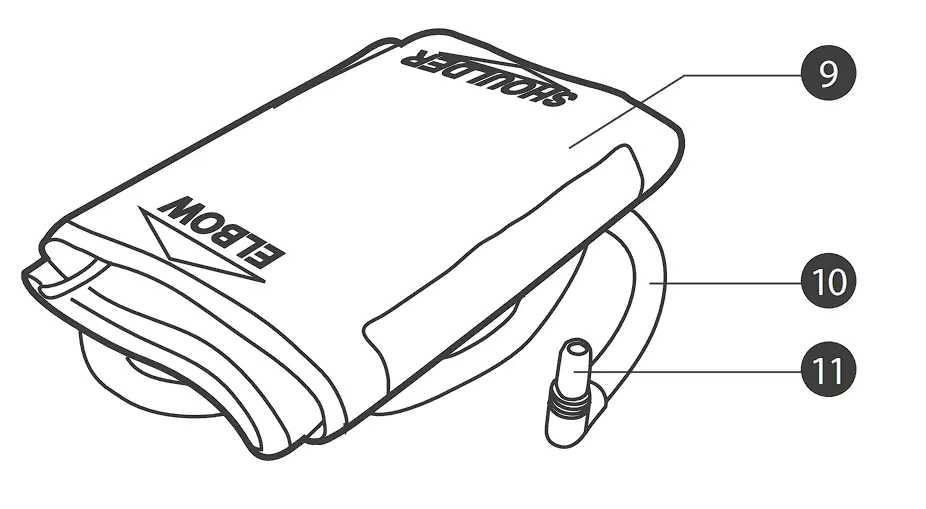
❶ DISPLAY SCREEN
❷ M BUTTON
Enter the meter memory.
❸ USER SELECTION BUTTON
Assist you with user number selection.
❹ ON/OFF BUTTON
❺ BATTERY COMPARTMENT
❻ AC ADAPTER PORT
Connect to a power supply.
❼ AIR JACK
❽ BT INDICATOR
Download test results with a Bluetooth connection.
❾ PRESSURE CUFF
❿ AIRTUBE
⓫ AIR PLUG
Connect to air jack.
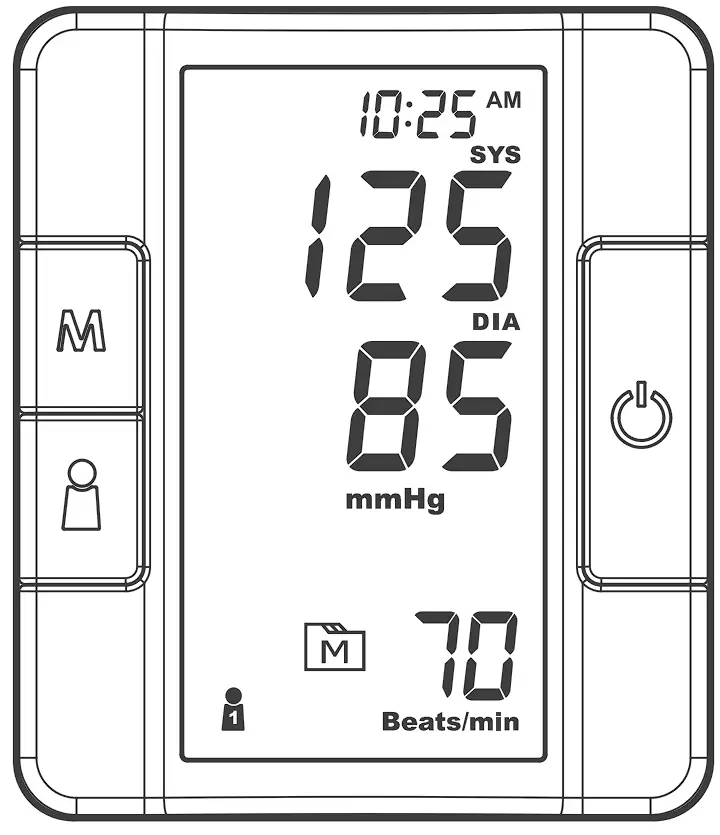
DISPLAY SCREEN
❶ Error Warning
❷ Systolic Pressure Value
❸ Diastolic Pressure Value
❹ Low Battery Symbol
❺ Movement During Measurement
❻ Memory Mode Symbol
❼ Pulse Rate Symbol
❽ User Number
❾ Time& Date
❿ Systolic Pressure Symbol
⓫ Diastolic Pressure Symbol
⓬ Units of Blood Pressure
⓭ AC Adaptor Symbol
⓮ Average
⓯ Pulse Rate
SETTING THE METER
Before using your meter for the first time or if you change the meter battery, you should check and update these settings. Make sure you complete the steps below and save the desired settings.
Entering the Setting Mode
Start with the meter off. Press and firmly hold ![]() for 3 seconds until the meter turns on.
for 3 seconds until the meter turns on.
Setting the Date and the Time
With the year flashing, press ![]() until the correct year appears. Press
until the correct year appears. Press ![]() to set.
to set.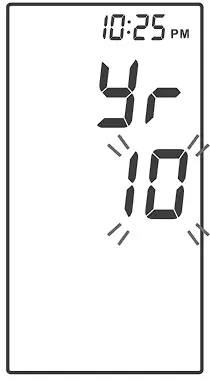
With the month flashing, press ![]() until the correct month appears. Press
until the correct month appears. Press ![]() to set.
to set.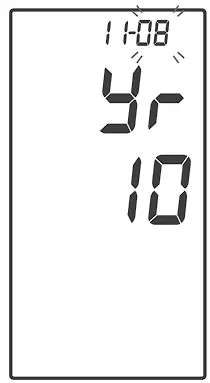
With the day flashing, press ![]() until the correct day appears.
until the correct day appears.
Press ![]() to set.
to set.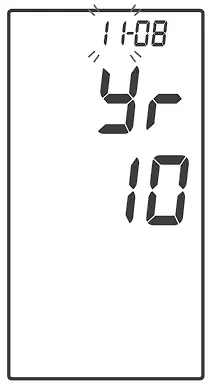
With the hour flashing, press until the correct hour appears.
Press ![]() to set.
to set.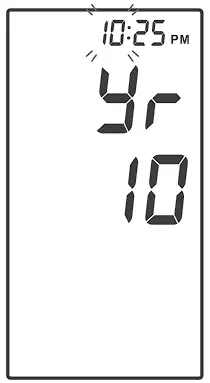
With the minute flashing, press ![]() until the correct minute appears.
until the correct minute appears.
Press ![]() to set.
to set.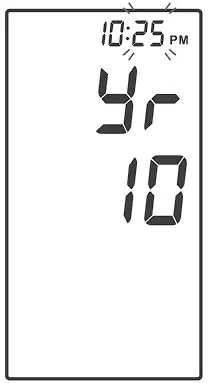
Setting the Time Format
Press ![]() to select the desired time format — 12h or 24h.
to select the desired time format — 12h or 24h.
Press ![]() to set.
to set.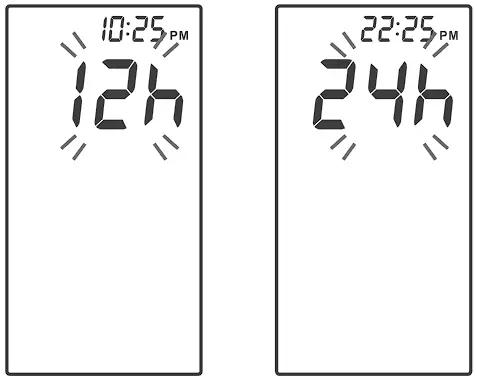
Setting the Unit of Measurement
Press ![]() to select mmHg or KPa.
to select mmHg or KPa.
Press ![]() to set.
to set.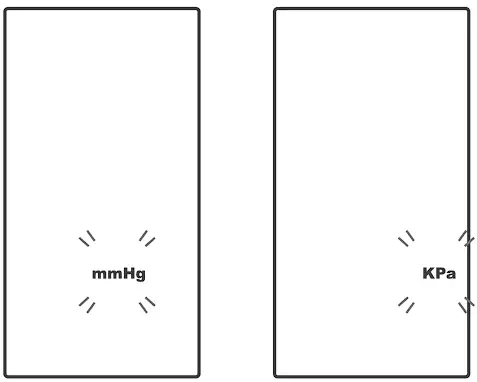
Delete The Memory
While “dEL” and a flashing “![]() ” symbol appears on the display, if you do not wish to delete the saved results, press
” symbol appears on the display, if you do not wish to delete the saved results, press ![]() to skip this step.
to skip this step.
To delete ALL the results, press ![]() twice. “
twice. “![]() ”and “
”and “![]() ” are displayed on the meter, which indicates that all results have been deleted.
” are displayed on the meter, which indicates that all results have been deleted.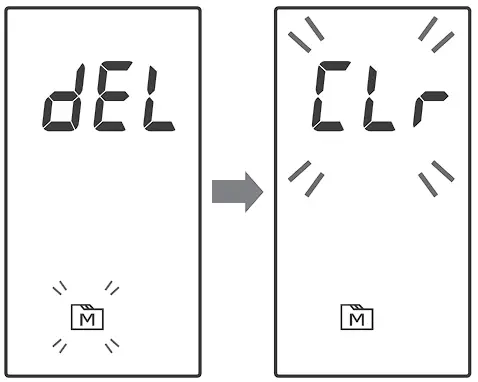
Enter the Bluetooth Pairing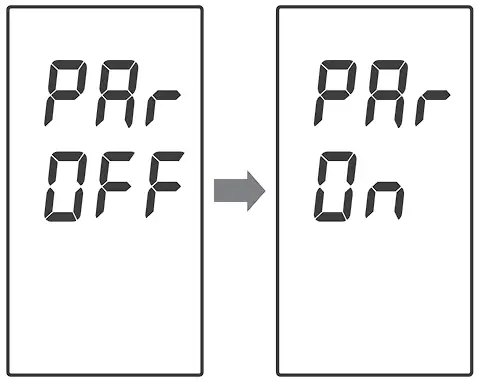
| NOTE This step is recommended when the user needs to pair this meter to a Bluetooth receiver for the first time, or when user needs to pair this meter to another new Bluetooth receiver. |
If you wish to enter the pairing mode, with “PAr OFF” shows on the meter, press ![]() once and the meter will display “PAr On” to enable Bluetooth pairing mode.
once and the meter will display “PAr On” to enable Bluetooth pairing mode.
Congratulations! You have completed all settings!
NOTE
|
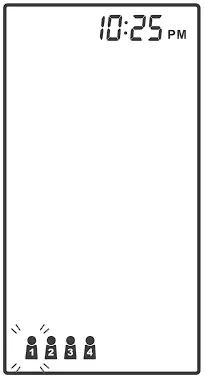
USER NUMBER SELECTION
This system stores blood pressure measurements for up to four users. Each user’s test results are stored separately under each user number.
- Press
 to select the desired user number.
 - Press
 to confirm. The monitor will repeat the selected user number and then turn off automatically.

TESTING YOUR BLOOD PRESSURE
BEFORE MEASUREMENT
- Avoid caffeine, tea, alcohol and tobacco for at least 30 minutes before measurement.
- Wait 30 minutes after exercising or bathing before measurement.
- Sit or lie down for at least 10 minutes before measuring.
- Do not measure when feeling anxious or tense.
- Take a 5-10 minutes break between measurements. This break can be longer if necessary, depending on your physical condition.
- Keep the records for your healthcare provider as reference.
- Blood pressure naturally varies between each arm. Always measure your blood pressure on the same arm.
FITTING THE CUFF PROPERLY
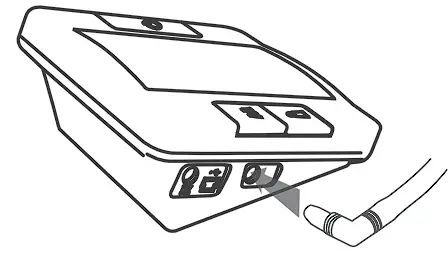
- Connect the air plug of the tubing to the air jack of the meter.

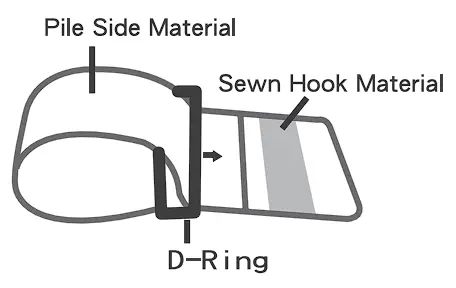
- Assemble the cuff as shown. The smooth surface should be inside of the cuff loop and the metal D-ring should not touch your skin.
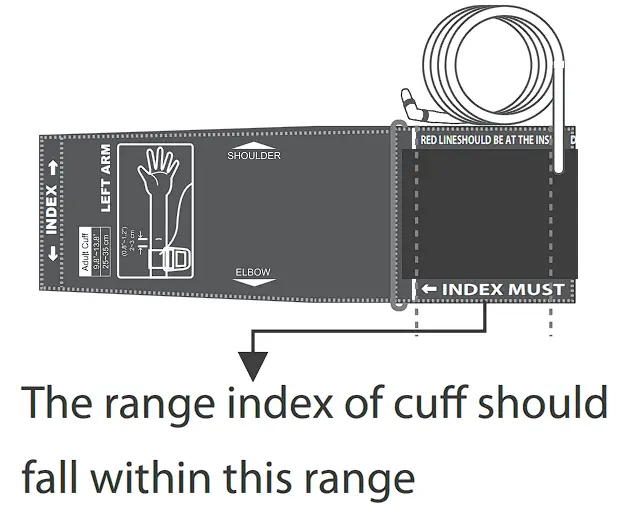
- Stretch your left (right) arm in front of you with your palm facing up. Slide and place the cuff onto your arm with the air tube and artery mark region toward the lower arm.
Wrap and tighten the cuff above your elbow. The bottom edge of the cuff should be approximately 0.8” to 1.2” (2 cm to 3 cm) above your elbow. Align the tube over the main arteries on the inside.
- Leave a little free space between the arm and the cuff; you should be able to fit two fingers between them. Clothing must not restrict the arm. Remove all clothing covering or constricting the measurement arm.

- Press the hook material firmly against the pile material. The top and bottom edges of the cuff should be tightened evenly around your upper arm.


PROPER MEASUREMENT POSITION
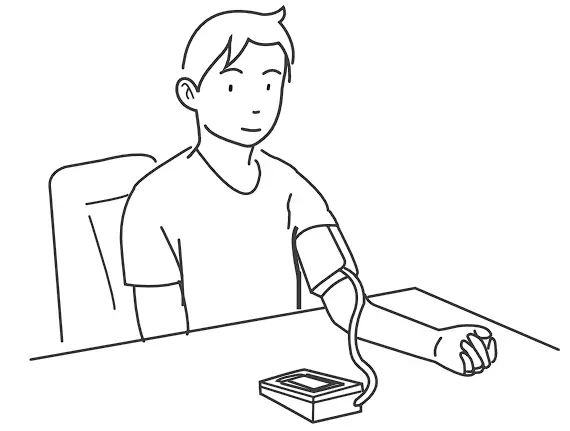
- Sit down for at least 10 minutes before measuring.
- Place your elbow on a flat surface. Relax your hand with the palm facing up.
- Make sure the cuff is about the same height as the location of your heart.
Press . Remain still and do not talk or move during the measurement.
WARNING
If the cuff is relatively lower (higher) than the heart, the obtained blood pressure value could be higher (lower) than the actual value. A 15 cm difference in height may result in an error around 10 mmHg. - Measurement is in progress. After the meter is turned on, the cuff will begin to inflate automatically
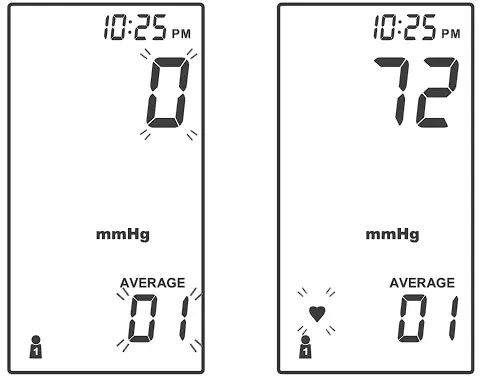
TAKING MEASUREMENTS
Always apply the pressure cuff before turning on the meter.
- Press . All the LCD symbols will appear. Press to select user “
 “(numbers from 1 to 4) whose test reading will be stored in its memory. Then the cuff will begin to inflate automatically.
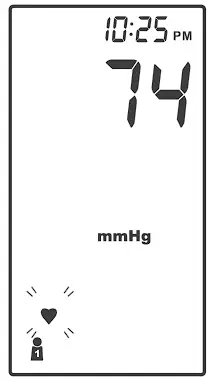
- The heart symbol “
 “will flash when pulse is detected during the measurement.
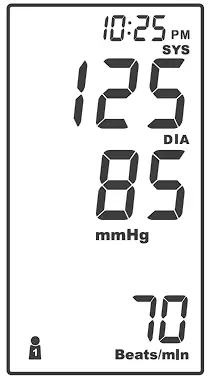
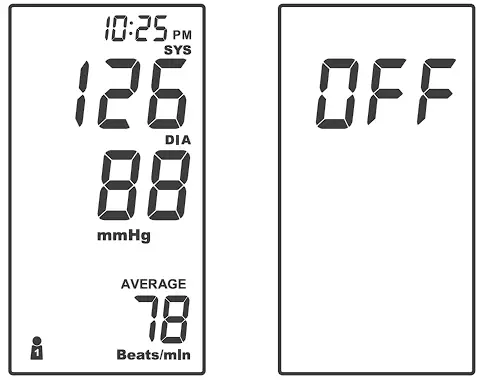
 - After the measurement, the meter displays the systolic pressure, diastolic pressure and pulse rate.
- Press to switch off or it will switch off automatically after being idle for 3 minutes.
- The meter will enter Bluetooth mode automatically.

NOTE
|
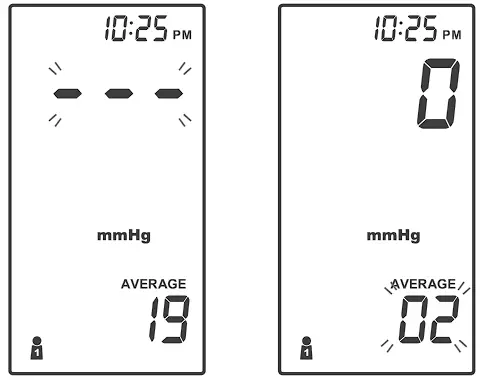
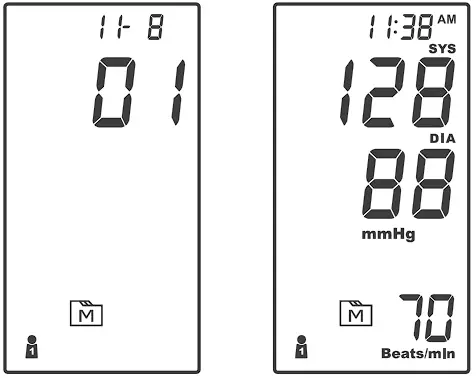
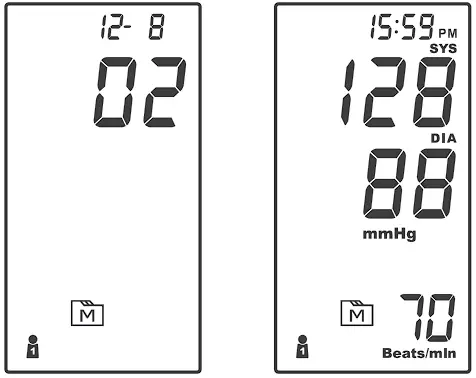
AVERAGING MEASUREMENT MODE
Always apply the pressure cuff before turning on the meter.
- Press and hold until the meter displays “AVERAGE’: then press to select user “” (numbers from 1 to 4) whose test reading will be stored in its memory. Then the cuff will begin to inflate automatically.

- After the first measurement is completed, the meter will start counting down before the second measurement begins. The number on the right represents the remaining countdown between each measurement. The meter will take three (3) measurements consecutively with intervals of 20 seconds.
- After taking three measurements, the results are averaged to produce the blood pressure measurement with “AVERAGE” symbol display on the meter. Press to turn off the meter.

METER MEMORY
Your meter stores the 400 most recent blood pressure test results along with respective dates and times in the meter memory. To recall the memory, start with the meter off.
REVIEWING TEST RESULTS
- Press and release
The user symbol (numbers from 1 to 4) appears first, press to select which one you used to store in the memory.Press again, and the first reading you see is the last blood pressure result along with date and time.
- Press again, and the first reading you see is the last blood pressure result along with date and time.
- Press Review all test results stored in the meter.

- Exit the memory
Press and the meter will turn off.
APP CONNECTION
Data Transmission via Bluetooth
You can transmit your blood pressure monitoring data from the meter to your smart mobile device via Bluetooth. Please contact your local customer service or place of purchase for assistance.
Please note that you must complete the pairing between meter and Bluetooth receiver before transmitting data.
| NOTE Only data of user number 1 is transmitted to the mobile app. Make sure the correct user number is selected during measurement to allow proper data transmission. |
Pairing with your mobile device
- Turn on the Bluetooth function on your mobile device.
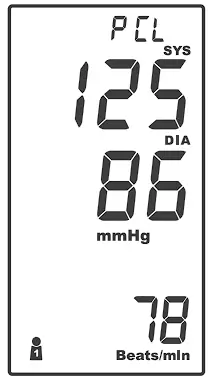
- Start with the meter off. Press and firmly hold for 3 seconds until the meter turns on.” PCL” will appear on the meter.
- Open your Dario App on your mobile device. Go to MENU ->SETTINGS -> CONNECTED APPS & DEVICES. Enable the “Dario Blood Pressure Monitoring System” connection and follow the app instruction for pairing.
- After successfully pairing the app with the device, the Bluetooth function of meter shall be on before transmitting the data to your app.
Bluetooth indicator on the blood pressure monitor:
Bluetooth indicator on the blood pressure monitor:
| BLUETOOTH INDICATOR | STATUS |
| Flashing Blue | The Bluetooth function is on and waiting for connection. |
| Solid Blue | The Bluetooth connection is established. |
NOTE
|
MAINTENANCE
BATTERY
Your meter comes with four (4)1.SV AA size alkaline batteries.
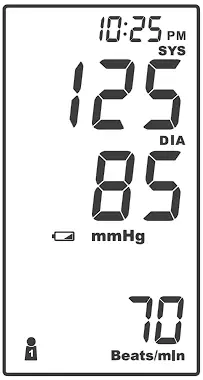
Low Battery Signal
The meter will display either of the two messages below to alert you when the meter power is getting low.
- The
 symbol appears along with display messages:
The meter is functional and the result remains accurate, but it is time to change the batteries.
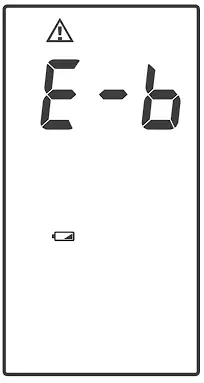
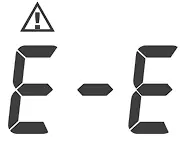
- The symbol appears with E-b:
The power is not enough to do a test. You must change the batteries immediately.
Replacing the Battery
To replace the batteries, make sure the meter is turned off.
- Press the edge of the battery cover and lift it up to remove.
- Remove the old batteries and replace with four 1.5V AA size alkaline batteries.
- Close the battery cover.
NOTE
|
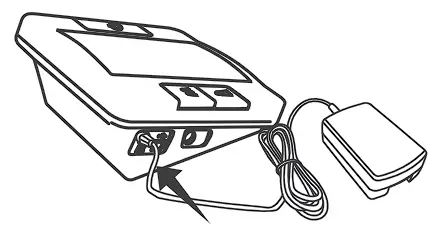
USING AC ADAPTER
Connect AC adapter to the meter.
- Connect AC adapter plug to DC adapter jack of the meter.

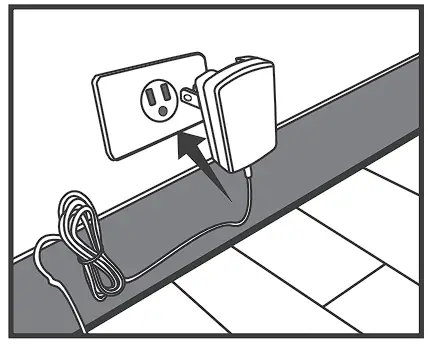
- Plug AC adapter power plug into an electrical outlet.
Press to start the measurement.
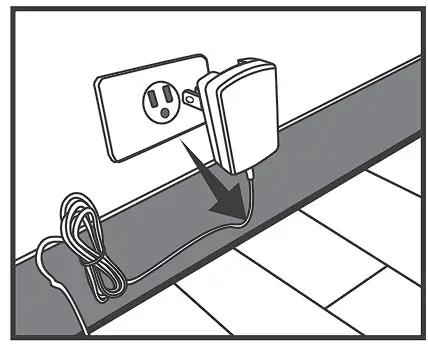
Remove AC adapter from the meter.
- When the meter is off, remove AC adapter power plug from the electrical outlet.
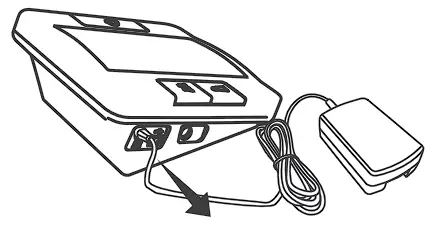
- Disconnect AC adapter plug from DC adapter jack of the meter.

CARING FOR YOUR METER
To avoid the meter attracting dirt, dust or other contaminants, wash and dry your hands thoroughly before use.
Cleaning
- To clean the meter exterior, wipe it with a cloth moistened with tap water or a mild cleaning agent, then dry the device with a soft dry cloth. Do NOT flush with water.
- Do NOT use organic solvents to clean the meter.
- Do NOT wash the pressure cuff.
- Do NOT iron the pressure cuff.
Meter Storage
- Storage condition: -25°( to 70°( (-13°F to 158°F), 10% to 95% relative humidity.
- Always store or transport the meter in its original storage case.
- Avoid dropping or heavy impact.
- Avoid direct sunlight and high humidity.
DETAILED INFORMATION
REFERENCE VALUES
Clinical studies show that adult diabetes is often accompanied by elevated blood pressure. People with diabetes can reduce their heart risk by managing their blood pressure along with diabetes treatment*1.
Monitoring your routine blood pressure trend helps you to know your body condition. Human blood pressure naturally increases after reaching middle age. This symptom is a result of continuous ageing of the blood vessels. Further causes include obesity, lack of exercise and cholesterol (LDL) adhering to the blood vessels. Rising blood pressure accelerates hardening of the arteries, and the body becomes more susceptible to apoplexy and coronary infarction. Categories of blood pressure in adults*2:
| Blood Pressure Category | Systolic Blood Pressure (mmHg) | Diastolic Blood Pressure (mmHg) | |
| Normal | Less than 120 mmHg | and | Less than 80 mmHg |
| Elevated | 120-129 mmHg | and | Less than 80 mmHg |
| Hypertension | |||
| Stage 1 | 130-139 mmHg | or | 80-89 mmHg |
| Stage 2 | 140 mmHg or more | or | 90 mmHg or more |
Individuals with systolic blood pressure and diastolic blood pressure in two categories should be designated to the higher blood pressure category.
*1. American Diabetes Association: The Diabetes-Heart Disease Link Surveying Attitudes, Knowledge and Risk (2002)
*2: Whelton PK, Carey RM, Aronow WS, et al. 2017 ACC/ AHA/ AAPA/ ABC/ ACPM/ AGS/ APhA/ ASH/ ASPC/ NMA/PCNA guideline for the prevention, detection, evaluation, and management of high blood pressure in adults: a report of the American College of Cardiology/ American Heart Association Task Force on Clinical Practice Guidelines. Hypertension. 2018;71:e13-115
SYSTEM TROUBLESHOOTING
If you follow the recommended action but the problem persists, or error messages other than the ones below appear, please call your local customer service. Do not attempt to repair by yourself and never try to disassemble the meter under any circumstances.
ERROR MESSAGES
| MESSAGE | CAUSE | WHAT TO DO |
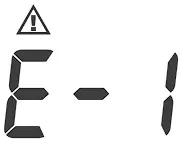 | Inflation or pressure error. | Please contact local customer service for help. |
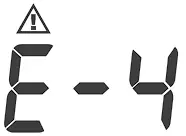 | Blood pressure measurement error. | Refit cuff tightly and correctly. Relax and repeat the measurement. If error still remains, contact local customer service for help. |
 | Appears when the cuff deflates too slow. | Please contact local customer service for help. |
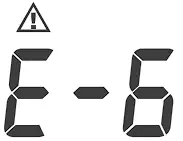 | Appears when the cuff deflates too fast. | |
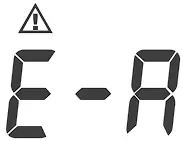 | Problems with the meter. | Review the instructions and repeat the test. If the meter still does not work, please contact the local customer service for help. |
 | ||
 | Batteries are too low. | Repeat with new batteries or input AC adapter. |
 | Bluetooth transmission errors. | Please contact local customer service for help. |
TROUBLESHOOTING
- If no display appears after pressing .
POSSIBLE CAUSE WHAT TO DO Batteries exhausted. Replace the batteries. Batteries incorrectly installed or absent. Check that the batteries are correctly installed. - If the heart rate is higher/lower than user’s average:
POSSIBLE CAUSE WHAT TO DO Movement during measurement. Repeat measurement. Measurement taken just after exercise. Rest at least 30 minutes before repeating measurement. - If the result is higher/lower than user’s average measurement:
POSSIBLE CAUSE WHAT TO DO May not be in correct position while measuring. Adjust to the correct position to measure. Blood pressure naturally varies from time to time. Keep in mind for next measurement. - If the cuff inflates again while measuring:
POSSIBLE CAUSE WHAT TO DO Cuff is not fastened. Fasten the cuff again. If user’s blood pressure is higher than the pressure the device has inflated, the device will automatically increase the pressure and start to inflate again. Stay relaxed and wait for the measurement. - If the measurement is not transmitted to the mobile app:
POSSIBLE CAUSE WHAT TO DO Mobile App is not connected. Follow the steps in the “APP CONNECTION” section to connect the monitor to the mobile App. Measurement is not done on user number 1. Select user 1 and measure again. App is not open while taking a measure. Make sure that while taking a measurement the mobile app is open and within a distance of up to 3 fit from the monitor.
SPECIFICATIONS
SYSTEM PERFORMANCE
Model no.: DH-1160 (Medium Cuff) and DH-1165 (Large Cuff)
Power Source: Four l .SV AA alkaline batteries
Size of Meter w/o Cuff: 141 (L) x 121 (W) x 72 (H)mm, 350g without batteries.
Cuff Size: M (medium): 24-35 cm (9.4-13.8 inches) with air tube 80 cm.
L (Large): 9.4-1 ?Inch (24-43cm) with air tube 80cm.
Memory: Maximum 400 memory records
External Output: Bluetooth
Power Saving: Automatic power off if system idle for 3 minutes
Operating Conditions: S°C to 40°C (41 °F to 104°F), 15% to 93% relative humidity, 700 hPa to 1060 hPa
Storage /Transportation Conditions: -25°C to 70°C (-13°F to 1S8°F),10% to 95% relative humidity
Power Supply Input: DC+ 6V / 1 A (max) via Power Plug
IP Classification: IP21
Expected Service Life: 3 yea rs
BLOOD PRESSURE MEASUREMENT PERFORMANCE
Systolic Measurement Range: 60 mmHg -255 mm Hg
Diastolic Measurement Range: 30 mmHg -195 mm Hg
Pulse Rate Measurement Range: 40-199 beats I minute
Accuracy of Pressure: +3 mmHg or +2% of reading
Accuracy of Pulse Rate: +4% of reading
Measurement Unit: Either mm Hg or KPa
This device has been tested to meet the electrical and safety requirements of:
IEC/EN 60601-1, IEC/EN 60601-1-2, EN 301 489-17, EN 300 328.
Reference to Standards:
- EN 1060-1 /-3, NIBP-requirements
- IEC60601-1 General requirement for safety
- IEC60601-1-2 Requirements for EMC
- EN 1060-4, NIBP clinical investigation
- AAMI /ANSI/ IEC 80601-2-30, ANSI/AAMI/ISO 81060-2, NIBP requirements
FEDERAL COMMUNICATIONS COMMISION (FCC) STATEMENT
15.21
You are cautioned that changes or modifications not expressly approved by the part responsible for compliance could void the user’s authority to operate the equipment.
15.105(b)
Federal Communications Commission (FCC) Statement
This equipment has been tested and found to comply with the limits for a Class B digital device, pursuant to part 15 of the FCC rules. These limits are designed to provide reasonable protection against harmful interference in a residential installation. This equipment generates, uses and can radiate radio frequency energy and, if not installed and used in accordance with the instructions, may cause harmful interference to radio communications. However, there is no guarantee that interference will not occur in a particular installation. If this equipment does cause harmful interference to radio or television reception, which can be determined by turning the equipment off and on, the user is encouraged to try to correct the interference by one or more of the following measures:
- Reorient or relocate the receiving antenna.
- Increase the separation between the equipment and receiver.
- Connect the equipment into an outlet on a circuit different from that to which the receiver is connected.
- Consult the dealer or an experienced radio/TV technician for help.
This device complies with Part 15 of the FCC Rules. Operation is subject to the following two conditions:
- This device may not cause harmful interference and B 1-30 of 31.
- This device must accept any interference received, including interference that may cause undesired operation of the device.
FCC RF Radiation Exposure Statement:
- This transmitter must not be co-located or operating in conjunction with any other antenna or transmitter.
- This equipment complies with FCC RF radiation exposure limits set forth for an uncontrolled environment. This equipment should be installed and operated with a minimum distance of 20 centimeters between the radiator radiation source and your body.
| Manufacturer’s declaration-electromagnetic emissions | ||
| The DH-1160 and DH-1165 is in ten d ed for u se in the electromagnetic environment (for home healthcare) sp ec i fi ed b el o w . The customer or the user of the DH-1160 and DH-1165 should assure that it is used in such an environment. | ||
| Emission test | Compliance | Electromagnetic environment-guidance (for home healthcare environment) |
| RF em issions CISPR 11 | Group 1 | The DH-1160 and DH-1165 uses RF energy only for its internal function. Therefore, its RF emissions are very low and are not likely to cause any interference in nearby electronic equipment. |
| RF em issions CISPR 1 1 | Class B | The DH-1160 and DH-1165 is suitable for use in all establishments, including domestic establishments and those directly connected to the public low-voltage power supply network that supplies buildings used for domest ic purposes. |
| Harmonic emissions IEC 61000-3-2 | Class A | |
| Voltage fluctuations/ flicker emission s IEC 61000-3-3 | Compliance | |
| M anufacturer ‘s de claration–electrom agnetic immunity | |||
| The DH-1160 and DH-1165 is intended for use in the electromagnetic environment (for home healthcare) specified below. The customer or the user of the DH-1160 and DH-1165 should assure tlhat it is used in such an environment. | |||
| Immunity test | IEC 60601 test level | Compliance level | Electromagnetic environment–guidance (for home healthcare environment) |
| Electrostatic discharge (ESD) IEC 61000 -4-2 | Contact : +8 kV Air+ 2 kV, +4 kV,+ 8 kV, +15 kV | Cont act: + 8 kV Air+2 kV,+4 kV, +8 kV, + 15 kV | Floors should be wood, concrete or ceramic tile. If floors are covered with synthetic material, the relative humidity should be at least 30°/2. |
| Elect r ical fast transient/ burst IEC 61000-4-4 | + 2kV for power supply lines + 1kV for input /output lines | + 2kV for power supply lines Not applicable | Mains power quality should be that of a typical home healthcare environment. |
| Surge IEC 61000-4-5 | ± O.SkV, ± 1kV line(s) to line(s) + O.SkV, +1 kV, +2kV line(s)to earth | ± O.SkV, ± 1kV li111e (s)to line(s) Not applicable | Mains power quality should be that of a typical home healthcare environment. |
| Voltage Dips, short interruptions and voltage variation s on power supply input lines IEC 61000 -4-11 | Voltage dips: 0 °/2 Ur; 0,5 cycle 0 °/2 Ur; 1 cycle 70 % Ur; 25/30 cycles Voltage int erruptions: 0 °/2 Ur; 250/300 cycle | Voltage dips: 0 % Ur; 0,5 cycle 0 % Ur; 1 cycle 70 % Ur; 25 cycles Voltage interrup tio ns: 0 % Ur; 250 cycle | Mains power quality should be that of a typical home healthcare environment. If the user of the DH-1160 and DH-1165 requires continued operation during power mains interruptions, it is recommended that the DH-1160 and DH-1165 be powered from an uninterruptible power supply or a batt ery. |
| Power frequency (50, 60 Hz) magnetic field IEC 61000-4-8 | 30A/m 50 Hz or 60 Hz | 30A/m 50 Hz | The DH-1160 and DH-1165 power frequency magnetic fields should be at levels characteristic of a typical location in a typical home healthcare environment. |
| NOTE UT is the a.c. mains voltage prior to application of the test level. | |||
| M nuf cturer dec r tion e ectrom gnetic immunity | |||
The DH-1160 and DH-1165 is intended for use in the electromagnetic environment (for home healthcare) specified below. | |||
Immunity test | IEC 60601 test level | Compliance level | Electromagnetic environment-guidance (for home healthcare environment) |
| Conducted RF IEC 61000-4-6 | 3 Vrms: 0,15 MHz – 80 MHz 6 Vrms: in ISM and amateur radio bands between 0,15 MHz and 80 MHz | 3 Vrms: 0,15 MHz – 80 MHz 6 Vrms: in ISM and amateur radio bands between 0,15 MHz and 80 MHz | Portable and mobile RF communications equipment should be used no closer to any part of the DH-1160 and DH-1165 including cables, than the recommended separation distance calculated from the equation applicable to the frequency of the transmitter. Recommended separation distance: d = 1,2 √P d = 1,2 √P 80 MHz to 800 MHz d = 2,3 √P 800 MHz to 2,7 GHz Where P is the maximum output power rating of the transmitter in watts (W) according to the transmitter manufacturer and d is the recommended separation distance in metres (m).Interference may occur in the vicinity of equipment marked with the following symbol: |
| Radiated RF IEC 61000-4-3 | 80 % AM at 1 kHz 10 V/m 80 MHz – 2,7 GHz 80 % AM at 1 kHz | 80 % AM at 1 kHz 10 V/m 80 MHz – 2,7 GHz 80 % AM at 1 kHz | |
| NOTE 1 At 80 MHz and 800 MHz, the higher frequency range applies. NOTE 2 These guidelines may not apply in all situations. Electromagnetic propagation is affected by absorption and reflection from structures, objects and people. | |||
| a) Field strengths from fixed transmitters, such as base stations for radio (cellular/cordless) telephones and land mobile radios, amateur radio, AM and FM radio broadcast and TV broadcast cannot be predicted theoretically with accuracy. To assess the electromagnetic environment due to fixed RF transmitters, an electromagnetic site survey should be considered. If the measured field strength in the location in which the DH-1160 and DH-1165 is used exceeds the applicable RF compliance level above, the DH-1160 and DH-1165 should be observed to verify normal operation. If abnormal performance is observed, additional measures may be necessary, such as re-orienting or relocating the DH- 1160 and DH-1165. b) Over the frequency range 150 kHz to 80 MHz, field strengths should be less than 3 V/m. | |||
Recommended separation distance between portable and mobile RF communications equipment and the DH-1160 | |||
| The DH-1160 and DH-1165 is intended for use in an electromagnetic environment (for home healthcare) in which radiated RF disturbances are controlled. The customer or the user of the DH-1160 and DH-1165 can help prevent electromagnetic interference by maintaining a minimum distance between portable and mobile RF communications equipment (transmitters) and the DH-1160 and DH-1165 as recommended below, according to the maximum output power of the communications equipment. | |||
Rated maximum output power of transmitter (W) | Separation distance according to frequency of transmitter (m) | ||
150 kHz to 80 MHz d =1,2-JP | 80 MHz to 800 MHz d = 1,2-JP | 800 MHz to 2,7 GHz | |
| 0,01 | 0,12 | 0,12 | 0,23 |
| 0,1 | 0,38 | 0,38 | 0,73 |
| 1 | 1,2 | 1,2 | 2,3 |
| 10 | 3,8 | 3,8 | 7,3 |
| 100 | 12 | 12 | 23 |
| For transmitters rated at a maximum output power not list ed above, the recommended separation distanced in meters (m) can be estimated using the equation ap plicable to the frequency of the transmitter, where pis the maximum output power rating of the transmitter in watts (W) according to the transmitter manufact u rer. NOTE 1 At 80 MHz and 800 MHz, the separation distance for the higher frequency range app lies. NOTE 2 These guid elines may not apply in all situations. Elect romagnetic propagation is affected by absorption and reflection from structures, objects and people. | |||
M anufacturer‘sdeclaration-electromagn etic immunity | |||||||
| The DH-1160 and DH-1165 is intended for usein the electromagnetic environment (for home healthcare) specified below. The customer or the user of the DH-1160 and DH-1165 should assure th at it is used in such an environment. | |||||||
| Test frequency (MHz) | Band a) (MHz) | Service a) | Modulation b) | Maximum power (W) | Distance (m) | I MM UNITY TEST LEVEL (V/m) | Compliance LEVEL ( V/ m) (for home healthcare) |
| 385 | 380-390 | TETRA400 | Pulse modulation b) 18 Hz | 1 , 8 | 0,3 | 27 | 27 |
| 450 | 430-470 | GMRS 460,FRS 460 | FM c) ± 5 kHz deviation 1 kHz sine | 2 | 0,3 | 28 | 28 |
| 710 | 704- 787 | LTE Band 13, 17 | Pulse modulation b) 217 Hz | 0,2 | 0,3 | 9 | 9 |
| 745 | |||||||
| 780 | |||||||
| 810 | 800-960 | GSM 800 /900, TETRA 800, iDEN 820,CDMA 850, LTE Band 5 | Pulse modulation b) 18 Hz | 2 | 0,3 | 28 | 28 |
| 870 | |||||||
| 930 | |||||||
| 1 720 | 1 700- 1 990 | GSM 1800; CDMA 1900; GSM 1900; DECT; LTE Band 1, 3, 4, 25; UMTS | Pulse modulation b) 217 Hz | 2 | 0,3 | 28 | 28 |
| 1 845 | |||||||
| 1 970 | |||||||
| 2 450 | 2400-2 570 | Bluetooth,WLAN, 802.11 b/ g/ n, RFID 2450, LTE Band 7 | Pulse modulation b) 217 Hz | 2 | 0,3 | 28 | 28 |
| 5 240 | 5 100 – 5 800 | WLAN 802.11 a/ n | Pulse modulation b) 217 Hz | 0,2 | 0,3 | 9 | 9 |
| 5 500 | |||||||
| 5 785 | |||||||
| NOTE If necessary to achieve the IMMUNITYTEST LEVEL, the distance between the transmitting antenna and the ME EQUIPMENTor ME SYSTEM may be reduced to 1m. The 1m test distance is permitted by IEC 61000-4-3. | |||||||
| a) For some services,on ly the uplink frequenciesare included. b) The carrier shall be modulated using a 50% duty cycle square wave sig nal. c) As an altern ative to FM modulation, 50 % pulse modulation at 18 Hz may be used because while it does not represent actual modulation, it wou ld be worst case. | |||||||