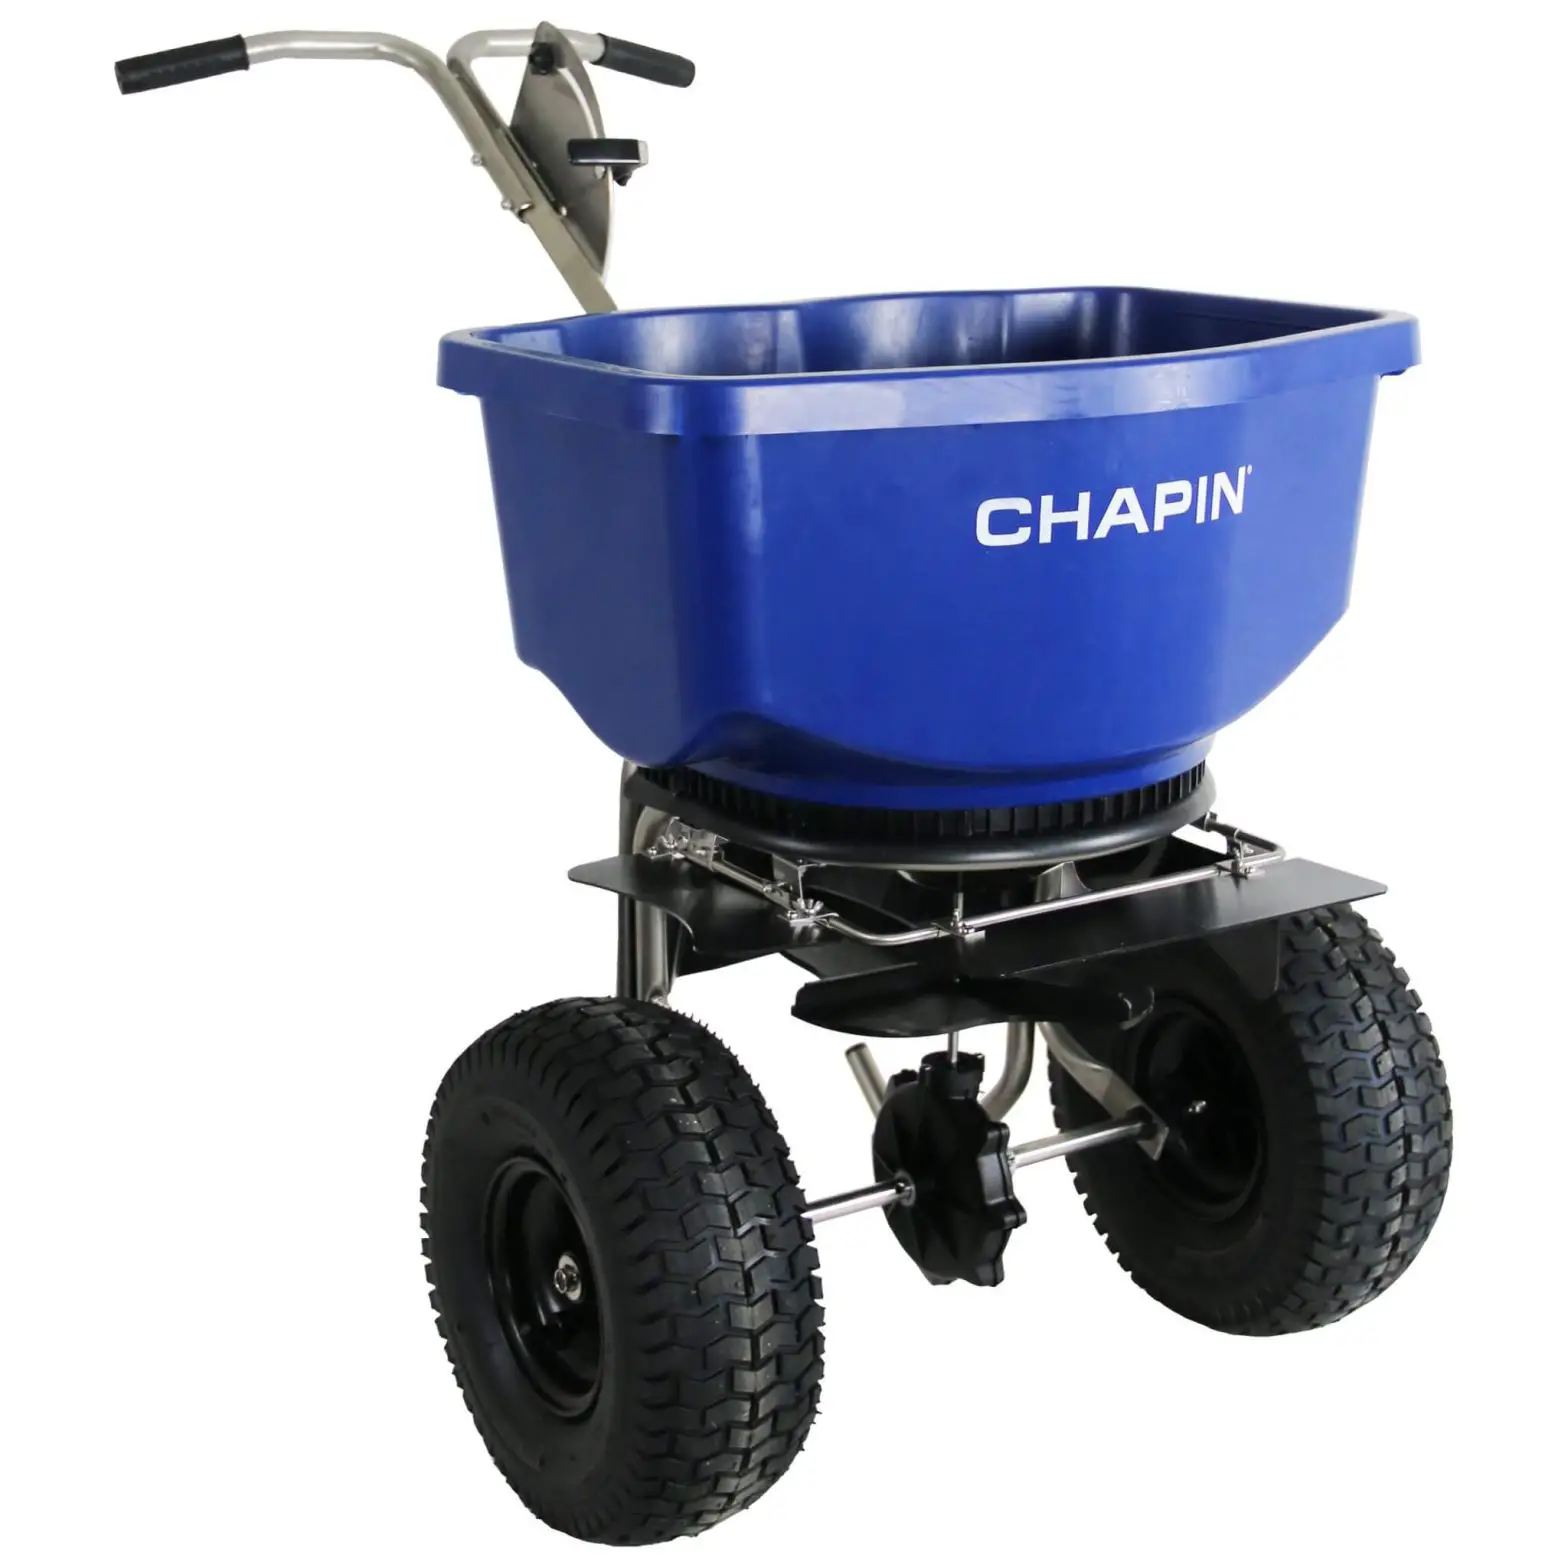

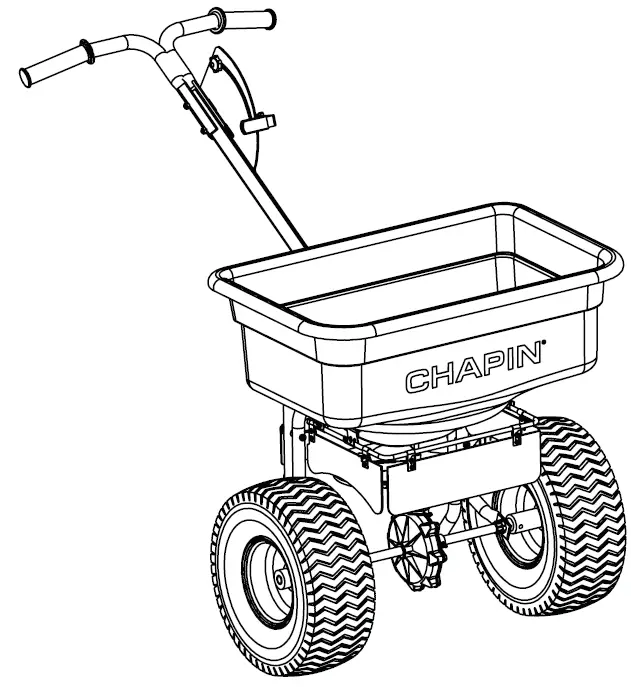
CHAPIN 82400B Professional Rock Salt Spreader
WARNING
Carefully Read These Instructions Before Use
IMPROPER USE OR FAILURE TO FOLLOW INSTRUCTIONS CAN RESULT IN PRODUCT FAILURE OR INJURIES. FOR SAFE USE OF THIS PRODUCT YOU MUST READ AND FOLLOW ALL INSTRUCTIONS BEFORE USING.
- Do not allow anyone to operate the broadcast spreader without proper instructions.
- Do not permit children to operate the broadcast spreader.
- Wear protective eyewear and gloves when handling and applying lawn and garden chemicals.
- Read the chemical label instructions and warnings for handling and applying the chemicals you plan to spread – application settings provided are only a guideline.
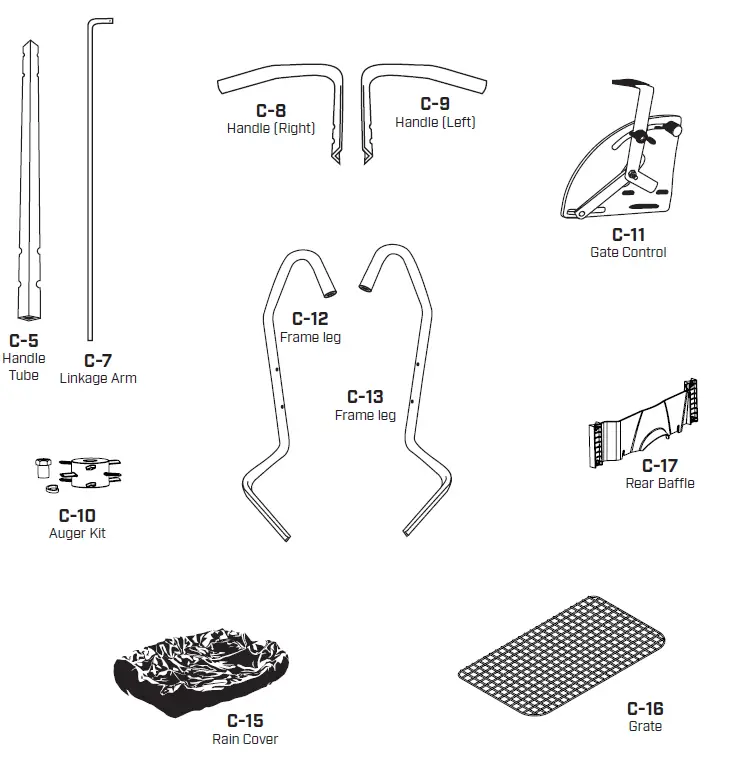
Contents:
Spreader Hardware (Actual size)
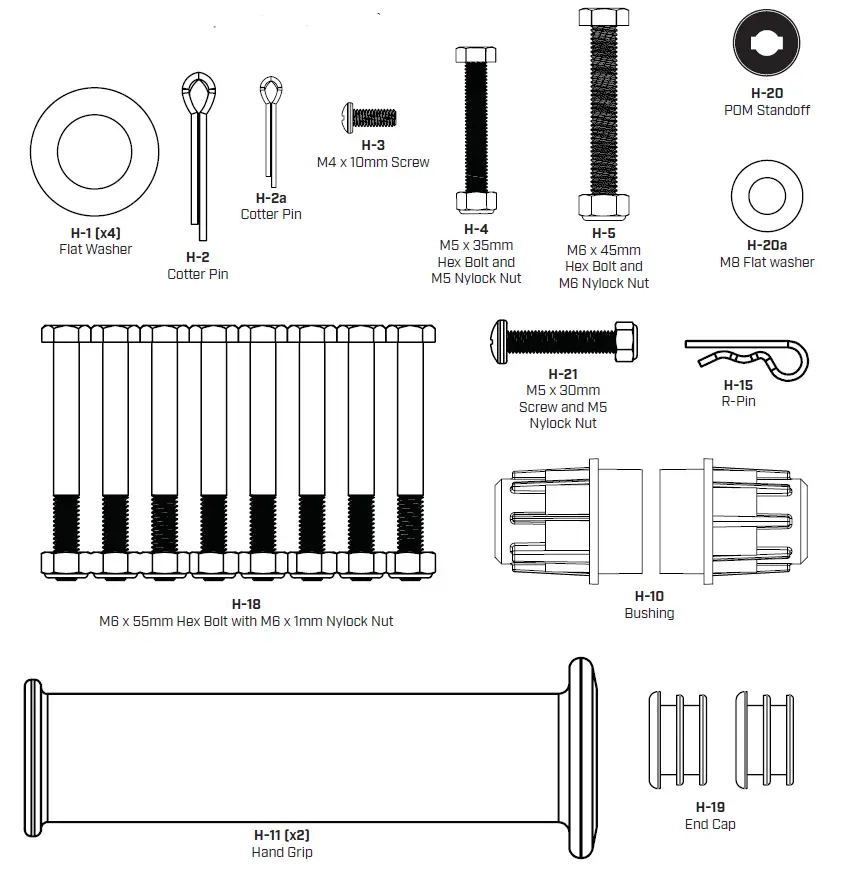
Note: Not all components shown may be needed on your model
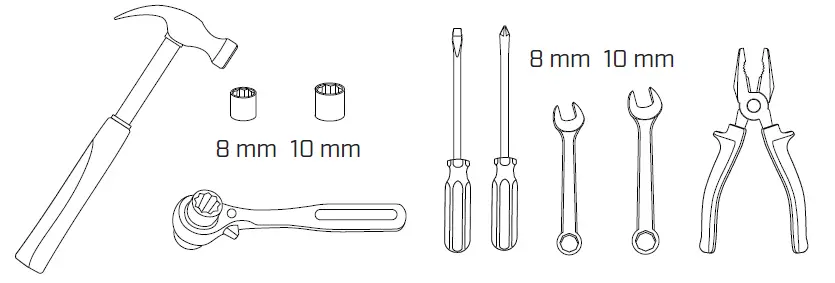
TOOLS NEEDED:
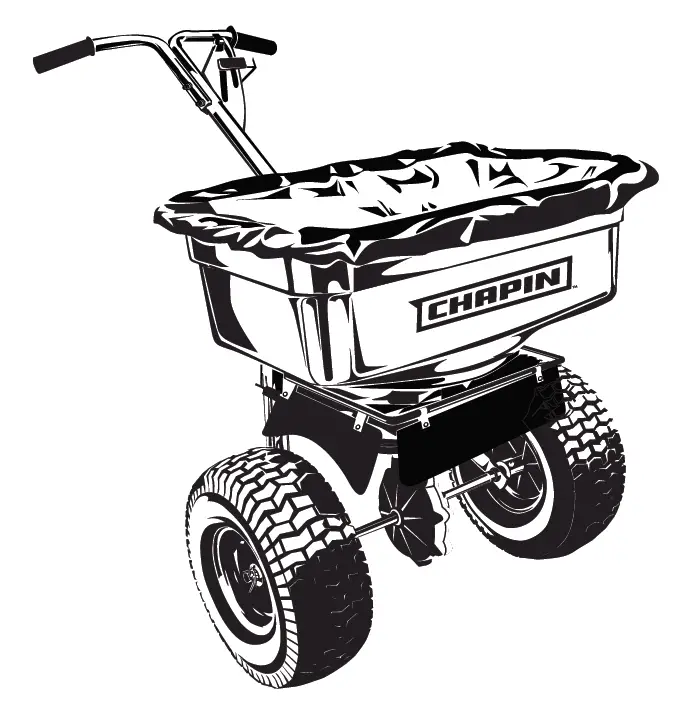
Spreader Components (Not Actual size)
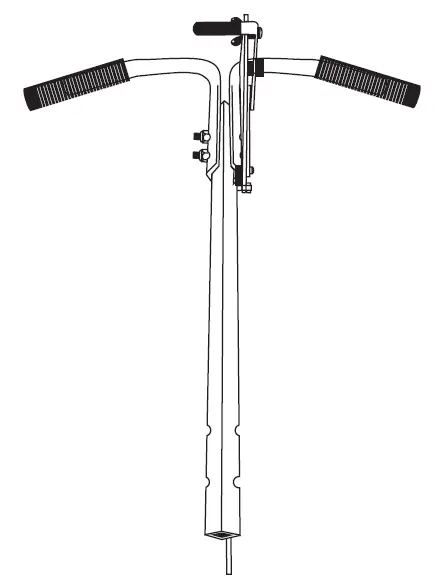
Handle Bar and Gate Control Assembly
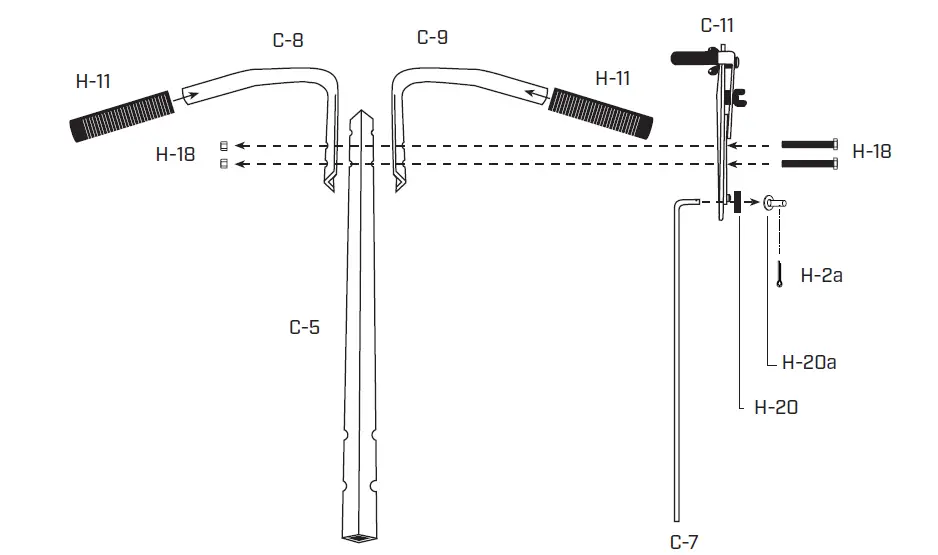
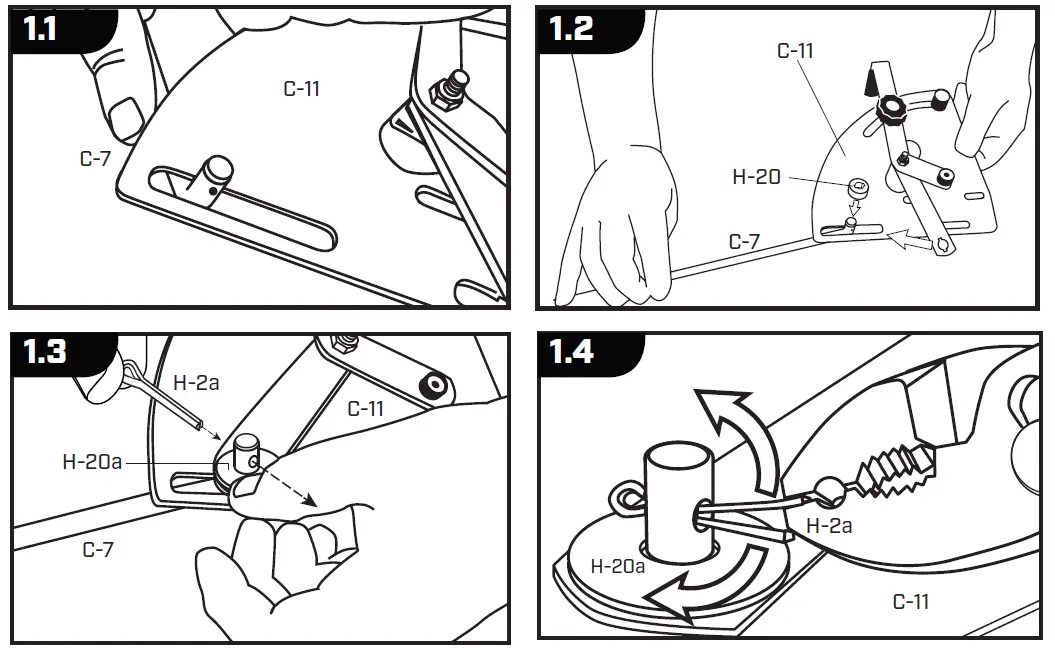

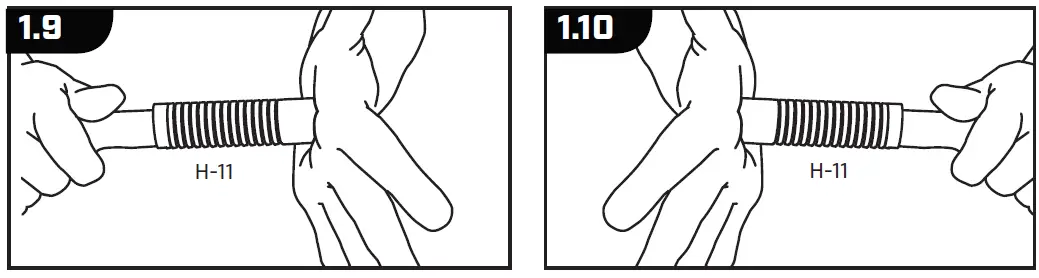
Completed Assembly
Note: When installing Gate control assembly (1.8), Tighten both screws enough to hold in place for adjustment of gate control later. (Step 4.7 – 4.10)
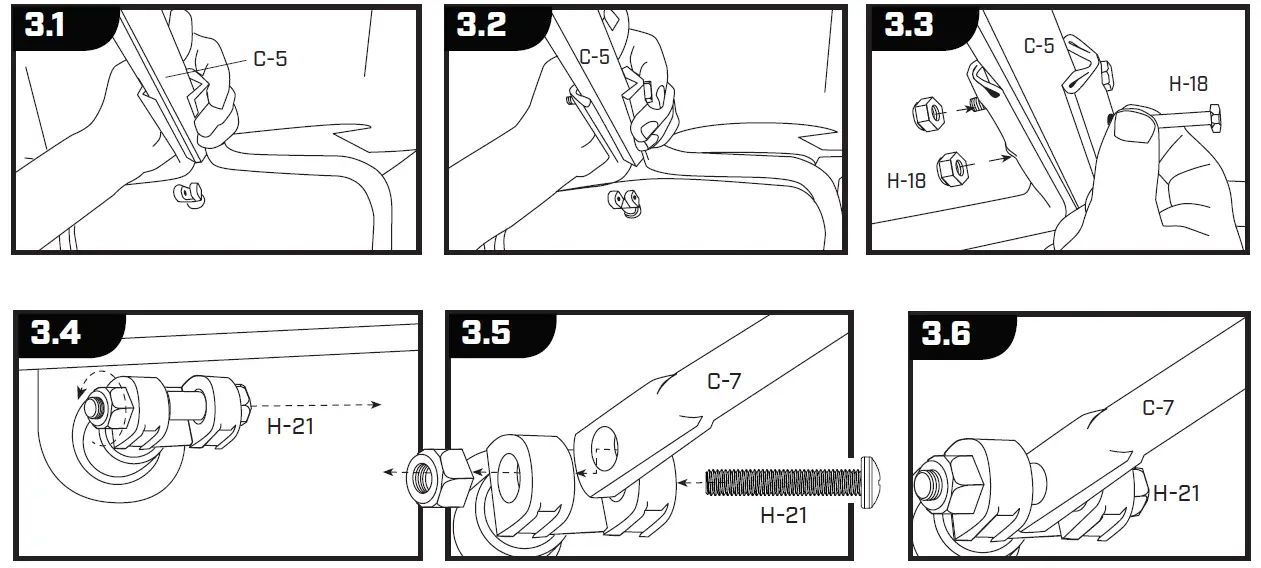
Frame Legs to Hopper assembly
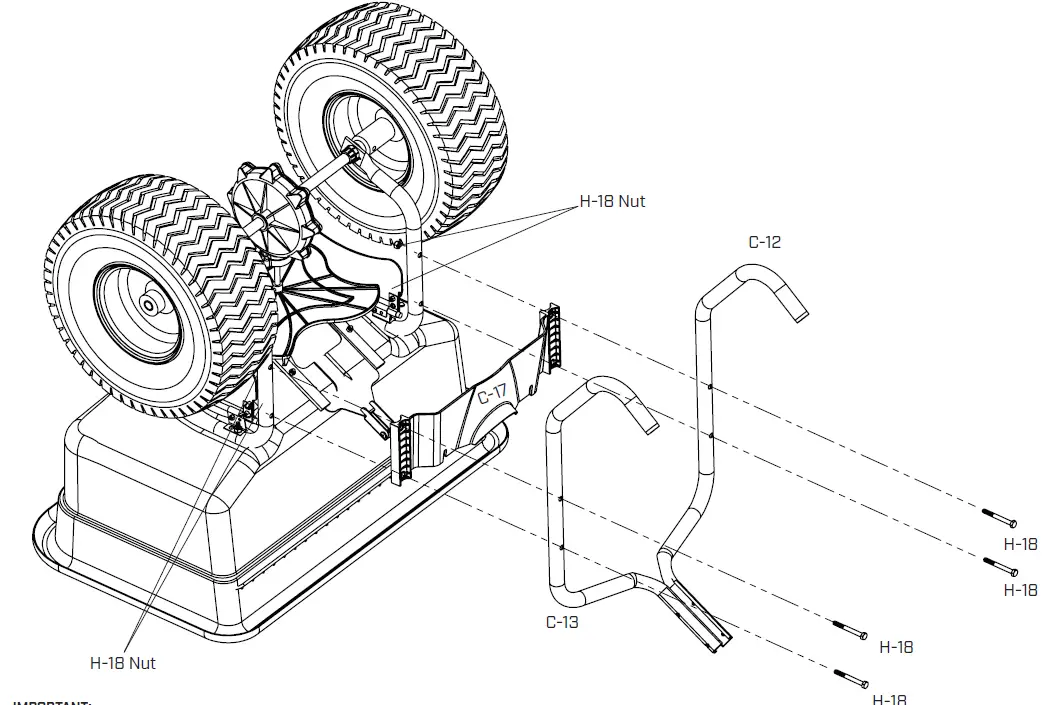
IMPORTANT:
When assembling frame components, do not fully tighten nuts and bolts. Snug them up enough to hold components loosely together during assembly. Once you have completed step 3.6 and the spreader is sitting upright on a level surface, adjust components so that the spreader legs sit evenly and the spreader does not tip. Once the spreader sits firmly on the level surface, tighten all the nuts and bolts.
Handlebar Assembly to Hopper Frame
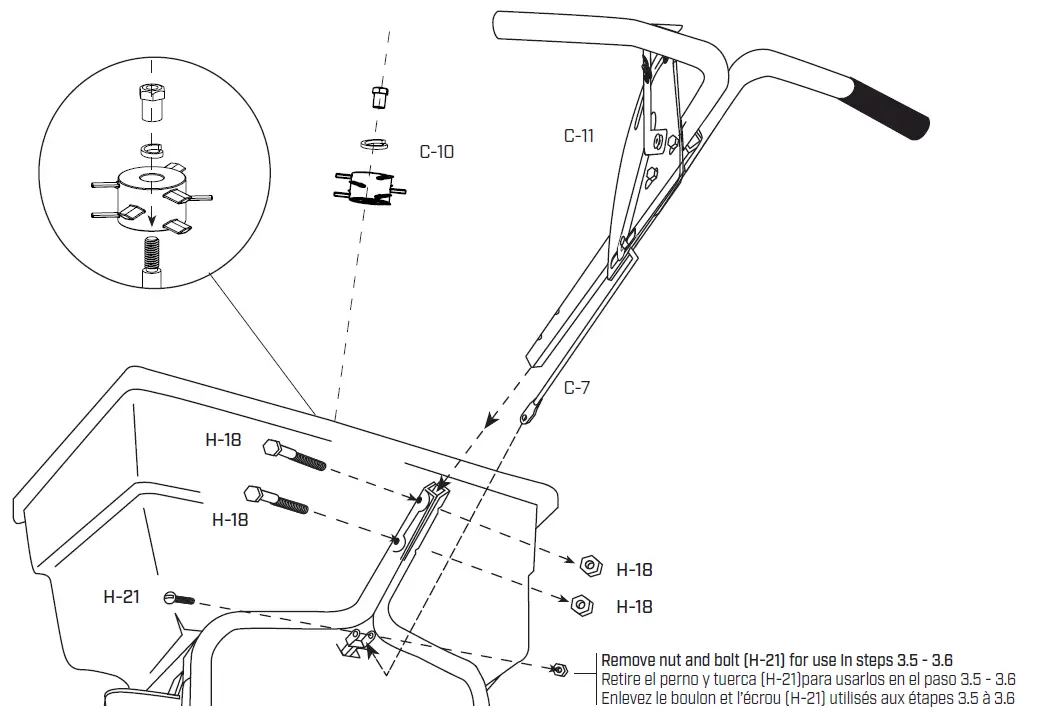
Gate Adjustment and Auger Installation (Inside Hopper)
Note: Complete steps 3.7 – 3.10 only if gate isn’t completely closed when lever is in forward position (as shown in 3.7). Once gate is adjusted, tighten both nuts on Gate Control Assembly (C-11).
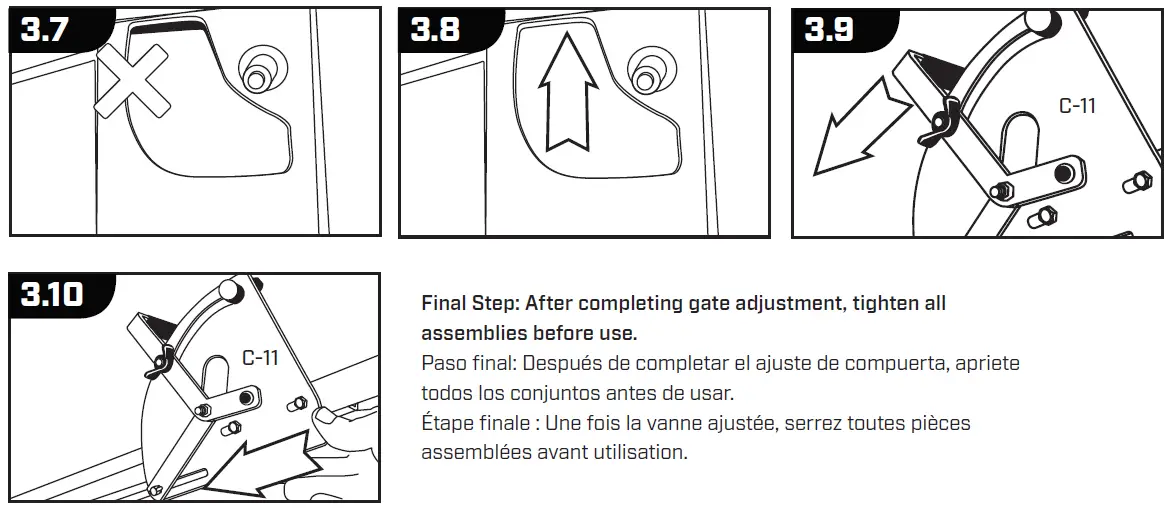
Final Step: After completing gate adjustment, tighten all assemblies before use.
Completed Assembly
STORAGE AND MAINTENANCE
• Use garden hose to wash down the spreader after each use. Some ice melt products, such as magnesium chloride will cause rusting to any stainless steel in wet conditions.
• Be careful not to direct the spray directly onto the gear box.
• It is recommended that you DO NOT use a power washer on your spreader.
• On models with a grease fitting, it’s recommended that you apply a general purpose grease at least once a month.
• Check tires for proper inflation after storing spreader for long periods of time. Inflate to 20psi.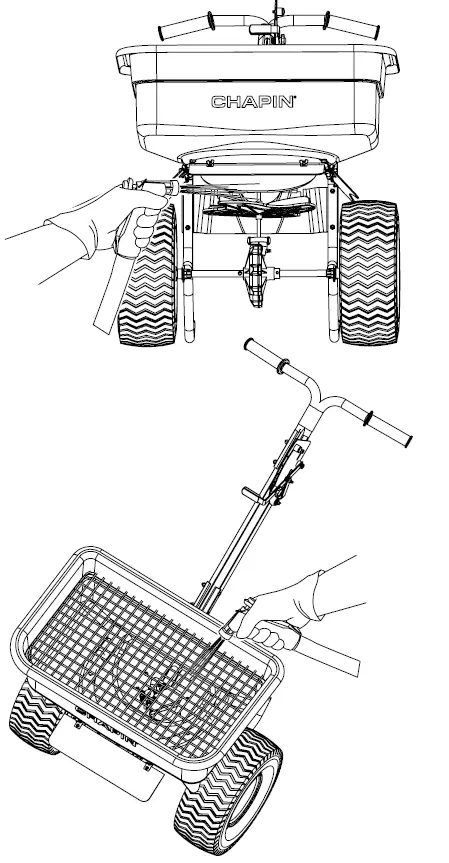
NOTE: Regardless of the material used, spreaders should be cleaned out after every use to ensure a lifetime of service. Some materials are much more aggressive oxidizers than others. Magnesium chloride will rust any stainless or mild steel materials in wet conditions in a matter of days. Calcium chloride is less aggressive but will rust stainless or mild steel in a matter of weeks. The ice melting chlorides are normally used when temperatures drop below 20 degrees Fahrenheit, or in ‘pet safe’ or ‘environmental friendly’ ice melt products. Regular rock salt or calcium, will take a couple of months to cause rust. This is why it is important to wash out after each and every use.
For detailed information on how to clean and maintain your Chapin spreader: visit https://www.youtube.com/ChapinInternationalInc
REPLACEMENT PARTS
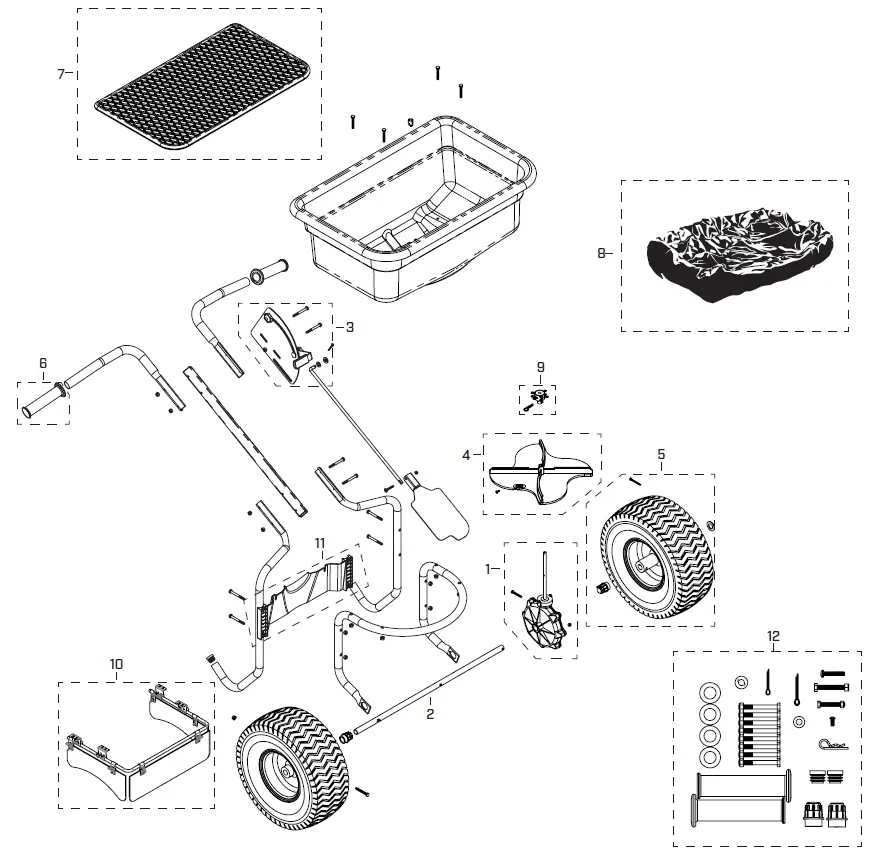
| REF NO. QTY PART NO. DESCRIPTION / DESCRIPCIÓN / DESCRIPTION | |||
| 1 | 1 | 6-9068 | Gear Box Assembly / Conjunto de la caja de engranes / Ensamble de la boîte de’engrenages |
| 2 | 1 | 6-9009 | Drive shaft w/2 bearings / Fletcha de transmisión c/2 conjinetes / Arbre de transmission avec 2 roulements |
| 3 | 1 | 6-9038 | Gate Control Assembly / Conjunto del control de la compuerta / Ensemble du contrôle de la vanne |
| 4 | 1 | 6-9058 | Impeller / impulsor / Roue à ailettes |
| 5 | 1 | 6-9015 | Wheels w/hardware / Ruedas C/herrajes / Roues avec matériel (14” /35.5cm) – 100 LB. |
| 6 | 1 | 6-9062 | Handle Grips / Cubiertas de manijas / Prises de poignées |
| 7 | 1 | 6-9053 | Grate / Parrilla / Grille |
| 8 | 1 | 6-9054 | Rain Cover / Cubierta para lluvia / Couverture protectrice contre la pluie |
| 9 | 1 | 6-9067 | Auger Kit / Taladro / Foreuse |
| 10 | 1 | 6-9025 | Salt Baffles / deflectores de la sal / Cloisons de sel |
| 11 | 1 | 6-9050 | Rear Baffle / Bafle posterior / Cloison arrière |
| 12 | 1 | 6-9093 | Hardware Kit / Bolsa de herrajes / Sac de matériel |
P.O. Box 549 700 Ellicott St.
Batavia, NY 14021-0549 U.S.A.
1-800-950-4458 www.chapinmfg.com
© 2021 Chapin International, Inc.
Due to our ongoing product improvement process, product specifications may change without notice.


