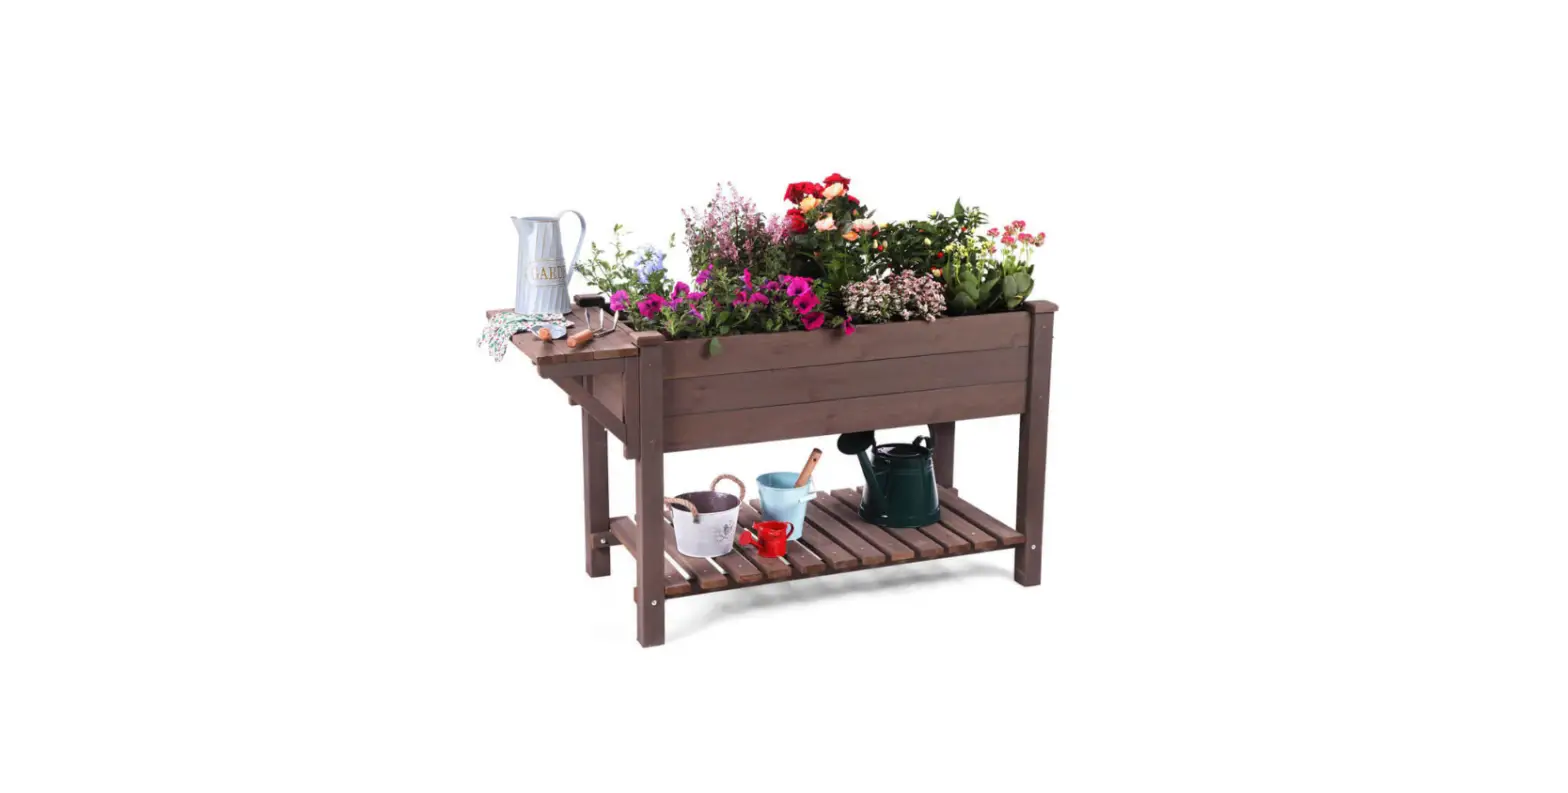
aivituvin GUT02 Raised Garden Bed with Large Storage Shelf

NOTICE
Please retain these instructions for future reference.
- Firmly secure all bolts,screws and knobs before use.
- Reconfirm that all bolts,screws,and knobs are secure every 90 days.
- Fasten screws loosely during initial assembly. Do not fully tighten screws until the item is completely assembled.
- Do not use or store this item in the proximity of open flame or flammable/combustible chemicals.
- Be aware that some parts are heavy and have sharp edges.
- Be aware that moving parts can injure,crush and cut.
- If any parts are missing,broken,damaged,or worn,stop using this product until repairs are made and/or factory replacement parts are installed.
- Do not use this item in a way inconsistent with the manufacturer’ s instructions as this could void the product warranty.
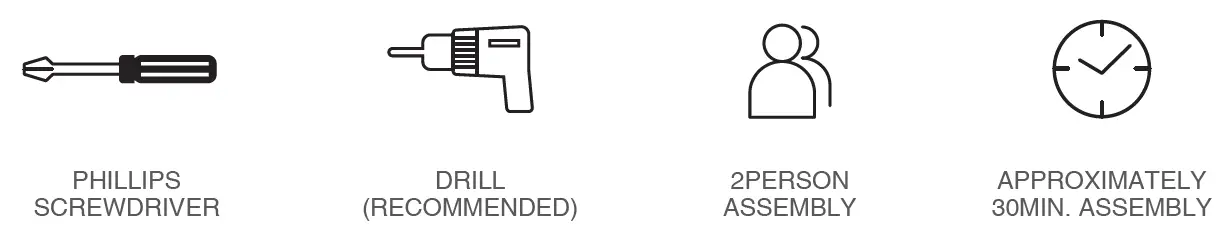
TOOLS REQUIRED
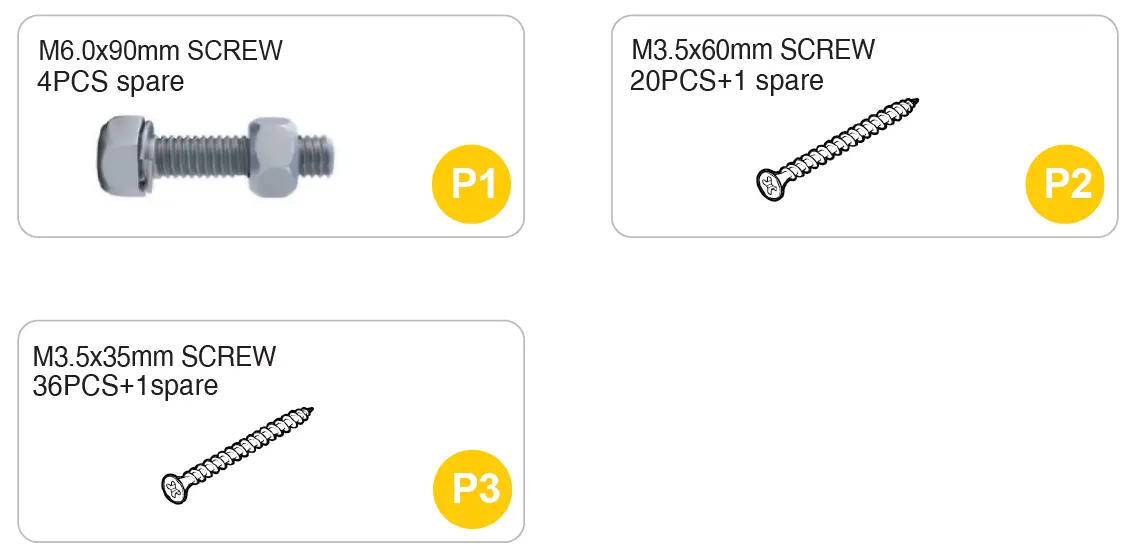
HARDWARE
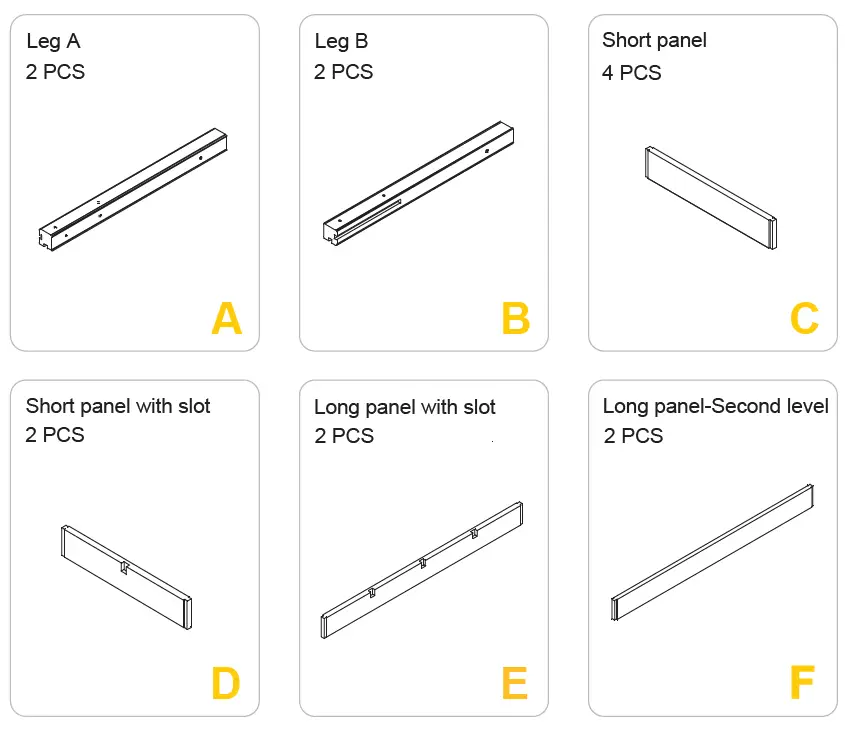
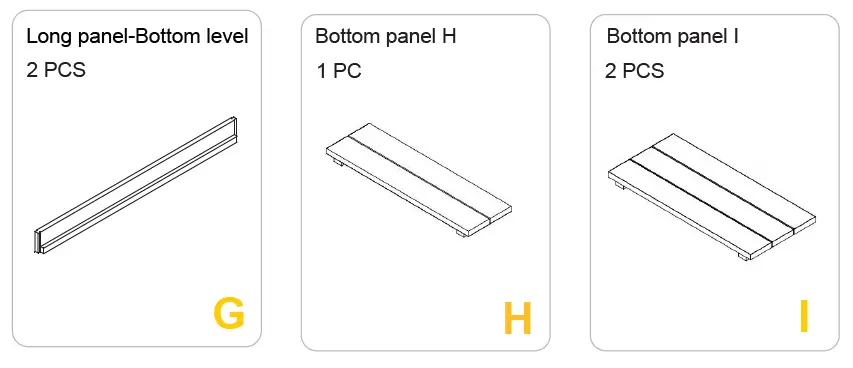
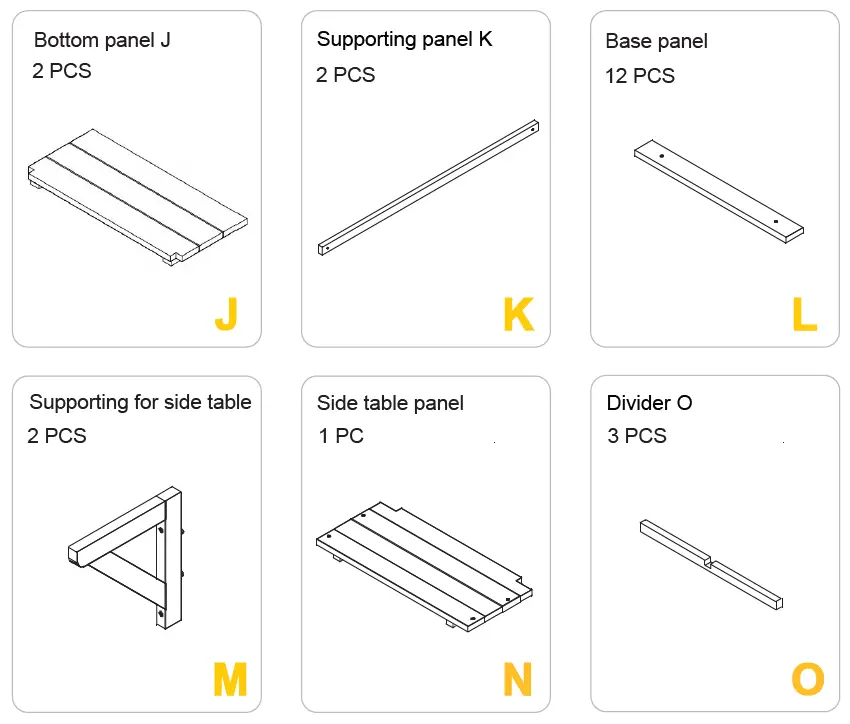
PARTS


PRODUCT ASSEMBLY
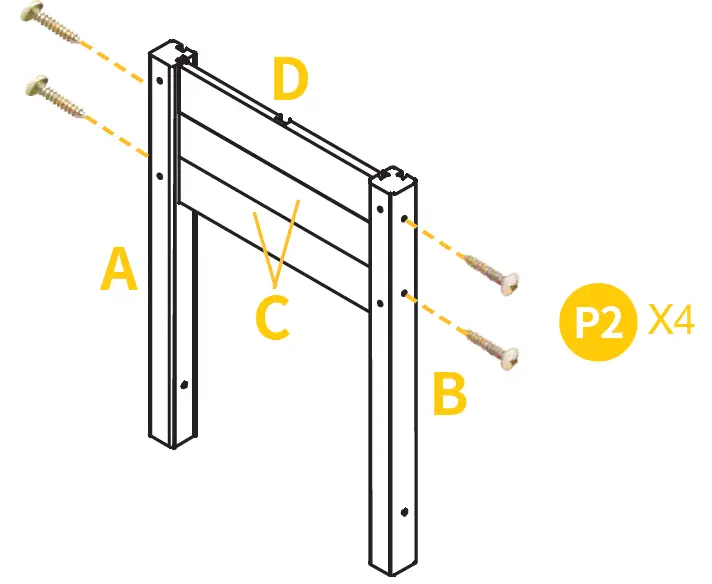
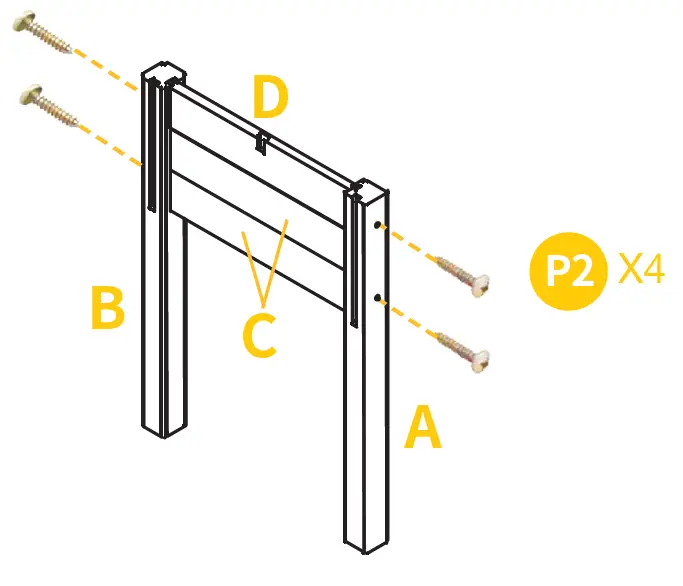
- Slide two Part C and one Part D short panels into Part A & Part B legs
- Secure panels with P2X4.

- Secure panels with P2X4.
- Repeat to build another set of legs

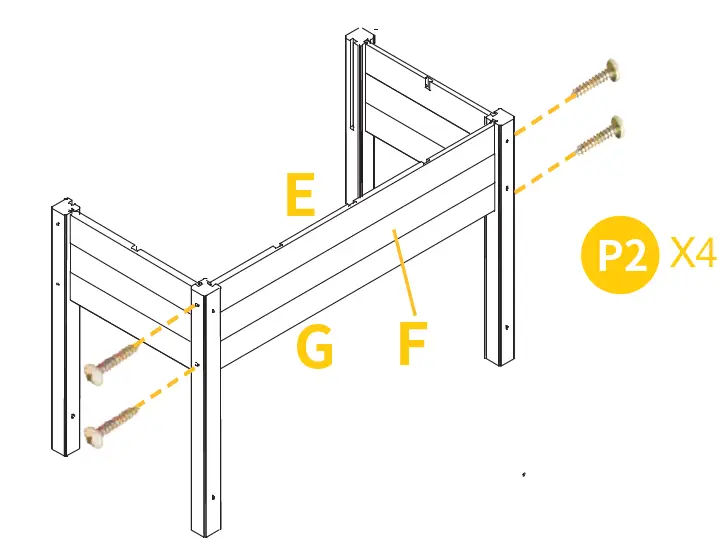
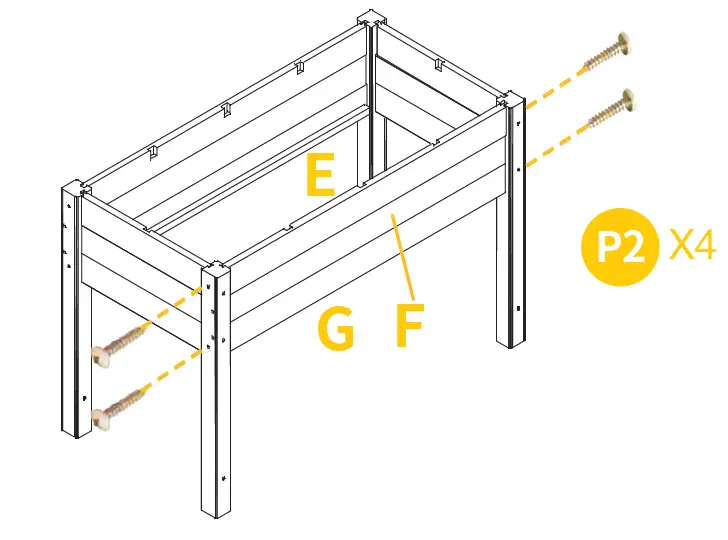
- Slide a Part G, Part F,Part E orderly into the legs.Secure panels with P2X4

- Repeat on the other side.

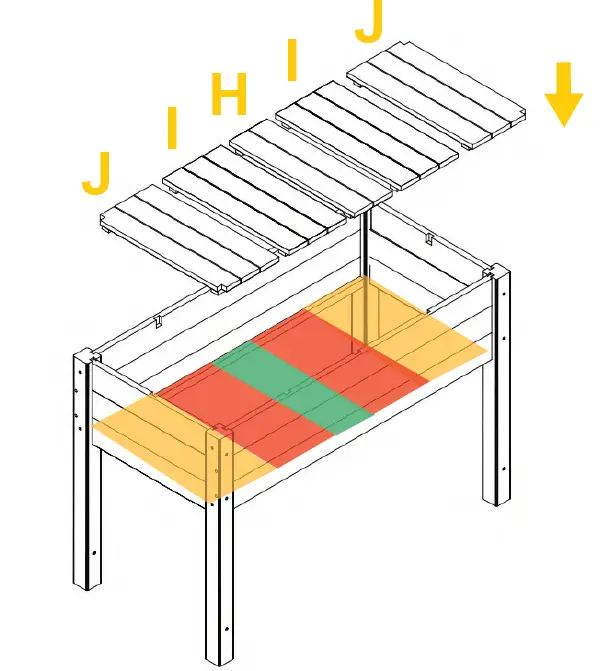
- Insert two Part J and one Part H,two Part I bottom panels.

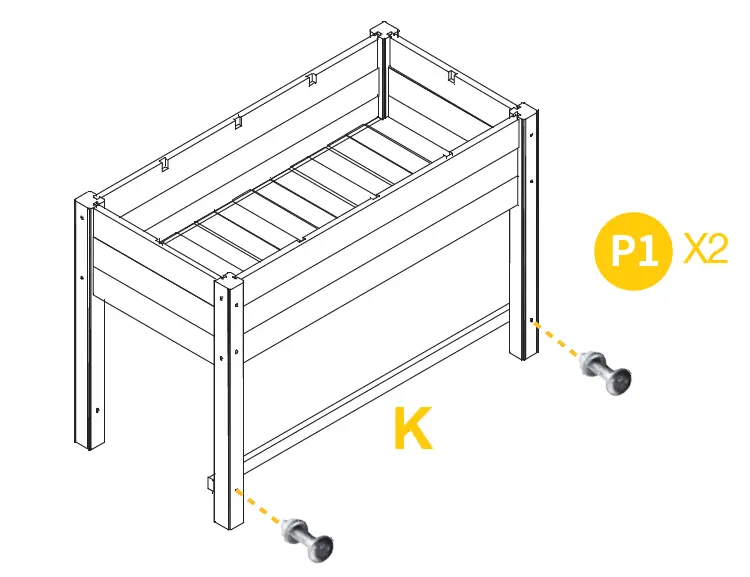
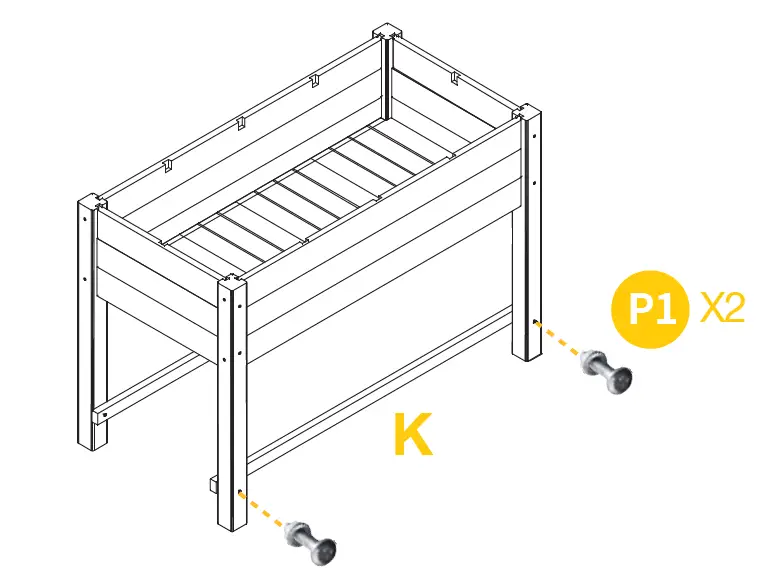
- Attach Part K to legs with bolt P1X2

- Repeat on the other side

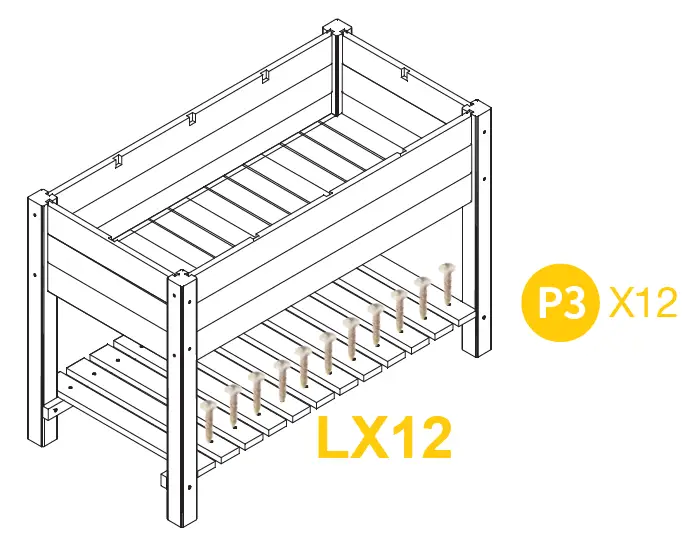
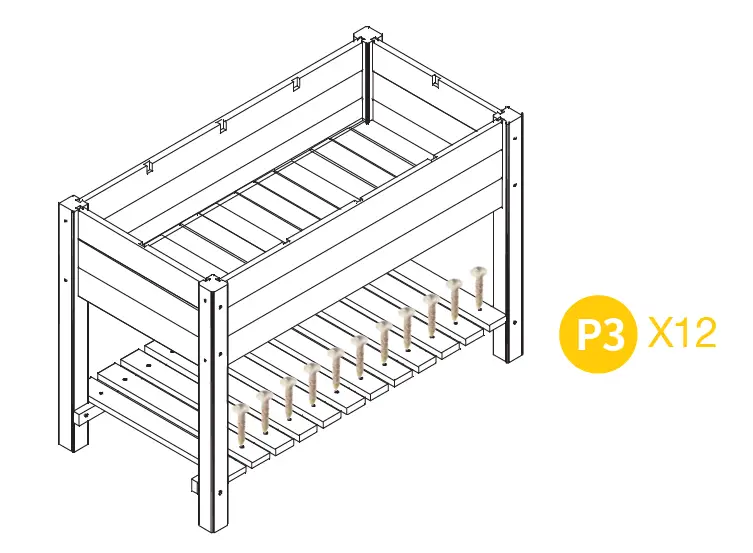
- Attach Part L to Part K with P3X12

- Screw P3X12 on the other side.

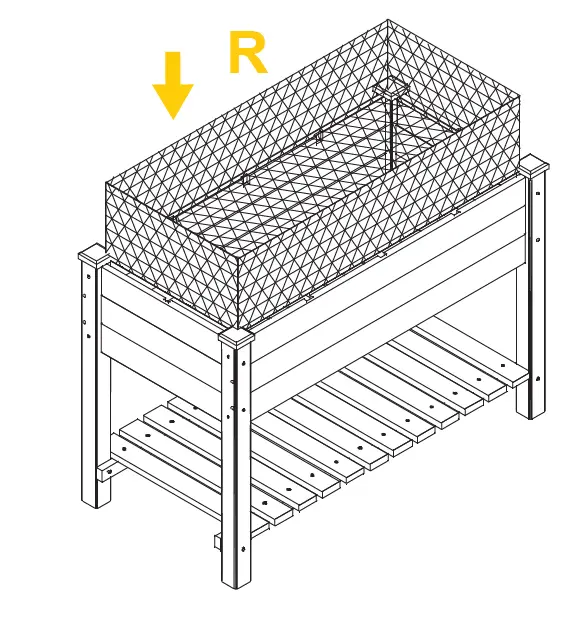
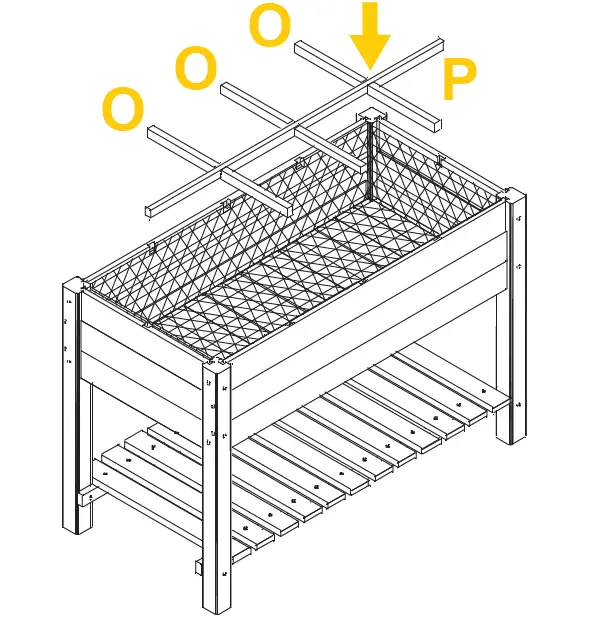
- Insert the Part R inner lining

- Stuck in divider one Part P and three Part O into the slots.

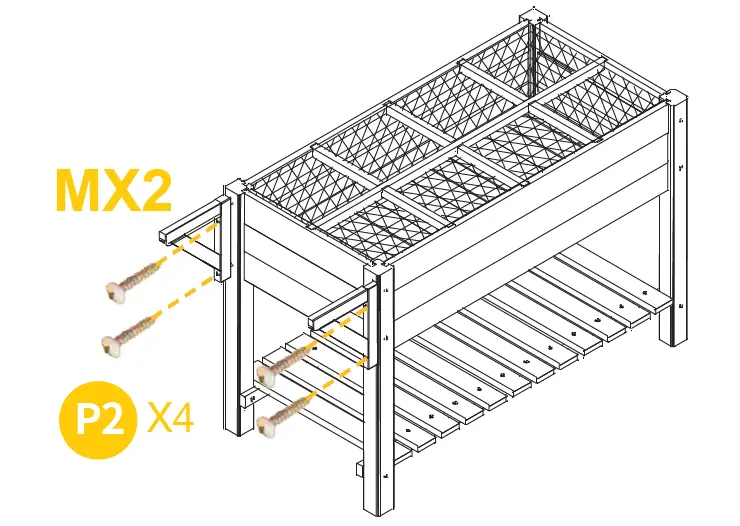
- Attach two Part M to with P2X4.
- The side table can be assemble on left/right side either. Both pre-drilled are in cluded

- The side table can be assemble on left/right side either. Both pre-drilled are in cluded
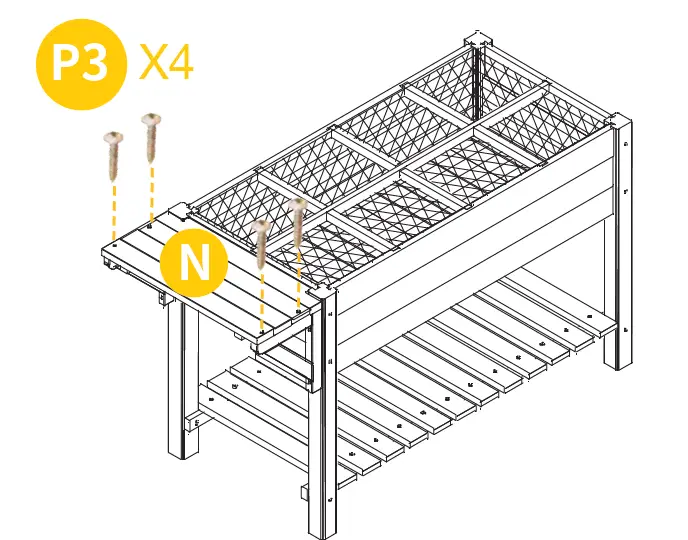
- Attach Part N to the Part M with P3X4.
- The side table can be assemble on left/right side either. Both pre-dilled holes are included

- The side table can be assemble on left/right side either. Both pre-dilled holes are included
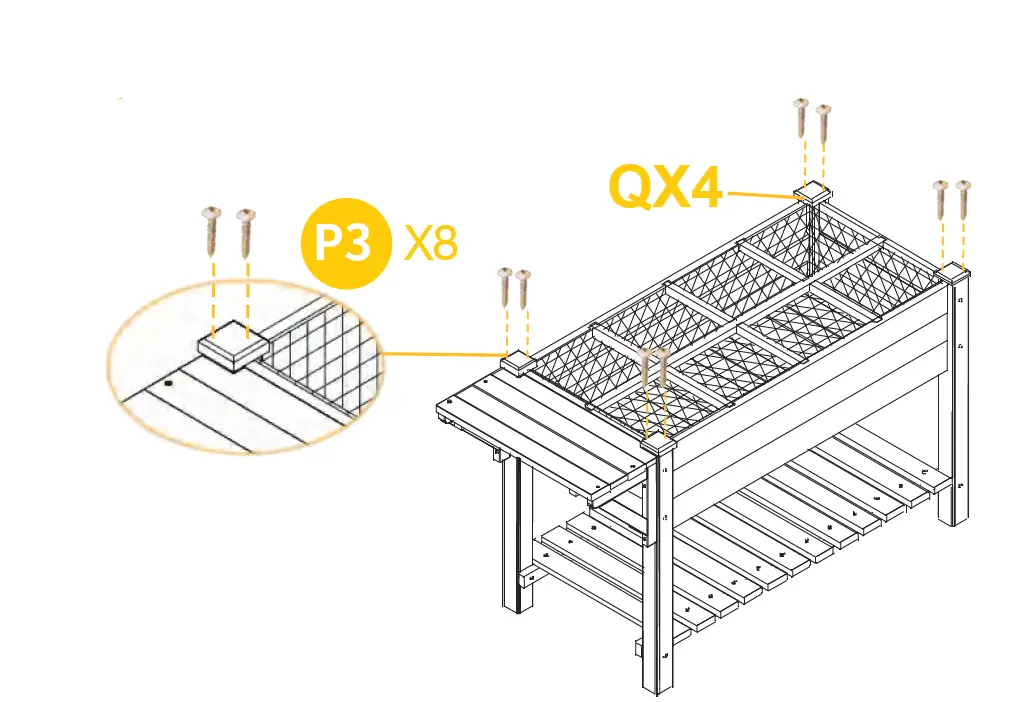
- Attach four Part Q leg ends with P3X8

WARNING
Manufacturer and seller expressly disclaim any and all liability for personal injury, property damage or loss, whether direct , indirect, or incidental, resulting from the incorrect attachment, improper use, inadequate, or neglect of this product


