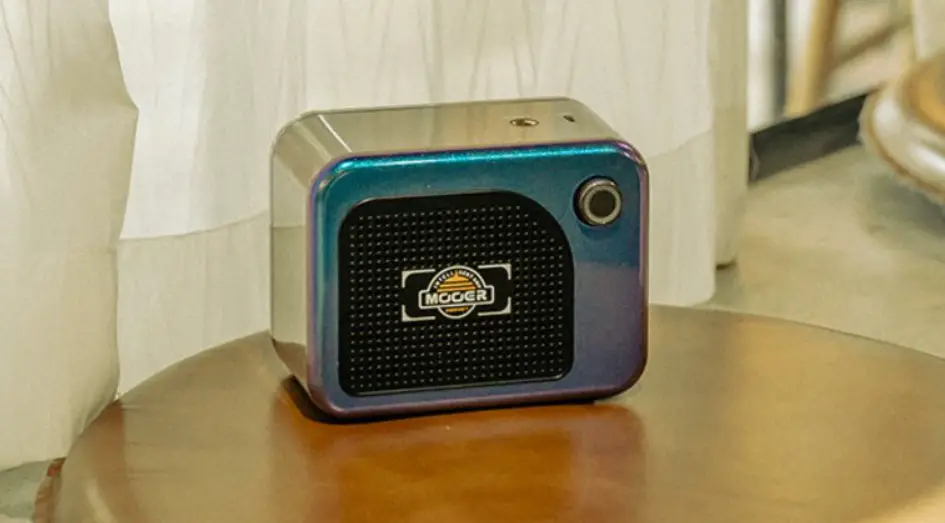
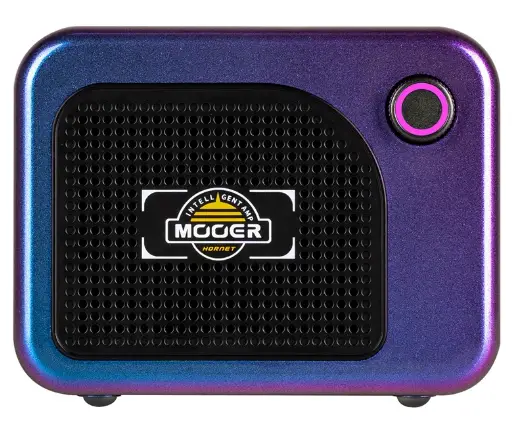
MOOER Hornet 05i Intelligent Amplifier
Product Information
The Hornet05i is an amplifier that can be used with a guitar or other audio device. It features 10 preset banks, each with 4 preset patches, and 40 preset patches in total. The amplifier can be connected to a mobile device via Bluetooth and controlled using the MOOERiAMPApp. The SuperKnob can be used to turn on the device, adjust the volume, switch between preset patches, and access the tuner. The amplifier should be kept away from direct sunlight, extreme temperature or humidity, excessive dust or dirt, magnetic fields, high humidity or moisture, and strong vibrations or shocks.
Product Usage Instructions
- Before setting up the connection, always turn off the power of the amplifier and other devices to avoid malfunction and unexpected damage. Also, before moving the amplifier, ensure it is powered off and disconnected from the other device. If the amplifier is idle for a long time, power off the amplifier and unplug the power supply. Do not use the amplifier during an electrical storm; power off the device and unplug the power cord from the socket.
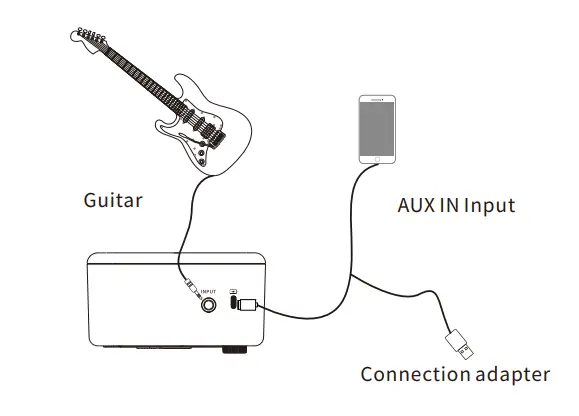
- To use the Hornet05i with a guitar or other audio device, connect your instrument to the INPUT of the amplifier. Rotate the SuperKnob clockwise to adjust the volume level. To connect to a mobile device via Bluetooth, open the menu of your mobile device and search for Hornet05iAudio in the Bluetooth list for connecting. After the connection is set up successfully, you can play the audio track from your mobile device via the Hornet05i directly.
- To switch between preset patches in the currently selected bank, press the SuperKnob. To access the tuner, press and hold the SuperKnob for 2 seconds. The LED will turn yellow. Then, tune the guitar via the iAMPApp. Press and hold the SuperKnob for 2 seconds again to quit the tuner mode.
- To use the MOOERiAMPApp, download the app via Google Play or Appstore. Open the app, select Hornet Series, and click on Search. Find your device in the list below (the default name is Hornet05i). Wait for a few seconds to set up the connection until it is connected successfully. If you haven’t used the MOOERiAMPApp before, please register a new account for use. You can log into the MOOERCloud to download and share tones from users from all over the world via the account.
- To select a preset patch, click on the preset area to open the preset list. Click on one of the preset patches to select it. Click on the effect module, select an effect type in the list below, and drag the parameter bar to adjust the parameters of the current effect. Click on the effect module again to turn on/off the currently selected module. Press and hold the module to drag it to a different position of the effect chain. Click on the to save the changes.
- To upload/download the preset from Cloud, ensure that you have registered an iAMP account and logged in for use. To download, click on the icon on the top-left corner, select Cloud, select a music type, and click on PLAY to have a try of it. If you are satisfied with it, click on the download icon and select the storing slot for download. To upload, select a preset patch, click on the icon in the top-left corner, select UPLOAD, fill in the information of the preset, then confirm uploading.
PRECAUTIONS
Power Supply
Please connect the DC POWER Supply to an AC outlet of the correct voltage. Please be sure to use only an AC adapter that supplies 7.8V (±5%) DC, center negative, 2000mA current draw. Unplug the AC power adapter when not in use or during electrical storms.
Connections
Always turn off the power of the amplifier and other devices before setting up the connection to avoid malfunction and unexpected damage. In addition, before you move the amplifier, please ensure the amplifier is powered off, and disconnect it from the other device. Please power off the amplifier, and unplug the power supply, if the amplifier is idle for a long time. Please do not use the amplifier during an electrical storm, power off the device and unplug the power cord from the socket.
Location
To avoid deformation, discoloration, or other serious damage, do not expose this unit to the following conditions:
- Direct sunlight
- Extreme temperature or humidity
- Excessive dusty or dirty location
- Magnetic fields
- High humidity or moisture
- Strong vibrations or shocks
Cleaning
Clean only with a soft, dry cloth. If necessary, slightly moisten the cloth. Do not use abrasive cleaners, cleaning alcohol, paint thinners, wax, solvents, cleaning fluids, or chemical-impregnated wiping cloths.
Operation
- Please do not toggle the switch, rotate the knob heavily.
- Please do not let the paper scrap, metal debris, or other sundries falls inside the unit.
- Please do not let the unit fall from a high level, push, or strike the unit heavily.
- Please do not modify the unit without authorization.
- For repairing service, please contact the MOOER support team for more information.
Features
- Digital modelling amplifier based on the MOOER Intelligent AMP system.
- 52 amp models created with MNRS technology, and 49 classic and experimental effects.
- 5-watt D class amplifier with a two-inch loudspeakers.
- 40 drum machine varieties and 10 metronomes.
- 80-second looper that can sync with the drum machine.
- Comes with tuner for tuning your instrument easily.
- Rechargeable battery with up to 5 hours battery life.
- Specialized MOOER iAMP APP for complete effectsediting, firmware updates, and the ability to upload/download tones from MOOER Cloud.
- Support for wireless footswitch control.
- Bluetooth 5.0 high quality audio input for audio playback or practice.
- USB-C port for high-quality audio recording and playback.
Layout
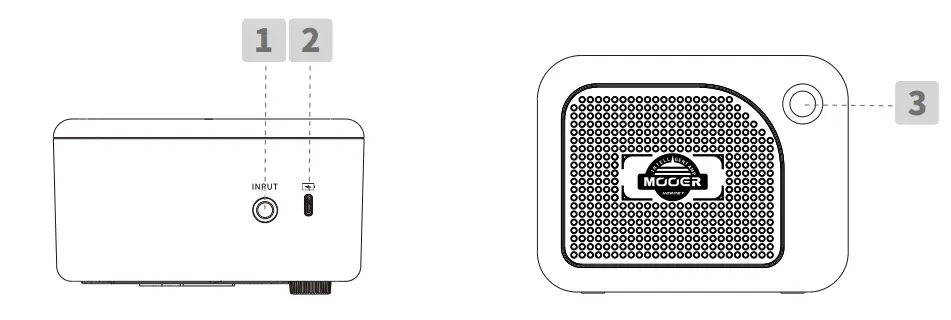
- INPUT
6.35mm TS instrument input jack for connecting to guitar or any other electric instrument. - USB-C
Charging port/OTG port for audio direct recording, and audio playback via the smart mobile device.
Notes: The USB port is designed for direct recording via your mobile device. It cannot play the role of professional audio interface for low latency recording. If you would like to use it in the DAW on the Windows platform, ASIO audio drivers are needed, which could lead to compatibility issues. - Super Knob
Rotate the knob to the far-left position to turn On/Off the amplifier. When the amplifier is powered On, rotate the knob clockwise to turn up the volume level; rotate the knob ounter clockwise to turn down the volume level.
Press the knob to switch between 4 preset patches (The color of the knob LED will indicate the currently selected preset.). The knob LED will turn RED when the battery life is low, please charge the amplifier in time.
Connection
Quick Start
- Power On
Rotate the Super Knob clockwise until “Click″ to turn On the device. The LED knob will blink and then boot up. - Set up connection
Connect your instrument to the INPUT of Hornet 05i. Rotate the Super Knob clockwise to get the proper volume level. - Bluetooth
Open the menu of your mobile device, and search for “Hornet 05i Audio″ in the Bluetooth list for connecting. After the connection is set up successfully, you can play the audio track from your mobile device via the Hornet 05i directly.
Instructions
- Switch the preset
Hornet 05i includes 10 preset banks, each bank has 4 preset patches, and 40 preset patches in total. Without connecting to iAMP App, the user can press the Super Knob to switch between 4 preset patches in the currently selected bank. - Tuner
Press and hold the Super Knob for 2 seconds to access the tuner. The LED will turn yellow. Then the user can tune the guitar via the iAMP App. Press and hold the Super Knob for 2 seconds again to quit the tuner mode.
MOOER iAMP App
- Download the MOOER iAMP App
Please download the MOOER iAMP App via Google Play or Appstore - Connection
Open the MOOER iAMP App, select “Hornet Series″, and click on “Search″. Find your device in the list below (The default name is “Hornet 05i″). Wait for a few seconds to set up the connection until it is connected successfully. - Registration
Please register a new account for use if you have not used the MOOER iAMP App before. You can log in to the MOOER Cloud to download and share tones from users from all over the world via the account. - Preset selection/edition/saving
Press the click on the preset area to open the preset list. Click on one of the preset patches to select it.
Click on the effect module, select an effect type in the list below, and drag the parameter bar to adjust the parameters of the current effect. Click on the effect module again to turn On/Off the currently selected module.
Press and hold the module to drag it to a different position of the effect chain.
Click on the saving icon to save the changes.
 - Upload/download the preset from Cloud
Please ensure that you have registered a iAMP account and login for use.
Download: Click on the icon on the top-left corner, select Cloud, select a music type, and click on “PLA7″ to have a try of it. If you are satisfied with it, click on the download icon, and select the storing slot for download.
Upload: Select a preset patch, click on the icon in the top-left corner, select UPLOAD, fill in the information of the preset, then confirm uploading. - Firmware update
Hornet 05i supports firmware updates via the App. When the new version of firmware is released (connect your device with the App), the firmware update reminder will pop up when you open the App for use. Click to confirm firmware updating. The device will boot to update mode, please wait for a few minutes until the update is complete. - Factory reset
Click on the icon on the top-left corner, and select SETTING-VERSION to reset the device to factory setting, all the user settings and preset patches will be clear.
MOOER F4 Wireless footswitch
Hornet 05i supports MOOER F4 wireless footswitch for control function expansion, including preset switching, drum machine/looper control, tuner, and tap tempo.
Paring
Please pair the wireless footswitch with the App for the first time of using.
Turn on the F4, press and hold the footswitch A and C to enter the pairing mode, and the LED of F4 will start to blink.
Open the iAMP App, and click the icon to start pairing. When the pairing is complete, the screen of F4 will show the number of current selected preset patches.
Preset switching
Press the footswitch A/B/C/D to switch between four presets in the current selected preset bank. Press the A & B footswitches to scroll up in the preset banks; press the C & D footswitches to scroll down in the preset banks.
TAP TEMPO
When the delay module is On, the footswitch LED will blink according to the delay time. Press the footswitch of the current selected preset patch multi-time to set up the delay time directly.
TUNER
Press and hold any of the footswitches to enter tuner mode. The App will switch to the TUNER page automatically, or you can utilize the screen of the footswitch directly for tuning. The left part of the screen shows the note name and the right part of the screen shows the pitch status. O for standard, rotating anticlockwise for being flat, rotating clockwise for being sharp.
Drum machine/looper
Hornet 05i has the integrated 80-second looper and the 40-groove drum machine. The looper can synth with the drum machine for use. Utilizing the wireless footswitch for a better control experience.
Looper & drum mode: In the preset select mode, press the footswitch B & C simultaneously to enter looper & drum mode, the screen of the footswitch will show“ LD”. Press the footswitch B & C again to quit.
Control: The footswitch A and B for looper control. A: REC/PLAY/DUB; B: STOP/press and hold for clear.
The footswitch C and D for the drum machine control. C: Tap tempo function of the drum machine, and press it for multi-time to set up the speed of the drum machine; D: Play/stop the drum machine. Press and hold the footswitch C to enter the drum grooves selection mode. The screen will show the number of currently selected grooves. Press C or D to go through to select a groove.
The groove select mode will quit automatically after being idle for a few seconds.
OTG Recording/Playback
The USB-C port of Hornet 05i supports OTG function via connecting to the mobile device (smartphone/tablet) for direct recording/audio playback. Please purchase the correct OTG cable (USB-A female to Lightning/USB-C port), then combine it with the original USB-A to USB-C cable which comes with the device for use.
TONE
| seriarl number | name | OD serial number |
| 1 | Pure Boost | Based on MOOER@ Pure Boost effect |
| 2 | Flex Boost | Based on MOOER@ Flex Boost effect |
| 3 | Tube DR | Based on BK.Butler@ Tubedriver overdrive effect |
| 4 | 808 | Based on Ibanez@ TS808 overdrive effect |
| 5 | Gold Clon | Based on Klon Centaur@ Gold overdrive effect |
| 6 | D-Drive | Based on Barber@ Direct Drive overdrive effect |
| 7 | Jimmy OD | Based on Paul Cochrane@ Timmy OD overdrive effect |
| 8 | Full DR | Based on Fulltone@ Fulldrive 2 overdrive effect |
| 9 | Beebee Pre | Based on Xotic BB Preamp Overdrive distortion effect |
| 10 | Beebee | Based on Xotic@ BB Plus overdrive distortion effect |
| 11 | Black Rat | Based on Proco@ Rat distortion effect |
| 12 | Grey Faze | Based on Dunlop@ Fuzz Face fuzz effect |
| 13 | Muffy | Based on EH@ Big Muff fuzz effect |
| 14 | Full DS | Based on Fulltone GT-500 distortion effect |
| 15 | Shred | Based on Marshall@ Shred Master distortion effect |
| 16 | Riet | Based on Suhr@ Riot distortion effect |
| 18 | MTL Zone | Based on Boss@ Metal Zone effect |
| 19 | MTL Master | Based on Digitech METAL MASTER distortion effect |
| 20 | Obsessive Dist | Based on Fulltone@ OCD distortion effect |
| seriarl number | name | AMP serial number |
| 1 | 65 US DLX | Based on Fender@65 Delux Reverb preamp module |
| 2 | 65 US TW | Based on Fender@65 Twin Reverb preamp module |
| 3 | 59 US Bass | Based on Fender@ 59 Bassman preamp module |
| 4 5 | US Sonic | Based on Fender@ Super Sonic preamp module |
| 6 | US Blue CL | Based on Fender@ Blues Deluxe preamp module clean channel |
| 7 | US Blue OD | Based on Fender@ Blues Deluxe preamp module overdrive channel |
| 8 | E 650 CL | Based on ENGL@ E650 preamp module clean channel |
| 9 10 | Powerbell CL | Based on ENGL@ E645 preamp module clean channel |
| 11 | Blacknight CL | Based on ENGL@ E650 Blackmore Signature preamp module clean channel |
| 12 | Mark III CL | Based on Mesa/Boogie@ Mark III preamp module clean channel |
| 13 | Mark V CL | Based on Mesa/Boogie@ Mark V preamp module clean channel |
| 14 15 | Tri Rec CL | Based on Mesa/Boogie@ Triple Rectifier preamp module clean channel |
| 16 | Rockvrb CL Dr Zee 18 JR | Based on Orange® Rockerverb Clean Channel Based on Orange@ Dr Zee 18 JR preamp module clean channel |
| 17 | Dr Zee Reck | Based on DR.Z@ Z-Wreck preamp module |
| 18 | Jet 100H CL | Based on Jet City@ JCA100H preamp module clean channel |
| 19 | Jazz 120 | |
| UK 30 CL | Based on Roland@ JC120 preamp module Based on Vox AC30 preamp module clean setup | |
| UK 30 OD | ||
| Based on Vox AC30 preamp module overdrive setup | ||
| seriarl number | name | AMP serial number |
| 20 | HWT 103 | Based on Hiwatt@ DR-103 preamp module |
| 21 | PV5050 CL | Based on Peavey@ 5150 preamp module clean channel |
| 22 | Regal Tone CL | Based on Tone King@ Falcon preamp module Rhythm channel |
| 23 | Regal Tone OD 1 | Based on Tone King@ Falcon preamp module Tweed channel |
| 24 | Carol CL | Based on Two Rock@ Coral preamp module clean channel |
| 25 | Cardeff | Based on Two Rock@ Cardiff preamp module |
| 26 | EV 5050 CL | Based on EVH@ 5150 preamp module clean channel |
| 27 | HT Club CL | Based on Blackstar@ HT Stage100 preamp module clean channel |
| 28 | Hugen CL | Based on Diezel@ Hagen preamp module clean channel |
| 29 | Koche OD | Based on Koch@ Powertone preamp module overdrive channel |
| 30 | J800 | Based on Marshall@ JCM800 preamp module |
| 31 | J900 | Based on Marshall@ JCM900 preamp module |
| 32 | PLX 100 | Based on Marshall@ Plexi 100 preamp module |
| 33 | E650 DS | Based on ENGL@ E650 preamp module distortion channel |
| 34 | Powerbell DS | Based on ENGL@ E645 preamp module distortion channel |
| 35 | Blacknight DS | Based on ENGL@ 650 Blackmore preamp module distortion channel |
| 36 | Mark III DS | Based on Mesa/Boogie@ Mark III preamp module distortion channel |
| 37 | Mark V DS | Based on Mesa/Boogie@ Mark V preamp module distortion channel |
| seriarl number | name | AMP serial number |
| 38 | Tri Rec DS | Based on Mesa/Boogie@ Triple Rectifier preamp module distortion channel |
| 39 | Rockvrb DS | Based on Orange@ Rockverb preamp module distortion channel |
| 40 41 | Citrus 30 | Based on Orange@ AD30 preamp module |
| 42 | Citrus 50 | Based on Orange@ AD50 preamp module |
| 43 | Slow 100 CR | Based on Soldano@ SLO 100 preamp module crunch channel |
| 44 | Slow 100 DS | Based on Soldano@ SLO100 preamp module distortion channel |
| 45 46 | Jet 100H OD | Based on Jet City@ JCA100 H preamp module overdrive channel |
| 47 | PV 5050 DS | Based on Peavey@ 5150 preamp module distortion channel |
| 48 | Regal Tone OD 2 | Based on Tone King@ Falcon preamp module Lead channel |
| 49 | Carol OD | Based on Two Rock@ Coral preamp module overdrive channel |
| 50 51 | EV 5050 DS | Based on EVH@ 5150 preamp module distortion channel |
| 52 | HT Club DS | Based on Blackstar@ HT Stage 100 preamp module distortion channel |
| Hugen OD | Based on Diezel@ Hagen preamp module overdrive channel | |
| Hugen DS | Based on Diezel@ Hagen preamp module distortion channel | |
| Koche DS | Based on Koch@ Powertone preamp module distortion channel | |
| seriarl number | name | DYNA serial number |
| 1 | NG | Based on MOOER@ Nosie Killer noise gate |
| 2 | Comp | Based on MOOER@ Blue Comp compressor effect |
| 3 | Touch Wah | Based on MOOER@ Envelope fliter effect |
| 4 | Auto Wah | Based on MOOER@ WAH auto wah effect |
| seriarl number | name | MOD serial number |
| 1 | Phaser | liquid like phaser effect |
| 2 | Step Phaser | Based on square wave phaser effect |
| 3 | Flanger | Classic flanger effect |
| 4 5 | Jet Flanger | Based on the MOOER@ JET FLANGER |
| 6 | Tremlo | Tremolo effect with periodically changing volume level |
| 7 | Stutter | Stutter effect with periodically changing volume level |
| 8 | Vibrato | Vibrato effect with periodically changing pitch |
| 9 10 | Pitch Shift | Effect for changing the pitch |
| 11 | Rotary | Rotary effect |
| 12 | Ana Chorus | Warm analog like chorus effect |
| 13 | Tri Chorus | Modern multi chorus effect |
| 14 15 | Ring | Can produce the ring like tone |
| Q-Filter | Modulation filter effect | |
| Lofi Slow Gear | Downsampling effect Slow pronunciation effect | |
| seriarl number | name | DELAY serial number |
| 1 | Digital | Clear and precise digital delay effect |
| 2 | Analog | Classic warm analog like delay |
| 3 | Real Echo | Real space like delay effect |
| 4 5 | Tape | Vintage tape delay effect |
| 6 | Mod | Delay with modulation effect |
| Reverse | Delay with reversed signal | |
| seriarl number | name | REVERB serial number |
| 1 | Room | Small room reverb |
| 2 | Hall | Concert Hall reverb |
| 3 | Plate | Studio style plate reverb |
| 4 5 | Spring | Vintage spring reverb tank |
| Mod | Reverb with modulation effect | |
Specifications
- Rates power: 5-watt class D amplifier
- Mono/Stereo: Mono
- Speaker: 1*2-inch customized full-range flat-response speaker
- Battery: 2000mAh
- Charging requirements: 5V 2A
- Duration: 4 hours (Reference from the test data in the MOOER laboratory environment)
- Num. of effects: 52 amp models, 49 effects (dynamic/distortion/modulation/reverb)
- Looper: 80-second stereo looper
- Wireless footswitch: Support
- Bluetooth: Bluetooth audio playback and App control
- USB digital audio: OTG audio recording, OTG audio playback
- Input jack: ¼″ audio input jack, 1Meg ohm
- Dimensions: 130 (D) x 104 (W) x 75.5 (H)mm
MOSER
www.mooeraudio.com
SHENZHEN MOOER AUDIO CO. LTD 6F, Unit D, Jinghang Building, Liuxian 3rd Road,
Bao’ an 71 District, Shenzhen, China. 518133
Made in China


