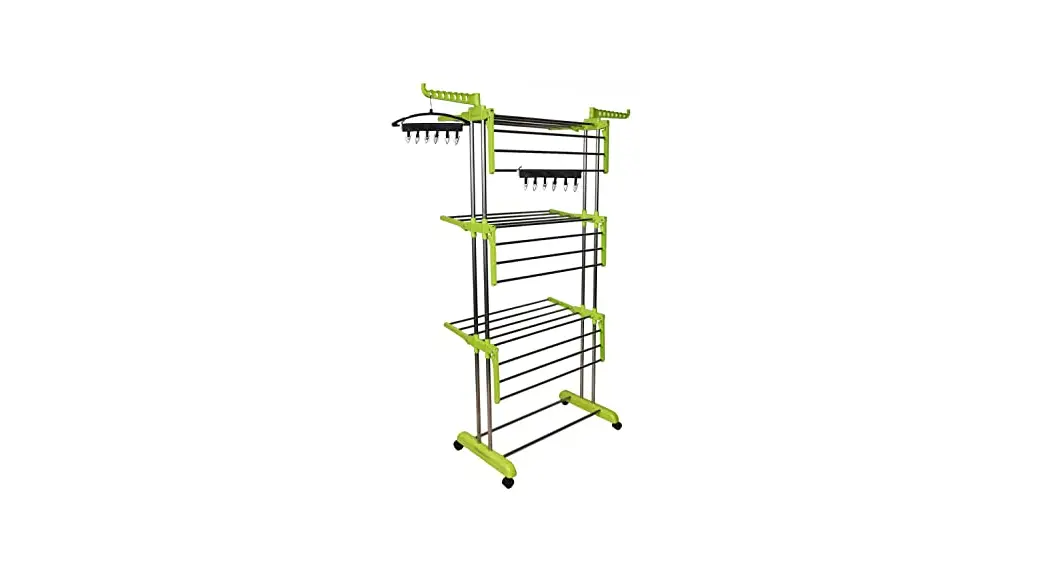
![]() 2/3 Tier Cloth Drying Stand
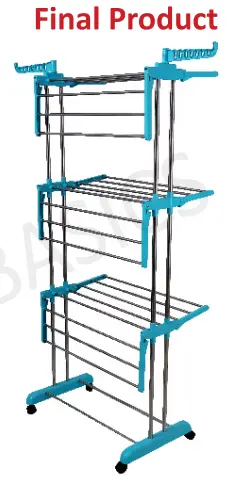
2/3 Tier Cloth Drying Stand
Steps To Install
FIND INSTALLATION STEPS AT BACK
Instruction Manual
IN THE BOX
| Parts Name | 2 Layer | 3 Layer | Reference Image |
| Base Connecting Rods (28.5 Inch) | 2 pcs | 2 pcs |  |
| Vertical Support Rods (20.5 Inch) | 8 pcs | 12 pcs |  |
| Horizontal Support Rods (27 Inch) | 2 pcs | 6 pcs |  |
| Base Parts with Attached Wheels | 2 pcs | 2 pcs | 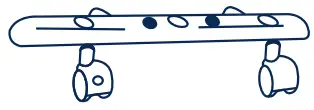 |
| Wings | 4 pcs | 6 pcs | 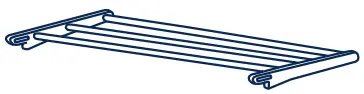 |
| Top Connectors | 2 pcs | 2 pcs |  |
| Middle Connectors | 2 pcs | 4 pcs |  |
| Hanger Holders* | 2 pcs | 2 pcs |  |
| Screw & Nuts* (For Fixing Wings) | 8+1 pcs | 12+1 pcs |
* Hanger Holders and Screw – Nuts are Kept Together in The Box.
OPEN THE CAMERA SCAN THE
QR CODE
FOR INSTALLATION VIDEP https://www.youtube.com/watch?v=GxlxWkQKF9k&t=3s
* USE A & C RODS HORIZONTALLY
* USE B RODS VERTICALLY
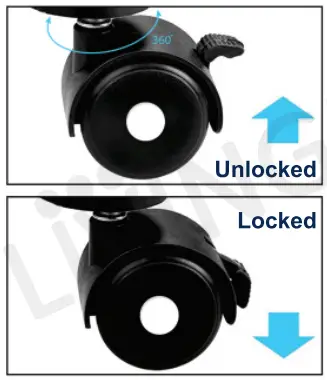
4 Rolling Castors, 2 Castors Can Be Locked.
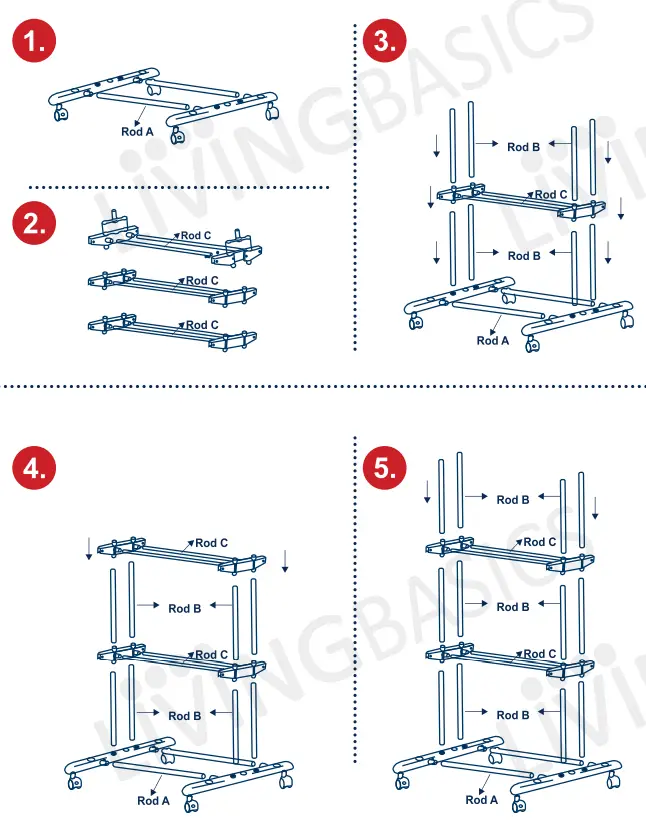
Installation Instruction
Installation Process will be same for 2 & 3 Layer.
Unpack all the items and lay them out, as you can see there isn’t much to do.
Step 1 – Grab 2 base parts and 2 pieces of ROD A and put them horizontally into the base parts and insert the RODS fully inside the slots.
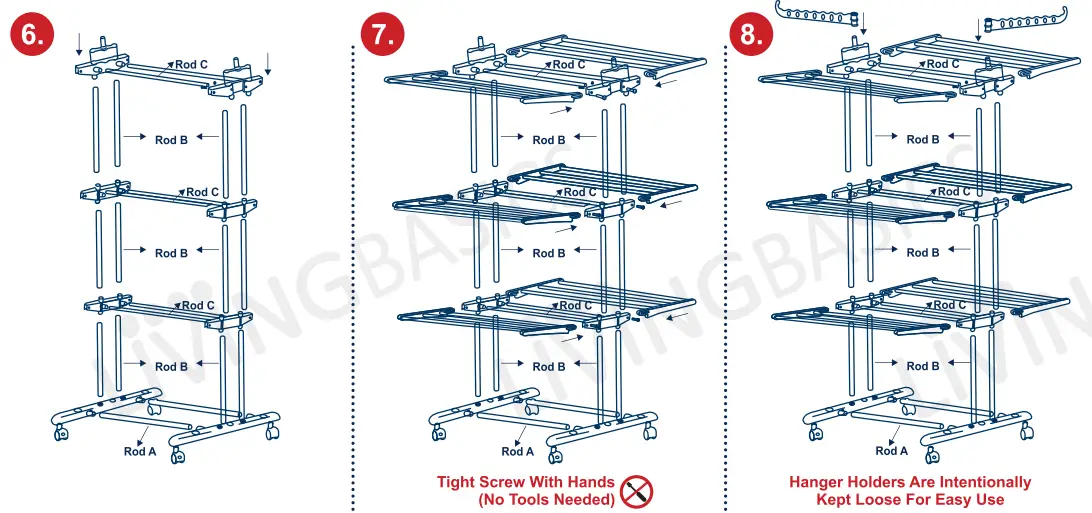
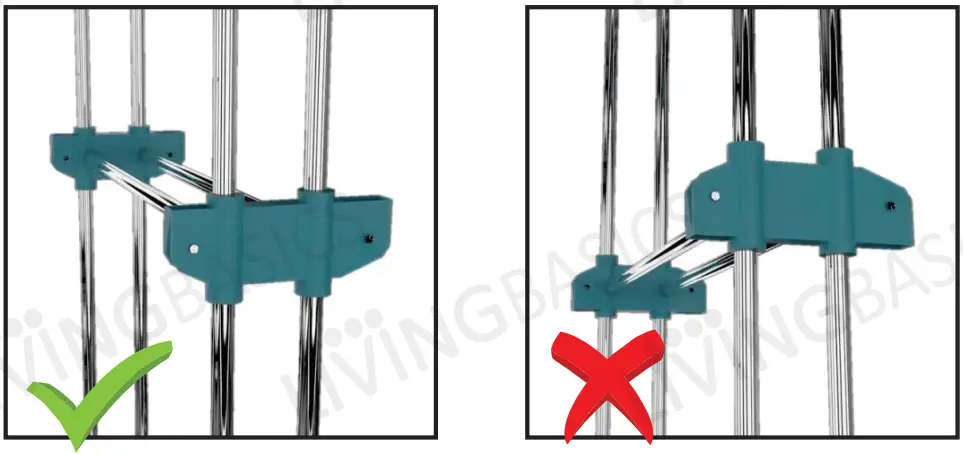
Step 2 – Now, take 2 middle connectors and 2 pieces of ROD C. Please refer to the given below Image 1 for the proper positioning of the middle connector. ROD C should now be connected horizontally with the middle connectors. Repeat the same with the other middle connectors / top connectors and ROD C.
“If ROD C are not inserted properly then wing won’t fit.”
Step 3 to 6 – Place 4 ROD B pieces vertically on the top of the base parts. After this, connect ROD B to the frame you fixed in step 2. Follow the same steps for the other ROD B and frames you created in step 2.
Step 7 – Fix the wings in place and tighten them (with your hands) using the included screws and nuts.
(Only after perfectly completing step 2, you’ll be able to fix the wings in the right direction.)
Step 8 – Take the 2 hangers and place them on the top connectors on both sides.
Note: No tools are required in this process and the cloth drying stand can be easily connected using your hands. It won’t get loose. “Using screw driver will block the movement of wings”. Simple as that! It is very easy to put together than it looks; if you have any problem, give us a call and we’ll help you out!
- How to use middle connector ?

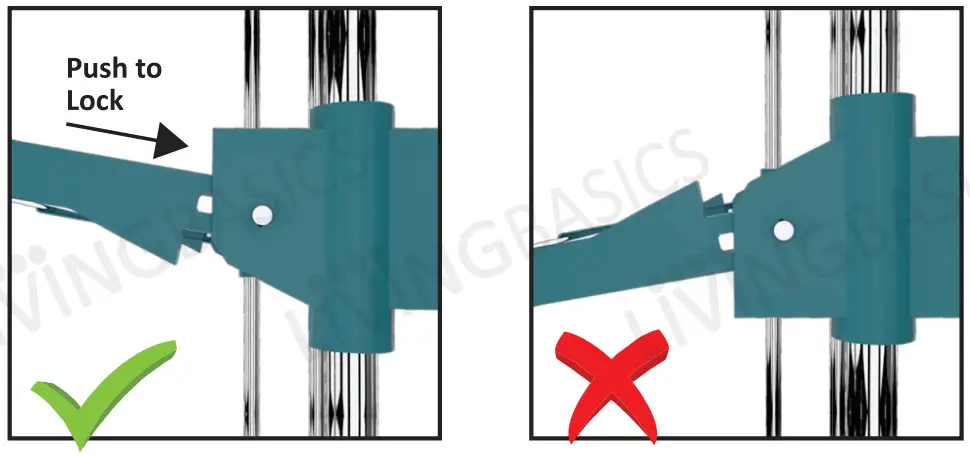
- How to lock wings ? To avoid it falling after putting clothes.


Dear Customer, If any Part is Missing or Damage Please Contact / Whatsapp at Our
Customer Care No.: +91 6262 422 422 “We Will Send That Part For Free”
Remember, we are just a call away from you If you need any help.
Customer Care: +91 6262 422 422 / [email protected] www.livingbasics.in
![]() Follow Us On :
Follow Us On :


