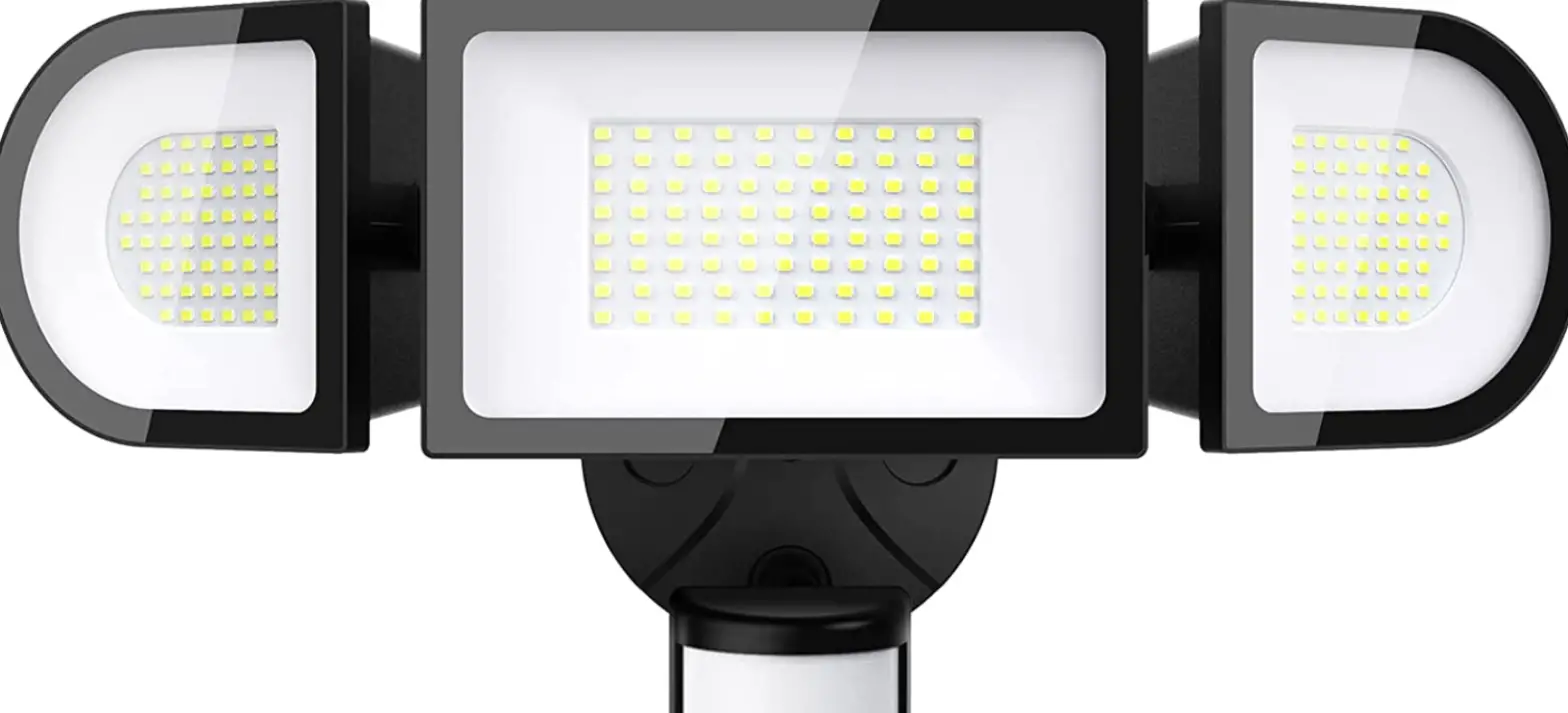
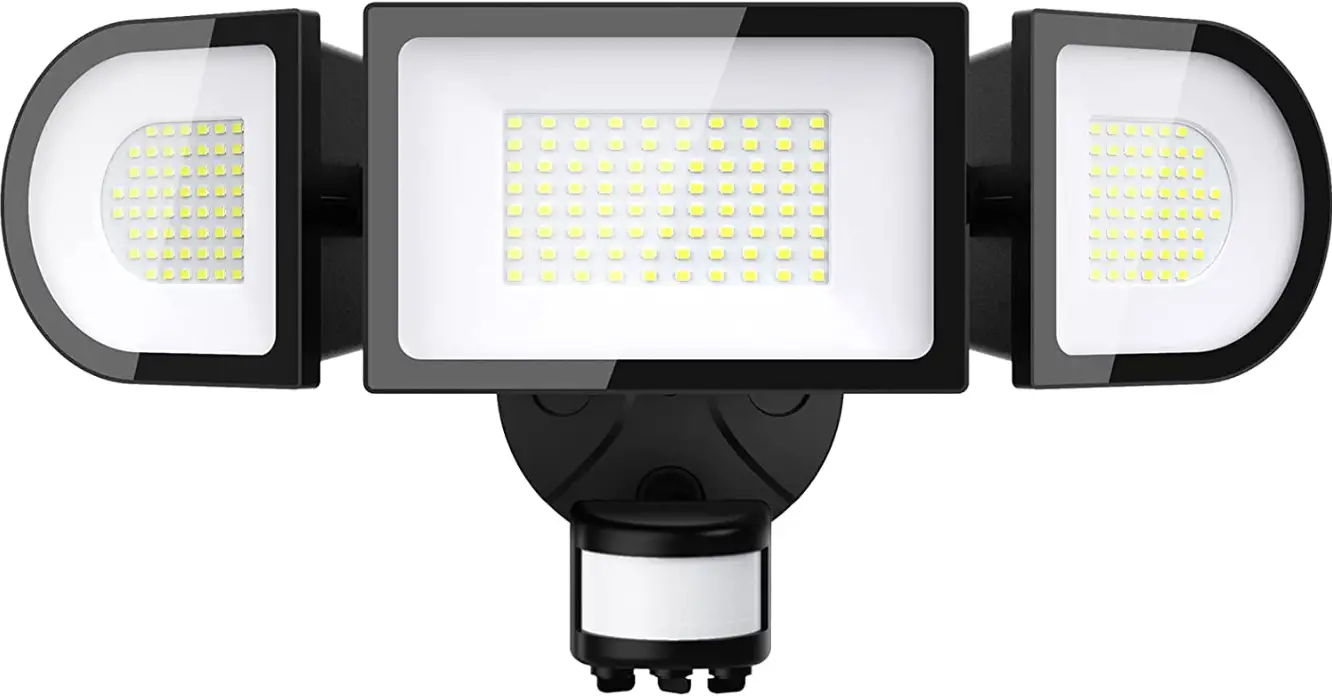
ONFORU D100WIFI LED Flood Light
SAFETY INFORMATION
Disconnect the power supply before attempting any work on the unit!
- Installing these units involves work on the mains voltage supply; installation must therefore be carried out professionally in accordance with the appliance national wiring regulations and electrical operating conditions.
- The product must be installed by a licensed professional electrician.
- Check all components for damage, do not use the product if it is damaged.
- To ensure the product can work normally, please use it in the voltage within the range on the lamp label.
- The floodlight enclosure heats up when the light is on.Please adjust the angle of the light after the power off for 10-15 minutes. Do not look into the LED light at a short range or any prolonged period(>5 min).
- Do not install the unit on (normally) flammable surfaces.
- Do not alter or change parts of the light at will, in case of the accidents such as breakage, fall, electric shock, fire, etc.
- To reduce the risk of strangulation the flexible wiring connected to this luminaire shall be effectively fixed to the wall if the wiring is within arm’s reach
- The light is IP66 waterproof, but the plug is non-waterproof. Please connect the plug indoor or connect to a socket that provides IP65 protection.
- Please use tools to adjust the lights.
- The light source of this luminaire is not replaceable; when the light source reaches its end of life the whole luminaire shall be replaced.
- Never plug the light in with wet hands in case of electric shock.
- This light is a non-dimmable product. To avoid failure, please don’t connect it with the dimming controller.
- Do not connect this light fixture to an ungrounded electrical system.
WARNING:
Installing this light in an ungrounded electrical system may cause the metal parts of the light to carry current if any wires or wire connections are damaged or loose. In this case, anyone who touches the light will receive an electric shock, resulting in injury or death.
- Be sure to use wire nuts/connectors rated for the correct gauge and number of wires used.
NOTE:
Make sure there are no exposed wire bundles outside the wire nut/connector (if applicable).
- Be careful not to damage or cut the wire insulation (covering) during installation. Do not let the wires touch any sharp edges.
- The floodlight is supplied with cable and must be terminated using a terminal block (not supplied) in a suitable IP rated enclosure (not included).
- For type Z attachments:
The external flexible cable or cord of this luminaire cannot be replaced; if the cord is
damaged, the luminaire shall be destroyed. - This equipment complies with FCC radiation exposure limits set forth for an uncontrolled environment. This equipment should be installed and operated with minimum distance 20cm between the radiator & your body.
NOTE:
FCC Warning:
Any Changes or modifications not expressly approved by the party responsible for compliance could void the user’s authority to operate the equipment.
This device complies with part 15 of the FCC Rules. Operation is subject to the following two conditions:
- This device may not cause harmful interference, and
- this device must accept any interference received, including interference that may cause undesired operation.
Note:
This equipment has been tested and found to comply with the limits for a Class B digital device, pursuant to part 15 of the FCC Rules. These limits are designed to provide reasonable protection against harmful interference in a residential installation. This equipment generates uses and can radiate radio frequency energy and, if not installed and used in accordance with the instructions, may cause harmful interference to radio communications. However, there is no guarantee that interference will not occur in a particular installation. If this equipment does cause harmful interference to radio or television reception, which can be determined by turning the equipment off and on, the user is encouraged to try to correct the interference by one or more of the following measures:
- Reorient or relocate the receiving antenna.
- Increase the separation between the equipment and receiver.
- Connect the equipment into an outlet on a circuit different from that to which the receiver is connected.
- Consult the dealer or an experienced radio/TV technician for help.
This equipment complies with FCC radiation exposure limits set forth for an uncontrolled environment. This equipment should be installed and operated with minimum distance 20cm between the radiator & your body.
PARAMETER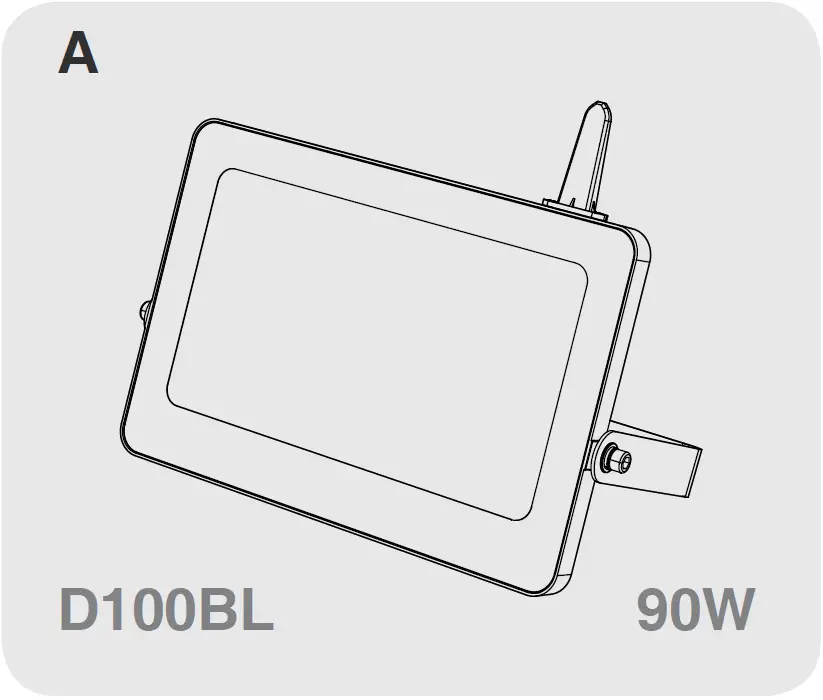
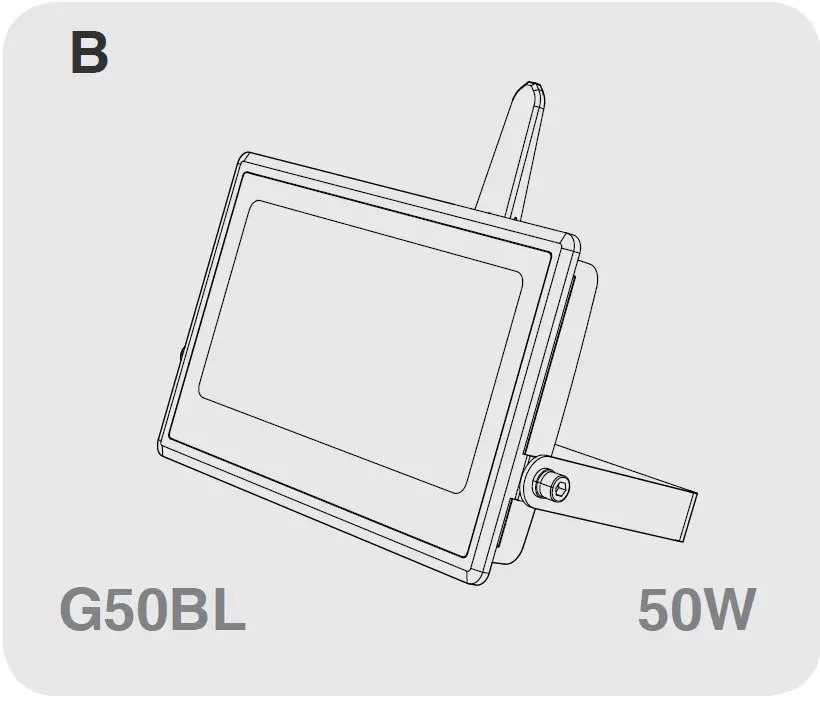
 | A-330x35x306 mm / 12.99×1.36×12.05 in B-242x39x256 mm / 9.52×1.53×10.07 in |
 | A- 1.74 kg / 3.83 lb B- 0.80 kg / 1.76 lb |
 | 100-120V ~ 60Hz 220-240V ~ 50Hz |
 | RGB/2700 ~ 6500K |
 | IP66 / SUITABLE FOR WET LOCATIONS |
PF | >0.5 |
| ta | -25°C - 40°C / -4°F-104°F |
| Max Projected Area |
| A: 0.0243m² B: 0.0616m² |
| Max. Lighting Coverage |
| A: 80m² B: 160m² |
PAIRING LED LIGHT WITH” Onforu” App.
NOTE:
Turn ON/OFF the Smart LED Light three times until the LED Light starts to flash quickly, which indicates the success of the factory reset.
- Step 1: “Onforu Home” App Download.
There are 2 options for obtaining and downloading the “Onforu Home” App on your smart device.
- Scan the QR code on the right.
- Search for “Onforu Home” in the App Store or Google Play.


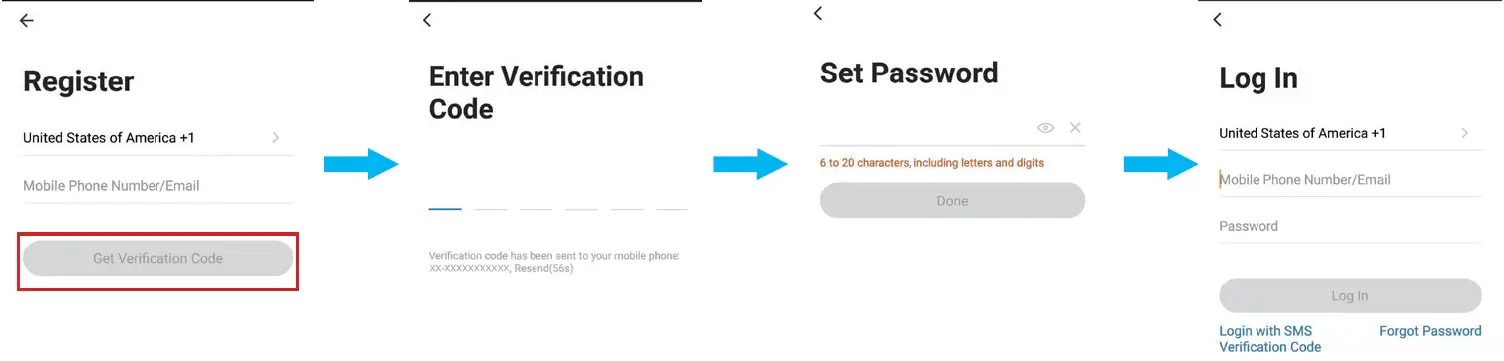
- Step 2: Enter the “Onforu Home” App. and register an account and log in. If you already have an account for Onforu Home App., Please select “Log in with existing account”.
Note:
You will need your “Onforu Home” App. username and password to pair with Amazon Alexa and/or Google Assistant.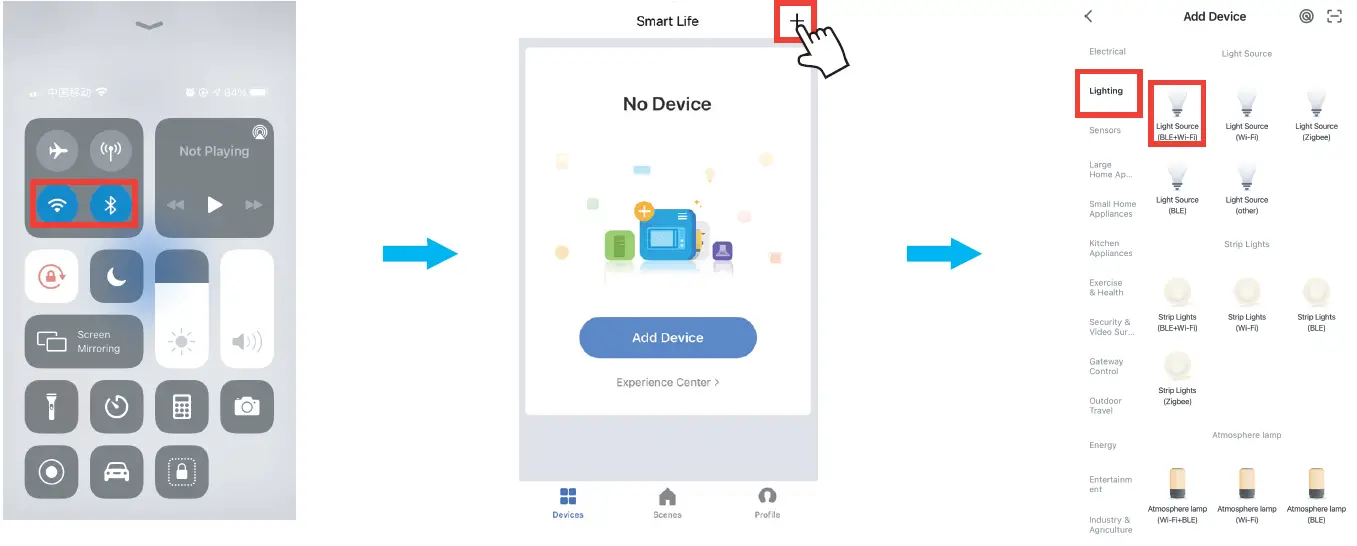
- Step 3. Please turn on the Wi-Fi and Bluetooth before connecting LED lights to the
“Onforu Home” APP.
Tap “+” button on top right corner to add device, then tap “lighting device” to enter next page.
Note:
This smart LED Light can only support 2.4 GHz network and cannot work with 5.0 GHz network. Please check if your home network is 2.4 GHz and make sure that your phone has been connected to your Wi-Fi network. Please ensure your network is not hidden.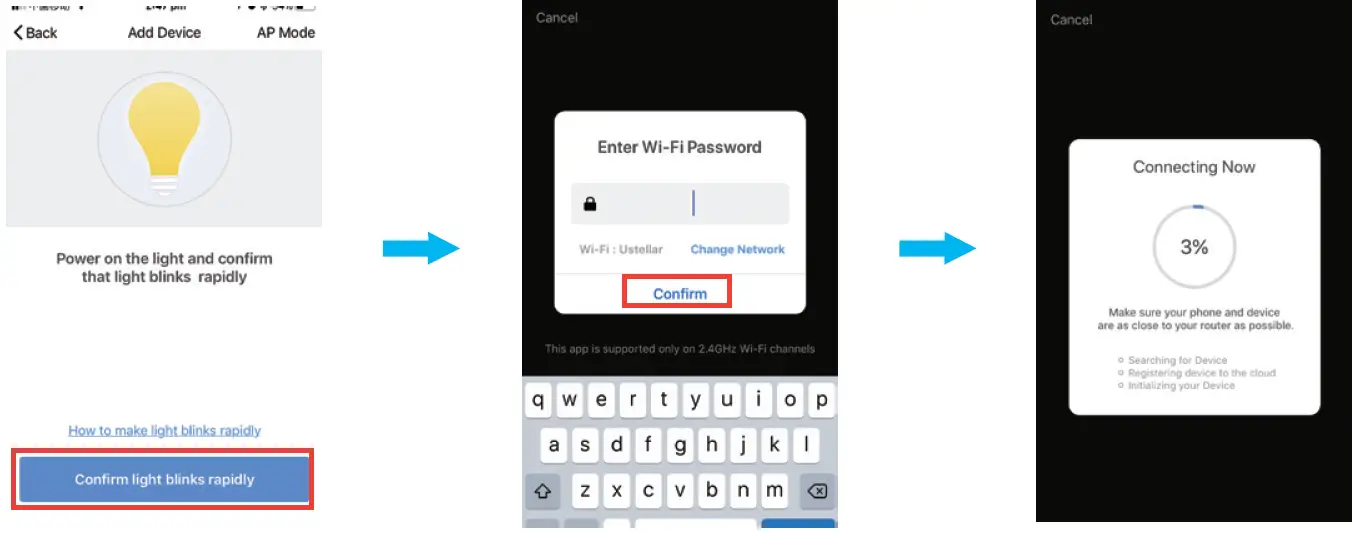
- Step 4. How to pair the LED Light.
- Power on the LED Light.
- Power off it three times quickly until the LED chips flashes, it indicates that the flood light has entered pairing mode.
- Tap the confirmation button to pair the LED Light.
- Enter Wi-Fi password to join your network.
Please Note:- a. This smart LED Light can only support 2.4 GHz network and cannot work with 5.0 GHznetwork.
- b. Please check if your home network is 2.4 GHz and make sure that your phone has been connected to your Wi-Fi network. Please ensure your network is not hidden.
- Wait till it is successfully connected.
Note:
If the LED Light is still flashing until the progress map reaches 100%, the pairing fails, and you will need to repeat the previous 4 steps to pair the LED Light.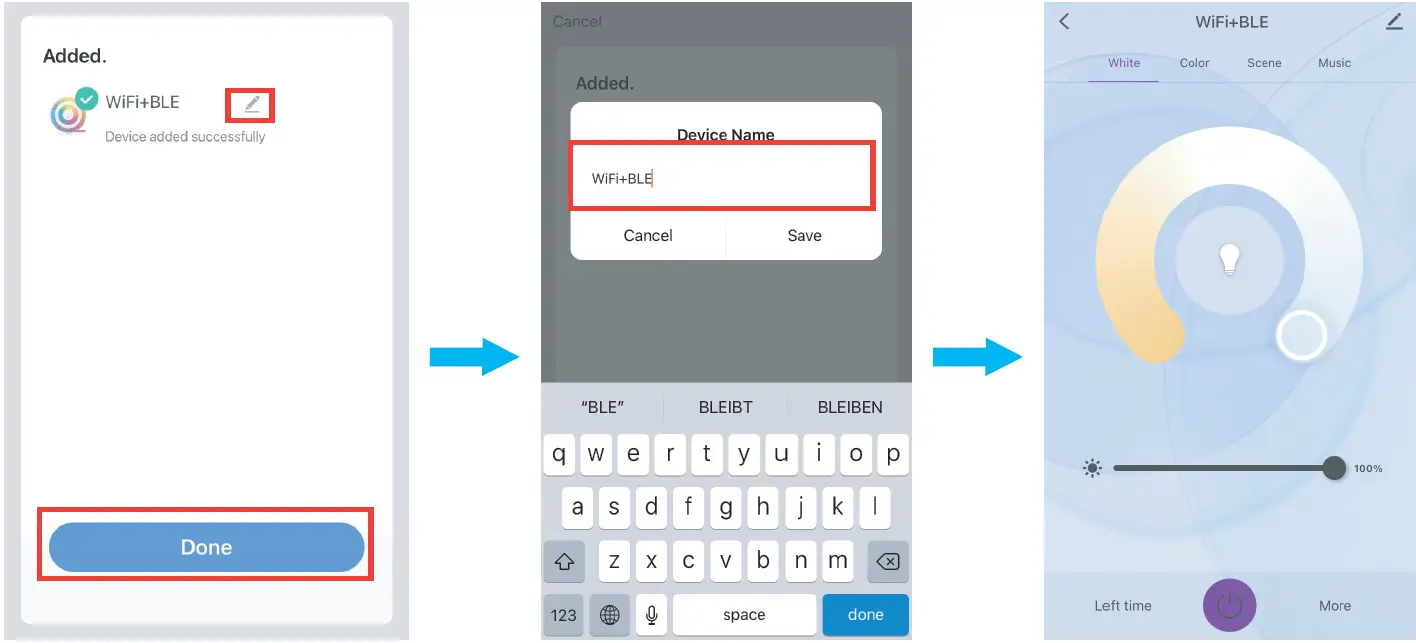
- Step 5. Name the LED light and tap “Done”. You will find the device you’ve named is shown on the App homepage. Tap the device to enter the setting page.
You can now control the light with Onforu Home App. on this setting page.
AMAZON ALEXA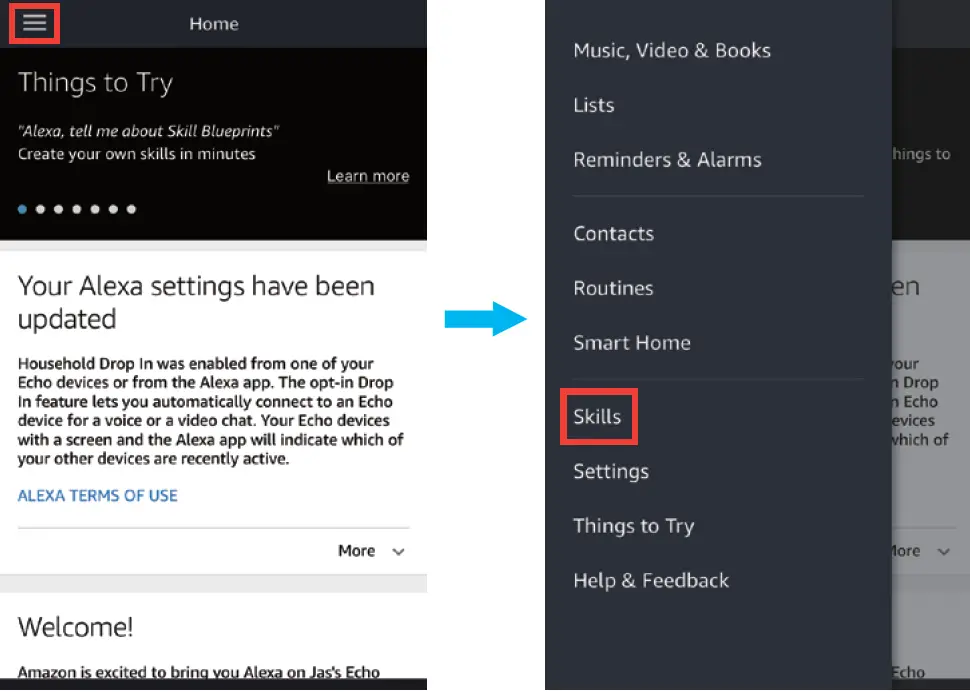 Please make sure that your Alexa App. is connected to Amazon Echo, and both work together successfully under your Wi-Fi network.
- Step A : Log in your Alexa App., tap the top left corner, and tap “Skills”.

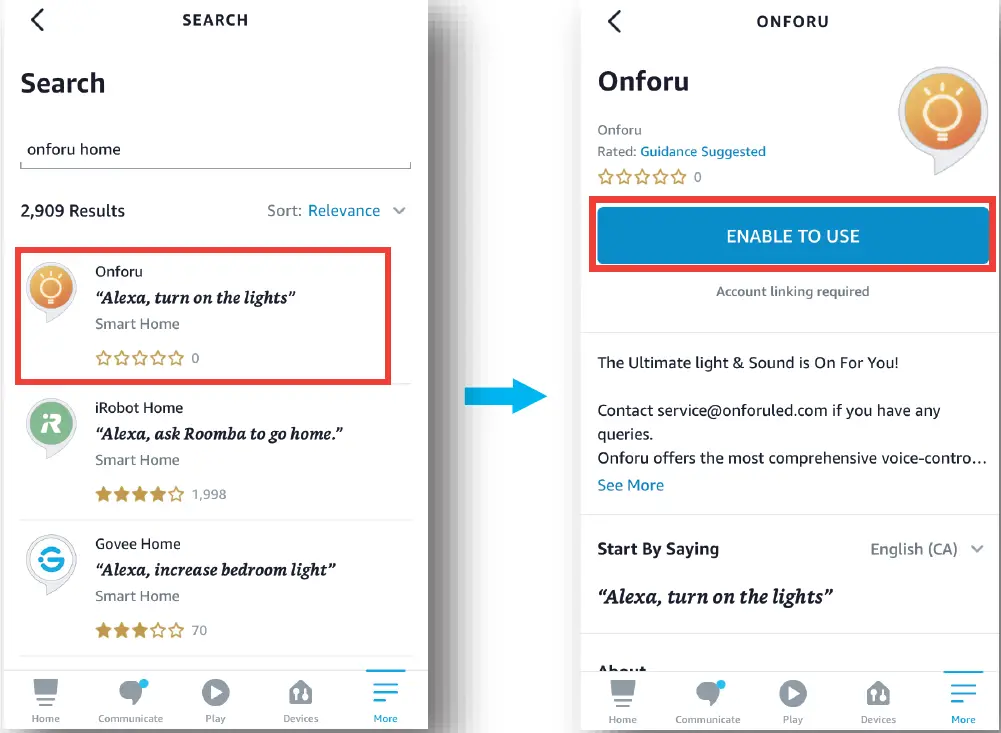
- Step B : Type “Onforu Home” to search for “Onforu Home”, and enable “Onforu Home” on Alexa.

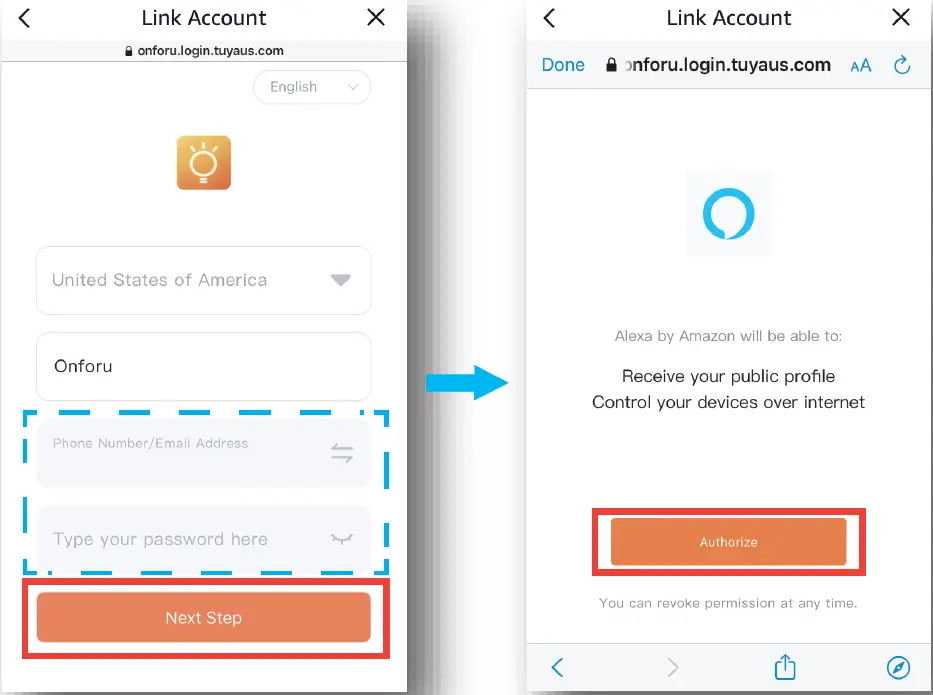
- Step C : Enter your account and password of Onforu Home App., tap “Nest Step”, then tap ” Authorize” on the next page authorize Onforu Home Info to Alexa. Note: Same account and password as Onforu Home App.

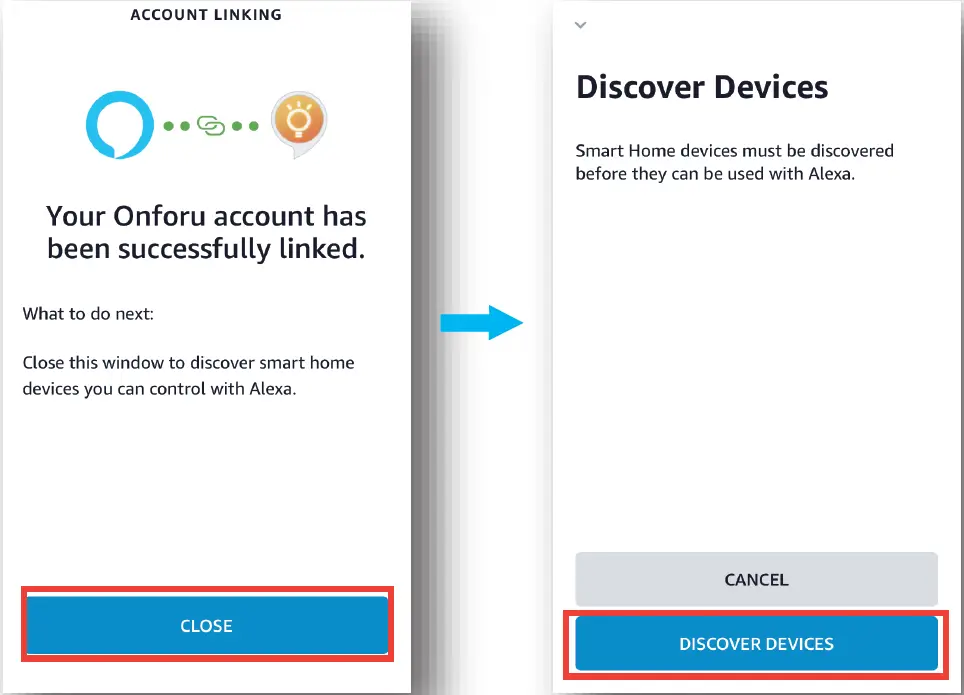
- Step D : Once your Onforu Home account is successfully connected to Alexa, the following page will pop up. Tap “CLOSE” , then
tap “DISCOVER DEVICES” on the next page.
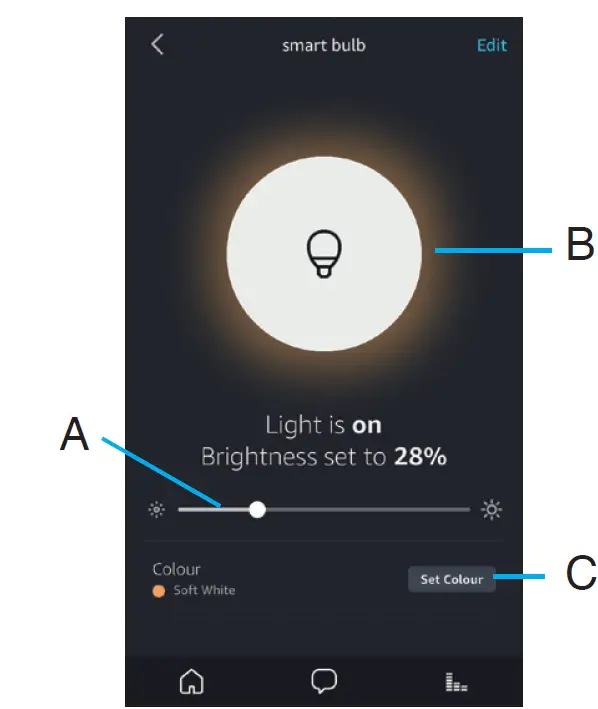
- Step E : Wait a few seconds for Alexa to detect the LED Light from Onforu Home App., and you will find the device named “Smart LED Light” has been paired to Alexa App from Onforu Home App. After step E is done, you can now control the light with Alexa App. on this setting page.
- A. slide to change brightness
- B. tap to turn on/off the light
- C. enter to change colors
Try these commands and see what happens by asking Alexa : - Alexa, turn on “device name”
- Alexa, turn off “device name”
- Alexa, set “device name” to “color”
- Alexa, set “device name” to “number”
For example: “Alexa, turn on Smart LED Light”, “Alexa, dim Smart LED Light to 50%” etc.
Note:
The device name is the one you give to the LED Light on Onforu Home App. In this user guide, the device is named “Smart LED Light”.
GOOGLE ASSISTANT APP
- Step A : Open your Google Home App., tap “Home Control” on the Left Side Bar page.
- Step B : Tap “+” button on the bottom right corner to enter next page.

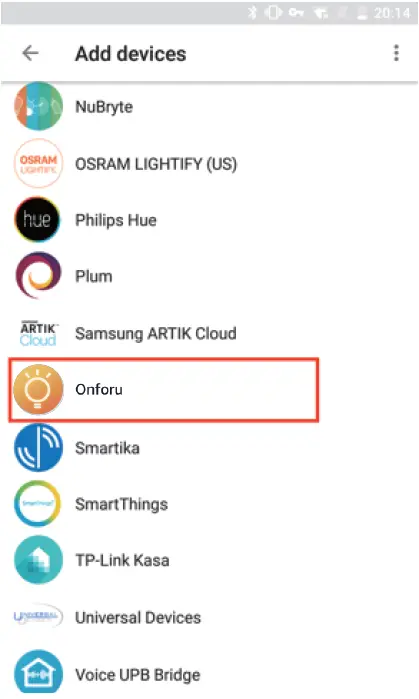
- Step C : Find “Onforu Home from the side bar list.

- Step D: Enter your account and password of Onforu Home App., tap “Link Now”, then tap “Authorize” on the next page to authorize your Onforu Home Account Info to Google Home .

Note:
Same account and password as Onforu Home App.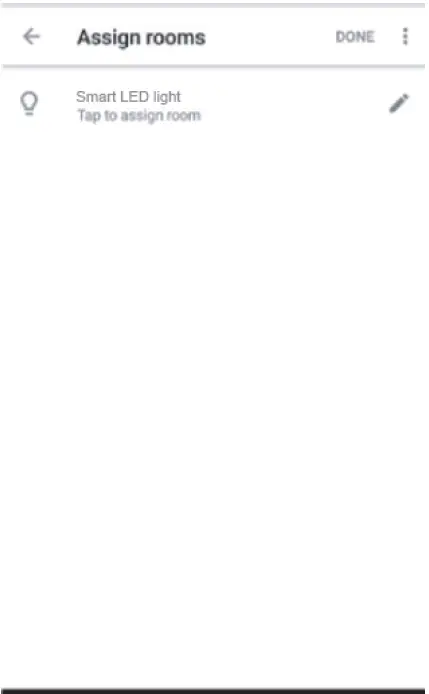
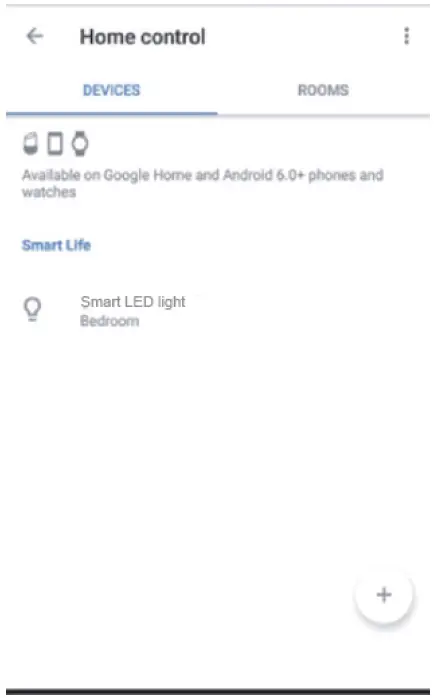
- Step E: You will find that Google Home has found the device named “Smart LED Light” on this page.
Try these commands and see what happens by asking Google : - , Google, turn on “device name”
- ok, Google, turn off “device name”
- ok, Google, set the “device name” to “color”
- ok, Google, set “device name” to “number”
For example: “ok Google, turn on Smart LED Light”, “ok Google, dim Smart LED Light
To 50%” etc.
Note:
The device name is the one you give to the LED Light on Onforu Home App. In this user guide, the device is named “Smart LED Light”.
COMPONENTS AND STRUCTURE
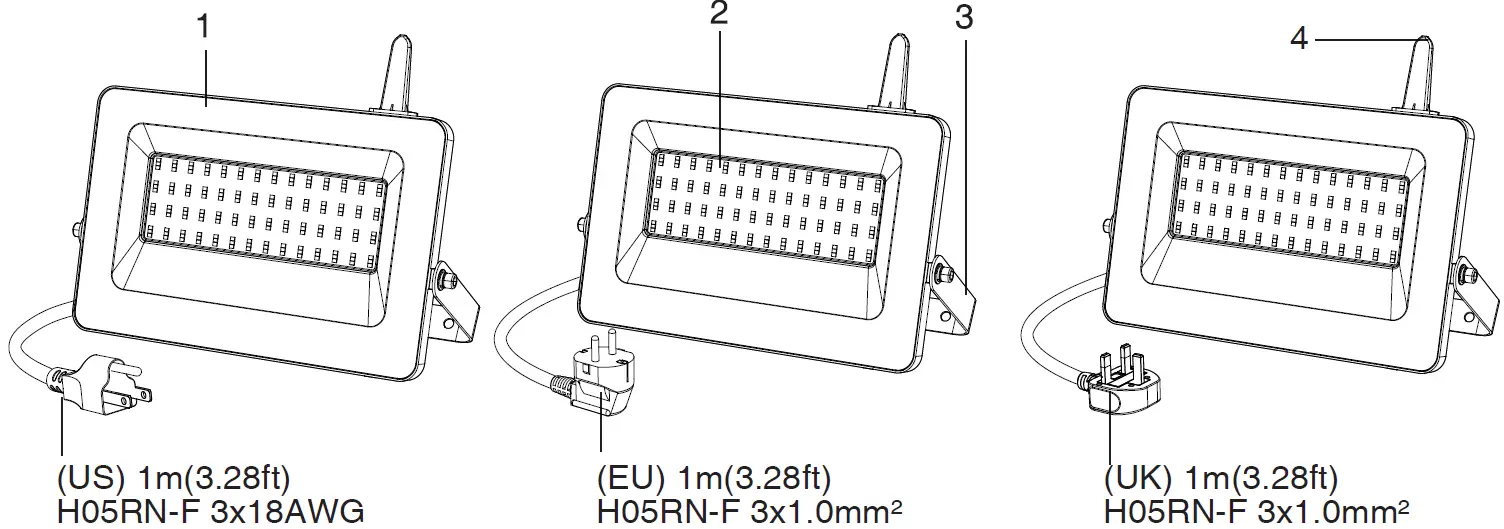
- Tempered Glass Lid
- LED Light Source
- Lamp Bracket
- Antenna
NOTE 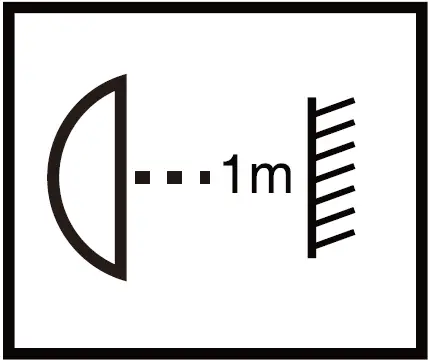
- – Make sure that the distance between the light and the object being lit is more than 1 meter, so as to avoid high temperature caused by short distance.
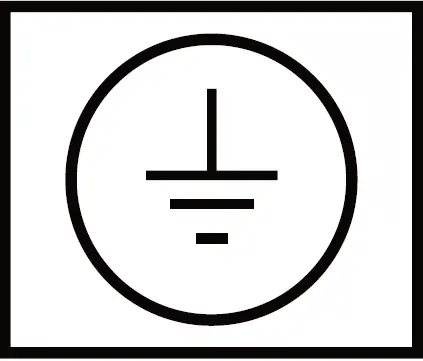
- Earth wire is required for connection for electric safety
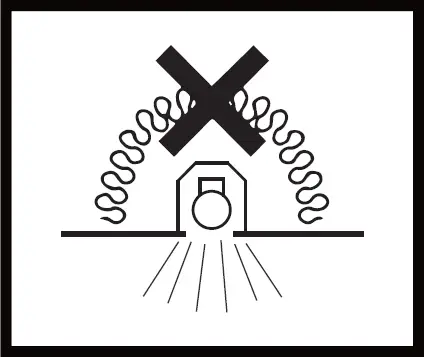
- Lights that are not suitable for covering with thermal insulation materials.
Limitation of Indoor and Outdoor Use
- This light is waterproof and dustproof. It is protected against the rain, but it cannot be immersed in water.
- The mounting position of this light should be able to bear at least 10 times as heavy as the light.
- This light is powered by High Voltage Alternating Current (HVAC). It should be connected to the ground wire and kept away from easy reach.
- This light should be used in condition with sound heat dissipation. The working temperature of it should be less than 40°C. Overhigh working temperature will cause serious lumen depression and affect lifespan of the light.
INSTALLATION STEPS
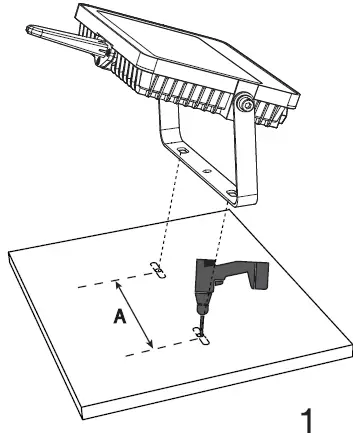
- Step 1: According to the spacing (see the “A” part of the picture) of two screw bits on the LED Light bracket, drill two mounting holes.
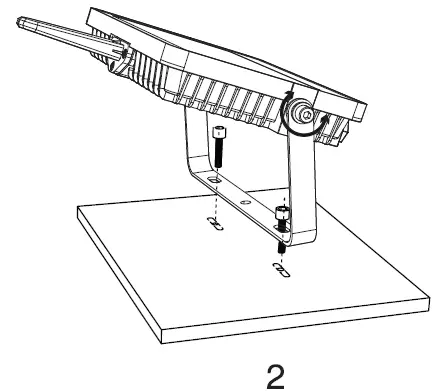
- Step 2: Put the bracket onto the prepared mounting holes and then screw it on.
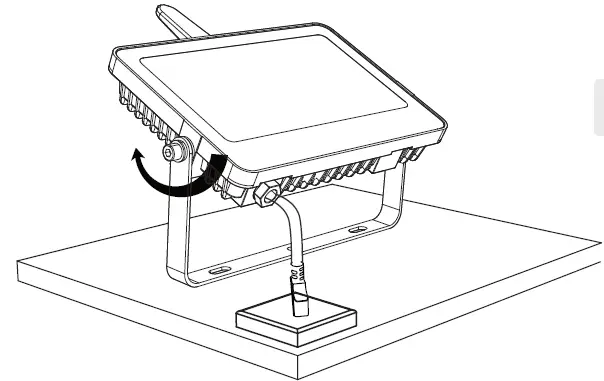
- Step 3: Adjust the beam direction as you like, and then plug into the main socket.
NOTE:
Recommended installation height not higher than 5 m (16.4 ft)
OPERATION AND MAINTENANCE
- Prior to cleaning the light, make sure it has been disconnected from the power supply.
- The unit is not suitable for burglar alarm systems as it is not tamperproof in the manner prescribed for such systems.
- Never use any chemicals or corrosive substances for cleaning.
DISPOSAL
Electrical and electronic equipment, accessories and packaging must be recycled in an environmentally compatible manner.
Do not dispose of electrical and electronic equipment as domestic waste.
EU countries only:
Under the current European Directive on Waste Electrical and Electronic equipment and its implementation in national law, electrical and electronic equipment no longer suitable for use must be collected separately and recycled in an environmentally compatible manner.


