![]() 860042 Solar Power Meter
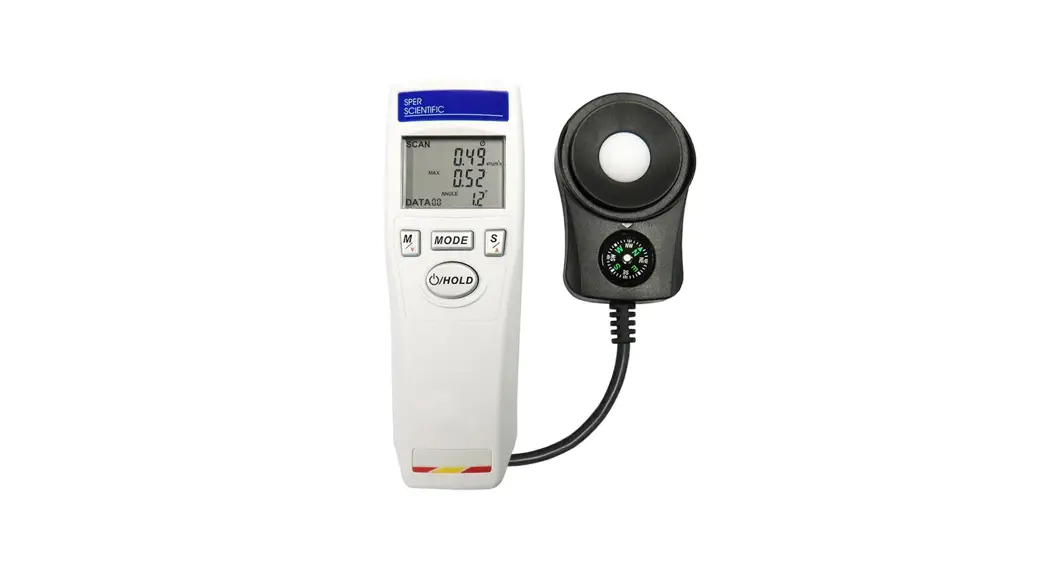
860042 Solar Power Meter
Instruction Manual
Product Introduction
Thank you for purchasing the Solar Power Meter. Read through this instruction manual before operating the meter. Please also store and retain this instruction manual for future reference.
1-1 Features
- Solar power measurement with orientation and tilt angle.
- 4 digits and auto range measurement.
- Max/Min/Avg and data hold.
- Zero adjustment.
- W/m² or BTU/ft²•h unit selection.
- 20 points memory, auto record and data recall.
- Auto transmission measurements.
- Low battery indicator.
- Auto power off with disable function.
- Automatic backlight LCD and triple reading display.
- Tripod Socket.
1-2 Applications
- Meteorology
- Agriculture
- Physics and optical laboratories.
- Solar radiation measurements for location of the solar panels or solar water heater.
- Solar power plant.
- Solar transmission measurement for windows.
2. Safety Information
Read the following safety information carefully before attempting to operate or service the meter. Only qualified personnel should perform repairs.
2-1 Safety Symbols![]() CE Certification.
CE Certification.
This meter conforms to the following standards:
EN61326: Electrical equipment for measurement, control and laboratory use.
IEC61000-4-2: Electrostatic discharge immunity test.
IEC61000-4-3: Radiated, radio-frequency, electromagnetic field immunity test.
IEC61000-4-8: Power frequency magnetic field immunity test.
RoHS Restrict to use of six substances within electrical and electronic equipment (EEE), thereby contributing to the protection of human health and the environment.
REACH (SVHC) The meter of used materials content no following substances that list of proposed REACH substances of very high concern.![]() The meter may not be disposed of with the trash. It promotes the re-use recycling and other forms of recovery of used materials and components, and to improve the environmental performance of all operators (manufacturers, traders and treatment facilities) involved in the life cycle of products. Dispose of the product appropriately in accordance with the regulations in force in your country.
The meter may not be disposed of with the trash. It promotes the re-use recycling and other forms of recovery of used materials and components, and to improve the environmental performance of all operators (manufacturers, traders and treatment facilities) involved in the life cycle of products. Dispose of the product appropriately in accordance with the regulations in force in your country.
2-2 Warning
Be sure to adhere to the following points to avoid injury. Please read the manual carefully to ensure safe and correct use of this meter before using. Please reread if necessary.
- Do not immerse the meter in water.
- Do not disassemble or modify the meter.
- Do not attempt to repair it yourself if the meter is malfunction. Only qualified personnel may do it.
- Do not press, push or strike the LCD and sensor.
- Do not use the meter in places where flammable or near-by the fire.
- Do not use this meter in environments outside this range: 32ºF (0°C) to 122ºF (50°C) at Relative Humidity no higher than 80%.
- After measurement, please close the sensor cover.
- Be aware the accumulation of irradiations would cause the sensor continue to age.
- If the meter will not be used for a long time, remove the battery and close the sensor cover.
- Never use organic solvents to clean the meter. (such as thinner, benzene, etc)
Specifications
| Sensor | High sensitivity silicon photodiode |
| Spectral Response | 400~1100 nm |
| Range | 0~2000 W/m² (0~634 BTU/ft²•h) |
| Accuracy (at 23°C, 60% RH) | 0.00~99.99 W/m² : 0.01 W/m² 100.0~999.9 W/m² : 0.1 W/m² 1000~2000 W/m² : 1 W/m² 0.00~99.99 BTU/ft²•h : 0.01 BTU/ft²•h 100.0~634.0 BTU/ft²•h : 0.1 BTU/ft²•h |
| Resolution | Cosine corrected < 7% (angle < 60°) |
| Angular Accuracy | 0°~90° |
| Tilt Angle Range | ±1.2° (=< 60°), Additional temperature induced error ±0.1°/°C from 23°C |
| Tilt Angle Accuracy (at 23°C, 60% RH) | Approx. 0.4 second |
| Sample Time | 0°C~50°C (32°F~122°F), Less than 80% RH |
| Operation Temp. & Relative Humidity | -10°C~60°C (14°F~140°F), Less than 85% RH |
| Store Temp. & Relative Humidity | Enable or Disable (Auto power off after approx. 10 minutes) |
| Auto Power Off | Approx. 30 hours for continuous use |
| Battery Life | Yes |
| Max / Min / Avg | Yes |
| Data Hold | Yes |
| Low Battery Indication | Yes |
| Backlight Function | Yes |
| Zero Adjustment | Yes |
| Over Range Indication | Yes (“–H I–”) |
| Memory | Yes (20 points memory) |
| Compass | Yes |
| Solar Transmission Measurement | Yes |
| Tripod Socket | Yes |
| Weight | 202 g (7.1 oz.) without battery |
| Dimensions | Main Instrument : 140×49×29 mm (5.5×1.9×1.1 inch) Sensor Probe : 83×54×26 mm (3.3×2.1×1.0 inch) |
| Accessories | 9V battery, Instruction manual, Carrying case |
General Descriptions
4-1 LCD and Control Panel
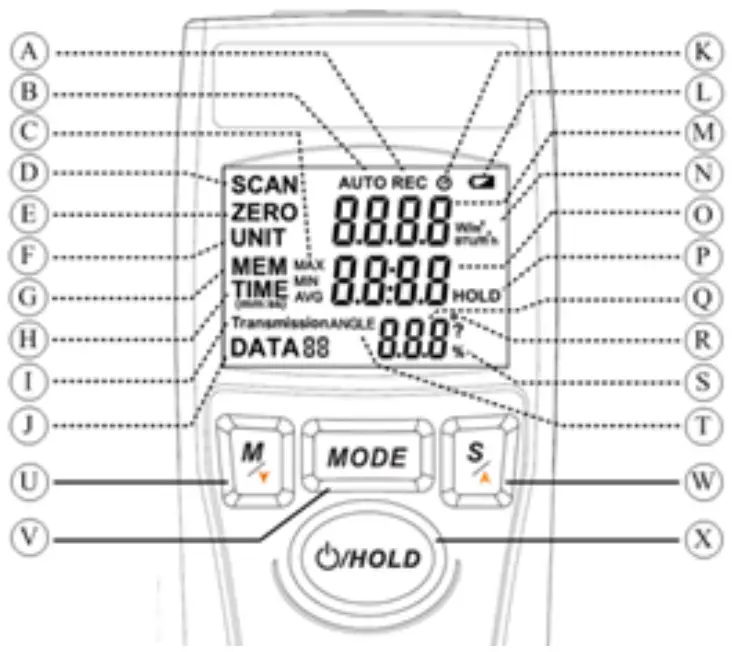
| A. Record Data | K. Auto Power Off |
| B. Auto Record | L. Low Battery |
| C. MAX/MIN/AVG Symbols | M. Primary Reading |
| D. SCAN Mode | N. W/m2 and BTU/ft2•h Units |
| E. ZERO Mode | O. Secondary Reading |
| F. UNIT Mode | P. Data Hold |
| G. MEM Mode | Q. Tertiary Reading |
| H. TIME Mode | R. Degree (Angle) Symbol |
| I. Transmission Mode | S. Percent Symbol |
| J. Data Counter | T. Tilt Angle |
| U. Memory / Down Button | W. Select / Up Button |
| V. Mode Button | X. Power and Hold Button |
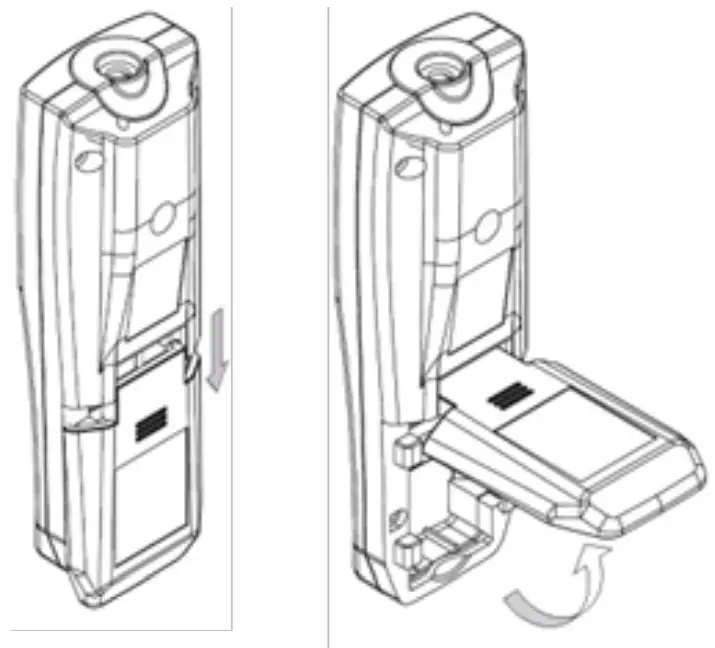
4-2 Rear
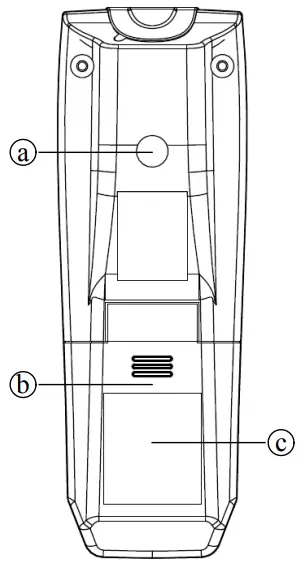
A. Tripod Socket
B. Battery Cover
C. Anti-slippery Pad
4-3 Probe
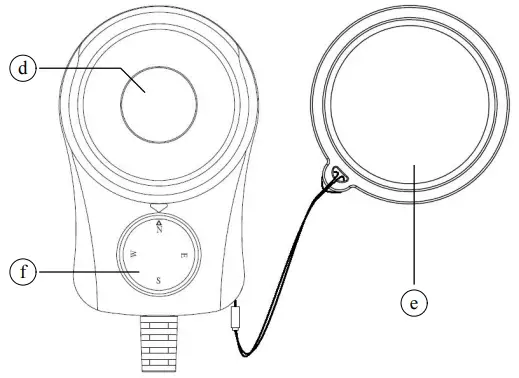
d. Sensor
e. Sensor Cover
f. Compass
4-4 Battery Change
The meter is powered by a 9V battery. When the ![]() symbol appears, the battery voltage drops below the level for reliable operation, the user has to replace a new battery. Turn the meter off first, open the battery cover on the back and replace the battery in the battery compartment.
symbol appears, the battery voltage drops below the level for reliable operation, the user has to replace a new battery. Turn the meter off first, open the battery cover on the back and replace the battery in the battery compartment.
Operation Instruction
5-1 Main Function
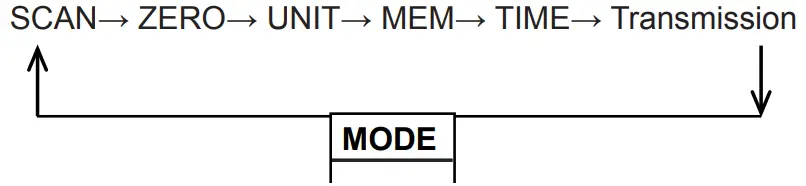
There are 6 main modes to toggle in the meter by using MODE button.
5-1-1 Power ON / OFF
Press and hold the Power button for 2 seconds to turn the meter on. Repeat to press and hold the Power button for 2 seconds again to turn the meter off.
5-1-2 Auto Power Off
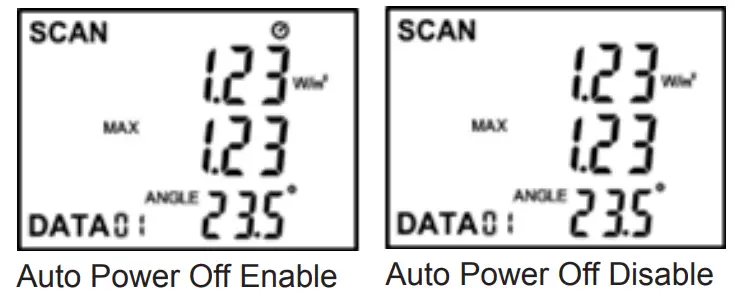
Press and hold the Power button and press S button to disable the Auto Power Off function. The auto power off symbol will disappear on the LCD. Release all buttons and repeat to press and hold the Power button and press S button again to enable the Auto Power Off function. The auto power off symbol will appear on the LCD.
5-2 SCAN Mode
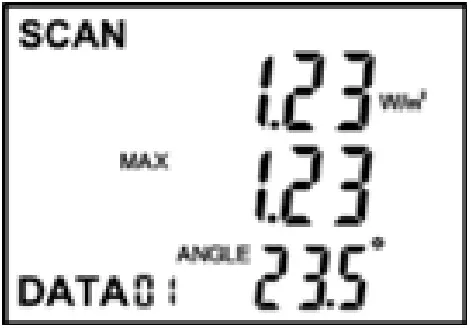
In the SCAN mode, the solar power value shows on the primary reading and shows MAX/MIN/AVG value on the secondary reading. The tilt angle of the probe shows on the tertiary reading.
5-2-1 MAX/MIN/AVG Measurement
Press the S button to toggle the MAX/MIN/AVG measurement.
5-2-2 Data Hold
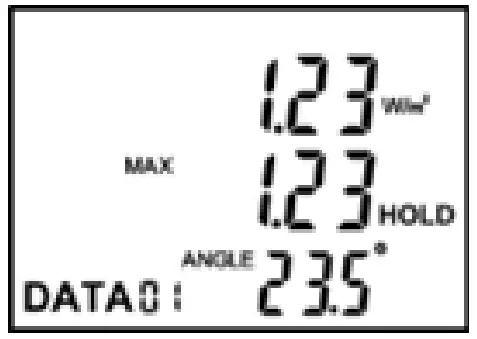
During measuring, press the HOLD button once to hold all measured values. The HOLD symbol will appear and the SCAN symbol disappear on the LCD. Press HOLD button again to return to measure. The HOLD symbol will disappear and the SCAN symbol appear on the LCD.
5-2-3 Data Record
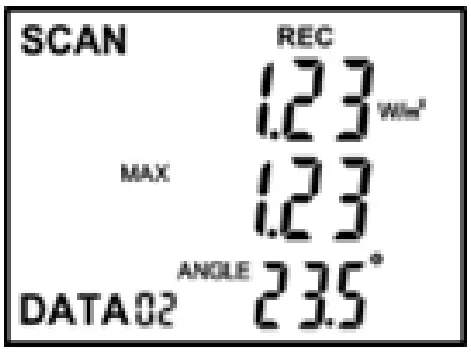
Press the M button once to save all of the current measured values. REC symbol will flash once with DATA Counter on the LCD.
5-2-4 Auto Record
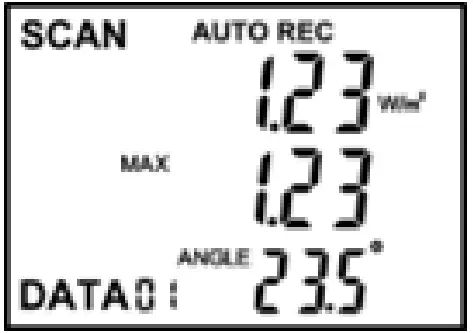
Press and hold the M button for 2 seconds to start the Auto Record mode and the AUTO symbol will appear on the LCD. Repeat to press and hold the M button for 2 seconds again to exit this mode. In this mode, the meter will automatically save 20 points and automatically power off if the Auto Power Off be enabled. The time interval of the Auto Record can select in TIME mode.
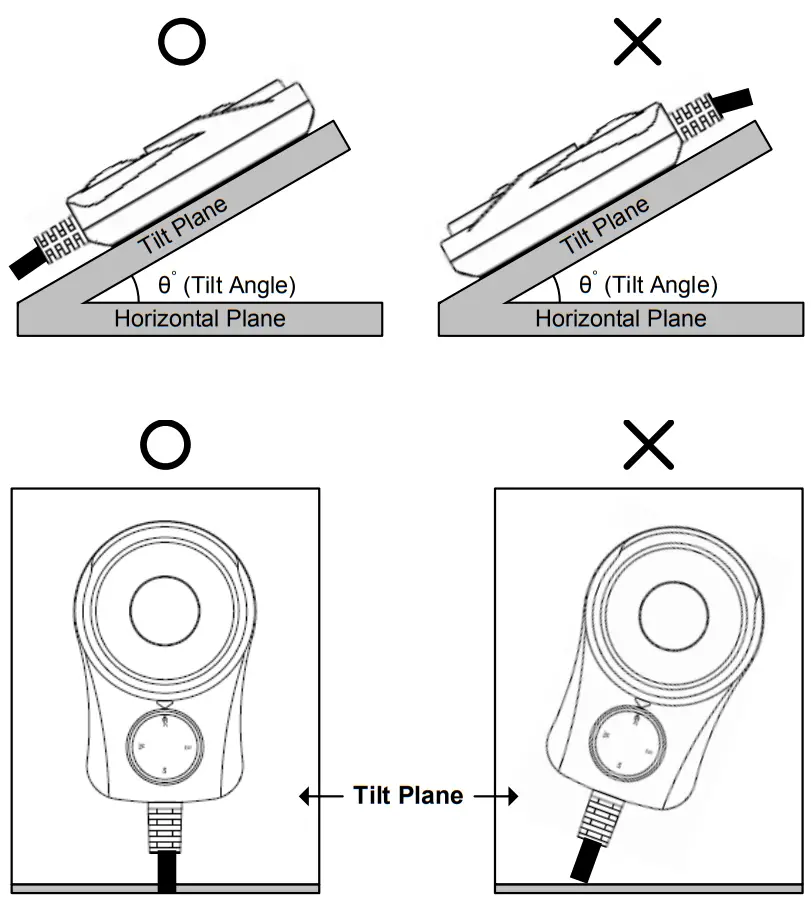
5-2-5 Tilt Angle of the Probe
Place the probe in the following figure to get the correct accuracy.
5-3 ZERO Mode
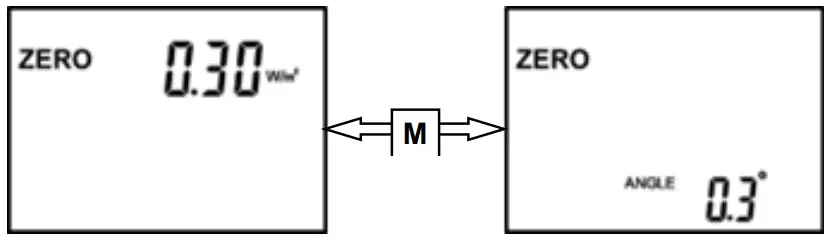
There are 2 kinds of zero value in this ZERO mode: solar power and the tilt angle of the probe. Press the M button to toggle.
5-3-1 Zero the Solar Power
Toggle to the Solar Power. Close the sensor cover and press the S button to zero. Press and hold S button for 2 seconds to reset to zero value.
5-3-2 Zero the Tilt Angle
Toggle to the Tilt Angle. Place the probe in a horizontal plane and press the S button to zero the tilt angle. Press and hold S button for 2 seconds to reset to zero value.
5-4 UNIT Mode
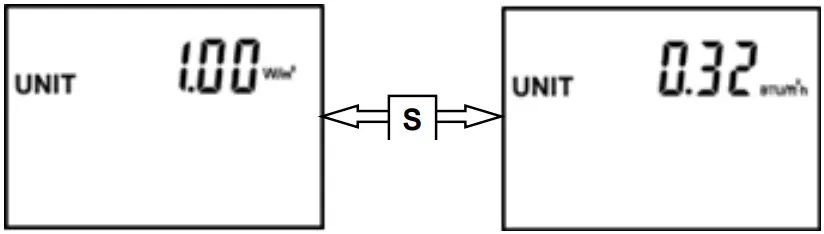
Press the S button to toggle unit. (1W/m2 = 0.3169984BTU/ft2•h)
5-5 MEM Mode
Press the Up (S) and Down (M) button to recall the stored data.

The REC symbol means that the data are saved during the Data Record pattern (see 5-2-3). The AUTO REC symbol means that the data are saved during the Auto Record pattern (see 5-2-4).
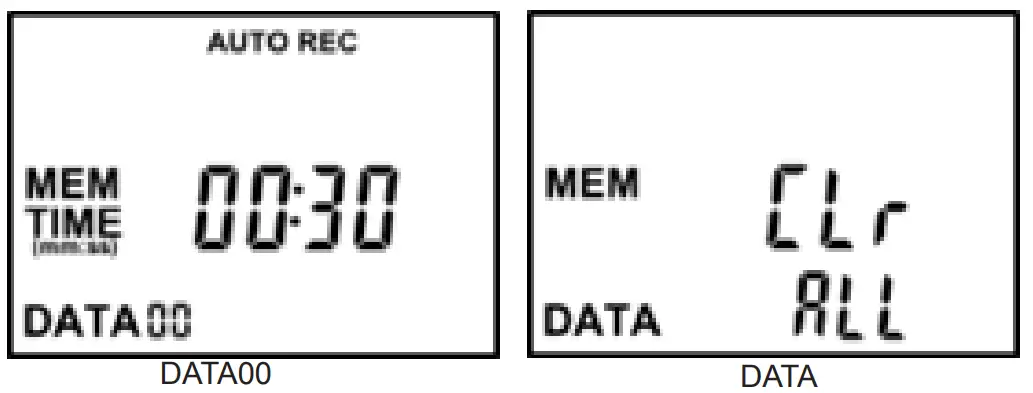
DATA00 stores the time interval of the Auto Record of last measurement. At the DATA, it will show “CLr” and “ALL” on the LCD. Press the HOLD button 2 times to clear all data.
5-6 TIME Mode
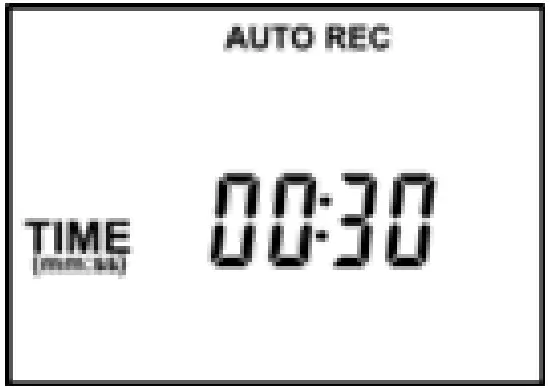
6 time intervals:
30 seconds or 1,2,5,10, & 30 minutes.
Press the S button to select the time interval of the Auto Record.
5-7 Transmission Mode
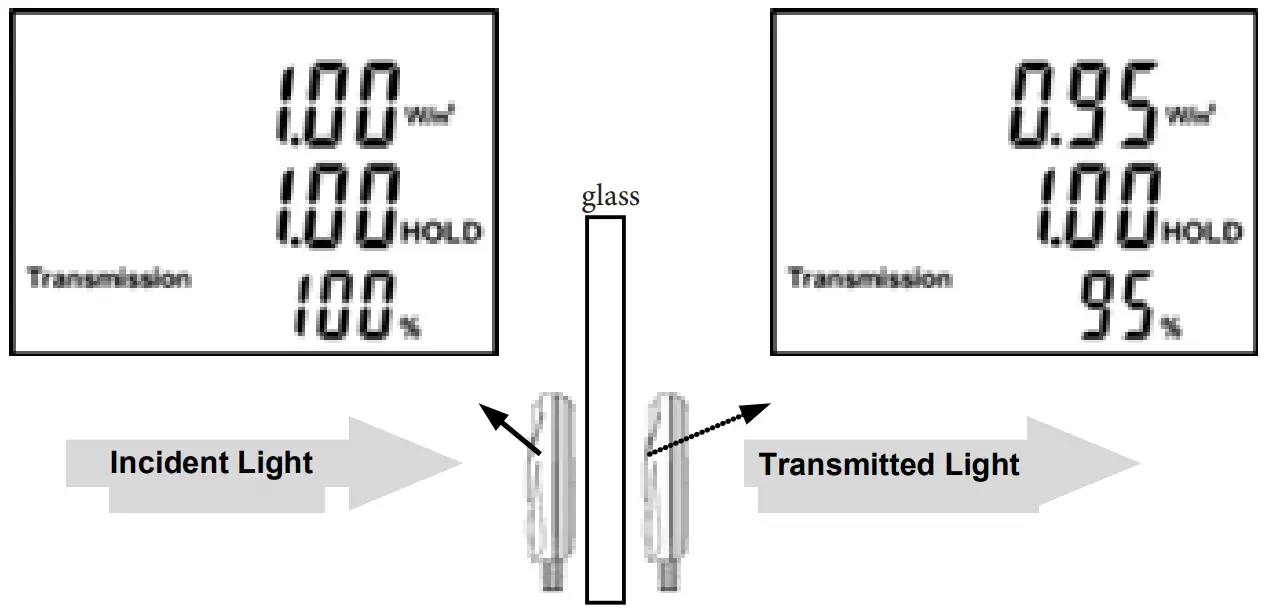 Transmission(T)=(Transmitted Light)/(Incident Light)×100% ,(0≤T≤100 %)
For example, place the probe in front of the glass to measure the incident light source and press the HOLD button to lock. The incident light displays on the secondary reading. Then move and place the probe behind the glass to measure the transmitted light. The transmission of the glass displays on the tertiary reading.
Maintenance
Clean the Sensor
Blow off loose particles using clean compressed air. Gently brush remaining debris sway with a camel’s hair brush. Carefully wipe the surface with a cotton swab. The swab may be moistened with some water.
Clean the Housing
When you clean the meter, wipe it with soap and water on a damp sponge or soft cloth.
NOTE
Never use organic solvents to clean the meter or sensor. (such as thinner, benzene, etc.) If the meter will not be used for a long time, remove the battery and close the sensor cover.
WARRANTY
Sper Scientific warrants this product against defects in materials and workmanship for period of one (1) year from the date of purchase and agrees to repair or replace any defective unit without charge. If your model has since been discontinued, an equivalent Sper Scientific product will be substituted, if available. This warranty does not cover probes, batteries, battery leakage, or damage resulting from accident, tampering, misuse, or abuse of the product. Opening the meter to expose its electronics will void the warranty. To obtain warranty service, please contact Sper prior to shipping the unit postage prepaid to:
SPER SCIENTIFIC INSTRUMENTS
8281 E. Evans Rd, Suite #103
Scottsdale, AZ 85260
The defective unit must be accompanied by a description of the problem and your return address. Register your product online at www.sperwarranty.com within 10 days.
Please note: The most current version of the manual can always be found at www.sperdirect.com
![]() Environmental Measurement Instruments
Environmental Measurement Instruments


